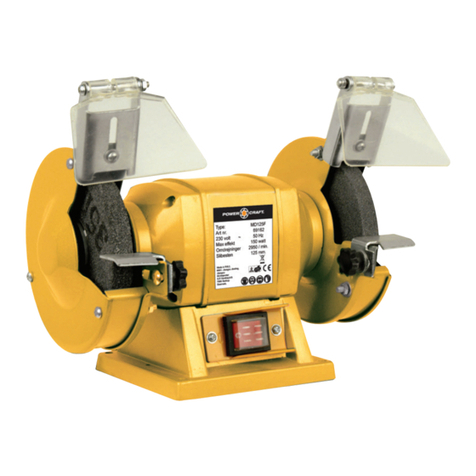
Power Craft PSM-200 User manual

Servotool BV • P.O. Box 30159 • 8003 CD Zwolle • NL • www.ferm.com 0507-05
GB Subject to change
UK USERS MANUAL
Art.nr. BGM6013
PSM-200 Bench grinder

Powercraft 7
EXPLODED VIEW
BENCH GRINDER
Read this users manual carefully, before using the
machine. Make sure you understand how the
machine works, and you know how to operate it.
Maintain the machine according to the instruc-
tions, to be sure of correct functioning. Keep this users manual
and other enclosed documentation with the machine.
TECHNICAL SPECIFICATIONS
PRODUCT INFORMATION
Fig. A
1. On/off switch
2. Tool rest (Right)
3. Eye shield
4. Eye shield bracket
5. Screw
6. Tool rest (Left)
PACKAGE CONTENTS
1 Bench Grinder
2 Sets eye shield bracket + eye shield
1 Tool rest (Right)
1 Tool rest (Left)
1 Users manual
1 Guarantee card
SAFETY GUIDELINES
In this users manual the following pictograms are used:
Read instructions manual
In accordance with essential applicable safety
standards of European directives
Denotes risk of personal injury, loss of life or
damage to the tool in case of non-observance of
the instructions in this manual.
Indicates electrical shock hazard.
Immediately unplug the plug from the mains elec-
tricity in the case that the cord gets damaged and
during maintenance
Keep bystanders away
Wear eye and ear protectors
Faulty and/or discarded electrical or electronic
apparatus have to be collected at the appropriate
recycling locations.
ATTENTION!
Whenever using electrical machines, always observe
local safety guidelines in regard to danger of fire,
electric shock hazard and risk of bodily injury. Read
the instructions below, carefully.
1. Keep your work area clean and tidy
A cluttered work area can cause accidents.
2. Be alert to the conditions in your surroun-
dings
Never use electric tools in damp or wet surroun-
dings, and do not leave them lying in the rain. Ensure
good lighting of the work area. Never use electric
tools in the presence of inflammable fluids or gases.
3. Prevent electric shock
Avoid bodily contact with earthed objects such as
pipes, radiators, heaters and/or refrigerators.
4. Keep children at a safe distance
While working, do not allow others to distract you,
and keep them at a safe distance so that they cannot
trip over or stand on the power cord.
5. Store your tool in a safe place
When not in use, store your tools in a dry and unex-
posed space, out of reach of children.
6. Do not overload the tool
You will work better and safer when you stay within
the maximum design loading.
7. Use the right tool for the job
For heavier work, do not use tools or jigs that are too
light for the job. Never force a tool to do a job for
which it was not designed.
8. Wear suitable work clothing
1
2
3
4
5
6
Voltage | 230 V~
Frequency | 50 Hz
Power rating | 200 W
Rotational speed, not loaded | 2950/min
Peripheral speed |
grinding wheel | 23 m/s
Grinding wheel dimensions | Ø150 x 20 mm
Spindle hole diameter | Ø12.7 mm
Weight | 6.85 kg
Lpa (sound pressure level) | 58.0 dB (A)
Lwa (sound power level) | 71.0 dB (A)
2Powercraft
PARTS LIST
REF NR DESCRIPTION POWERCRAFT NR
1 RUBBER FOOT 206411
4 EYE SHIELD 206452
5 - 13 EYE SHIELD BRACKET 206151
25 TOOL REST (RIGHT) 206406
37 SWITCH 206403
39 TOOL REST (LEFT) 206405

6Powercraft
Do not wear loose or hanging clothing and jewellery.
They can get caught in the moving parts of the power
tool. While working outdoors, wear rubber gloves
and footwear that will not slip. If you have long hair,
wear a hairnet.
9. Wear safety glasses
During very dusty work, always wear safety glasses
and a dust mask.
10.Do not misuse the power cord
Never carry the tool by its power cord, and do not
unplug the tool from the power by pulling on the
power cord. Protect the power cord from heat, oil,
and/or sharp edges.
11.Secure the workpiece
Where possible, use clamps or a vice to hold the
workpiece. This holds it more firmly than you can
with your hand. Moreover, it frees both hands to
operate the tool.
12.Make sure you have a firm footing
Avoid taking an abnormal working position. Stand
squarely, and at all times maintain your balance. This
is especially important when working from a (step)
ladder.
13.Maintain the tool with care
Keep your tool in good condition, for best results
and safe work. Ensure that accessories are sharpe-
ned. Follow the instructions for maintenance and
changing of accessories. Check the plug and power
cord regularly, and have them repaired by an expert,
in the event of any damage. Also inspect extension
cords regularly, and replace them if damaged. Keep
handles dry and free from grease and oil.
14.Disconnect the tool from the power
Remove the plug from the power supply whenever
the machine is not in use, before performing any
maintenance, and before changing the grinding
wheel.
15.Never leaving any adjusting tools on the
machine
Before switching on, check that spanners and other
adjusting tools have been removed.
16.Avoid unintentional starting
Never carry a connected machine with a finger on
the switch. Always check first whether the switch is
in the OFF or 0 position before connecting to the
power supply.
17.Extension cords for outdoor use
When outdoors, only use approved and labelled out-
door extension cords.
18.Always stay alert
Take care when working. Think consciously about
what you are doing. Do not use the tool whenever
your concentration is poor.
19.Check the machine for damaged parts
Check carefully that the guards are in working order,
and that all parts still work correctly, even when they
are slightly damaged, before using the machine.
Inspect moving parts for correct alignment, that they
are not binding, and that no essential parts are dama-
ged. All components must be correctly assembled
and working, for the machine to do its job right.
Damaged covers, guards and other parts should be
repaired or replaced in a qualified service workshop,
unless otherwise directed in the operator’s manual.
Damaged switches should only be replaced in a quali-
fied service workshop. Never use any tool that can-
not be properly switched on and off.
20.Use of accessories and tools
In the interest of your own safety, do not use acces-
sories or auxiliary tools that are not indicated in the
users manual, or which are not recommended by the
tool’s manufacturer. Other accessories and/or auxi-
liary tools can lead to personal injury.
21.Repairs and servicing should only be carried
out by a qualified technician
This electric tool complies with the relevant safety
guidelines. To avoid hazards arising from unskilled
workmanship, repairs should only be carried out by a
qualified technician.
Powercraft 3
OPERATION
SELECTING THE GRINDING WHEEL
Coarse grinding wheels will in general remove the most
material, and fine grinding wheels are used for finishing. If
the surface is uneven, begin by using a coarse grinding
wheel, and grind the workpiece until it is smooth. Next
use a fine grinding wheel to remove the grooves and
scratching left by the coarse wheel, and finish off the
workpiece.
HOW TO GRIND
To prevent the grinding surface from blocking up, avoid
holding wood, lead or any other soft material or metal
against the grinding wheel. To avoid creating grooves, do
not press the workpiece too firmly on the grinding
wheel. Use water to regularly cool the workpiece being
ground. Wood chisels and the like should never be shar-
pened ‘blue’.
Take care not to lose your grip on the object being
ground, as it may suddenly become jammed between the
tool rest and the grinding wheel. This can cause the
stone to shatter, the motor to seize, or the workpiece to
fly off, all of which can cause injury and damage.
Whenever the machine has been in use for 30 minutes, it
should be switched off. Allow the machine to cool down
to room temperature.
SWITCHING THE MACHINE ON
• Check that the switch is in the “OFF/0” position
before connecting the machine to the power supply.
• Press the power switch into the “ ON/1” position to
start your bench grinder.
• Always keep the power cord out of the way of the
tool’s moving parts.
FAULTS
Should the machine fail to function correctly, a number
of possible causes and the appropriate solutions are
given below:
1. The electric motor becomes hot
• The motor has become overloaded.
Give the motor a chance to cool down.
• The motor is defective.
Contact the service point.
2. Machine switched on, but will not run
• There is a break in the power supply to the machine.
Check whether there is a break in the power cord.
• The switch may be damaged.
Contact the service point.
3. The tool rest is in contact with the grinding
wheel.
Repairs and servicing should only be carried out by
a qualified technician or service firm.
MAINTENANCE
Take care that the machine is not connected to
power whenever maintenance work on the mecha-
nical parts is taking place.
These machines are designed to function problem-free
for a long period with a minimum of maintenance.
Through regular cleaning and correct treatment, you
help assure a long working life for your machine.
Cleaning
Clean the machine casings regularly with a soft cloth,
preferably after each use. Make sure that the ventilation
openings are free of dust and dirt.
Remove very persistent dirt using a soft cloth moistened
with soapsuds. Do not use any solvents such as gasoline,
alcohol, ammonia, etc. Chemicals like these will damage
the synthetic components.
Lubrication
The machine requires no extra lubrication.
FAULTS
If a fault should occur, for example as a result of wear on
a part, contact the service point.
At the back of this users manual you will find an exploded
parts diagram with the parts that can be ordered.
ENVIRONMENT
To prevent damage in transit, the machine is delivered in
sturdy protective packaging. The packaging makes maxi-
mum use of recycled materials. You too can help the
environment, by recycling the packaging wherever pos-
sible.
GUARANTEE
For questions please find the service address or telep-
hone number of help desk line Omega, mentioned in the
guarantee card.
We declare under our sole responsibility that this
product is in conformity with the following standards or
standardized documents
EN61029-1:2000, EN 61029-2-4:2003
EN55014-1:2001, EN55014-2:1998,
EN61000-3-2:2001, EN61000-3-3:1995
in accordance with the stipulations of the guidelines:
98/37/EWG
73/23/EWG
89/336/EWG
from 01-07-2005
ZWOLLE
W. Kamphof
Quality department
CE
ı
DECLARATION OF CONFORMITY (UK)

INSTALLATION
Fig. C
The grinder must be firmly bolted to a workbench. The
length of the fixing bolts will depend on the thickness of
the workbench. If the workbench is made of steel, it is
advisable to use a wooden block or plank between the
grinder and the bench, to insulate it and prevent vibra-
tion.
ASSEMBLY AND ADJUSTMENT OF EYE
SHIELD BRACKET AND EYE SHIELD
The eye shield bracket and eye shield should only
ever be assembled/adjusted with the grinding
wheel stationary, and the machine disconnected
from the power supply.
• Fix the eye shield bracket (4) with attached eye shield
to the grinding wheel cover, using the screw provi-
ded (A).
• Set the eye shield bracket at the correct height. The
clearance (B) between the wheel and the eye shield
bracket should be 1 to 1.5 mm.
• Next tighten the screw (A) firmly.
• Position the eye shield to give maximum protection
when working.
• Always wear safety glasses.
FITTING AND ADJUSTING TOOL REST
The tool rest should only be adjusted when the grin-
ding wheel is completely stationary, and the
machine is disconnected from the power supply (the wall soc-
ket).
• Fit the tool rest as shown in Fig. C.
• Fix it as tightly as possible in position, with a maxi-
mum clearance (C) of 1 – 1.5 mm between the tool
rest and the grinding wheel.
If the grinding wheel is worn down to the point where the
wheel guard can no longer be adjusted to this distance
( 1 - 1,5 mm ), the grinding wheel must be replaced.
REPLACING THE GRINDING WHEEL
Fig. D
Required tools:
• 19 mm Spanner
• 8 mm Spanner
• Screwdriver
Only ever replace the grinding wheel when the
motor is at a standstill and the power is completely
disconnected.
• Remove the grinding wheel guards using the tools lis-
ted above. The spindle nut on the right-hand side has
a right-handed thread. The spindle nut on the left-
hand side has a left-handed thread. Keep this in mind
when you are replacing the grinding wheels.
• Loosen the nut using the correct spanner. Remove
the old wheel from the spindle.
• Clean the flanges. Place one flange (A) back on the
spindle, with the hollow side facing the grinding
wheel. Slide the new wheel onto the spindle. Place
the second flange (A) on the spindle, again with the
hollow side facing the grinding wheel. Now tighten
the nut on the spindle. Do not overtighten! Now refit
the grinding wheel cover, and again adjust the tool
rest correctly. Run the motor briefly, without grin-
ding.
A
B) 1 - 1,5 mm
C) 1 - 1,5 mm
A43
Powercraft 5
SPECIAL SAFETY GUIDELINES
WHEN USING THE MACHINE FOR THE
FIRST TIME
• Check the following:
• Does the voltage rating of the bench grinder corre-
spond to the power supply?
• Is an earthed mains power socket available?
• Are the power cord and plug in good condition (solid,
without fraying or other damage)?
• Avoid the use of long extension cords. The exten-
sion cords you use must always be earthed.
• A grinding wheel is a brittle toolpiece. The stone is
not resistant to knocks. Always grind on the front
edge of the grinding wheel, and never on the side of
the grinding wheel. Never fit a cracked grinding
wheel. Replace it immediately, as the high rotational
speed could cause the stone to fly apart, causing a
serious accident.
• Always wear safety glasses when grinding.
• Never grind without the cover fitted over the grin-
ding wheel.
• Always fit the grinding wheel cover and tool rest
tightly, and with the correct clearance.
• Never allow more than 1-1.5 mm clearance between
tool rest and grinding wheel.
• Only use the grinding wheel for the work it was
designed for (for example sharpening tools), and
NOT for heavy construction work. The following
information must be available, before you fit any new
grinding wheel:
• Details about the manufacturer.
• Binding material.
• Dimensions.
• Permissible rotational speed.
• Never ream out the hole in a grinding wheel to a lar-
ger diameter.
• The maximum rotational speed of the grinding wheel
should never be allowed to exceed the maximum
speed given for the wheel.
• Never use any grinding wheel that is damaged or
deformed.
• In order to be able to grind safely, the machine must
be firmly bolted to a workbench.
• The tool rest should be replaced whenever the width
of the tool rest measures less than 20 mm.
• The recommended depth of the recess in the flange
(T) is 2 mm and the diameter of the spindle hole is 13
mm (see Fig. B).
Fig. B
WHENEVER USING THE MACHINE
• Check that the switch is NOT in the ‘ON/1’ position
before connecting the machine to the power supply.
• Always keep the power cord out of the way of the
tool’s moving parts.
IMMEDIATELY SWITCH OFF THE MACHINE
WHENEVER:
• The plug or power cord is defective or damaged.
• The switch is defective.
• You smell smoke or burning insulation.
ELECTRICAL SAFETY
Always be certain that your mains power supply
corresponds with the rating on the type plate.
When replacing power cords or plugs
Immediately dispose of old plugs as soon as they are
replaced with new ones. It is dangerous to plug a loose
power cord into the mains power supply.
When using extension cords
• The grinder is fitted with a triple-core power cord
and an earthed mains plug. Therefore always use a
mains power socket that is also earthed. Should you
need an extension cord, always use a triple-core
extension with earthed plug and socket.
• The cores should have a cross-section of at least 1.5
mm2.
ø 13 mm
2 mm
4Powercraft
Table of contents
Other Power Craft Grinder manuals

Power Craft
Power Craft 80036 User manual

Power Craft
Power Craft 69780 User manual

Power Craft
Power Craft S1J-135A User manual

Power Craft
Power Craft 1020W Technical manual

Power Craft
Power Craft 11940 User manual

Power Craft
Power Craft 11942 User manual

Power Craft
Power Craft PAG-230/2100 Technical manual

Power Craft
Power Craft PAG-115/1020 Technical manual

Power Craft
Power Craft PAG-230/2100K User manual

Power Craft
Power Craft 88601 User manual