Power works BPB60L00PW User manual

60V BACKPACK BLOWER
BPB60L00PW
Read all safety rules and instructions carefully before operating this tool.
Owner’s Manual
TOLL-FREE HELPLINE: 1-855-470-2181
www.powerworkstools.com

2
Contents .................................................................................................................................2
Product Specications ............................................................................................................2
General Safety Rules..............................................................................................................3
Symbols..................................................................................................................................6
Know Your Blower...................................................................................................................8
Assembly Instruction ..............................................................................................................9
Operation...............................................................................................................................13
Maintenance .........................................................................................................................17
Troubleshooting ....................................................................................................................18
Warranty ................................................................................................................................19
Exploded View.............................................. ..........................................................................20
Parts List...............................................................................................................................20
PRODUCT SPECIFICATIONS
60V BACKPACK AXIAL BLOWER
Type ............................................................................................................................Cordless
Motor .................................................................................................................60V Brushless
Air Volume ................................................................................................................. 540 CFM
Air Speed................................................................................................................... 140 MPH
Weight (Without Battery)................................................................................... 8.4 lbs (3.8 kg)
CONTENTS
* For household use only.

3
IMPORTANT SAFETY INSTRUCTIONS
READ ALL INSTRUCTIONS BEFORE USING (THIS POWER TOOL)
WARNING
Read and understand all instructions before using this product. Failure to follow all instructions
listed below may result in electric shock, re, and/or serious personal injury. When using an electrical
appliance, basic precautions should always be followed, including the following:
1. BEFORE USING
• Use extra care when cleaning on stairs.
• Do not use outdoors or on wet surfaces.
• Do not allow to be used as a toy. Close attention is necessary when used by or near children.
• Use only as described in this manual. Use only manufacturer’s recommended attachments.
• Keep hair, loose clothing, ngers and all body parts away from openings and moving
parts.
• When using in direct sunshine, keep out of water.
• Don’t expose to rain when operating the machine.
• Store indoors. Do not expose to rain or water. Avoid direct sunshine.
2. WHEN USING THIS BLOWER
• Do not use to pick up ammable or combustible liquids, such as gasoline, or use in areas
where they may be present.
• To reduce the risk of electric shock, the batttery charger has a polarized plug (one blade
is wider than the other) and will require the use of a polarized extension cord. The plug
will only t into a polarized extension cord one way. If the plug does not t fully into the extension
cord, reverse the plug. If the plug still does not t, obtain a correct polarized extension cord. A
polarized extension cord will require the use of a polarized wall outlet. This plug will only t into
the polarized wall outlet one way. If the plug does not t fully into the wall outlet, reverse the plug.
If the plug still does not t, contact a qualied electrician to install the proper wall outlet. Do not
change the equipment plug, extension cord receptacle, or extension cord plug in any way.
• Never allow children to operate the equipment. Never allow adults to operate the equipment
without proper instruction.
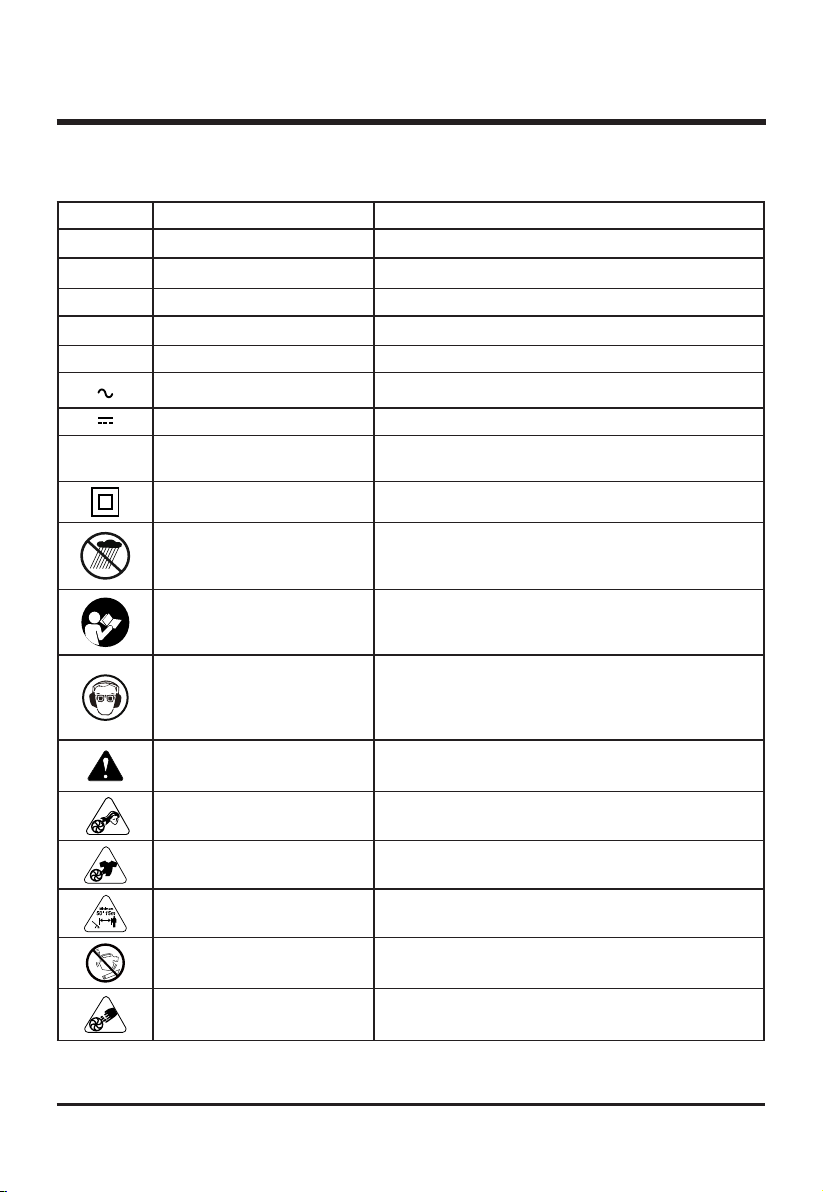
• Wear eye protection that is marked to comply with ANSI Z87.1 when operating this
product.
• Do not handle charger, including charger plug, and charger terminals with wet hands.
• Do not charge the unit outdoors.
• Wear heavy long pants, boots, and gloves. Avoid loose garments or jewelry that could get
caught in moving parts of the machine or its motor.
• Do not force the tool. Use the correct tool for your application. The correct tool will work more
eciently and safely when it is used at the rate that it was designed to work at.
• Do not incinerate the appliance even if it is severely damaged. The batteries can explode in
a re.
• Do not leave appliance when plugged in/before removing the battery.
• Do not operate the equipment while barefoot or when wearing sandals or similar
lightweight footwear. Wear protective footwear that will protect your feet and improve your
footing on slippery surfaces.

4
IMPORTANT SAFETY INSTRUCTIONS
• Secure long hair so it is above shoulder level to prevent entanglement in any moving
parts.
• Do not overreach. Overreaching can result in loss of balance.
• Do not allow children or untrained individuals to use this unit.
• Any tool that cannot be controlled
with the switch is dangerous, and must be repaired.
• Keep all bystanders, children, and pets at least 50 ft. (15 m) away.
• Use only with Powerworks Batteries: L60A02PW, LB60A01PW, LB60A03PW.
• Use only with Powerworks Charger: CH60A00PW.
•
or medication.
• Do not operate in poor lighting.
• Keep all parts of your body away from any moving parts and all hot surfaces of the unit.
• Do not put any object into the openings. Do not use with any opening blocked. Keep openings
• Check the work area before each use. Remove all objects that can be thrown or become
entangled in the machine, such as rocks, broken glass, nails, wire, or string.
• Use only identical manufacturer’s replacement parts and accessories. Use of any other
parts may create a hazard or cause product damage.
3. FOR BATTERY-OPERATED EQUIPMENT:
• Prevent unintentional starting.
the switch or energizing equipment that have the switch on invites accidents.
•
• Disconnect the battery pack from the equipment before making any adjustments,
changing accessories, or storing equipment. Such preventive safety measures reduce the
risk of starting the equipment accidentally.
• A charger that is suitable for
• Use only the charger supplied by the manufacturer to recharge.
• Use of any other battery
• When battery pack is not in use, keep it away from other metal objects like paper clips,
coins, keys, nails, screws or other small metal objects that can make a connection from
one terminal to another.
•
• Under abusive conditions, liquid may be ejected from the battery; avoid contact. If contact
accidentally occurs, flush with water. If liquid contacts eyes, additionally seek medical help.
Liquid ejected from the battery may cause irritation or burns.
•
• Exposure to

5
WARNING (PROPOSITION 65)
This product contains a chemical known to the state of California to cause cancer, birth defects or
other reproductive harm.
Some dust created by power sanding, sawing, grinding, drilling, and other construction activities
contains chemicals known to cause cancer, birth defects or other reproductive harm. Some examples
of these chemicals are:
• Lead from lead-based paints
• Crystalline silica from bricks and cement and other masonry products, and
• Arsenic and chromium from chemically treated lumber.
Your risk of exposure to these chemicals varies depending on how often you do this type of work.
To reduce your exposure to these chemicals, work in a well-ventilated area, and work with approved
safety equipment, such as dust masks that are specially designed to lter out microscopic particles.
4. CHILD SAFETY
Tragic accidents can occur if the operator is not aware of the presence of children.
• Keep children out of the working area and under the watchful care of a responsible adult.
• Do not allow children under the age of 14 to operate this blower. Children who are 14 years
of age and older must read and understand the operating instructions and safety rules in this
manual and must be trained and supervised by a parent.
• Stay alert, and turn the blower o if a child or any other person enters the working area.
• Use extreme care when approaching blind corners, doorways, shrubs, trees, or other objects
that may obscure your view of a child who may run into the path of the blower.
IMPORTANT SAFETY INSTRUCTIONS
• Have servicing performed by a qualied repair person using only identical replacement
parts. This will ensure that the safety of the product is maintained.

6
SYMBOLS
Some of the following symbols may be used on this product. Please study them and learn their meaning.
Proper interpretation of these symbols will allow you to operate the product better and safer.
SYMBOL NAME DESIGNATION/EXPLANATION
V Volts Voltage
A Amperes Current
Hz Hertz Frequency (cycles per second)
W Watts Power
min Minutes Time
Alternating Current Type of current
Direct Current Type or a characteristic of current
/min Per Minute Revolutions, strokes, surface speed, orbits etc., per
minute
Class II Construction Double-insulated construction
Wet Conditions Alert Do not expose to rain or use in damp locations
Read The Operator’s
Manual
To reduce the risk of injury user must read and
understand operator’s manual before using this
product.
Wear eye protection
and ear protection.
Always wear eye protection with side shields
marked to comply with ANSI Z87.1 when operating
this equipment. Wear ear protection when operating
this equipment.
Safety Alert Precautions that involve your safety.
Long Hair Failure to keep long hair away from the air inlet
could result in personal injury.
Loose Clothing Failure to keep loose clothing from being drawn into
air intake could result in personal injury.
Keep Bystanders Away Keep all bystanders at least 50 ft. away.
Blower Tubes Do not operate without tubes in place.
Impeller Blades Rotating impeller blades can cause severe injury.

7
SYMBOLS
The following signal words and meanings are intended to explain the levels of risk associated with
this product.
SERVICE
Servicing requires extreme care and knowledge and should be performed only by a qualied service
technician. For service we suggest you return the product to your nearest AUTHORIZED SERVICE
CENTER for repair. When servicing, use only identical replacement parts.
WARNING
To avoid serious personal injury, do not attempt to use this product until you have read this Owner's
Manual thoroughly and understand it completely. If you do not understand the warnings and
instructions in this Owner's Manual, do not use this product. Call the Toll-free Helpline (1-855-470-
2181) for assistance.
WARNING
The operation of any power tool can result in foreign objects being thrown into your eyes,
which can result in severe eye damage. Before beginning power tool operation, always wear
safety goggles or safety glasses with side shields and, when needed, a full face shield. We
recommend Wide Vision Safety Mask for use over eyeglasses or standard safety glasses
with side shields. Always use eye protection which is marked to comply with ANSI Z87.1.
SYMBOL SIGNAL MEANING
DANGER Indicates an imminently hazardous situation, which, if not
avoided, will result in death or serious injury.
WARNING Indicates a potentially hazardous situation, which, if not
avoided, could result in death or serious injury.
CAUTION Indicates a potentially hazardous situation, which, if not
avoided, may result in minor or moderate injury.
CAUTION (Without Safety Alert Symbol) Indicates a situation that may
result in property damage.

8
KNOW YOUR BLOWER (See Figure 1.)
The safe use of this product requires an understanding of the information on the product and in
this operator’s manual as well as a knowledge of the project you are attempting. Before use of this
product, familiarize yourself with all operating features and safety rules.
BLOWER TUBE
The blower tube can be easily installed on the blower without any additional tools.
VARIABLE SPEED TRIGGER
Starts/Stops the ow of air through the blower.
CRUISE CONTROL LEVER
Pull backwards on the Cruise Control Lever to engage and lock the trigger. Push forward on the
Cruise Control Lever to release and disengage the trigger.
TURBO BUTTON
Press the Turbo Button to boost the speed. Release the turbo button to make the blower run at the
normal speed.
HARNESS
A well adjusted backpack blower and harness makes work easier. Adjust the harness to give you
the best working stance. Adjust the side straps so the weight is equally distributed across your
shoulders.
KNOW YOUR BLOWER
FIG.1
Blower tube
Trigger
Cruise control lever
Turbo button
Harness

9
ASSEMBLY INSTRUCTION
WARNING
If any parts are damaged or missing, do not operate this product until the parts are replaced. Using
a product with damaged or missing parts could result in serious personal injury.
WARNING
Do not attempt to modify this product or create accessories not recommended for use with this
product. Any such alteration or modication is misuse and could result in a hazardous condition
leading to possible serious personal injury.
WARNING
Do not insert the battery until assembly is complete. Failure to comply could result in accidental
starting and possible serious personal injury.
UNPACKING
This product requires assembly.
• Carefully remove the product and any accessories from the box. Make sure that all items listed
in the package contents section are included.
• Inspect the product carefully to make sure no breakage or damage occurred during shipping.
• Do not discard the packing material until you have carefully inspected and satisfactorily
operated the product.
• If any parts are damaged or missing, please call (1-855-470-2181) for assistance.
PART NAME FIGURE QTY
60V Axial Blower 1
Lower Blower Tube 1
Upper Blower Tube 1
Operator’s Manual 1
PACKING LIST

10
• The flexible tube (A) is connected to the fan outlet tube (B) from the manufacturer.
• Slide trigger handle (C) on the upper blower tube (D).
• Move trigger handle to desired location before fully tightening. Use supplied screw (E) to tighten
trigger handle to the blower tube.
ASSEMBLING THE BLOWER TUBE (See Figure 4-5.)
• Before tube installation, place the hose clamp (F) around the flex tube. Clamp may need to
be slightly loosened for tube installation. Insert the shorter end of the upper blower tube (D)
assembly into the flex tube (A) at a slight angle.
• Use one end of the tube as a pivot point, and press the other side into the flex tube. This may
require some force or lubrification to help assemble the two parts.
• Stop pressing the upper blower tube when it connects to the flex tube. Fully tighten the screw ( G)
on the hose clamp (F) once assembled. Use a screw driver (not provided) to loosen and tighten
the hose clamp. Turn clockwise to tighten, and counter clockwise to loosen.
• Place the cord (H) in the cord retainer (I).
• Connect the blower tube (J) to the operating tube (D). Twist clockwise until the tubes lock into
postion.
WARNING
To prevent accidental starting that could cause serious personal injury, always remove the battery
pack from the tool when assembling parts.
ASSEMBLY INSTRUCTION
ASSEMBLING THE TIGGER HANDLE (See Figure 2-3.)
D
CA
B
E
D
F
G
A
J D
H
I
FIG.2 FIG.3
FIG.4 FIG.5

11
ASSEMBLY INSTRUCTION
HARNESS ADJUSTMENT
A well adjusted backpack blower and harness makes work easier. Adjust the harness to give you the
best working stance. Adjust the side straps so the weight is equally distributed across your shoulders.
Once the blower is properly tted on your back, pull the ends of the straps downward to tighten
the harness. Connect the horizontal chest strap, and pull the end of the strap to tighten.
Lift the tabs of the adjusters to loosen the straps.
Close and lock the quick-release fastener by pushing it together.
Squeeze the hooks to open the quick-release fastener.
A
B
C
D

12
ASSEMBLY INSTRUCTION
PUT ON THE SHOULDER STRAP. (See Figure 6.)
1. Adjust the harness straps (1) to the correct length.
2. Adjust chest strap (2) to correct length and fasten it together.
NOTE: The back padding must t rmly and securely against your back.
Harness Removal
• Open the quick-release fasteners on the strap.
• Loosen the harness straps by lifting the sliding adjusters and then take o the blower.
2
11
WARNING
The backpack blower must be quickly removed in the event of imminent danger. The chest strap
must be released before putting the backpack blower on the ground.
FIG.6

13
OPERATION INSTRUCTION
W A R N I N G
Do not allow familiarity with this product make you careless. Remember that a careless fraction of a
second is sucient to inict serious injury.
WARNING
Always wear eye protection with side shields marked to comply with ANSI Z87.1, along with hearing
protection. Failure to do so could result in objects being thrown into your eyes and other possible
serious injuries.
WARNING
Do not use any attachments or accessories not recommended by the manufacturer of this product.
The use of attachments or accessories not recommended can result in serious personal injury. Before
each use, inspect the entire product for damaged, missing, or loose parts, such as screws, nuts, bolts,
caps,etc. Securely tighten all fasteners and caps and do not operate this product until all missing or
damaged parts are replaced.
HOLDING THE TOOL (See Figure 7.)
The operator should wear proper clothing, such as boots, safety glasses or goggles, ear/hearing
protection, gloves, long pants and a long-sleeved shirt.
This backpack blower is designed to be operated with one hand.
The user can carry it holding the control lever with the left or right hand.
Always walk slowly while working.
Always check the blowing nozzle outlet area.
Fig.7

14
BATTERY
IMPORTANT! The battery pack is not charged when it is purchased. Before using the blower for
the rst time, place the battery pack in the battery charger and charge. Make sure to read all safety
precautions, and follow the instructions in the Battery Charger section.
To Remove (See Figure 8.)
1. Press and hold the battery release button with rm grip.
2. Grasp the backpack rmly. Pull the battery pack out of the backpack.
NOTE:The battery pack ts into the handle snugly in order to prevent accidental dislodging. It may
require a strong pull to remove it.
1. Align the tongue of the battery pack with the cavity in the handle housing.
2. Insert the battery into the battery opening until the battery release button locks into place.
3. Grasp the trigger handle rmly.
4. Push the battery pack into the backpack until both sides lock. The latch button will click when
locked into place.
5. Do not use force when inserting the battery pack. It should slide into place and click.
To Install (See Figure 8.)
Follow these instructions in order to avoid injury and to reduce the risk of electric shock or re:
• Replace the battery pack or the charger immediately if the battery case or charger cord is
damaged.
• Verify that the switch is in the OFF position before inserting or removing the battery pack.
• Verify that the battery pack is removed and the switch is in the OFF position before inspecting,
adjusting, or performing maintenance on any part of the blower.
• Read, understand, and follow the instructions contained in the section entitled Charging
Procedure.
OPERATION INSTRUCTION
WARNING
Battery Release Button
FIG.8

15
STARTING/STOPPING THE BLOWER (See Figure 9.)
Before start-up, make sure that the blower is in perfect condition to guarantee safe operation.
• Squeeze the switch trigger to start.
• To change speed, press or release trigger by degrees to increase or decrease the speed.
USING CRUISE CONTROL LEVER (See Figure 9.)
This blower is equipped with a cruise control function. Please read and understand the function of
the cruise control lever.
• Squeeze the trigger to start the unit.
• Once the unit is on, pull the lever back clockwise to increase the speed. This will lock the speed
at the desired setting.
• To decrease the speed, push the lever counter clockwise to decrease the speed to the desired
setting.
NOTE:
If you decrease the speed all the way, the unit will shut o and step one will need to be
repeated.
USING TURBO BUTTON (See Figure 9.)
This blower is equipped with a turbo button. Please read and understand the function of the turbo
button.
• Squeeze the switch trigger to start.
• To boost speed, press the turbo button so that the blower can be operated at the highest speed.
Once the turbo button is released, the blower will be operated at the normal speed.
WARNING
• To avoid serious personal injury, wear goggles or safety glasses at all times when operating this
unit. Wear a face mask or dust mask in dusty locations.
• To prevent serious personal injury or damage to the unit, make sure the blower tube is in place
before operating the unit.
Turbo Button
HIGH
LOW
Cruise Control Lever
Variable Speed Trigger
OPERATION INSTRUCTION
FIG.9

16
WARNING
• To avoid serious personal injury, wear goggles or safety glasses at all times when operating this
unit. Wear a face mask or dust mask in dusty locations.
• To prevent serious personal injury or damage to the unit, make sure the blower tube is in place
before operating the unit.
OPERATING TIPS
• To keep from scattering debris, blow around the outer edges of a debris pile. Never blow directly
into the center of a pile.
• To reduce sound levels, limit the number of pieces of equipment used at any one time.
• Use rakes and brooms to loosen debris before blowing. In dusty conditions, slightly dampen
surfaces when water is available.
• Conserve water by using power blowers instead of hoses for many lawn and garden applications,
including areas such as gutters, screens, patios, grills, porches, and gardens.
• Watch out for children, pets, open windows, or freshly washed cars, and blow debris safely away.
• After using blowers or other equipment, clean up. Dispose of debris properly.
AIR VENTS
Never cover air vents. Keep them free of obstructions and debris. They must always remain clear
for proper motor cooling.
OPERATING THE BLOWER
Hold the blower rmly. Sweep from side to side with the nozzle several inches above the ground
or oor. Slowly advance the unit, keeping the accumulated pile of debris in front of you. Most dry
blowing operations are better suited to low speeds, rather than high speeds. High speed blowing is
a better way to move heavier items like large debris or gravel.
WARNING
• To avoid serious personal injury, do not wear loose-clothing or articles such as scarves, strings,
chains, ties, etc., that could be drawn into the air vents. Tie back long hair to make sure it does
not get drawn into the air vents.
• To avoid serious personal injury, ensure the unit is in OFF position and unplugged before
clearing the impeller.
• To avoid serious personal injury, always wear gloves to protect yourself from the impeller blades
or other sharp objects.
OPERATION INSTRUCTION

17
W A R N I N G
In order to avoid personal injury and the risk of re and electric shock, remove the battery pack before
adjusting, inspecting, or cleaning the blower.
CLEANING
Remove the battery pack.
1. Brush or blow dust and debris out of the air vents using compressed air or a vacuum. Keep the
air vents free of obstructions, sawdust, and wood chips. Do not spray, wash, or immerse the air
vents in water.
2. Wipe o the housing and the plastic components using a moist, soft cloth. Do not use strong
solvents or detergents on the plastic housing or plastic components. Certain household cleaners
may cause damage, and may cause a shock hazard.
BATTERY PACK
• Store the battery pack fully charged.
• Once the charging light turns green, remove the battery from the charger and disconnect the
charger from the outlet.
• Do not store the battery pack on the tool.
• After charging, the battery pack may be stored in the charger, as long as the charger is not
plugged in.
CHARGER MAINTENANCE
• Keep the charger clean and clear of debris. Do not allow foreign material to get into the recessed
cavity or onto the contacts. Wipe the charger clean with a dry cloth. Do not use solvents or water,
and do not place the charger in wet conditions.
• Unplug the charger when there is no battery pack in it.
• Fully charge the batteries before placing them in storage.
• Store the charger at normal room temperature. Do not store it in excessive heat. Do not use the
charger in direct sunlight. Recharge at room temperature between 43˚F and 104˚F (6˚C and
40˚C). If the battery pack is hot, allow it to cool down before recharging.
MAINTENANCE

18
TROUBLESHOOTING
PROBLEM POSSIBLE CAUSE SOLUTION
Motor fails to start
when switch trigger
is depressed.
Battery is not secure.
Ensure the battery is fully secure in the
battery compartment and the battery release
button locks into place.
Battery is not charged. Charge the battery pack according to the
instructions included with your model.
Unit will not start. Defective power switch.
Return to place of purchase or return the unit
to a repair center or call customer service at
1-855-470-2181.
Unit will not blow. Blocked tube. Clear the blockage.
Cruise Control
Lever doesn’t work. The screw is loose. Tighten the screw with a Phillips
screwdriver.

19
LIMITED WARRANTY
POWERWORKS™ hereby warranties this product, to the original purchaser with proof of purchase,
for a period of two (2) years against defects in materials, parts or workmanship. POWERWORKS™,
at its own discretion will repair or replace any and all parts found to be defective, through normal
use, free of charge to the customer. This warranty is valid only for units which have been used for
personal use that have not been hired or rented for industrial/commercial use, and that have been
maintained in accordance with the instructions in the owners’ manual supplied with the product from
new.
ITEMS NOT COVERED BY WARRANTY:
1. Any part that has become inoperative due to misuse, commercial use, abuse, neglect,
accident, improper maintenance, or alteration; or
2. The unit, if it has not been operated and/or maintained in accordance with the owner's
manual; or
3. Normal wear, except as noted below;
4. Routine maintenance items such as lubricants, blade sharpening;
5. Normal deterioration of the exterior nish due to use or exposure.
POWERWORKS HELPLINE (1-855-470-2181):
Warranty service is available by calling our toll-free helpline, at 1-855-470-2181.
TRANSPORTATION CHARGES:
Transportation charges for the movement of any power equipment unit or attachment are the
responsibility of the purchaser. It is the purchaser’s responsibility to pay transportation charges for
any part submitted for replacement under this warranty unless such return is requested in writing by
POWERWORKS.
TOOL WARRANTY
L'OUTIL
YEAR/ANS/AN
GARANTIE DE
GARANTÍA DE LA
HERRAMIENTA

20
EXPLODED VIEW
PARTS LIST
Item No. Part No. Description Qty
1341101949A Upper Blower Tube 1
2311091957 Lower Blower Tube 1
3311011957 Blower Assembly 1
4349011949 Harness 1
5341091949A Flexible Hose 1
6341171949 Hose Clamps 2
TOLL-FREE HELPLINE: 1-855-470-2181
R e v : 0 0 ( 09 - 1 3 - 1 7 ) Printed in China on 100% Recycled Paper
Powerworks Tools
PO Box 1238
Mooresville, NC 28115
1
3
4
56
2
Table of contents
Languages:
Other Power works Blower manuals

Power works
Power works XB 20V User manual

Power works
Power works 2400213 User manual

Power works
Power works XB 40V BLP302 User manual

Power works
Power works 2401373 User manual

Power works
Power works 2401013 User manual

Power works
Power works 2400513 User manual

Power works
Power works P48AB User manual

Power works
Power works XB 20V User manual