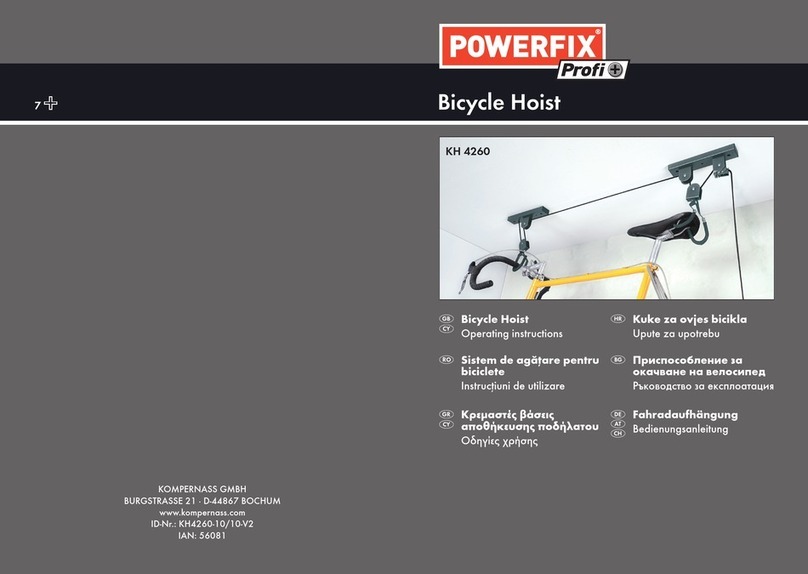
Powerfix Profi KH 4260 User manual

Bicycle Hoist3
KOMPERNASS GMBH
BURGSTRASSE 21 · D-44867 BOCHUM
www.kompernass.com
ID-Nr.: KH4260-10/10-V2
IAN: 56081
KH 4260
Bicycle Hoist
Operating instructions
Polkupyörän ripustusteline
Käyttöohje
Cykelupphängning
Bruksanvisning
Cykelophæng
Betjeningsvejledning
Fahradaufhängung
Bedienungsanleitung
CV_KH4260_56081_LB3.indd 1-2CV_KH4260_56081_LB3.indd 1-2 04.11.2010 16:13:22 Uhr04.11.2010 16:13:22 Uhr

1
KH 4260
GB
IE
1
KH 4260
Intended use ...................................................................................2
Safety instructions ..........................................................................2
Items supplied.................................................................................3
Required assembly material .........................................................3
Assembly.........................................................................................4
Cleaning and Care .........................................................................6
Disposal...........................................................................................6
Declaration of EG Conformity.......................................................7
Importer / Service..........................................................................7

2KH 4260
GB
IE
Bicycle Hoist KH 4260
Read these operating instructions carefully before using the device for the first
time and preserve this booklet for later reference. Pass this booklet on to whoever
might acquire the device at a future date.
Intended use
This bicycle hoist in intended to save space and relieve the tyres during bicycle
storage.
It is not intended for use in commercial or industrial applications.
Safety instructions
NEVER lift more than 20 kg with the bicycle hoist. If you do, the bicycle hoist■
will be damaged and the load will fall down.
Check for the correct tightness of all screws before using the bicycle hoist.■
At all times use the securing hooks for securing the load. Otherwise, the load■
could crash down.
Do not take up a position underneath the suspended load.■
Use the bicycle hoist only for storage purposes, not for any other purpose.■
NEVER perform repairs on the suspended load.■
Should the nylon cord become damaged, replace it immediately.■
If you do not, it could sever.
Ensure that the nylon cord does not slide too fast between your hands! It■
could lead to burns and abrasions!
The bicycle hoist may not be operated by weak persons, for example,■
children. The bicycle could crash down and cause injuries.
Ensure that the holding hooks cannot slip from the saddle and handlebar■
when raising or lowering of the bicycle.

3
KH 4260
GB
IE
Items supplied
2 Ceiling mounts▯
2 Holding hooks▯
1 Nylon cord (16,5 m)▯
1 Attachment hooks▯
1 Handle▯
4 Cross-head screws and plugs (S8)▯
This operating manual▯
NOTICE
Check the items supplied to ensure everything is available and for visible►
damage.
If the supply is incomplete or is damaged due to defective packaging or►
transportation, contact the Service Hotline.
Required assembly material
1 Cross-head screwdriver▯
1 Measuring tape▯
1 Pencil▯
1 Drilling machine▯
1 Drill bit (8 mm diameter)▯

4KH 4260
GB
IE
Assembly
IMPORTANT
Before use, check to ensure that the holding hook can reach under the saddle►
and find a firm hold there, for example on a raised edge, a cross bar or
similar. Should a secure attachment of the holding hook onto the saddle not
be possible, the bicycle hoist may not be used with this particular bicycle!
Measure the distance between the handlebars and the saddle of your bicycle.♦
Transfer this measurement to the ceiling. Drill the required holes and insert♦
the plugs.
Attach both ceiling mounts to the ceiling using the supplied cross-head screws.♦
Pass the nylon cord through the ceiling mounts and make a solid double-knot♦
on the end.

5
KH 4260
GB
IE
Connect the construction together with the cord like a pulley. Run the nylon♦
cord, starting at the ceiling support, alternately through the rollers.
Pass the nylon cord through the safety device (A) of the ceiling mount, the♦
holding hooks (B) and the handle (C).
Check for the correct tightness of all screws before using the bicycle hoist.♦
A
B
C

6KH 4260
GB
IE
Attach the holding hooks onto the saddle and handlebars and raise the bicycle.♦
Secure the bicycle at a suitable location with the attachment hook.♦
NOTICE
Should the nylon cord slip through your hands quickly when raising or►
lowering the bicycle, the increased tempo of the nylon cord itself will
trigger the brake and the nylon cord will stop automatically.
Cleaning and Care
Except for an occasional greasing of the rollers, the bicycle hoist is maintenance-free.
Clean the bicycle hoist with a slightly damp cloth if it becomes dirty.♦
Disposal
Do not dispose of the device in your normal domestic waste. Dispose of the
device through an approved disposal centre or at your community waste facility.
Observe the currently applicable regulations. In case of doubt, please contact
your waste disposal centre.
Dispose of all packaging materials in an environmentally friendly manner.

7
KH 4260
GB
IE
Declaration of EG Conformity
We, Kompernaß GmbH, Burgstraße 21, D-44867 Bochum, declare on our
sole responsibility that this product complies with all of the requirements of the
Machinery Directive 2006/42/EC.
Type/Device designation:
Powerfix Profi + Bicycle Hoist KH 4260
Year of Manufacture:
11/2010
Serial Number:
IAN 56081
Related harmonised standards:
EN ISO 12100-1: 2003
EN ISO 12100-2: 2003
Bochum, 10.13.2010
Hans Kompernaß
- Managing Director -
Importer / Service
KOMPERNASS GMBH
BURGSTRASSE 21
44867 BOCHUM, GERMANY
www.kompernass.com


9
KH 4260
FI
9
KH 4260
Sisällysluettelo
Määräystenmukainen käyttö......................................................10
Turvaohjeet ...................................................................................10
Toimituslaajuus .............................................................................11
Tarvittava asennusmateriaali......................................................11
Asennus.........................................................................................12
Puhdistus ja hoito .........................................................................14
Hävittäminen ................................................................................14
EY-vaatimustenmukaisuusvakuutus............................................15
Maahantuoja / Huolto.................................................................15

10 KH 4260
FI
Polkupyörän ripustusteline KH 4260
Lue käyttöohje ennen ensimmäistä käyttökertaa huolellisesti läpi ja pidä sitä
lähettyvillä myös myöhemmissä käytöissä. Jos myyt laitteen, anna ohje myös
seuraavalle omistajalle.
Määräystenmukainen käyttö
Polkupyörän ripustusteline on tarkoitettu polkupyörien tilaa säästävään ja renkaita
suojaavaan varastointiin. Sitä ei ole tarkoitettu teolliseen tai kaupalliseen käyttöön.
Turvaohjeet
Älä nosta polkupyörän ripustustelineellä koskaan enempää kuin 20 kg.■
Polkupyörän ripustusteline voi muuten vaurioitua ja kuorma putoaa alas.
Varmista, että kaikki ruuvit ovat tukevasti paikallaan, ennen kuin alat käyttää■
polkupyörän ripustustelinettä.
Käytä yleisesti kiinnityskoukkua kuorman varmistamiseen.Kuorma saattaa■
muutoin pudota.
Älä oleskele riippuvan kuorman alapuolella.■
Käytä polkupyörän ripustustelinettä ainoastaan säilytystarkoituksiin, ei tarkoi-■
tuksenvastaisesti.
Älä suorita korjaustöitä riippuvalle kuormalle.■
Mikäli nailonköysi on vahingoittunut, vaihda se välittömästi uuteen.■
Muuten se saattaa revetä.
Varmista, ettei nailonköysi liu'u käsiesi lomitse liian nopeasti! Se saattaa■
johtaa palo- ja hankausvammoihin!
Heikot henkilöt, esim. lapset, eivät saa käyttää polkupyörän ripustustelinettä.■
Polkupyörä saattaa pudota ja aiheuttaa vammoja.
Varmista, etteivät pitokoukut voi liukua satulasta ja ohjaustangosta polkupyörää■
ylös vedettäessä tai alas laskettaessa.

11
KH 4260
FI
Toimituslaajuus
2 kattopidikettä▯
2 pitokoukkua▯
1 nailonköysi (16,5 m)▯
1 kiinnityskoukku▯
1 kahva▯
4 ristipääruuvia tulppineen (S8)▯
Tämä käyttöohje▯
OHJE
Tarkista, että toimitus on täydellinen ja ettei osissa ole näkyviä vaurioita.►
Jos toimitus on puutteellinen tai havaitset puutteellisen pakkauksen tai kulje-►
tuksen aiheuttamia vaurioita, käänny huollon palvelunumeron puoleen.
Tarvittava asennusmateriaali
1 ristipääruuvimeisseli▯
1 mittanauha▯
1 lyijykynä▯
1 porakone▯
1 poranterä (halkaisija 8 mm)▯

12 KH 4260
FI
Asennus
HUOMIO
Varmista ennen käyttöä, että pitokoukku osuu satulan alle ja saa sieltä►
hyvän otteen, esim. reunuksesta, poikkitangosta tai vastaavasta.
Jos pitokoukun varma kiinnittäminen satulaan ei ole mahdollista, polkupyörän
ripustustelinettä ei saa käyttää tälle polkupyörälle!
Mittaa polkupyöräsi ohjaustangon ja satulan välinen etäisyys.♦
Merkitse mittaustulokset kattoon. Poraa porakoneella reiät ja aseta niihin♦
tulpat.
Kiinnitä molemmat kattopidikkeet mukana tulevilla ristipääruuveilla sisäkattoon.♦
Vie nailonköysi kattopidikkeen läpi ja solmi sen päähän tukeva kaksoissolmu.♦

13
KH 4260
FI
Kiinnitä rakennelma nailonköyden avulla nostotaljaperiaatteen mukaisesti.♦
Vie nailonköysi vuorotellen rullien läpi, aloita kattopidikkeestä.
Vie nailonköysi kattopidikkeen varolaitteen (A), kiinnityskoukun (B) ja♦
kahvan (C) läpi.
Varmista, että kaikki ruuvit ovat tukevasti paikallaan, ennen kuin alat♦
käyttää polkupyörän ripustustelinettä.
A
B
C

14 KH 4260
FI
Kiinnitä pitokoukku satulaan ja ohjaustankoon ja nosta polkupyörä ylös.♦
Varmista polkupyörä sopivaan paikkaan kiinnityskoukun avulla.♦
OHJE
Jos nailonköysi lipeää käsistäsi polkupyörää nostettaessa tai laskettaessa,►
köyden nopea läpikulku aktivoi jarrun ja nailonköysi pysähtyy automaattisesti.
Puhdistus ja hoito
Polkupyörän ripustusteline ei kaipaa huoltoa, rullien satunnaista rasvausta lukuun
ottamatta.
Puhdista likainen polkupyörän ripustusteline kostealla liinalla.♦
Hävittäminen
Älä hävitä laitetta tavallisen talousjätteen mukana. Hävitä laite hyväksytyn jät-
teenhuoltoyrityksen tai kunnallisen jätehuollon kautta. Noudata voimassa olevia
määräyksiä. Ota epävarmoissa tapauksissa yhteyttä jätelaitokseesi.
Hävitä kaikki pakkausmateriaalit ympäristöystävällisellä tavalla.

15
KH 4260
FI
EY-vaatimustenmukaisuusvakuutus
Me, Kompernaß GmbH, Burgstraße 21, D-44867 Bochum, vakuutamme
ainoana vastuullisena, että tuote vastaa kaikkia konedirektiivin 2006/42/EC
vaatimuksia.
Tyyppi/Laitekuvaus:
Powerfix Profi + polkupyörän ripustusteline KH 4260
Valmistusvuosi:
11/2010
Sarjanumero:
IAN 56081
Sovelletut yhdenmukaistetut standardit:
EN ISO 12100-1: 2003
EN ISO 12100-2: 2003
Bochum, 13.10.2010
Hans Kompernaß
Toimitusjohtaja
Maahantuoja / Huolto
KOMPERNASS GMBH
BURGSTRASSE 21
44867 BOCHUM, GERMANY
www.kompernass.com


17
KH 4260
SE
17
KH 4260
Innehållsförteckning
Föreskriven användning..............................................................18
Säkerhetsanvisningar ..................................................................18
Leveransens innehåll....................................................................19
Nödvändigt monteringsmaterial ................................................19
Montering .....................................................................................20
Rengöring och skötsel..................................................................22
Kassering ......................................................................................22
EU-försäkran om överensstämmelse..........................................23
Importör/Service..........................................................................23

18 KH 4260
SE
Cykelupphängning KH 4260
Läs igenom bruksanvisningen noga innan du börjar använda produkten och
spara den för senare bruk. Lämna över bruksanvisningen tillsammans med
produkten om du överlåter den till någon annan person.
Föreskriven användning
Cykelupphängningen ska användas för att spara plats och skona däcken när
man förvarar cyklar.
Den är inte avsedd för industriellt eller yrkesmässigt bruk.
Säkerhetsanvisningar
Lyft aldrig med än 20 kg med cykelupphängningen. Annars kan den skadas■
och cykeln kan falla ner.
Kontrollera att alla skruvar sitter ordentligt innan du använder cykelupp-■
hängningen.
Använd alltid fästhaken för att säkra lasten. Annars kan den falla ner.■
Vistas inte under hängande last.■
Använd endast cykelupphängningen för förvaring, aldrig i andra syften.■
Gör inga reparationer på den upphängda cykeln.■
Byt genast ut nylonlinan om den är skadad.■
Annars kan den gå av.
Akta så att nylonlinan inte glider för fort genom händerna! Du kan få bränn-■
och skrapsår på handflatorna!
Cykelupphängningen får inte användas av svaga personer, t ex barn.■
Då kan cykeln falla ner och orsaka skador.
Försäkra dig om att krokarna inte kan lossna från sadeln och styret när du■
hissar upp eller ner cykeln.

19
KH 4260
SE
Leveransens innehåll
2 takfästen▯
2 krokar▯
1 nylonlina (16,5 m)▯
1 fästhakkar▯
1 handtag▯
4 stjärnskruvar med pluggar (S8)▯
Denna bruksanvisning▯
OBSERVERA
Kontrollera att leveransen är komplett och inte har några synliga skador.►
Om någonting fattas eller om leveransen skadats på grund av bristfällig►
förpackning eller i transporten ska du kontakta vår service hotline.
Nödvändigt monteringsmaterial
1 stjärnskruvmejsel▯
1 måttband▯
1 blyertspenna▯
1 borrmaskin▯
1 borr (8 mm)▯
Other manuals for KH 4260
3
Table of contents
Languages:
Other Powerfix Profi Bicycle Accessories manuals

Powerfix Profi
Powerfix Profi KH 4260 User manual

Powerfix Profi
Powerfix Profi KH 4260 User manual

Powerfix Profi
Powerfix Profi 94516 Installation and operating instructions

Powerfix Profi
Powerfix Profi 89269 User manual

Powerfix Profi
Powerfix Profi KH 4056 User manual

Powerfix Profi
Powerfix Profi 73015 User manual

Powerfix Profi
Powerfix Profi Z31845 Installation and operating instructions
Powerfix Profi
Powerfix Profi KH 4260 User manual
Powerfix Profi
Powerfix Profi 96689 User manual