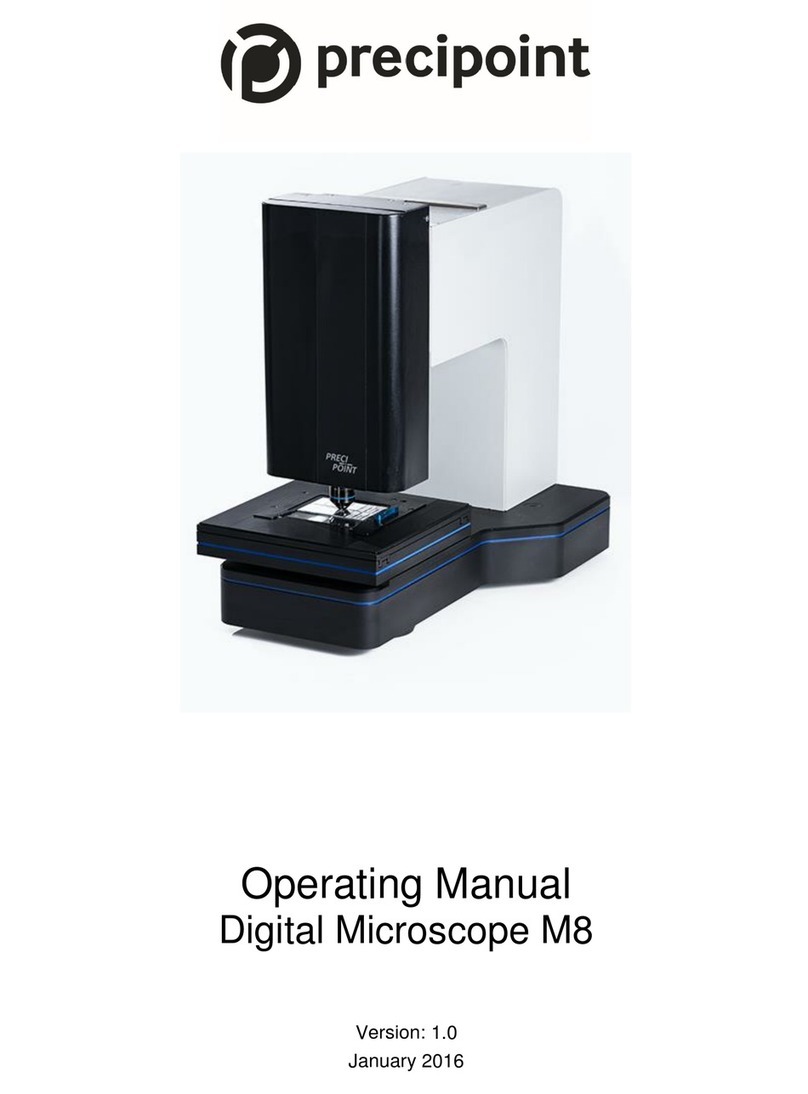
Precipoint M8 User manual

User Manual
M8
Microscope & Scanner
For research use only. Not for use in diagnostic procedures.
User Manual: UM-M8-2021-01
Revision: A
Date: December 2021

Copyright Notice
Copyright © 2021 PreciPoint GmbH. All Rights Reserved. PRECIPOINT and the PreciPoint logo are registered
trademarks of PreciPoint GmbH. M8 is a trademark of PreciPoint GmbH in Germany and optionally in other
countries. Other logos, product and/or company names might be trademarks of their respective owners.
This product is protected by registered patents. For a list of patents, contact PreciPoint GmbH.
PreciPoint Products & Sales
For the latest information on PreciPoint products and services, please visit https://precipoint.com/.
Disclaimer
PreciPoint Field Representatives should be contacted immediately for assistance in the event of any
instrument malfunction. Installation of hardware should only be performed by a certified PreciPoint Service
Engineer.
This is the original version of the user manual.
Contact Information – PreciPoint GmbH
Headquarter Customer Support Sales
PreciPoint GmbH
Alois-Steinecker-Straße 22
85354 Freising
Bavaria, Germany
Tel: +49 (0) 8161 97693-98
support@precipoint.de
https://precipoint.com/support
Tel: +49 (0)8161 976979-99
sales@precipoint.de
el: +49 (0)8161 976979-0
https://precipoint.com/
Get access to
our support
platform here:
Send email
here:
FM34F056

Table of Contents
iii
Index
1Scope of Usage .......................................................................................................................... 5
1.1 General Information............................................................................................................. 5
1.2 Information about used pictograms....................................................................................... 7
1.3 Intended Use ...................................................................................................................... 7
1.4 Key Features of the M8......................................................................................................... 9
2Scope of Delivery...................................................................................................................... 10
3Transport, Storage and Disposal ................................................................................................. 13
3.1 Transport.......................................................................................................................... 13
3.2 Intermediate and Permanent Storage.................................................................................. 14
3.3 Disposal............................................................................................................................ 15
3.3.1 Disposal of Packaging ................................................................................................. 15
3.3.2 Disposal of Device....................................................................................................... 15
4Operating Safety....................................................................................................................... 16
5Initial Set Up............................................................................................................................. 18
5.1 General Information........................................................................................................... 18
5.2 Microscope hardware setup................................................................................................ 18
5.3 Wiring and Connections ..................................................................................................... 19
5.4 Starting the Software ......................................................................................................... 21
6Basic Menu Structure of MicroPoint............................................................................................ 23
6.1 Live View Mode ................................................................................................................. 23
6.2 Instant Scan Mode ............................................................................................................. 24
6.3 Slide Scan Mode ................................................................................................................ 25
6.4 Change of the Modes ......................................................................................................... 25
7Changing Slides........................................................................................................................ 26
8Changing Objective................................................................................................................... 28
9Care of the M8.......................................................................................................................... 30
10 Maintenance of the M8.......................................................................................................... 31

Table of Contents
iv
11 Troubleshooting ................................................................................................................... 31
12 Specifications and Dimensions ............................................................................................... 32
12.1 General M8 Microscope and Scanner Specifications .............................................................. 32
12.2 Dimensions....................................................................................................................... 33
12.3 Environmental Conditions .................................................................................................. 34
12.4 Operating Data.................................................................................................................. 34
12.5 Specification of z-axis......................................................................................................... 35
12.6 Specification of x-y-stage.................................................................................................... 35
12.7 Objektiv............................................................................................................................ 36
12.8 Optical and Imaging Data.................................................................................................... 37
12.9 Computer Minimum System Requirements .......................................................................... 37
12.10 Monitor Minimum System Requirements.......................................................................... 37
12.11 Specifications of intended microscopy glass slides ............................................................ 38
12.12 Compliance Specifications .............................................................................................. 39
List of Figures.................................................................................................................................. 40

Chapter 1: Scope of Usage
User Manual M8
© PreciPoint GmbH, 2021 December 2021 Page 5 of 40
1Scope of Usage
1.1 General Information
Complete reading of the user manual is required!
The device is a digital microscope and is called M8, in the further manual just called M8. The M8 consists
of a microscope and the corresponding control software “MicroPoint” running on the host PC. “ViewPoint”
the desktop based (offline) viewer in which the scanned images are displayed. “PreciCloud” the browser-
based (online) viewer in which the scanned images are displayed. There images in the PreciCloud can be
shared via link with other users also with restrictions for viewing. Images need to be uploaded to the
PreciCloud for viewing. It also has annotation and image manipulation functionalities. The M8 can only be
used as a complete system. The device creates a magnified image of a specimen by optical magnification.
This virtual image is digitized by a camera sensor and transmitted to the host PC. The digital image is then
displayed to the user through the control software on a computer screen. The operator can use the device
for digitizing microscopic slides, make annotations on them and analysing the samples.
In addition to the operating instructions, the user must observe and instruct all legal and other binding
regulations in their respective work place and country, such as but not limited to regulations related to
accident prevention and environmental protection! Such obligations may include, for example but not
limited to, the handling of hazardous materials or the provision and wearing of personal protection. This
manual can’t cover all possible cases relevant for safety instructions. Therefore, it does only contain a
limited variety of safety provisions. PreciPoint may not be held liable for mishandling and misusing the M8.
Hence, it lies in the user’s own responsibility to use the equipment with diligent care and consideration.
This user manual must be stored and/or kept within reach of the device! Staff charged with operating the
device must read the operating instructions and especially the chapter safety instructions before working
with the product.
The M8 is certified to DIN EN 61326-1 (VDE 0843-20-1:2013-07) and DIN EN 61326-2-2 (VDE 0843-20-2-
2:2013-08).

Chapter 1: Scope of Usage
User Manual M8
© PreciPoint GmbH, 2021 December 2021 Page 6 of 40

Chapter 1: Scope of Usage
User Manual M8
© PreciPoint GmbH, 2021 December 2021 Page 7 of 40
1.2 Information about used pictograms
The following symbols may appear on your product or in this user manual:
Consult instruction for use
General warning
Manufacturer
Catalog number
Protect from direct sunlight
Protect from water
Electronic and electrical equipment waste disposal
1.3 Intended Use
The digital microscope system is an aid for microscopic assessment for the purpose of displaying a
specimen obtained by optic magnification. The user needs basic education and knowledge in microscopy
and lab work and have basic knowledge in English.
Scope of applications:
•Research
•Life Sciences
•Industry

Chapter 1: Scope of Usage
User Manual M8
© PreciPoint GmbH, 2021 December 2021 Page 8 of 40
The M8 is not intended to be used in applications that require medical certification! The
M8 is not for use in diagnostic procedures!
Although this device is tested for compliance with the electromagnetic radiation emission limit (EMC),
there remains a risk of affecting other devices.
This device must not be placed in a room with life support devices!
Specifications of intended microscopy glass slides:
Two types of glass slides with the following dimensions are intended to be used on the x-y-stage.
a)
Length 75.5mm ± 0.5mm
Width 25.5mm ± 0.5mm
Thickness 1mm ± 0.05 mm
b)
Length 75.5mm ± 0.5mm
Width 51 mm ± 1mm
Thickness 1mm ± 0.05 mm
M8 is optimized for scanning glass slides with coverslips affixed with mounting media.
The coverslip/label shall not protrude beyond the edge of the glass slide. The entire coverslip and label
must adhere to the glass slide. There must be no lifted edges or parts of the coverslip/label. The outer
surface of the slide must be dry.
Slides are typically prepared using:
- Glass coverslip with mounting media such as Eukitt
- Film coverslip with integrated glue

Chapter 1: Scope of Usage
User Manual M8
© PreciPoint GmbH, 2021 December 2021 Page 9 of 40
Maximum tissue thickness (including mounting media) optimized for 3-5 µm
Optimized for coverslip with thickness of 0.17 mm, made of typical coverslip material: Standard
microscope cover glass or Cellulose Tri-Acetate film (microscope cover film)
25 mm x 25 mm. Handwritten/printed non-transparent, matte (paper-like reflecting) sticker. Labels shall
not protrude beyond the edge of the slides or be lifted. Labels shall not be attached to the bottom of the
slide, but only attached to the coverslip-side of the slide. Maximum label thickness 200 microns. Minimum
label size 12 mm x 25 mm There must be a minimum of 0.5 mm between each side of the barcode and
the edge of the label.
It is considered improper use that slides or objects with dimensions other than shown in
above specification list are used with the M8. The M8, the objective and/ or the slide may
be damaged.
Improper use of this device can result in danger for life and health, as well as damages to this device and
connected devices. Any other use or extended use other than the intended use is considered improper
use. The manufacturer and supplier shall not be liable for any resulting damage or loss whatsoever. The
intended use includes following the instructions in this manual.
Operate the device only under perfect conditions. Malfunctions which can impair safety
must be remedied immediately!
1.4 Key Features of the M8
1. View specimen on glass slides in high magnification in three different modes
a. Live View Mode
b. Instant Scan Mode
c. Scan and digitize specimen on glass slides for documentation and further examinations
(Whole Slide Image)

Chapter 2: Scope of Delivery
User Manual M8
© PreciPoint GmbH, 2021 December 2021 Page 10 of 40
2Scope of Delivery
•1 PreciPoint M8 microscope (see figure 2.1)
oAll required connecting cables, such as USB 3.0 cable
o1 magnetic tray holder
•Objective(s): Scope of delivery may differ. Various objectives are available upon request (see figure
3.2)
•1 All in one Computer with PC and monitor functionalities or 1 PC and 1 Monitor. Please see order
confirmation for exact delivery content.
oPre-installed operating system Win10 and supplies like power plug, mouse, and keyboard
•M8 operating software „MicroPoint“ (pre-installed on PC)
•M8 viewer software „ViewPoint“ (pre-installed on PC)
•Dustcover for microscope
•Quickguide for quick setup of the device (see figure 3.3)

Chapter 2: Scope of Delivery
User Manual M8
© PreciPoint GmbH, 2021 December 2021 Page 11 of 40
Figure 3-1: PreciPoint M8
Figure 3-2: Objective (Example picture)

Chapter 2: Scope of Delivery
User Manual M8
© PreciPoint GmbH, 2021 December 2021 Page 12 of 40
Figure 3-3: Quick start guide

Chapter 3: Transport, Storage and Disposal
User Manual M8
© PreciPoint GmbH, 2021 December 2021 Page 13 of 40
3Transport, Storage and Disposal
Please read the following instructions about the correct transportation and storage as well as disposal of
this device carefully and observe the information contained therein.
3.1 Transport
Lift the device with care – it is heavy! Lifting it in the wrong way may cause injuries and/or
damage to the device.
Always carry the device using two hands. Grab the device below the girder holding the
microscope head. Improper carrying of the device can cause accidents, such as dropping
of the device, and consequently damage the device and the slides.
Figure 4-1: Lifting and holding the M8
While lifting the device, be careful not to lift the side parts as they are fixed magnetically.
Moving the side parts of the device can cause the device to drop and consequently lead
to damages. Additionally, shifted side parts can cause damage.
When moving the microscope, never hold on to the x-y-stage or the z-axis. This can cause
damage.

Chapter 3: Transport, Storage and Disposal
User Manual M8
© PreciPoint GmbH, 2021 December 2021 Page 14 of 40
3.2 Intermediate and Permanent Storage
The M8 parts are equipped with advanced mechanical parts and electronic components. To maintain the
function and functionality of the device, observe the following instructions for intermediate and
permanent storage:
The storage location must be indoor and dry. If not, device can be damaged.
The device must be protected against direct sunlight.
•The storage location must be indoor and dry.
•The device should be accessible from the front
•The device must be protected against direct sunlight.
•The device should be placed in an environment with low incidence of extraneous light to ensure
high quality images with correct illumination.
•The device must be protected against fine sand and dust.
•The device must be protected against aggressive substances such as abrasive solvents or other
substances harming metal, glass and/ or plastic.
•The floor and surface where the device is place upon, must be horizontal, hard, have sufficient
load-bearing capacity and withstand the gross weight of the device over time. Weight of the
device in chapter 13.
•The floor and surface where the device is place upon, must be stable and without vibration.
•Do not place anything on the device or put weight on the device.
•Leave enough space for the z-axis to move up and the stage to move.
•Ensure the cables are not bent or squeezed.

Chapter 3: Transport, Storage and Disposal
User Manual M8
© PreciPoint GmbH, 2021 December 2021 Page 15 of 40
•The temperature range is limited from 10°C to 40°C.
•The maximum relative humidity is limited to max. 55%.
•Always cover the device with a protective dust cover when not in use.
•Ensure that the device is turned off when not in use.
3.3 Disposal
3.3.1 Disposal of Packaging
Dispose the packing in accordance with local environmental regulations.
Dispose the materials that were used for packaging of the device in accordance with local environmental
regulations and supply the packaging to the local disposal facility. Check your local disposal regulations
for further information.
3.3.2 Disposal of Device
Dispose the device in accordance with local environmental regulations.
This device falls under the EU Directive 2012 / 19 / EU to reduce the increasing amount of electronic
waste. This device may not be disposed in unsorted residual and domestic waste! Check your local disposal
regulations for further information.

Chapter 4: Operating Safety
User Manual M8
© PreciPoint GmbH, 2021 December 2021 Page 16 of 40
4Operating Safety
Improper use of this device can result in danger for life and health, as well as damages to this device and
other devices. Any other use or extended use other than the intended use is considered improper use. The
manufacturer and supplier shall not be liable for any resulting damage or loss whatsoever. Instructions in
this manual must be followed.
The M8 is not intended to be used in applications that require medical certification! The
M8 is not for use in diagnostic procedures!
Operate the device only under conditions specified above.
Malfunctions must be reported immediately. Do not use malfunctioning devices.
Maintenance or repair (especially opening the housing) must be performed by
PreciPoint staff or personal authorized by PreciPoint. Unauthorized opening or other
meddling with the devices leads to los of all warranty rights and annuls PreciPoint’s
service contract obligations!
The system may only be operated with the indicated voltage. Wrong voltage may cause
damage of the device and personal injuries.
Although this device is tested for compliance with the electromagnetic radiation
emission limit (EMC), there remains a risk of affecting other devices. This device must not
be placed in a room with life support devices!
Do not place body parts between the stage and the z-axis while moving. This can cause
injuries and damage to the device.

Chapter 4: Operating Safety
User Manual M8
© PreciPoint GmbH, 2021 December 2021 Page 17 of 40
Do not look directly into light sources (LED) emitted by the microscope. This can cause
injuries.
The flashing light of the
LED light source may harm sensitive people (for example
epileptic people), though the risk is considered minor.

Chapter 5: Initial Set Up
User Manual M8
© PreciPoint GmbH, 2021 December 2021 Page 18 of 40
5Initial Set Up
5.1 General Information
The device and its connected components need time to adapt to the ambient temperature. Use the
device only after an appropriate waiting time, in extreme cases, this could take up to one day, if the
temperatures in transport and storage environment strongly differ from the temperature in the operating
environment.
5.2 Microscope hardware setup
See figure 6-1 below for location of the components of the microscope and their explications given here:
#1: z-axis: The z-axis a moving part of the microscope. It can move up and down and is responsible for the
focus of the microscope. Please ensure to leave enough space in the location of the microscope to allow
for full movement of the z-axis – see also the product sheet for further information.
#2 Objective: the microscope can hold one objective at the time, there is an option of changing the
objective – please check your invoice to find out which objectives you purchased.
#3 Magnetic tray holder: This is the holder to which the slides are fixed for using the microscope on them.
#4 x-y-stage: The x-y-stage is one of the moving components of the microscope. The stage can move to
the front and back as well as left and right – please ensure to leave enough space in the location of the
microscope to allow for full movement of the stage – see also the product sheet for further information.
#5 Foot: This is the stand of the microscope in which there are also the electrical components.

Chapter 5: Initial Set Up
User Manual M8
© PreciPoint GmbH, 2021 December 2021 Page 19 of 40
Figure 6-1: Components of the microscope
5.3 Wiring and Connections
1. Make sure that all cables used are without damage.
2. Ensure that the magnetically fixed side parts of the M8 are in proper position and are not in
touch with parts of the z-axis.
3. Connect the computer to the microscope. Put the USB cable into the USB 3.0 cable connection
of the microscope and fasten it using the screws in the plug. Plug the other end of the cable into
a USB 3.0 cable port on the computer.
4. Plug the power cord into the power cable connector of the microscope. Ensure that the plug is
firmly placed in the connector. Then plug the power cord into an electrical outlet (please pay
attention to the operating data).
5. Repeat point 4 with the power cable of the computer.

Chapter 5: Initial Set Up
User Manual M8
© PreciPoint GmbH, 2021 December 2021 Page 20 of 40
6. Connect the cable from the x-y-stage to the back of the microscope. Then plug the cable to the
connector at the stage pay attention to the direction of the pins in the plug. Do not bend or
break the pins. Use the notch at the circumference of the plug, to guide the direction of the
plug. Gently push the plug so the pins are inserted in the respective holes. Use the wheel on the
outside of the plug to tighten it.
7. Turn on the computer. Wait at least 3 minutes after booting before proceeding, while the
computer might be finishing installations in the background. Now, switch on the device by using
the toggle switch on the back of the device. When the switch is pressed to “I”, the device is
turned on. When the switch is pressed at “O”, the device is off.
Figure 6-2: Rear side of the M8
Other manuals for M8
1
Table of contents
Other Precipoint Microscope manuals
