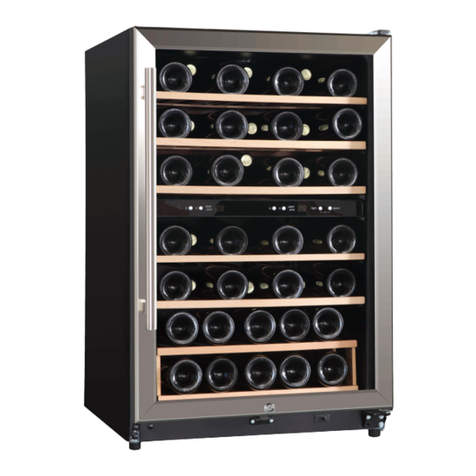
Premium PWC1007XB User manual

PWC1007XB
Model:
This product is for domestic use only
Use &Care Manual
Important Safeguards
Manual de uso ycuidado
Precauciones importantes
Este producto es para uso domestico unicamente
ENFRIADOR DE VINO
WINE COOLER

ATTENTION
GROUNDING INSTRUCTIONS
This appliance must be grounded. In the event of an electrical short circuit,
grounding reduces the risk of electrical shock by providing an escape wire for the
electrical current. This appliance is equipped with a cord having a grounding wire
with a grounding plug. The plug must be plugged into an outlet that is properly
installed and ground
WARNING - Improper use of the grounding plug can result in a risk of electric
shock. Consult a qualified electrician or service person if the grounding
instructions are not completely understood or if doubt exists as to whether the
appliance is properly grounded.
DO NOT USE AN EXTENSION CORD
Use an exclusive wall outlet. Do not connect your refrigerator to an extension cord
or together with any other appliance in the same wall outlet. Do not splice the
cord.
IMPORTANT WARNING
An empty refrigerator is a very dangerous attraction for children. Remove either
the gasket, latches, lid or door from unused appliances, or take some other action
that will guarantee it harmless.

DANGER: Risk of child entrapment. Before you throw away your old refrigerator
or freezer:
Take off the doors.
Leave the shelves in place so that children may not easily climb inside.
DON'T WAIT! DO IT NOW!
SPECIAL INSTRUCTIONS
You must remove the bottom door support on the bottom left hand side of the unit
before you can open the door. (See Fig. A)
INSTALLATION INSTRUCTIONS
Remove the exterior and interior packing materials. Wipe the outside thoroughly

with a soft dry cloth and the inside with a wet, lukewarm cloth. Avoid placing the
cabinet in a narrow recess or near any heat source, direct sunlight, or moisture.
Let air circulate freely around the cabinet. Keep the rear of the wine cooler 5
inches away from the wall.
Location
1. Select a place with a strong, level floor.
2. Allow 5 inches of space between the back of the wine cooler and any adjacent
wall.
3. Avoid direct sunlight and heat. Direct sunlight may affect the acrylic coating.
Heat sources nearby will cause higher electricity consumption.
To avoid vibration, the cabinet must be set level. To start the wine cooler, turn the
temperature control to the position corresponding to the desired cooling. The wine
cooler temperature will vary depending on the quantity of bottles stored and on
the frequency with which the door is opened.
OPERATION
To turn OFF the wine cooler you must disconnect the power cord from the
electrical outlet. There is no "OFF” position available on the electronic control

panel. When the wine cooler is not to be used for a long period of time, disconnect
the plug and leave the door partially open.
NOTE: Wait 3 to 5 minutes before restarting if operation has been interrupted,
Interior Light
The interior light is manually controlled and does not operate with the opening or
closing of the door. To turn the light ON, manually press the "light" keypad located
on the electronic control panel.
NOTE: Leaving the interior light on for extended time periods will increase the
internal temperature of the cabinet.
Defrosting
Your wine cooler is designed with an "Auto-Cycle" defrost system.
What is Auto Cycle defrost?
The refrigerated surfaces of the interior compartment defrost automatically, during
the "OFF” cycle of the temperature control. Defrost water from the interior
compartment is disposed of automatically, by means of being channeled onto a
drip tray located on the compressor. Heat transfer from the compressor causes
the defrost water to evaporate.

ELECTRONIC CONTROL OPERATION
The electronic LED display on this wine cooler is programmed to display
independently the following temperature information:
INTERNAL CABINET TEMPERATURE: this setting is represented by a steady
state (non-flashing) LED display and is the normal (LED) default setting during
operation.
SET OPERATING TEMPERATURE: This setting is represented by a flashing
LED display and can only be programmed by pressing and releasing either of the
+/- temperature keys during operation.
NOTE: The set temperature can only be adjusted/set while the LED is in flashing
mode.
CARE & MAINTENANCE
DEFAULT SETTINGS: When the unit is first connected to a 115V/60Hz power
supply, and/or in the event of a power failure, the temperature settings
automatically revert to the following default settings:
The LED default setting for the internal cabinet temperature is the real (ambient)

temperature measured at the time the unit is connected or power is restored.
The LED default setting for the set operating temperature is 50oF/10oC. After a
power failure has occurred, the previously set temperature is automatically erased
and will have to be reset.
The LED default setting for temperature selection (oF/oC) is oF (Fahrenheit Scale).
SETTING OPERATING TEMPERATURE: To set/change the operating
temperature:
1. Press and release either of the +/- temperature keys.
The LED display will temporarily reveal the flashing set temperature for
approximately 5 seconds. If you fail to set/change the operating temperature
within this 5 second period, the LED will automatically revert back and display
the internal (cabinet) temperature.
2. Each time you press the +/- keys during flashing mode will change the
temperature incrementally by 1o (Temperature ranges between 43oF ~ 57oF /
6oC~14oC). The operating temperature will flash in the LED display for
approximately 5 seconds after the selection is made, then revert back to
display the internal cabinet temperature.
TEMPERATURE SELECTION (oF/oC): This unit can display temperatures on the

Fahrenheit or Celsius scales. Press the temperature selector keypad to alternate
between the oF/oC scales. The blue indicator light adjacent to the corresponding
mode will illuminate to mark the selection made.
Cleaning
To clean the inside of the cabinet, use a soft cloth and a solution of a tablespoon
of baking soda to one quart of water, or a mild soap solution, or some mild
detergent. Clean the cantilever wine racks using a lightly dampened cloth and
then dry them thoroughly with a soft cloth. Clean the outside with a soft damp
cloth and some mild detergent or appliance cleaner.
Vacation Time
For short vacation periods, leave the electronic controls at their usual settings.
During longer absences:
(a) Remove bottles,
(b) Disconnect from electrical outlet,
(c) Clean the wine cooler thoroughly,
(d) Leave door open to avoid possible condensation, mold or odors.
Power Failure
Most power failures are corrected within an hour or two and will not affect the
internal temperature of your wine cooler. Try and minimize the number of door
openings while the power is off. During power failures of longer duration, take

steps to protect your wine. When power is restored, the previously set operating
temperature is automatically erased and must be re-programmed. (See Setting
Operating Temperature)
If You Move
Remove or securely fasten down all loose items inside the wine cooler. To avoid
damaging the leveling screws, turn them all the way into the base.
Light Bulb Replacement
To replace the interior light bulb:
Remove the screw holding the light bulb cover and remove the cover.
Unscrew the light bulb. Replace the light bulb.
NOTE: This appliance uses a standard 25-watt appliance bulb only. (Available at
most local hardware stores). The replacement bulb should not exceed 25-watt
rating.
Replace light bulb cover. Re-install the screw to secure cover.
Wine Racks:
This unit is equipped with the following wine racks:
6 Cantilevered Wine Racks (Contoured)

11 bottles (750ml) per shelf.
1 Cantilevered Wine Racks (Contoured)
15 bottles (750ml) per shelf.
1 Slide-out Wine Rack (Layered)
13+6 750ml bottles per shelf.
Total Capacity: 100 Bottles.
Some important rules for the correct use of the Wine Cooler:
Beverages should be stored in sealed bottles.
Do not overload the cabinet.
Do not open the door unless necessary.
Should the wine cooler be stored without use for long periods, it is
suggested, after a careful cleaning, to leave the door ajar to allow the air to
circulate inside the cabinet in order to avoid possible condensation, mold or
odors,
DO NOT cover shelves with aluminum foil or any other shelf covering
material which may prevent air circulation.
Recommended Temperatures tor Chilling Wines:
Dry Wines: 9oC/48oF - 14oC/57oF
Rose Wines: 10oC/50oF

Red Wines: 13oC/55oF - 14oC/57oF
Sparkling Wines: 9oC/48oF
Technical and Structural Operation Features
Bonderized and acrylic enameled cabinet according to the most modem
electrostatic spraying techniques.
High-density polyurethane thermal insulation.
Magnetic door closure gasket.

ATENCIÓN
INSTRUCCIONES DE CONEXIÓN A TIERRA
Este aparato debe estar conectado a tierra. En caso de un cortocircuito eléctrico,
la conexión a tierra reduce el riesgo de choque eléctrico proporcionando un cable
de escape para la corriente eléctrica. Este aparato está equipado con un cable
que tiene un cable de conexión a tierra con un enchufe de conexión a tierra. El
enchufe debe estar conectado en un tomacorriente que esté debidamente
instalado y puesto a tierra
ADVERTENCIA - El uso incorrecto del enchufe de conexión a tierra puede
ocasionar un riesgo de descarga eléctrica. Consulte a un electricista calificado o
persona de servicio si las instrucciones de conexión a tierra no se entienden
completamente o si existe duda sobre si el aparato está debidamente conectado
a tierra.
NO UTILICE UN CABLE DE EXTENSIÓN
Utilice un enchufe de pared exclusivo. No conecte su refrigerador a un cable de
extensión o junto con cualquier otro aparato en la misma toma de corriente. No
empalme el cable.
ADVERTENCIA IMPORTANTE
Un refrigerador vacío es una atracción muy peligrosa para los niños. Retire las
juntas, los pestillos, la tapa o la puerta de los electrodomésticos no utilizados, o

tome alguna otra acción que lo haga inofensivo.
PELIGRO: Riesgo de que los niños se queden atrapados. Antes de desechar su
refrigerador o congelador viejo:
Retire las puertas.
Deje los estantes en su lugar para que los niños no puedan subir
fácilmente dentro.
¡NO ESPERE! ¡HAGALO AHORA!
INSTRUCCIONES ESPECIALES
Usted debe remover el soporte inferior de la puerta en el lado inferior izquierdo de
la unidad antes de poder abrir la puerta. (Véase la figura A)
INSTRUCCIONES DE INSTALACIÓN

Retire los materiales de embalaje exterior e interior. Limpie el exterior
completamente con un paño suave y seco y el interior con un paño húmedo y
tibio. Evite colocar el gabinete en un espacio estrecho o cerca de cualquier fuente
de calor, luz solar directa o humedad. Deje que el aire circule libremente
alrededor del gabinete. Mantenga la parte trasera del enfriador de vino a 5
pulgadas de distancia de la pared.
Ubicación
1. Seleccione una ubicación con un piso fuerte y nivelado.
2. Deje 5 pulgadas de espacio entre la parte posterior del enfriador de vino y
cualquier pared adyacente.
3. Evite la luz directa del sol y el calor. La luz directa del sol puede afectar el
recubrimiento acrílico. Las fuentes de calor cercanas causarán un mayor
consumo de electricidad.
Para evitar vibraciones, el gabinete debe estar nivelado. Para encender el
enfriador de vino, gire el control de temperatura a la posición correspondiente al
enfriamiento deseado. La temperatura del enfriador del vino variará dependiendo
de la cantidad de botellas almacenadas y de la frecuencia con la que se abre la
puerta.
OPERACIÓN
Para apagar el enfriador de vino, desconecte el cable de alimentación de la toma
de corriente. No hay ninguna posición "OFF" de apagado en el panel de control
electrónico. Cuando el enfriador de vinos no se vaya a utilizar durante un largo

período de tiempo, desconecte el enchufe y deje la puerta parcialmente abierta.
NOTA: Espere de 3 a 5 minutos antes de reiniciar si se ha interrumpido la
operación,
Luz interior
La luz interior es controlada de forma manual y no funciona con la apertura o
cierre de la puerta. Para encender la luz, presione manualmente la tecla "light"
ubicada en el panel de control electrónico.
NOTA: Si deja la luz interior encendida durante períodos de tiempo prolongados,
aumentará la temperatura interna del gabinete.
Descongelación
Su enfriador de vinos está diseñado con un sistema de descongelación
"Auto-Cycle" (de ciclo automático).
¿Qué es el descongelamiento de ciclo automático?
Las superficies refrigeradas del compartimento interior se descongelan
automáticamente durante el ciclo apagado del control de temperatura. El agua de
descongelación del compartimento interior se desecha automáticamente al ser
canalizada en una bandeja de goteo situada en el compresor. El compresor hace
que el agua de descongelación se evapore.

CONTROL ELECTRÓNICO DE OPERACIÓN
La pantalla LED electrónica de este enfriador de vinos está programada para
mostrar independientemente la siguiente información de temperatura:
TEMPERATURA DE GABINETE INTERNO: este ajuste está representado por
una pantalla LED estable (no parpadeante) y es el ajuste normal (LED) durante el
funcionamiento.
TEMPERATURA PROGRAMADA DE FUNCIONAMIENTO: Este ajuste se
representa mediante una pantalla LED parpadeante y sólo se puede programar
presionando y soltando cualquiera de las teclas de temperatura +/- durante el
funcionamiento.
NOTA: La temperatura programada sólo puede ajustarse/programarse mientras
el LED esté en modo intermitente.
CUIDADO Y MANTENIMIENTO
AJUSTES POR DEFECTO: Cuando la unidad se conecta por primera vez a una
fuente de alimentación de 115V / 60Hz y / o en caso de fallo de alimentación, los
ajustes de temperatura vuelven automáticamente a los siguientes valores
predeterminados:

El ajuste predeterminado del LED para la temperatura interna del gabinete es la
temperatura real (ambiental) medida en el momento en que la unidad se ha
conectado o la energía se restaura.
El ajuste predeterminado del LED para la temperatura de funcionamiento
ajustada es 50oF/10oC. Después de que se haya producido un corte de corriente,
la temperatura previamente ajustada se borrará automáticamente y deberá
restablecerse.
El ajuste predeterminado de LED para la selección de temperatura (oF/oC) is oF
(Escala Fahrenheit).
CONFIGURACIÓN DE LA TEMPERATURA DE FUNCIONAMIENTO: Para
ajustar / cambiar la temperatura de funcionamiento:
1. Presione y suelte cualquiera de las teclas de temperatura +/-.
La pantalla de LED revelará temporalmente la temperatura programada
parpadeando durante aproximadamente 5 segundos. Si no ajusta o cambia la
temperatura de funcionamiento dentro de este período de 5 segundos, el LED
volverá automáticamente a mostrar la temperatura interna del gabinete.
2. Cada vez que presione las teclas +/- durante el modo de parpadeo cambiará la
temperatura gradualmente en 1o(rangos de temperatura entre 43oF ~ 57oF /
6oC~14oC). La temperatura de funcionamiento parpadeará en la pantalla LED
durante aproximadamente 5 segundos después de la selección, y volverá a

mostrar la temperatura interna del gabinete.
SELECCIÓN DE TEMPERATURA (oF/oC): Esta unidad puede mostrar
temperaturas en las escalas Fahrenheit o Celsius. Pulse el teclado del selector
de temperatura para alternar entre las escalas oF / oC. La luz indicadora azul
adyacente al modo correspondiente se iluminará para marcar la selección
realizada.
Limpieza
Para limpiar el interior del gabinete, use un paño suave y una solución de una
cucharada de bicarbonato de soda en un litro de agua, o una solución de jabón
suave, o un detergente suave. Limpie los soportes para vino con un paño
ligeramente humedecido y luego séquelos con un paño suave. Limpie el exterior
con un paño húmedo suave y un detergente suave o un limpiador de
electrodomésticos.
Tiempo de vacaciones
Para períodos cortos de vacaciones, deje los controles electrónicos en sus
ajustes habituales. Durante las ausencias más largas:
(A) Retire las botellas,
(B) Desconecte del tomacorriente,
(C) Limpie el enfriador de vino a fondo,
(D) Deje la puerta abierta para evitar la posible condensación, moho u olores.

Falla de alimentación eléctrica
La mayoría de los fallos de energía se corrigen dentro de una hora o dos y no
afectarán la temperatura interna de su enfriador de vino. Intente minimizar el
número de aberturas de las puertas mientras la alimentación esté apagada.
Durante los cortes de energía de mayor duración, tome medidas para proteger su
vino. Cuando se restablece la alimentación, la temperatura de funcionamiento
previamente ajustada se borra automáticamente y se debe volver a programar.
(Consulte Configuración de la Temperatura de Funcionamiento)
Si se muda
Retire o asegure firmemente todos los artículos sueltos dentro del enfriador de
vino. Para evitar dañar los tornillos de nivelación, gírelos hasta el fondo de la
base.
Reemplazo de bombillas
Para reemplazar la bombilla interior:
•Retire el tornillo que sostiene la cubierta de la bombilla y retire la tapa.
•Desenrosque la bombilla. Reemplace la bombilla.
NOTA: Este electrodoméstico utiliza una bombilla de electrodomésticos estándar
de 25 vatios solamente. (Disponible en la mayoría de las ferreterías locales). La
bombilla de reemplazo no debe exceder la clasificación de 25 vatios.

•Vuelva a colocar la cubierta de la bombilla. Vuelva a instalar el tornillo
para asegurar la cubierta.
Estantes para vino:
Esta unidad está equipada con los siguientes estantes de vino:
•6 estanterías inclinadas para vino (contorneadas)
11 botellas (750 ml) por estante.
•1 estanterías inclinadas para vino (contorneadas)
15 botellas (750 ml) por estante.
•1 estante deslizable para vinos (en capas)
13+6 botellas de 750ml por estante.
Capacidad total: 100 botellas.
Algunas reglas importantes para el uso correcto del Enfriador de Vino:
•Las bebidas deben almacenarse en botellas selladas.
•No sobrecargue el gabinete.
•No abra la puerta a menos que sea necesario.
•Si el enfriador de vino se almacena sin uso durante largos períodos, se
sugiere, después de una limpieza cuidadosa, dejar la puerta
entreabierta para permitir que el aire circule dentro del armario para
evitar posible condensación, moho u olores,
•NO cubra los estantes con papel de aluminio ni ningún otro material de
Table of contents
Languages:
Other Premium Kitchen Appliance manuals

Premium
Premium PWC456MS User manual

Premium
Premium PWC147MB User manual

Premium
Premium PMU811D User manual

Premium
Premium PMFS688 User manual

Premium
Premium PWC286MLS User manual

Premium
Premium PSM 101 User manual
Premium
Premium PSM270 User manual

Premium
Premium PPN20 User manual

Premium
Premium PES1209C User manual

Premium
Premium PES1209 User manual