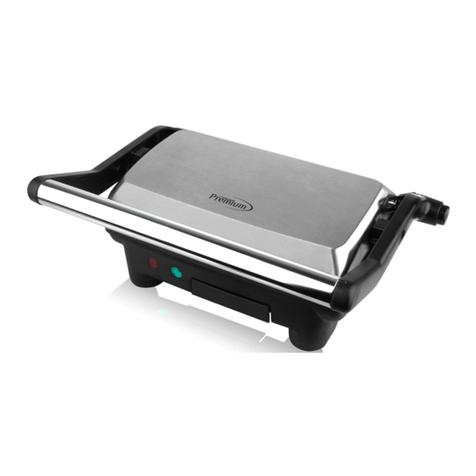
Premium PPN40 User manual

1

2
IMPORTANT SAFEGUARDS
When using electrical appliances, basic safety precautions should always be followed, including
the following:
1. Read all instructions carefully.
2. Do not touch hot surfaces. Use handles or knobs.
3. To protect against risk of electric shock, do not immerse appliance, cord, or plug in water
or other liquid.
4. Close supervision is necessary when any appliance is used by or near children.
5. Unplug from outlet when not in use and before cleaning. Allow to cool before putting on
or taking off parts, and before cleaning the appliance.
6. Do not operate any appliance with a damaged cord or plug or after the appliance
malfunctions or is dropped or damaged in any manner. Return the appliance to the
nearest authorized service facility for examination, repair, or electrical or mechanical
adjustment.
7. WARNING: To reduce risk of fire, cook only with the drip tray in place.
8. The use of accessory attachments not recommended by the appliance manufacturer
may cause injuries.
9. Do not use outdoors.
10. Do not let cord hang over edge of table or counter or touch hot surfaces, including the
stove.
11. Extreme caution must be used when moving an appliance containing hot oil or other hot
liquids.
12. Do not use this appliance for other than intended use.
13. Do not place on or near a hot gas or electric burner, or in a heated oven.
14. To ensure continued protection against risk of electric shock, connect to properly
grounded outlets only.
15. To disconnect, turn any control to “OFF”, then move plug from the wall outlet.
16. Preheat for about 3 minutes.
SAVE THESE INSTRUCTIONS
HOUSEHOLD USE ONLY

3
ADDITIONAL IMPORTANT SAFEGUARDS
CAUTION: This appliance is hot during operation and retains heat for some time after turning
OFF. Always use oven mitts when handling hot materials and allow metal parts to cool before
cleaning. Do not place anything on top of the appliance while it is operating or while it is hot.
1. All users of this appliance must read and understand this Instruction Manual before
operating for cleaning this appliance.
2. Do not leave this appliance unattended during use.
NOTES ON THE CORD
The provided short power supply cord (or detachable power-supply cord) should be used to
reduce the risk resulting from becoming entangled in or tripping over a longer cord. An
extension cords is available and may be used if care is exercised in their use. If an extension
cord is used, the marked electrical rating of the extension cord should be a grounding 3-wire
cord. If the appliance is of the grounded type, the extension cord should be arranged so that it
will not drape over the countertop or tabletop where it can be pulled on by children or tripped
over unintentionally.
NOTES ON THE PLUG
This appliance has a polarized plug (one blade is wider than the other). To reduce the risk of
electric shock, this plug will fit in a polarized outlet only one way. If the plug does not fit fully into
the outlet, reverse the plug. If it still does not fit, contact a qualified electrician. Do not modify the
plug in any way.
PLASTICIZER WARNING
CAUTION: To prevent Plasticizers from migrating to finish of the counter top or table top or
other furniture, place NON-PLASTIC coasters or place mats between the appliance and the
finish of the counter top or table top. Failure to do so may cause the finish to darken; permanent
blemishes may occur or stains can appear.
ELECTRIC POWER
If the electrical circuit is overloaded with other appliances, your appliance may not operate
properly. It should be operated on a separate electrical circuit from other appliance.

4
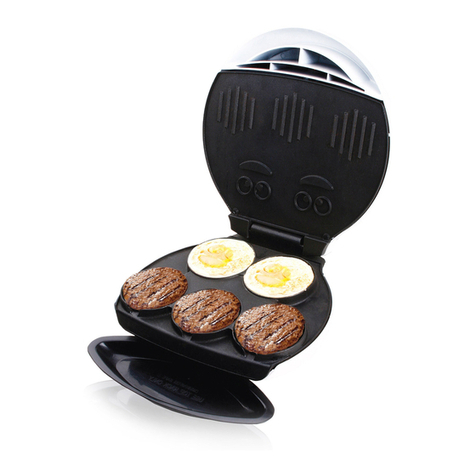
KNOW YOUR GRILL
Adjustable Feet
Top Housing
Grill Lock
Handle
Red power
indicator light
Green preheat
indicator light
Drip Tray
Bottom Housing

5
BEFOREFIRSTTIME USE
Carefully unpack the appliance and remove all packaging materials. See Care & Cleaning
section of this manual for proper cleaning. We recommend a ''trial run'' at a high temperature to
eliminate any protective substance or oil that may have been used for packing and shipping.
Plug your unit into a standard 120v wall outlet and let the grill run for 15 minutes. You may
notice some smoking coming from your Grill during this initial phase, this is normal during the
trial period.
WARNING: Do not immerse the appliance, cord or plug in water. To remove any dust that may
have accumulated during packaging, wipe the exterior with a clean, damp cloth. Do not use
harsh or abrasive cleaners on any part of the appliance.
ABOUT YOUR GRILL
Your grill is a versatile appliance that allows you to grill food with the plates in two different
positions. Grill with the plates in a CONTACT position (see Figure 1), or with the grill open in a
FLAT position (see Figure 2).
Figure 3

6
Figure 4b Figure 4c
USING YOUR GRILL
Place your grill on a flat, level, stable surface. Your grill can be used in two different
configurations. The LOWER and UPPER plate allows you to select between CONTACT (see
Figure 1) and FLAT position (see Figure 2).The GRILL LOCKS (see figure 3).
Your grill is equipped with adjustable feet in the front to assist grease runoff to the rear of the
grill into the drip tray. When cooking foods containing a lot of fats or oils, we recommend raising
the front feet. To rise the feet simply swing out the feet to the raised position (see Figures 4a 4b
and 4c).
GRILLING-INCONTACTPOSITION
Cooking in the CONTACT position (see Figure 1) allows both the LOWER and UPPER plate to
contact the food. Food cooks much faster than traditional open grilling cooking. Grease drains
away to the rear of the grill into a drip removable DRIP DRAWER. The position is most
commonly used to grill sandwiches, steaks, burgers, chicken, and fish.
The CONTACT position is best used with thick, crusty breads, such as French, Italian, and
focaccia. The top grill plate will compress and grill a panini to perfection in about 3 minutes
(depending on the bread, filling, and personal taste). The CONTACT position can also be used
to grill a variety of food items, such as meats, poultry, fish, and vegetables. Always preheat your
grill in the closed position as shown in Figure 1.
WARNING: Open the grill using the handle only. Be careful not to touch any hot surfaces such
as the housing or grill plates. We recommend the use of oven mitts or potholders to prevent the
risk of injury. Extreme care must be used when operating this appliance as surface
temperatures get extremely hot.

7
When you have finished using your appliance, disconnect the plug from the wall and allow the
unit to cool completely before cleaning.
GRILLING-INCONTACT POSITION
1. Ensure that your drip tray is in the sliding position and fully under the grill in the center of
the housing. (see Figure 5); and that the DRIP DRAWER is in proper position with it is
fully flush with the front of the housing (see Figure 6).
2. Your grill will not preheat properly unless the grill is in the closed position (see Figure 6).
3. Close the top housing and plug into a 120-volt 60HZ AC grounded outlet only. The red
light will turn on indicating that the appliance is preheating. After approximately 3
minutes, the green light will turn on indicating that the appliance is preheated and ready
for use.
NOTE: The green ready light is thermostatically controlled and will cycle on and off during
cooking to ensure that the correct temperature is maintained.
4. Place items to be cooked on the LOWER grill plate. Lower the top housing by handle
and cook the food according to desired temperature. Do not apply excessive force to
close the top housing cover; the grill plate should simply rest on the food.
5. When you have finished using your appliance, disconnect the plug from the wall and
allow the unit to cool completely before cleaning.

8
GRILLINGIN FLAT POSITION
NOTE: When cooking on both Lower and UPPER plates in FLAT mode ensure that your food is
spread evenly amongst both plates. Always place the food with longest cooking time on the
LOWER plate. When cooking on one plate, only use LOWER plate. In the FLAT position the
Top plate will run 75˚F cooler than the bottom plate.
WARNING: Open the grill using the handle only. Be careful not to touch any hot surface such
as the housing or grill plates. We recommend the use of oven mitts or potholders to prevent the
risk of injury. Extreme care must be used when operating this appliance as surface
temperatures get extremely hot.
When you have finished using your appliance, disconnect the plug from the wall and allow the
unit to cool completely before cleaning.
1. Ensure that your drip tray is in the sliding position and fully under the grill in the center of
the housing. (see Figure 5); and that the DRIP DRAWER is in proper position with it is
fully flush with the front of the housing (see Figure 6).
2. Your grill will not properly preheat unless the grill it is in the closed position. (see Figure
6).
3. Close the top housing and plug into a 120-volt 60HZ AC grounded outlet only. The red
light will turn on indicating that the appliance is preheating. After approximately 3
minutes, the green light will turn on indicating that the appliance is preheated and ready
for use.
4. Press the GRILL LOCKS button in (see Figure 3) and open your grill using the handle to
the FLAT position (see Figure 2).
5. When you have finished using your appliance, disconnect the plug from the wall and
allow the unit to cool completely before cleaning.
NOTA: The green ready light is thermostatically controlled and will cycle on and off during
cooking to ensure that the correct temperature is maintained.

9
HELPFUL HINTS
•Be sure to always wash the grill plates after each use to remove any residue that may
have accumulated.
•Do not use sharp objects or attempt to cut food on top of the grill plates.
•Always preheat for 10 minutes until the green ready light illuminates before use. Have all
ingredients in place before starts cooking.
•For best results, spread mayonnaise on both outer sides of sandwiches before cooking.
This will give darker grill marks on the bread.
•Do not use metal utensils, as this may damage the nonstick surface of the grill plates.
•If additional cooking is desired, close the top housing to preserve the heat while you
prepare your ingredients.
•Let sandwiches cool slightly before eating. Cheese especially, becomes very hot. Soft or
melted fillings will firm slightly.
CARE& CLEANING
Other than the cleaning mentioned in this manual, no other servicing or maintenance of this
appliance is required. Repairs, if necessary must be performed by an authorized service center.
CAUTION: Do not immerse the appliance, cord or plug in water.
Before cleaning and when finished using your appliance, unplug power cord from outlet and
allow cooling completely. Wipe the inside and the edges of the grilling plates with a clean, damp
cloth. To remove stubborn stains or food, use a nylon brush or other utensil safe for nonstick
surfaces. Do not use steel wool or scouring pads. Do not use abrasive cleaners. Wipe the
exterior with a clean, damp cloth. Clean the drip tray in warm soapy water or in the top rack of
your dishwasher. Dry all parts thoroughly before using again or storing.

10
IMPORTANTES PRECAUCIONES
Cuando se utilizan aparatos eléctricos, siempre deben seguirse las precauciones básicas de
seguridad, incluyendo las siguientes:
1. Lea todas las instrucciones.
2. No toque las superficies calientes. Utilice las asas o perillas.
3. Para protegerse contra descargas eléctricas, no sumerja el cable, los enchufes o la
unidad en agua u otros líquidos.
4. Atenta supervisión es necesaria cuando cualquier aparato es utilizado por o cerca de
niños.
5. Desenchufe del tomacorriente cuando no esté en uso y antes de limpiarlo. Deje que se
enfríe antes de poner o quitar piezas, y antes de limpiar el aparato.
6. No opere el aparato con un cable o enchufe dañado o después de un mal
funcionamiento del aparato o si ha sido dañado de cualquier manera. Devuelva el
aparato al centro de servicio autorizado más cercano para su revisión, reparación o
ajuste eléctrico o mecánico.
7. ADVERTENCIA: Para reducir el riesgo de incendio, cocine solamente con la bandeja de
goteo en su lugar.
8. El uso de accesorios no recomendados por el fabricante del aparato puede causar
lesiones.
9. No utilice al aire libre.
10. No permita que el cable cuelgue sobre el borde de la mesa o mostrador, o toque
superficies calientes, incluyendo la estufa.
11. No coloque sobre o cerca de una hornilla de gas o eléctrica, o en un horno caliente.
12. Para asegurar una protección continua contra el riesgo de descargas eléctricas, enchufe
a una toma de tierra solamente.
13. Para desconectar, gire el control a la posición de apagado “OFF” y luego retire el
enchufe del tomacorriente.
14. Precaliente durante unos 3 minutos.
GUARDE ESTAS INSTRUCCIONES
SOLO PARA USO DOMESTICO

11
OTRAS IMPORTANTES PRECAUCIONES
PRECAUCION: Este aparato está caliente durante su funcionamiento y retiene calor durante
un tiempo después de ser apagado. Siempre utilice guantes de cocina cuando maneje
materiales calientes y permita que las partes metálicas se enfríen antes de limpiarlas. No
coloque nada encima del aparato mientras esté funcionando o mientras esté caliente.
1. Todos los usuarios de este aparato deben leer y comprender este manual de
instrucciones antes de proceder con la limpieza del mismo.
2. No deje este aparato desatendido durante el uso.
NOTAS SOBRE EL CABLE
Se proporciona un cable corto de corriente o cable de corriente desmontable para reducir el
riesgo de enredarse o tropezase con un cable más largo. Si se requiere un cable más largo, los
cables de extensión están disponibles y pueden utilizarse con mucho cuidado. Si se utiliza un
cable de extensión, el cable de extensión debe ser de 3 patas. Si el aparato es de toma de
tierra el cable de extensión debe acomodarse de modo que no cuelgue del mostrador o mesa
en donde pudiera ser halado por niños o tropezado accidentalmente.
NOTAS SOBRE EL ENCHUFE
Este aparato tiene un enchufe polarizado (una pata es más ancha que la otra).Para reducir el
riesgo de descarga eléctrica, este enchufe encajará en un tomacorriente polarizado de una sola
manera. Si el enchufe no encaja completamente en el tomacorriente, invierta el enchufe. Si aun
así no encaja, comuníquese con un electricista calificado. No modifique el enchufe de ninguna
manera.
ADVERTENCIA SOBRE PLASTIFICANTE
PRECAUCION: Para evitar la expansión de plastificantes al acabado de la encimera, mesa u
otro mueble, coloque posavasos (no plástico) o manteles individuales entre la unidad y el
acabado de la encimera o mesa. No hacerlo puede causar que el acabado se oscurezca;
también puede producir manchas permanentes.
ENERGIA ELECTRICA
Si el circuito eléctrico se sobrecarga con otros artefactos, la unidad no funcionará
correctamente. Debe ser operado en un circuito eléctrico separado de otros aparatos.

12
CONOZCA SU PANINI
Patas Ajustables
Asa
Botón para bloquear
Parte inferior
Badeja recolector de
Luz rojo indicadora de
encendido
Luz verde indicadora de
precalentamiento
Parte superior

13
ANTES DE UTILIZAR POR PRIMERA VEZ
Cuidadosamente desenvuelva el aparato y retire todos los materiales de embalaje. Vea en el
manual la sección de cuidado y limpieza para hacer una apropiada limpieza. Recomendamos
una ''fase de prueba'' a una alta temperatura para eliminar cualquier sustancia protectora o
aceite que pueda haber sido utilizado para el embalaje y envío. Enchufe la unidad en un
tomacorriente de pared de 120voltiosy deje la parrilla encendida durante 15 minutos. Usted
puede notar algún humo procedente de la parrilla durante esta fase inicial, esto es normal
durante el período de prueba.
ADVERTENCIA: No sumerja la unidad, el cable o el enchufe en agua. Para eliminar el polvo
que se haya acumulado durante el embalaje, limpie el exterior con un paño limpio y húmedo.
No utilice limpiadores abrasivos en ninguna parte del aparato.
ACERCA DE SU PARRILLA
Su parrilla es un aparato versátil que permite asar alimentos con las planchas en dos
posiciones diferentes. Ase con las planchas en una posición cerrada o de contacto (Ver figura
1), o ase con las planchas abiertas en una posición plana (Ver figura 2).
Figure 3

14
Figure 4b Figure 4c
USO DE LA PARRILLA
Coloque la unidad sobre una superficie plana, nivelada y estable. La parrilla se puede utilizaren
dos posiciones diferentes. La plancha superior e inferior le permite seleccionar entre la posición
de contacto (Ver figura 1) y la posición plana (Ver figura 2).El seguro de la parrilla (ver figura 3).
La parrilla está equipada con patas regulables en la parte delantera para ayudar a escurrir la
grasa a la parte trasera de la unidad en la bandeja de goteo. Cuando cocine alimentos que
contienen gran cantidad de grasas o aceites, recomendamos levantar las patas de adelante.
Para levantar los patas simplemente gire a la posición elevada (Ver figuras 4a 4b y 4C).
ASAR EN POSICION DE CONTACTO
Cocinar en la posición de contacto (Ver figura 1) permite que la plancha inferior y superior
hagan contacto con la comida. Los alimentos se cocinan mucho más rápido que cocinar con un
asador abierto tradicional. La grasa drena hacia la parte trasera de la parrilla a una bandeja de
goteo extraíble. La posición se utiliza comúnmente para cocinar sándwiches, filetes,
hamburguesas, pollos y pescados.
La posición de contacto se utiliza mejor con panes gruesos, crujientes, como francés, italiano y
focaccia. La plancha superior comprime y asa a un panini a la perfección en unos 3 minutos
(dependiendo del pan, relleno y gustos personales).La posición de contacto también se puede
utilizar para cocinar una gran variedad de alimentos, como carnes, pollos, pescados y verduras.
Siempre precaliente la parrilla en la posición cerrada o de contacto como se muestra en la
figura 1.

15
ADVERTENCIA: Abra la parrilla utilizando sólo el mango. Tenga cuidado de no tocar las
superficies calientes, tales como la cubierta o planchas. Se recomienda el uso de guantes de
cocina o agarraderas para evitar el riesgo de lesiones. Con mucho cuidado debe ser operado
este aparato ya que las temperaturas de la superficie se calientan mucho.
Cuando haya terminado de utilizar el aparato, desconecte el enchufe de la pared y permita que
la unidad se enfríe completamente antes de limpiarla.
ASAR EN POSICION DE CONTACTO
1. Asegúrese de que su bandeja de goteo esté en la posición de desplazamiento y
plenamente debajo de la parrilla en el centro de la unidad (Ver figura 5); y que el cajón
de goteo esté en la posición correcta, completamente al ras de la parte frontal de la
unidad (Ver figura 6).
2. La parrilla no precalentará correctamente a menos que la parrilla esté en la posición
cerrada (Ver figura 6).
3. Cierre la cubierta superior y enchufe solamente a una toma de tierra de 120 voltios
60HZ AC. La luz roja se encenderá indicando que el aparato está en precalentamiento.
Después de aproximadamente 3 minutos, la luz verde se encenderá indicando que el
aparato está precalentando y listo para usar.
NOTA: La luz verde de preparado es controlada por un termostato y habrán ciclos de
encendido y apagado durante la cocción para asegurar que se mantenga la temperatura
correcta.

16
4. Coloque los alimentos que desee cocinar en la parrilla inferior. Baje la cubierta superior
por la manija y cocine los alimentos según la temperatura deseada. No aplique fuerza
excesiva para cerrar la cubierta superior; la planchas implemente debe apoyarse en la
comida.
5. Cuando haya terminado de utilizar el aparato, desconecte el enchufe de la pared y
permita que la unidad se enfríe completamente antes de limpiarla.
ASAR EN POSICION PLANA
NOTA: Al cocinar en ambas planchas, inferior y superior en el modo plano asegúrese que su
comida esté distribuida uniformemente entre ambas planchas. Coloque siempre el alimento que
tome mayor tiempo de cocción en la plancha inferior. Cuando cocine en un plato, sólo utilice la
plancha inferior. En la posición plana de la plancha superior producirá 75°F menos que la
plancha inferior.
ADVERTENCIA: Abra la parrilla utilizando sólo el mango. Tenga cuidado de no tocar las
superficies calientes, tales como la cubierta o planchas. Se recomienda el uso de guantes de
cocina o agarraderas para evitar el riesgo de lesiones. Con mucho cuidado debe ser operado
este aparato ya que las temperaturas de la superficie se calientan mucho.
Cuando haya terminado de utilizar el aparato, desconecte el enchufe de la pared y permita que
la unidad se enfríe completamente antes de limpiarla.
1. Asegúrese de que su bandeja de goteo esté en la posición de desplazamiento y
plenamente debajo de la parrilla en el centro de la unidad (Ver figura 5); y que el cajón
de goteo esté en la posición correcta, completamente al ras de la parte frontal de la
unidad (Ver figura 6).
2. La parrilla no precalentará correctamente a menos que la parrilla esté en la posición
cerrada (Ver figura 6).
3. Cierre la cubierta superior y enchufe solamente a una toma de tierra de 120 voltios
60HZ AC. La luz roja se encenderá indicando que el aparato está en precalentamiento.
Después de aproximadamente 3 minutos, la luz verde se encenderá indicando que el
aparato está precalentando y listo para usar.

17
4. Presione el botón del seguro de la parrilla (Ver figura 3) y abra la parrilla usando el
mango a la posición plana (Ver figura 2).
5. Cuando haya terminado de utilizar el aparato, desconecte el enchufe de la pared y
permita que la unidad se enfríe completamente antes de limpiarla.
NOTA: La luz verde de preparado es controlada por un termostato y habrán ciclos de
encendido y apagado durante la cocción para asegurar que se mantenga la temperatura
correcta.
UTILES CONSEJOS
•Asegúrese de lavar siempre las planchas después de cada uso para remover cualquier
residuo acumulado.
•No utilice objetos afilados o intente cortar alimentos sobre las planchas.
•Siempre debe precalentar durante 10 minutos hasta que la luz verde se encienda antes
de su uso. Tenga todos los ingredientes en su lugar antes de empezar a cocinar.
•Para obtener los mejores resultados, expanda mayonesa en ambos lados del sándwich
antes de cocinar. Esto le dará las marcas de la parrilla más oscuras en el pan.
•Si desea una cocción adicional, cierre la cubierta superior para conservar el calor
mientras preparas los ingredientes.
•Deje enfriar un poco los sándwiches antes de comer. De queso especialmente, se
calienta mucho. Rellenos suaves o fundidos endurecen ligeramente.
CUIDADO Y LIMPIEZA
Aparte de la limpieza mencionada en este manual, no se requiere ningún otro tipo de
reparación o mantenimiento de este aparato. Las reparaciones, si es necesario deben ser
realizadas por un centro de servicio autorizado.
PRECAUCION: No sumerja el aparato, el cable o el enchufe en el agua.

18
Antes de limpiar y cuando haya terminado de usar su aparato, desenchufe el cable del
tomacorriente y deje enfriar completamente. Limpie el interior y los bordes de las planchas de
asar con un paño limpio y húmedo. Para quitar manchas o alimentos, utilice un cepillo de nylon
u otro utensilio seguro para superficies antiadherentes. No utilice lana de acero o estropajos.
No use limpiadores abrasivos. Limpie el exterior con un paño limpio y húmedo. Limpie la
bandeja de goteo con agua tibia y jabón o en la rejilla superior del lavaplatos. Seque bien todas
las piezas antes de volverlas a utilizar o almacenar.

19
Table of contents
Languages:
Other Premium Kitchen Appliance manuals

Premium
Premium PPN20 User manual

Premium
Premium PWC147MB User manual

Premium
Premium PBM50 User manual

Premium
Premium PMFS688 User manual

Premium
Premium PP1200 User manual

Premium
Premium PMU811D User manual

Premium
Premium PWC286MLS User manual

Premium
Premium PES1209C User manual

Premium
Premium PES1209 User manual

Premium
Premium PSM270 User manual