Premium PES1209C User manual


IMPORTANT SAFEGUARDS
When using electrical appliances, basic safety precautions should always be followed including the
following:
1. Read all instructions.
2. Make sure the handles are properly attached before using the appliance.
3. Do not touch hot surfaces. Use handles and knobs.
4. To protect against electric hazards, do not immerse cord, plug or the temperature control probe in
water or other liquid.
5. Close supervision is necessary when appliance is used near children. This appliance is not to be
used by children.
6. Unplug from outlet when not in use and before cleaning. Allow unit to cool before putting or taking
off parts and before cleaning appliance.
7. Do not operate any appliance with a damaged cord or plug, or after the appliance malfunctions or
has been damaged in any manner. Return the appliance to the nearest authorized service facility for
any examination, repair or adjustment.
8. The use of accessories or attachments not recommended by the manufacturer may cause
hazards.
9. Do not use outdoors.
10. Do not let the cord hang over the edge of the table or counter or touch hot surfaces.
11. Do not place on or near a gas or electrical stove, or the oven.
12. Extreme caution must be used when moving an appliance containing hot liquids.
13. Always attach the temperature control probe to the appliance first, and then plug cord into the
wall outlet. To disconnect, turn temperature control dial to the off, then disconnect the plug from the
wall.
14. Do not use appliance for other than its intended use.
15. Be sure legs are assembled and fastened properly.
16. Always preheat skillet for about 5 minutes.
SAVE THESE INSTRUCTIONS

ADDITIONAL SAFEGUARDS
CONSUMER SAFETY INFORMATION
THIS APPLIANCE IS INTENDED FOR INDOOR HOUSEHOLD USE ONLY. DO NOT
OPERATE APPLIANCE IF THE ELECTRICAL CORD SHOWS ANY DAMAGE OR IF
APPLIANCE WORKS INTERMITTENTLY OR STOPS WORKING ENTIRELY.
SHORT CORD INSTRUCTIONS
A short power cord is provided to reduce the risk resulting from becoming entangled or
tripping over a longer cord.
Longer detachable power cords or extension cords are available and may be used if care is
exercised in their use. If a long detachable power cord or extension cord is used:
1) The marked electrical rating of the extension cord should be at least as high as the
electrical rating of the appliance.
2) The longer cord should be arranged so that it will not drape over the Counter top or
tabletop where it can be pulled on by children or tripped over unintentionally.
POLARIZED PLUG
This appliance has a polarized plug (one blade is wider than the other). To reduce the risk of
electric shock, this plug is intended to fit into a polarized outlet only one way. If the plug does
not fit into the outlet, reverse the plug. If it still does not fit, contact a qualified electrician. Do
not attempt to modify the plug in any way.
HOW TO ASSEMBLE YOUR ELECTRIC SKILLET
Remove all parts from the packaging.
1. Locate lid knob in packaging.
2. Center the knob on the glass lid above the screw hole.
3. Place the head screw through the screw hole on the center of the inside of the lid.
4. Tighten the screw in the lid knob. Do not over tighten. The lid is now ready for use.

HOW TO USE YOUR ELECTRIC SKILLET
1. Place left handle onto mounting studs under skillet pot. Use screwdriver to attach 2
screws through holes in the leg into the skillet pot. Place right handle onto mounting studs
under skillet pot. Use screwdriver to attach 2 screws through holes in the leg into the skillet
pot. CAUTION: Over tightening can result in stripping of screws or cracking of handles or
feet.
2. Set the skillet on a flat, dry, heat resistant surface. Caution: some countertop and table
surfaces, such as Corian® and other surfaces are not designed to withstand the prolonged
heat generated by certain appliances. If you plan to use the product for a prolonged period of
time, we recommend placing a hot pad or trivet under your skillet beforehand to prevent
possible damage to surface.
3. Turn temperature control to "OFF", plug temperature control probe securely into
receptacle on skillet, plug into standard 120V AC outlet and turn temperature control to the
desired setting.
4. The temperature control indicator light will come on when you set or adjust the
temperature. Once the desired temperature is reached, the indicator light will go out. (When
adding food, the indicator light will come on briefly as the overall cooking temperature is
reduced.)
5. Preheat the skillet with the lid on for 10-15 minutes or until the indicator light goes out.
NOTE: The cooking temperatures listed in this user manual are estimates. Adjust the
cooking temperature slightly up or down to achieve the results you prefer.

TIME/TEMPERATURE CHART
Control temperature
position
Equivalence
in Celsius
Off Off
Warming (250⁰F)
Warming
(120⁰C)
300⁰F 150⁰C
350⁰F 180⁰C
400⁰F 200⁰C
450⁰F 230⁰C
Food Temperature
Cooking time
(approximate
minutes)
Suggestions
Fried or scrambled eggs 250⁰F 3 to 5 Preheat skillet
Uncooked sausage link 300⁰F 20 to 30 Do not preheat. Turn often
Bacon 350⁰F 7 to 12 Do not preheat. Turn often
French Toast 350⁰F 6 to 10 Turn halfway into cooking time
Chicken 350⁰F 25 to 40 Turn halfway into cooking time
Hamburger (1/2" thick) 350⁰F 8 to 12 Turn halfway into cooking time
Ham slice 1/2" thick 350⁰F 10 to 12 Turn halfway into cooking time
Ham slice 3/4" thick 350⁰F 14 to 18 Turn halfway into cooking time
Fish 350⁰F 5 to 10 Turn halfway into cooking time
Pork Chops 1/2" thick 350⁰F 15 to 20 Brown both sides. Then reduce temperature to
250⁰F. Turn halfway into cooking time
Pork Chops 3/4" thick 350⁰F 25 to 30 Brown both sides. Then reduce temperature to
250⁰F. Turn halfway into cooking time
Grilled Sandwich 350⁰F 5 to 10 Butter outsides. Brown both sides
Steak 1" thick. Rare 400⁰F 6 to 7 Turn halfway into cooking time
Steak 1" thick. Medium 400⁰F 10 to 12 Turn halfway into cooking time
Steak 1" thick. Well done 400⁰F 13 to 18 Turn halfway into cooking time
Steak 1 1/2" thick. Rare 400⁰F 8 to 10 Turn halfway into cooking time
Steak 1 1/2" thick. Medium 400⁰F 18 to 20 Turn halfway into cooking time
Steak 1 1/2" thick. Well done
400⁰F 21 to 26 Turn halfway into cooking time
Pancakes 400⁰F 2 to 3 Pour batter onto skillet. Flip over when bubbles
appear
4

COOKING GUIDELINES
NOTE: The United States Department of Agriculture recommends tha
t meat and poultry be
cooked to the following internal temperatures to be sure any harmful bacteria has been killed.
Ground turkey and chicken should be cooked to an internal temperature of 165
˚ F / 74˚ C and
ground beef, veal, lamb and pork be cooked to an internal temperature 160
˚ F / 71˚ C. Whole
chicken and turkey should be cooked to an internal temperature of 180
˚ F / 82˚ C; 170˚ F / 77˚ C
for the breast. Goose and duck should be cooked to an internal temperature of 180˚ F / 82 ˚C.
Fresh beef, veal and lamb, etc., should be cooked to an internal temperature of at least 145˚ F /
63˚ C. Fresh pork should be cooked to an internal temperature of at least 160˚ F / 71˚ C. When
re-heating meat and poultry products, they should also be cooked to an internal tem
perature of
165˚ F / 74˚ C.
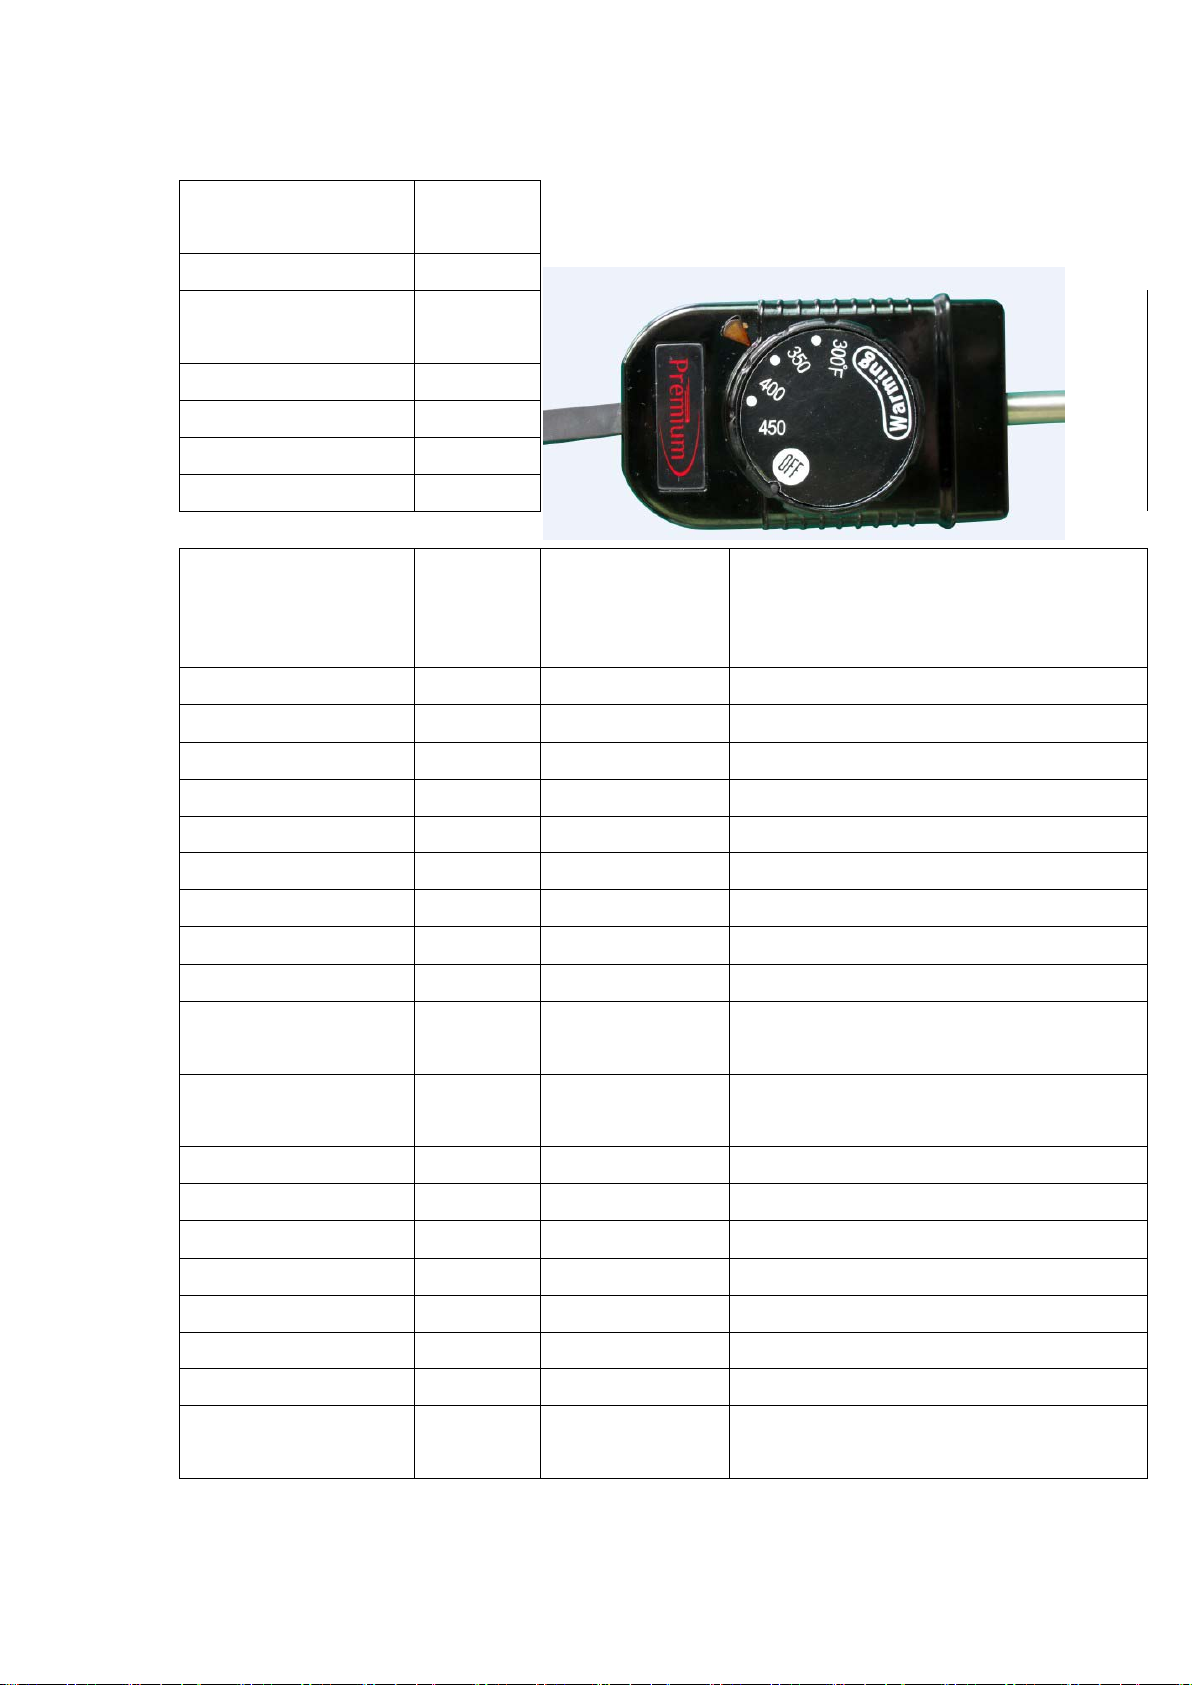
A steam vent is located on the glass lid. The steam vent allows steam to escape while
cooking with the lid in place. CAUTION: Escaping steam is hot!
Be careful when removing or lifting the lid. Oven mitts are recommended when removing
cover from skillet base or when replacing it.
NOTE: If heating oil, always leave the lid off. If oil smokes, immediately turn
skillet "OFF" and allow cooling.
HOW TO CLEAN YOUR ELECTRIC SKILLET
CAUTION: Skillet is hot. Handle carefully.
1. Always allow the skillet to completely cool before cleaning.
2. Unplug cord from wall outlet, then remove temperature control probe from appliance.
CAUTION: The probe on the temperature control piece could be hot. Wipe probe clean with
a dry towel.
3. Immerse the lid in warm, soapy water and wash with a soft cloth or sponge. Rinse well
and dry.
4. The skillet can be immersed in water without the temperature control probe.
5. The skillet is dishwasher safe without the temperature control probe.
6. Use a damp cloth or sponge to clean the probe.
NOTE: Do not use steel wool, abrasive cleaners, or metal scouring pads on cooking
surfaces as this will damage the non-stick coating.
WARNING: Do not immerse temperature control probe in water or any other liquid.

HELPFUL HINTS
• Before using the skillet for the first time, lightly brush cooking surface with vegetable oil.
Heat, uncovered, to 300o F. Turn "OFF" and cool completely. Wipe away excess oil.
• This skillet is not designed to deep fry. To pan-fry, do not use more than 1 cup of oil. Select
a vegetable oil or peanut oil for frying. Butter and olive oil should only be used to sauté foods
on a lower temperature setting.

CONSEJOS IMPORTANTES DE SEGURIDAD
CONSEJOS IMPORTANTES DE SEGURIDADC
Siempre que use electrodomésticos, tome las precauciones básicas, incluyendo las
siguientes:
1. Lea las instrucciones con atención.
2. Asegúrese que las asas estén debidamente ensambladas antes de usar el sartén.
3. No toque las partes calientes. Use las asas y partes de contacto frío.
4. Protéjase de la electricidad, no sumerja el cordón, enchufe ni el control de temperatura en
agua ni ningún líquido.
5. Se necesita supervisión extrema si el artefacto es usado cerca de niños.
Este producto debe ser usado por niños.
6. Desconecte el electrodoméstico si no se va a usar, y antes de limpiar.
Siempre permita que enfríe antes de remover partes o antes de limpiar.
7. No use ningún aparato con el cordón o enchufe dañados, ni en caso de mal
funcionamiento o si ha sufrido algún daño. Lleve el electrodoméstico al centro de servicio
autorizado más cercano para su examen, reparación o ajuste.
8. El uso de accesorios no recomendados es sumamente peligroso.
9. No utilice el electrodoméstico a la intemperie.
10. No permita que el cordón cuelgue del mostrador ni entre en contacto con objetos
calientes.
11. No coloque este artefacto cerca o sobre una estufa eléctrica o de gas ni en el horno.
12. Use extrema precaución al mover el sartén con alimentos o residuos calientes.
13. Siempre conecte el control de temperatura al sartén primero, después conecte el cordón
al tomacorriente. Para desconectar, primero coloque el control de temperatura en posición
OFF y desenchufe después.
14. No use el sartén para fines diferentes a para los que fue diseñado.
15. Esté seguro de que las patas estén montadas y fijadas correctamente.
16. Precaliente siempre el sartén por 5 minutos
GUARDE ESTAS INSTRUCCIONES

MEDIDAS DE SEGURIDAD ADICIONALES
INFORMACION DE SEGURIDAD PARA EL USUARIO
ESTE PRODUCTO ES SOLO PARA USO DOMÉSTICO.
NO UTILICE NINGUN ELECTRODOMESTICO SI EL CABLE O EL ENCHUFE
HAN SIDO DAÑADOS O SI EL EQUIPO FUNCIONA INTERMITENTEMENTE O NO
FUNCIONA DEL TODO.
INSTRUCCIONES SOBRE EL CABLE CORTO
Su sartén está provisto de un cordón corto para evitar que se enrede, sea tropezado o
halado accidentalmente.
En caso que sea necesario el uso de un cable de extensión, tome las siguientes
precauciones:
1. Asegúrese que la extensión sea de igual o mayor amperaje que el electrodoméstico.
2. Coloque la extensión de tal manera que no se enrede, ni sea tropezada o halada
accidentalmente.
ENCHUFE POLARIZADO
Su sartén está provisto de un enchufe polarizado (una hoja es más ancha que la otra). Esta
característica evita accidentes eléctricos, y hace que solo pueda conectarse en
tomacorrientes polarizados. Si el enchufe no encaja en el tomacorriente, gire el enchufe. Si
aun así no encaja, contacte a un electricista calificado. Nunca intente modificar usted mismo
el enchufe.
COMO ENSAMBLAR EL SARTEN ELECTRICO
Remueva todas las partes del sartén de su empaque.
1. Localice la perilla en el empaque.
2. Coloque la perilla de la tapa en la parte superior de la misma, alineando el orificio de la
perilla con el orificio de la tapa. Asegúrese que la perilla quede correctamente centrada.
3. Inserte el tornillo en orificio en la cara interior de la tapa.
4. Atornille cómodamente sin apretar excesivamente. La tapa está lista para usarse.

COMO USAR EL SARTEN ELECTRICO
1. Coloque cada mango sobre orificios laterales bajo del sartén y ajústelos con 2 tornillos
cada mango respectivamente. PRECAUCIÓN: El ajuste excesivo puede resultar en el
agrietamiento de las manijas o las patas.
2. Coloque el sartén en una superficie firme, segura y resistente al calor.
Asegúrese que la mesa o el mostrador donde usará el sartén sea resistente al calor si va a
usar el sartén por largos periodos de tiempo. Si va a usar el sartén por un periodo largo de
tiempo se recomienda colocar una base para recipientes calientes para evitar dañar la
superficie.
3. Asegúrese que el control de temperatura esté en posición OFF e inserte el control en el
receptáculo del sartén. Luego enchufe al tomacorriente y seleccione la temperatura
necesaria con el control.
4. La luz piloto del control se encenderá al ajustar la temperatura. Una vez que el sartén
alcance la temperatura seleccionada se apagará. (Al agregar los alimentos, notará que la
luz piloto volverá a encenderse momentáneamente. Esto es señal de que la temperatura
seleccionada está siendo ajustada automáticamente).
5. Precaliente el sartén con tapa por unos momentos hasta que la luz piloto se apague
antes de agregar los alimentos. NOTA: La temperatura indicada en este manual es para
referencia. Ajuste la temperatura según su preferencia.

TABLA DE TIEMPO Y TEMPERATURA
Posición del Control
de temperatura
Equivalencia en
Celsius
Off - Apagado Off - Apagado
Warming (250⁰F) -
Calentar
Warming (120⁰C) -
Calentar
300⁰F 150⁰C
350⁰F 180⁰C
400⁰F 200⁰C
450⁰F 230⁰C
Alimento Temperatura Tiempo de Coccion
(aproximado en minutos) Sugerencias
Huevos fritos o revueltos 250⁰F 3 a 5 Precaliente el sarten
Salchicha cruda 300⁰F 20 a 30 No precaliente. Voltee con frecuencia
Tocineta 350⁰F 7 a 12 No precaliente. Voltee con frecuencia
Tostada Francesa 350⁰F 6 a 10 Voltee a la mitad del tiempo de coccion
Pollo 350⁰F 25 a 40 Voltee a la mitad del tiempo de coccion
Hamburguesa (1/2" de grosor) 350⁰F 8 a 12 Voltee a la mitad del tiempo de coccion
Rebanada de jamon 1/2" de grosor 350⁰F 10 a 12 Voltee a la mitad del tiempo de coccion
Rebanada de jamon 3/4" de grosor 350⁰F 14 a 18 Voltee a la mitad del tiempo de coccion
Pescado 350⁰F 5 a 10 Voltee a la mitad del tiempo de coccion
Chuletas de cerdo 1/2" de grosor 350⁰F 15 a 20 Dore por ambos lados. Reduzca la temperatura a
250⁰F. Voltee a la mitad del tiempo de coccion
Chuletas de cerdo 3/4" de grosor 350⁰F 25 a 30 Dore por ambos lados. Reduzca la temperatura a
250⁰F. Voltee a la mitad del tiempo de coccion
Sandwich Tostado 350⁰F 5 a 10 Unte mantequilla a ambos lados por fuera del
sandwich. Dore por ambos lados
Filete 1" de grosor. Casi Crudo 400⁰F 6 a 7 Voltee a la mitad del tiempo de coccion
Filete 1" de grosor. Medium 400⁰F 10 a 12 Voltee a la mitad del tiempo de coccion
Filete 1" de grosor. Bien Cocido 400⁰F 13 a 18 Voltee a la mitad del tiempo de coccion
Filete 1 1/2" de grosor. Casi Crudo 400⁰F 8 a 10 Voltee a la mitad del tiempo de coccion
Filete 1 1/2" de grosor. Medium 400⁰F 18 a 20 Voltee a la mitad del tiempo de coccion
Filete 1 1/2" de grosor. Bien Cocido
400⁰F 21 a 26 Voltee a la mitad del tiempo de coccion
Panquecas 400⁰F 2 a 3 Vierta la mezcla en el sarte
n. Voltee cuando aparezcan
burbujas en la superficie
9

DIRECTRICES PARA
COCINAR
NOTA: El Departamento de Agricultura de los Estados Unidos recomienda que la carne y las aves
de corral se deben cocinar a las siguientes temperaturas internas para asegurarse de que las
bacterias nocivas se haya
n eliminado. Pavo y pollo deben cocinarse a una temperatura interna de
165 ˚ F / 74 ˚ C y la carne molida de res, ternera, cordero y cerdo debe cocinarse a una
temperatura interna de 160 ˚ F / 71 ˚ C. Todo el pollo y el pavo se debe cocinar a una temperatu
ra
interna de 180
˚ F / 82 ˚ C y 170 ˚ F / 77 ˚ C para la pechuga. Ganso y pato deben cocinarse a una
temperatura interna de 180˚ F / 82 ˚ C. Carne fresca de res y de cordero, etc., debe cocinarse a
una temperatura interna de al menos 145˚ F / 63 ˚ C. Ce
rdo fresco se debe cocinar a una
temperatura interna de al menos 160˚ F / 71 ˚ C. Cuando recaliente carne y productos avícolas,
deben también ser cocinados a una temperatura interna de 165 ˚F / 74˚ C.
En la tapa del sartén se encuentra un orificio para descargar el vapor.
Precaución: Los vapores que salen del orificio son altamente calientes. Retire la tapa con
cautela para no quemarse.
NOTA: Cocine con la tapa abierta si usa aceite. Destape el sartén si el aceite o los
ingredientes despiden humo y permita que el sartén se enfríe.
COMO LIMPIAR EL SARTEN
ADVERTENCIA: El sartén está caliente durante y después de usarse. Manéjelo con
cuidado.
1. Siempre permita que el sartén se enfríe antes de limpiar y guardar.
2. Apague el control de temperatura, desconecte el enchufe del tomacorriente primero y
remueva el control del sartén después.
Precaución: El control de temperatura puede estar caliente, no lo sumerja en agua, límpielo
con un paño seco.
3. Lave la tapa con agua y jabón en el fregadero o lavaplatos automáticos, enjuague y
seque bien.
4. Con excepción del cordón y el control de temperatura, las demás partes del sartén son
sumergibles en el agua.
5. El sartén puede lavarse en el lavaplatos eléctrico siempre y cuando se le haya removido
el control de temperatura.
6. Utilice un paño o una esponja para limpiar el control de temperatura.
NOTA: No utilice productos abrasivos ni estropajos metálicos para limpiar el sartén ya que
esto puede dañar la superficie antiadherente.
ADVERTENCIA: No sumerja el control ni el cordón en agua ni en ningún otro líquido.

CONSEJOS UTILES
• Antes de usar el sartén por primera vez, frote ligeramente con aceite vegetal la superficie
del sartén para preparar el antiadherente. Caliente el sartén destapado a 300° F. Apague y
deje enfriar. Limpie el exceso de aceite.
• Este sartén no fue diseñado para usarse como freidora de inmersión profunda. Para freír
no use más de una taza de aceite vegetal. Use mantequilla o aceite de oliva solo para freír a
baja temperatura
Table of contents
Languages:
Other Premium Kitchen Appliance manuals

Premium
Premium PPN40 User manual

Premium
Premium PHB315 User manual

Premium
Premium PSM 101 User manual

Premium
Premium PBM50 User manual

Premium
Premium PBM90 User manual

Premium
Premium PMFS688 User manual

Premium
Premium PMU811D User manual

Premium
Premium PES1209 User manual

Premium
Premium PWC1007XB User manual

Premium
Premium PWC456MS User manual
Popular Kitchen Appliance manuals by other brands

Zelmer
Zelmer SANO ZJE4800 user manual

Magic mill
Magic mill MFD-5000 instruction manual

Black & Decker
Black & Decker HGS200 Series use and care manual

Belling
Belling G552 Enfield Users guide & installation handbook

Cuisinart
Cuisinart Tazzaccino FR-10C Series INSTRUCTION AND RECIPE BOOKLET

Wisco Industries
Wisco Industries 412-3PC quick start guide