manuals.online logo
Brands
  1. Home
  2. •
  3. Brands
  4. •
  5. Prepac
  6. •
  7. Indoor Furnishing
  8. •
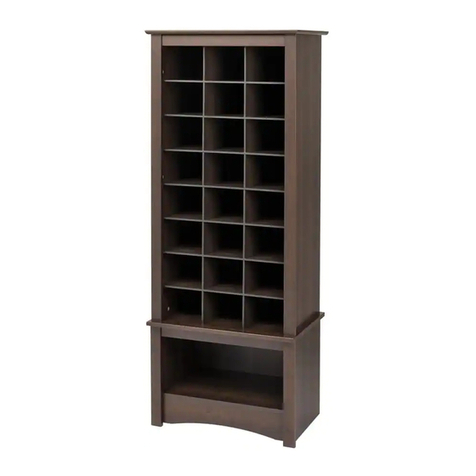
  9. Prepac MA-0320 Series User manual

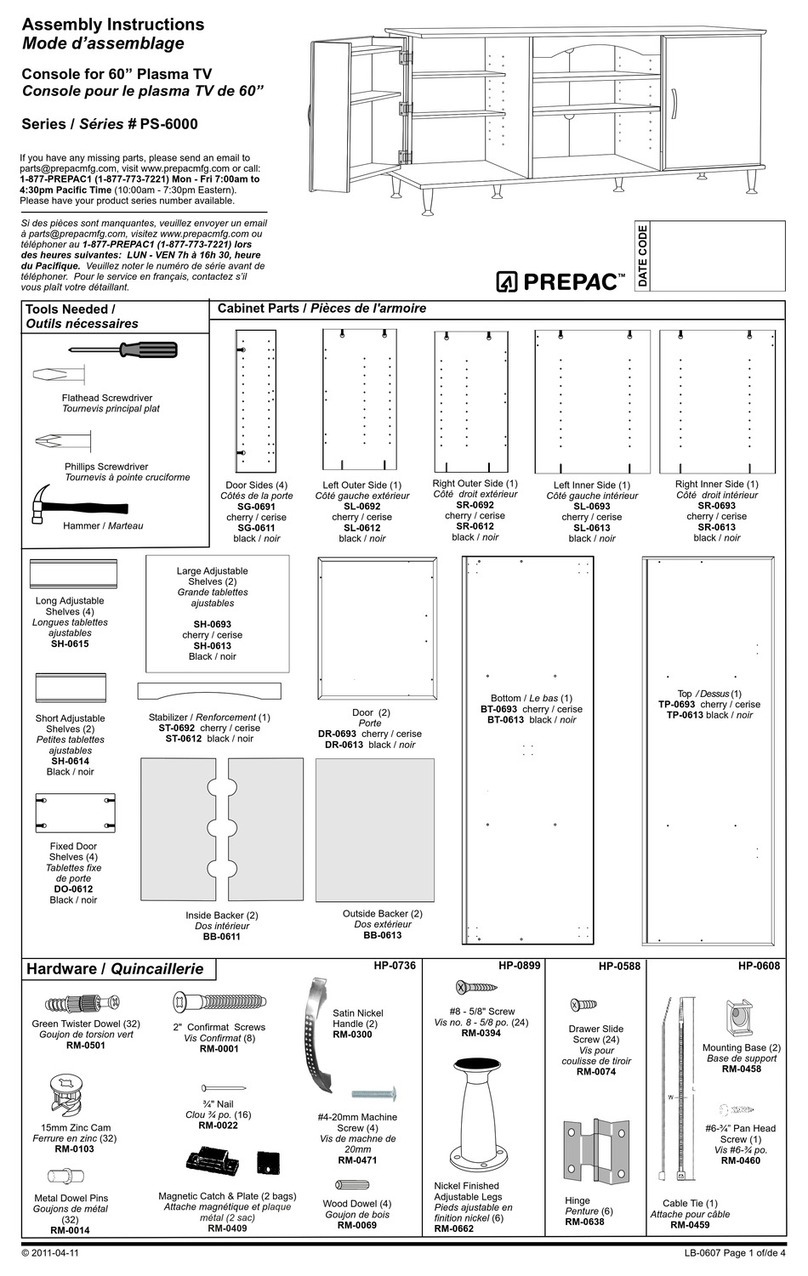
Prepac MA-0320 Series User manual

Hardware / Quincaillerie
2" Confirmat Screws
Vis Confirmat 2"
RM-0001
(6)
Tack Glide (4)
Patins à clou
RM-0139
Wood Dowel
Goujons de bois
RM-0069
(3)
¾" Nail
Clou de ¾”
RM-0022
(28)
Metal Dowel Pins
Goujons de métal
RM-0014
(56)
Assembly
Instructions
Mode d'assemblage
Tower Parts / Pièces de la tour
Adjustable Shelves
Tablettes ajustables (14)
SH-0210 black / noir
Bottom / le Bas (1)
BT-0251 black / noir
Top / le Dessus (1)
TP-0251 Black / noir
TP-0261 oak / chêne
Right Side (1)
Côté droit
SR-0220 oak / chêne
SR-0210 black / noir
Left Side (1)
Côté gauche
SL-0220 o
SL-0210 black / noir
ak / chêne
Double Width Multimedia
Storage Tower
Tour de rangement double
largeur pour multimédia
Series / Séries
#__MA-0320
Centre Gable
Montant du centre (1)
GA-0220
GA-0210 oak / chêne
black / noir
Backer
le Dos (1)
BB-0101
LB-0469 Page 1 of/de 2
© 2013-01-10
Hammer Tack Glides into the unfinished side of the Bottom
À l'aide d'un marteau, enfoncez les patins du côté non-fini du Bas
1. Insert cams and wood dowels into sides
Insérez les clés et les goujons de bois dans les
côtés.
Bottom
le Bas
3.
If you have any missing parts, please send an email to part[email protected], visit
www.prepacmfg.com or call: 1-877-PREPAC1 (1-877-773-7221) Mon - Fri 7:00am to 4:30pm
Pacific Time (10:00am - 7:30pm Eastern) Please have your product series number available.
Si des pièces sont manquantes, veuillez envoyer un email à parts@prepacmfg.com, visitez
www.prepacmfg.com ou téléphoner au 1-877-PREPAC1 (1-877-773-7221) lors des heures
suivantes: LUN - VEN 7h 30 à 16h 30, heure du Pacifique. Veuillez noter le numéro de série
avant de téléphoner. Pour le service en français, contactez s’il vous plaît votre détaillant.
Right Side
Côté droit
Wood Dowel
Goujon de bois
Cam
Ferrure
Finished edge
Côté fini
Centre Gable
Montant de centre
Holes are drilled through
Les trous sont percés de
bord en bord
Insert cams in the unlocked position,
with the opening facing toward the hole
for the blue rapid rod.
Insérez les ferrures dans la position
déverrouillée,de façon à ce que
l’overture soit face au trou de la tige
rapide bleu.
Cam
Ferrure
2. Insert blue rapid rod into the hole on the edge of
the left & right sides until it connects with the
cam. It will fit loosely and will protrude. You
won’t need to apply any force.
Insérez dans Ie trou sur Ie
côté du montants des côtés gauche et droit
jusqu'à ce qu'elle se fixe à la ferrure. ll y aura
un jeu et la vis dépassera. Vous n'aurez pas à
la forcer.
la tige rapide bleu
Left Side
Côté gauche
DATE CODE
Tools Needed /
Outils nécessaires
Phillips Screwdriver
Tournevis à pointe
cruciforme
Hammer
Marteau
Flathead
Screwdriver
Tournevis
principal plat
15mm Zinc Cam (3)
Ferrure en zinc
RM-0103
Blue Rapid Rod (3)
Tige rapide bleu
RM-0583
612 18 24 30 36 42 48 54 60 66 72
5. Insert one shelf in the center of the
tower before attaching the backer. This
will keep the sides of the tower straight
and will make it easier to attach the
backer.
Insérez une tablette au milieu avant de
poser le dos de la tour. Ceci aidera à
garder les côtés de la tour droits et
facilitera la fixation du dos.
Attachbase&toptosides
Fixezlabaseetledessusauxcôté
4.
Metal Dowel Pins
Goujons de métal
Confirmat Screws
Vis Confirmat
LB-0469 Page 2 of/de 2
6. Flip Storage Tower to
standing position.
Attach backer.
7.Insert metal dowels
into shelf holes and
add shelves.
Insérez les goujons de
métal dans les trous
des tablettes et posez
les tablettes.
Retournez la tour en
position verticale.
Posez le dos.
Shelves are grooved on the bottom &
rest on metal dowels.
Les tablettes ont des rainures à leur
base et reposent sur les goujons de
métal.
1" Nail
Clou de 1"
Tightening Cams
Use the flat head screwdriver
and turn cams to the RIGHT
almost 180 degrees until tight.
Serrez les ferrures
Utilizer le tournevis principal
plat et serrez les ferrures en
tournant vers LA DROITE
jusqu’a 180 degrés.
Locked
Verrouillé
Unlocked
Déverrouillé
© 2013-01-10

Other Prepac Indoor Furnishing manuals

Prepac LC-4830 User manual

Prepac

Prepac LC-4830 User manual

Prepac BSCW-0707-2K User manual

Prepac

Prepac BSCW-0707-2K User manual

Prepac SH-8445 User manual

Prepac

Prepac SH-8445 User manual

Prepac EMC-5022 User manual

Prepac

Prepac EMC-5022 User manual

Prepac DNH-0401-1 User manual

Prepac

Prepac DNH-0401-1 User manual

Prepac SH-6656 User manual

Prepac

Prepac SH-6656 User manual

Prepac Queen User manual

Prepac

Prepac Queen User manual

Prepac Sonoma User manual

Prepac

Prepac Sonoma User manual

Prepac BEP-3060 Series User manual

Prepac

Prepac BEP-3060 Series User manual

Prepac GSUW-0706-1 User manual

Prepac

Prepac GSUW-0706-1 User manual

Prepac GSCW-0707-2K User manual

Prepac

Prepac GSCW-0707-2K User manual

Prepac DNH-0339-1 User manual

Prepac

Prepac DNH-0339-1 User manual

Prepac BSUW-0707-1 User manual

Prepac

Prepac BSUW-0707-1 User manual

Prepac Sonoma SC-4820 User manual

Prepac

Prepac Sonoma SC-4820 User manual

Prepac DC-3345 User manual

Prepac

Prepac DC-3345 User manual

Prepac BQ-6212-3K User manual

Prepac

Prepac BQ-6212-3K User manual

Prepac Sonoma SC-3620 User manual

Prepac

Prepac Sonoma SC-3620 User manual

Prepac HD-1348 Series User manual

Prepac

Prepac HD-1348 Series User manual

Prepac DC-3345 User manual

Prepac

Prepac DC-3345 User manual

Prepac Wardrobe DC-3359 User manual

Prepac

Prepac Wardrobe DC-3359 User manual

Prepac BK-8400-K User manual

Prepac

Prepac BK-8400-K User manual

Prepac TV-3232 Series User manual

Prepac

Prepac TV-3232 Series User manual

Prepac GSCW-0706-2K User manual

Prepac

Prepac GSCW-0706-2K User manual

Prepac BEW-3264 User manual

Prepac

Prepac BEW-3264 User manual

Popular Indoor Furnishing manuals by other brands

StyleWell DP18009-CHAIR Use and care guide

StyleWell

StyleWell DP18009-CHAIR Use and care guide

Innostyle 10 75 HH 03 Assembly instructions
Innostyle

Innostyle 10 75 HH 03 Assembly instructions

Henley 614/3222 Assembly instructions

Henley

Henley 614/3222 Assembly instructions

Furniture of America Ludden CM-CR135 Assembly instructions

Furniture of America

Furniture of America Ludden CM-CR135 Assembly instructions

SHW OD-09A ZR03 Assembly instructions

SHW

SHW OD-09A ZR03 Assembly instructions

Axor Montreux 16502XX1 parts list

Axor

Axor Montreux 16502XX1 parts list

Ergolux ELERGKNEEBA user guide

Ergolux

Ergolux ELERGKNEEBA user guide

Axor 41820800 Specification sheet

Axor

Axor 41820800 Specification sheet

Husky HOTC5218B1QES Use and care guide

Husky

Husky HOTC5218B1QES Use and care guide

HOUZZ Monroe Series Instruction booklet

HOUZZ

HOUZZ Monroe Series Instruction booklet

Lightolier Lytespan 6351 specification

Lightolier

Lightolier Lytespan 6351 specification

Archers Sleepcentre SCANDI 2 WHITE DOOR 3 DRAWER OAK SIDEBOARD Assembly instructions

Archers Sleepcentre

Archers Sleepcentre SCANDI 2 WHITE DOOR 3 DRAWER OAK SIDEBOARD Assembly instructions

agape SOLID ASPE05991L quick start guide

agape

agape SOLID ASPE05991L quick start guide

HoMedics DS-CHAIR Assembly instructions

HoMedics

HoMedics DS-CHAIR Assembly instructions

COMFYTOGO BC313 Assembly instructions

COMFYTOGO

COMFYTOGO BC313 Assembly instructions

ULAX FURNITURE 730023 manual

ULAX FURNITURE

ULAX FURNITURE 730023 manual

Turnstone Campfire manual

Turnstone

Turnstone Campfire manual

Next CLRENDON DOUBLE ROBE 780924 Assembly instructions

Next

Next CLRENDON DOUBLE ROBE 780924 Assembly instructions

manuals.online logo
manuals.online logoBrands
  • About & Mission
  • Contact us
  • Privacy Policy
  • Terms and Conditions

Copyright 2025 Manuals.Online. All Rights Reserved.