manuals.online logo
Brands
  1. Home
  2. •
  3. Brands
  4. •
  5. Prepac
  6. •
  7. Indoor Furnishing
  8. •
  9. Prepac Sonoma SC-4820 User manual

Prepac Sonoma SC-4820 User manual

1. Insert cams and connecting rods into the bottom. Insert cams in the unlocked position,
with the opening facing toward the hole for the connecting rod.
Insérez les ferrures et les vis d'assemblage dans le bas. Insérez les ferrures dans la
position déverrouillée,de façon à ce que l’overture soit face au trou de la vis
d’assemblage.
Titus
Unlocked
Déverrouillé
Sides (2)
Côtés
Cam
Ferrure
Assembly Instructions
Mode d'assemblage
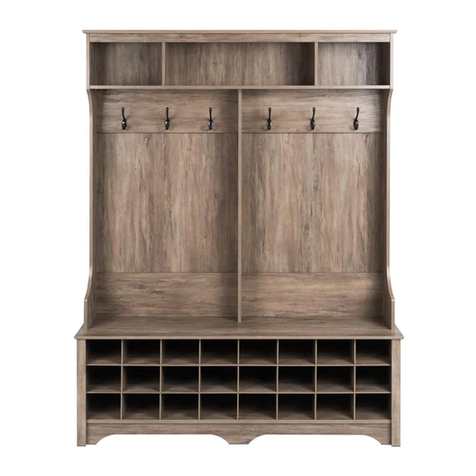
Sonoma Cubbie Bench
Banc de “cubbie”
Series / séries # SC-4820
DATE CODE
Parts / Pièces
Hardware / Quincaillerie
Tools Needed / Outils nécessaires
Hammer / Marteau
Phillips Screwdriver
Tournevis à pointe cruciforme
Flathead Screwdriver
Tournevis principal plat
2" Confirmat Screws
Vis Confirmat 2" (8)
RM-0001
15mm Zinc Cam (8)
Ferrure en zinc
RM-0103
Connecting Rod (4)
Vis d'assemblage
RM-0583
¾” Nail (24)
Clou ¾”
RM-0022
Tack Glide (4)
Patin à clou
RM-0139
Black Hardware
Quincaillerie noir
HP-0637
Maple Hardware
Quincaillerie érable
HP-0638
Backer / Dos (1)
BB-9709
maple / érable
BB-0114
black / noir
Front Stabilizer (1)
Renforcement
ST-0772 maple / érable
ST-0712 black / noir
Side Molding (2)
Moulure latérale
TR-0773 maple / érable
TR-0713 black / noir
Right Side (1)
Côté droit
SR-0772 maple / érable
SR-0712 black / noir
Top / Dessus (1)
TP-0772 maple / érable
TP-0712 black / noir
Left Side (1)
Côté gauche
SL-0772 maple / érable
SL-0712 black / noir
Top Molding (1)
Moulure supérieure
TR-0774 maple / érable
TR-0714 black / noir
Gables
Panneau (2)
GA-0773
maple / érable
GA-0713
black / noir Bottom
Le bas (1)
BT-0772 maple / érable
BT-0712 black / noir
Shown Upside Down
Montré à l'envers
2a. Attach one side to bottom and tighten cams using a FLAT
HEAD screwdriver.
Attachez un côté au fond et serrez les cames à l'aide d'un
tournevis PRINCIPAL PLAT.
Then, attach side to front stabilizer with Confirmat screws.
Puis, attaché le côté au renforcement arrière avec les vis
Confirmat.
Repeat for other side.
Répétition pour l'autre côté.
LB-0534 Page 1 of/de 2
© 2005-06-09
Screw Cover Caps (4)
Capuchons des vis
RM-0523 maple / érable
RM-0226 black / noir
Bottom
le bas
2b.
2a
2b
Plastic Dowels (12)
Goujons en plastique
RM-0072
If you have any missing parts, please send an email
to part[email protected], visit www.prepacmfg.com
or call: 1-877-PREPAC1 (1-877-773-7221) Mon - Fri
7:00am to 4:30pm Pacific Time (10:00am - 7:30pm
Eastern). Please have your product series number &
date code available.
Si des pièces sont manquantes, veuillez envoyer un
email à part[email protected], visitez
www.prepacmfg.com ou téléphoner au 1-877-
PREPAC1 (1-877-773-7221) lors des heures
suivantes: LUN - VEN 7h 30 à 16h 30, heure du
Pacifique. Veuillez noter le numéro de série avant
de téléphoner. Pour le service en français,
contactez s’il vous plaît votre détaillant.
Use the flat head screwdriver
and turn cams to the RIGHT
almost 180 degrees until tight.
Utilizer le tournevis principal
plat et serrez les ferrures en
tournant vers LA DROITE
jusqu’a 180 degrés.
iuTt s
Locked
Verrouillé
Titus
Unlocked
Déverrouillé
Tightening Cams
Serrage des ferrures
24mm Connecting Bolt (4)
Vis d'assemblage 24mm
RM-0501
Connecting Rod
Vis d'assemblage
Cam
Ferrure
Confirmat screws
& cover caps
Vis Confirmat et
capuchons des vis
7.
Attach top & side moldings using plastic
dowels. Insert dowels first into molding,
then into sides or top.
Attachez les moulure supérieurs et
latéraux à l'aide des goujons en
plastique. Insérez les goujons d'abord
dans la moulure, puis dans les côtés ou
le dessus.
Attach backer with 3/4” nails
Attachez le dos avec les clou de 3/4"
Attach center gables to bottom
using Confirmat screws
Attachez les pignons centraux au
bas à l'aide des vis de Confirmat.
3.
5. Turn right side up and attach top to sides and
center gables. Then, t
Mettez en position verticale et attachez le dessus
aux côtés et aux pignons centraux. Puis, s
ighten cams on each side.
errez
les ferrures de chaque côté.
LB-0534 Page 2 of/de 2
6.
Insert plastic dowels into the top.
Insérez les goujons en plastique dans
le dessus.
Plastic Dowels
Goujons en plastique
4a 4b
Plastic Dowels
Goujons en plastique
Shown Upside Down
Montré à l'envers
© 2005-06-09
24mm Connecting Bolt
Vis d'assemblage 24mm
Screw 24mm connecting bolts into the
underside of the top.
Vissez les vis d’assemblage de 24mm
dans le dessous du dessus.
4a.
4b.
Use the flat head screwdriver and
turn cams to the RIGHT almost 180
degrees until tight.
Utilizer le tournevis principal plat et
serrez les ferrures en tournant vers
LA DROITE jusqu’a 180 degrés.
Titus
Locked
Verrouillé
Titus
Unlocked
Déverrouillé
Tightening Cams
Serrage des ferrures
Confirmat screws
Vis Confirmat

Other Prepac Indoor Furnishing manuals

Prepac DC-2354 User manual

Prepac

Prepac DC-2354 User manual

Prepac GSCW-0706-2K User manual

Prepac

Prepac GSCW-0706-2K User manual

Prepac DC-2354 User manual

Prepac

Prepac DC-2354 User manual

Prepac DBR-0560-1 User manual

Prepac

Prepac DBR-0560-1 User manual

Prepac Queen User manual

Prepac

Prepac Queen User manual

Prepac Elite Storage WEW-3264 User manual

Prepac

Prepac Elite Storage WEW-3264 User manual

Prepac DC-3345 User manual

Prepac

Prepac DC-3345 User manual

Prepac SOH-0010 User manual

Prepac

Prepac SOH-0010 User manual

Prepac EC-6016 User manual

Prepac

Prepac EC-6016 User manual

Prepac BEW-3264 User manual

Prepac

Prepac BEW-3264 User manual

Prepac GSUW-0706-1 User manual

Prepac

Prepac GSUW-0706-1 User manual

Prepac SH-4543 User manual

Prepac

Prepac SH-4543 User manual

Prepac BK-8400-K User manual

Prepac

Prepac BK-8400-K User manual

Prepac USR-0008-1 User manual

Prepac

Prepac USR-0008-1 User manual

Prepac BSCW-0730-1 User manual

Prepac

Prepac BSCW-0730-1 User manual

Prepac SC-4820 User manual

Prepac

Prepac SC-4820 User manual

Prepac SBH-0003-01 User manual

Prepac

Prepac SBH-0003-01 User manual

Prepac EMC-5022 User manual

Prepac

Prepac EMC-5022 User manual

Prepac PS-6000 User manual

Prepac

Prepac PS-6000 User manual

Prepac DC-3345 User manual

Prepac

Prepac DC-3345 User manual

Prepac BEP-3060 Series User manual

Prepac

Prepac BEP-3060 Series User manual

Prepac EHW-0800-1 User manual

Prepac

Prepac EHW-0800-1 User manual

Prepac RK-2525 User manual

Prepac

Prepac RK-2525 User manual

Prepac GSCW-0707-2K User manual

Prepac

Prepac GSCW-0707-2K User manual

Popular Indoor Furnishing manuals by other brands

Dorel Asia WM3451 Instruction booklet

Dorel Asia

Dorel Asia WM3451 Instruction booklet

MANCHESTER WOOD Cherry Contemporary Media Stand Assembly instructions

MANCHESTER WOOD

MANCHESTER WOOD Cherry Contemporary Media Stand Assembly instructions

iRIZE K-240 installation guide

iRIZE

iRIZE K-240 installation guide

RH Teen KIERAN manual

RH Teen

RH Teen KIERAN manual

L.L.Bean Backyard Bistro Table Assembly instructions

L.L.Bean

L.L.Bean Backyard Bistro Table Assembly instructions

2K Furniture Designs CR2777 Assembly instructions

2K Furniture Designs

2K Furniture Designs CR2777 Assembly instructions

Global Correlation Patio Furniture brochure

Global

Global Correlation Patio Furniture brochure

Itatiaia ARM 2PT VD ALTO 80 EXCLUSIVE Assembly instruction

Itatiaia

Itatiaia ARM 2PT VD ALTO 80 EXCLUSIVE Assembly instruction

Forever Redwood MAYNARD MODERN REDWOOD PATIO TABLE Assembly instructions

Forever Redwood

Forever Redwood MAYNARD MODERN REDWOOD PATIO TABLE Assembly instructions

Furniture of America CM7811TV Assembly instructions

Furniture of America

Furniture of America CM7811TV Assembly instructions

Germania 1501 Assembly instruction

Germania

Germania 1501 Assembly instruction

Otto Komfort C 0780-UG C P3 Assembly instructions

Otto

Otto Komfort C 0780-UG C P3 Assembly instructions

PARISOT 2322LISU manual

PARISOT

PARISOT 2322LISU manual

Extremis Anker ASSEMBLY INSTRUCTIONS, HOW TO USE, USEFUL TIPS

Extremis

Extremis Anker ASSEMBLY INSTRUCTIONS, HOW TO USE, USEFUL TIPS

Habitat Renee 823728 manual

Habitat

Habitat Renee 823728 manual

Ethnicraft 50032-U Assembly instructions

Ethnicraft

Ethnicraft 50032-U Assembly instructions

GFW Stockholm Assembly instructions

GFW

GFW Stockholm Assembly instructions

Delacora Devine D192-101 Assembly instructions

Delacora

Delacora Devine D192-101 Assembly instructions

manuals.online logo
manuals.online logoBrands
  • About & Mission
  • Contact us
  • Privacy Policy
  • Terms and Conditions

Copyright 2025 Manuals.Online. All Rights Reserved.