manuals.online logo
Brands
  1. Home
  2. •
  3. Brands
  4. •
  5. Prepac
  6. •
  7. Indoor Furnishing
  8. •
  9. Prepac Sonoma SC-3620 User manual

Prepac Sonoma SC-3620 User manual

1.
Sides (2)
Côtés
Cam
Ferrure
Assembly Instructions
Mode d'assemblage
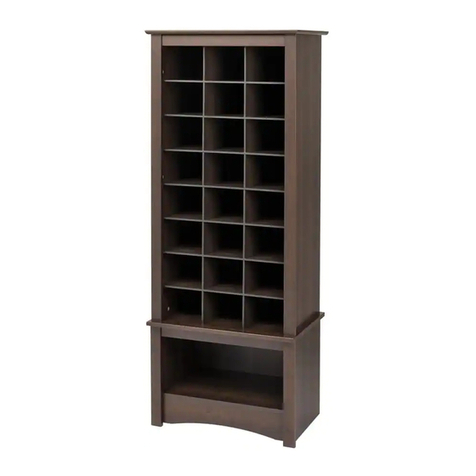
Sonoma Twin Cubbie
Bench
Banc Jumeau De Cubbie
Series / séries # SC-3620
DATE CODE
Parts / Pièces
Hardware / Quincaillerie
Tools Needed / Outils nécessaires
Hammer / Marteau
Phillips Screwdriver
Tournevis à pointe cruciforme
Flathead Screwdriver
Tournevis principal plat
2" Confirmat Screws
Vis Confirmat 2" (6)
RM-0001
15mm Zinc Cam (8)
Ferrure en zinc
RM-0103
¾” Nail (20)
Clou ¾”
RM-0022
Tack Glide (4)
Patin à clou
RM-0139
Shown Upside Down
Montré à l'envers
2a. Attach one side to bottom and tighten cams using a FLAT
HEAD screwdriver.
Attachez un côté au fond et serrez les cames à l'aide d'un
tournevis PRINCIPAL PLAT.
Then, attach side to front stabilizer with Confirmat screws.
Puis, attaché le côté au renforcement arrière avec les vis
Confirmat.
Repeat for other side.
Répétition pour l'autre côté.
LB-0549 Page 1 of/de 2
© 2007-05-25
Bottom
le bas
2b.
Plastic Dowels (8)
Goujons en plastique
RM-0072
If you have any missing parts, please send an email
to part[email protected], visit www.prepacmfg.com
or call: 1-877-PREPAC1 (1-877-773-7221) Mon - Fri
7:00am to 4:30pm Pacific Time (10:00am - 7:30pm
Eastern). Please have your product series number &
date code available.
Si des pièces sont manquantes, veuillez envoyer un
email à part[email protected], visitez
www.prepacmfg.com ou téléphoner au 1-877-
PREPAC1 (1-877-773-7221) lors des heures
suivantes: LUN - VEN 7h 30 à 16h 30, heure du
Pacifique. Veuillez noter le numéro de série avant
de téléphoner. Pour le service en français,
contactez s’il vous plaît votre détaillant.
Use the flat head screwdriver
and turn cams to the RIGHT
almost 180 degrees until tight.
Utilizer le tournevis principal
plat et serrez les ferrures en
tournant vers LA DROITE
jusqu’a 180 degrés.
iuTt s
Locked
Verrouillé
Titus
Unlocked
Déverrouillé
Tightening Cams
Serrage des ferrures
2a
2b
Confirmat screws
& cover caps
Vis Confirmat et
capuchons des vis
Blue Rapid Rod (4)
Tige rapide bleu
RM-0583
Green Twister Dowel (4)
Goujon de torsion vert
RM-0501
Screw Cover Caps (4)
Capuchons des vis
RM-0226 black / noir
RM-0620 cherry / cerise
RM-0523 maple / érable
RM-0008 white / blanc
Backer / Dos (1)
BB-0138 black / noir
BB-0138 cherry / cerise
BB-9716 maple / érable
BB-0123 white / blanc
Front Stabilizer (1)
Renforcement
ST-0713 black / noir
ST-0793 cherry / cerise
ST-0773 maple / érable
ST-0703 white / blanc
Side Molding (2)
Moulure latérale
TR-0713 black / noir
TR-0793 cherry / cerise
TR-0773 maple / érable
TR-0703 white / blanc
Right Side (1)
Côté droit
SR-0772 maple / érable
SR-0712 black / noir
SR-0792 cherry / cerise
SR-0702 white / blanc
Top / Dessus (1)
TP-0773 maple / érable
TP-0713 black / noir
TP-0793 cherry / cerise
TP-0703 white / blanc
Left Side (1)
Côté gauche
SL-0772 maple / érable
SL-0702 white / blanc
SL-0712 black / noir
SL-0792 cherry / cerise
Top Molding (1)
Moulure supérieure
TR-0775 maple / érable
TR-0715 black / noir
TR-0795 cherry / cerise
TR-0705 white / blanc
Gables
Panneau (1)
GA-0773 maple / érable
GA-0713 black / noir
GA-0793 cherry / cerise
GA-0703 white / blanc
Bottom
Le bas (1)
BT-0773 maple / érable
BT-0713 black / noir
BT-0793 cherry / cerise
BT-0703 white / blanc
Cam
Ferrure
Blue Rapid Rod
Tige rapide bleu
Unlocked
Déverrouillé
Titus
Insert cams and blue rapid rods into the bottom. Insert cams in the unlocked position,
with the opening facing toward the hole for the rod.
Insérez les ferrures et les tiges rapide bleu dans le bas. Insérez les ferrures dans la
position déverrouillée,de façon à ce que l’overture soit face au trou de la tige.
6. Attach backer with 3/4” nails
Attachez le dos avec les clou de 3/4"
Attach center gable to bottom using
Confirmat screws
Attachez les pignon central au bas à
l'aide des vis de Confirmat.
3a.
LB-0549 Page 2 of/de 2
Shown Upside Down
Montré à l'envers
Confirmat screws
Vis Confirmat
Plastic Dowels
Goujons en plastique
5. Turn right side up and attach top to sides and
center gable. Then, t
Mettez en position verticale et attachez le dessus
aux côtés et aux pignons centraux. Puis, s
ighten cams on each side.
errez
les ferrures de chaque côté.
Insert plastic dowels into the top.
Insérez les goujons en plastique dans
le dessus.
4a.
4b.
Attach top & side moldings using plastic
dowels. Insert dowels first into molding,
then into sides or top.
Attachez les moulure supérieurs et
latéraux à l'aide des goujons en
plastique. Insérez les goujons d'abord
dans la moulure, puis dans les côtés ou
le dessus.
6.
4a
Plastic Dowels
Goujons en plastique
4b
Use the flat head screwdriver and turn cams to the
RIGHT almost 180 degrees until tight.
Utilizer le tournevis principal plat et serrez les ferrures
en tournant vers LA DROITE jusqu’a 180 degrés.
itu
Ts
Locked
Verrouillé
Titus
Unlocked
Déverrouillé
Tightening Cams
Serrage des ferrures
© 2007-05-25
Screw green twister dowels into the
underside of the top.
Vissez les goujons de torison vert dans le
dessous du dessus.
Green Twister Dowel
Goujon de torsion vert
Hammer Tack Glides into the bottom of each side
À l’aide d’un marteau, enfoncez les patins à la
base de chacun des côtés
Tack Glide
Patins à clou
3b.

Other Prepac Indoor Furnishing manuals
Prepac Queen User manual

Prepac

Prepac Queen User manual

Prepac DC-2354 User manual

Prepac

Prepac DC-2354 User manual

Prepac EMC-5022 User manual

Prepac

Prepac EMC-5022 User manual

Prepac SBH-0003-01 User manual

Prepac

Prepac SBH-0003-01 User manual

Prepac LC-4830 User manual

Prepac

Prepac LC-4830 User manual

Prepac PS-6000 User manual

Prepac

Prepac PS-6000 User manual

Prepac BSUW-0707-1 User manual

Prepac

Prepac BSUW-0707-1 User manual

Prepac EHW-0800-1 User manual

Prepac

Prepac EHW-0800-1 User manual

Prepac SH-6643 User manual

Prepac

Prepac SH-6643 User manual

Prepac SH-8445 User manual

Prepac

Prepac SH-8445 User manual

Prepac SOG-0013-1 User manual

Prepac

Prepac SOG-0013-1 User manual

Prepac SH-4543 User manual

Prepac

Prepac SH-4543 User manual

Prepac BQ-6200-3K User manual

Prepac

Prepac BQ-6200-3K User manual

Prepac MA-0320 Series User manual

Prepac

Prepac MA-0320 Series User manual

Prepac SOH-0010 User manual

Prepac

Prepac SOH-0010 User manual

Prepac DC-3345 User manual

Prepac

Prepac DC-3345 User manual

Prepac Wardrobe DC-3359 User manual

Prepac

Prepac Wardrobe DC-3359 User manual

Prepac SOW-0200-1 User manual

Prepac

Prepac SOW-0200-1 User manual

Prepac BK-8400-K User manual

Prepac

Prepac BK-8400-K User manual

Prepac DC-2354 User manual

Prepac

Prepac DC-2354 User manual

Prepac USM-0003-1 User manual

Prepac

Prepac USM-0003-1 User manual

Prepac MB-0800 User manual

Prepac

Prepac MB-0800 User manual

Prepac RK-2525 User manual

Prepac

Prepac RK-2525 User manual

Prepac SS-4824 User manual

Prepac

Prepac SS-4824 User manual

Popular Indoor Furnishing manuals by other brands

siena GARDEN Falun 120.567 Assembly instruction

siena GARDEN

siena GARDEN Falun 120.567 Assembly instruction

Urban Barn AUSTIN QUEEN BED Assembly instructions

Urban Barn

Urban Barn AUSTIN QUEEN BED Assembly instructions

kingsley-bate Amalfi AM50 Assembly instructions

kingsley-bate

kingsley-bate Amalfi AM50 Assembly instructions

Auping 333B user manual

Auping

Auping 333B user manual

MOBB Health Care Alternating Pressure Mattress manual

MOBB Health Care

MOBB Health Care Alternating Pressure Mattress manual

Homelegance Atwood 2505BK-36 Assembly instructions

Homelegance

Homelegance Atwood 2505BK-36 Assembly instructions

Otto 69756201 Assembly instructions

Otto

Otto 69756201 Assembly instructions

DIR Baby Panda instruction manual

DIR

DIR Baby Panda instruction manual

BLADEZ GA-04P Assembly instruction

BLADEZ

BLADEZ GA-04P Assembly instruction

rst brands ASTER SL-SHLV-7 Assembly instructions

rst brands

rst brands ASTER SL-SHLV-7 Assembly instructions

BIG FURNITURE WAREHOUSE DELTA G-DLTLTVWGR Assembly instructions

BIG FURNITURE WAREHOUSE

BIG FURNITURE WAREHOUSE DELTA G-DLTLTVWGR Assembly instructions

WALA AXM Series Assembly manual

WALA

WALA AXM Series Assembly manual

Bontempi Casa CRUZ 01.80 Assembly instructions

Bontempi Casa

Bontempi Casa CRUZ 01.80 Assembly instructions

Glas Italia CROSSING Assembling and use instruction

Glas Italia

Glas Italia CROSSING Assembling and use instruction

Dedeman GARD 150 OG H2O5 Assembling Instruction

Dedeman

Dedeman GARD 150 OG H2O5 Assembling Instruction

Gautier GAMI H0D 160 quick start guide

Gautier

Gautier GAMI H0D 160 quick start guide

Habitat Leaf 819966 manual

Habitat

Habitat Leaf 819966 manual

Forte CLFK221 Assembling Instruction

Forte

Forte CLFK221 Assembling Instruction

manuals.online logo
manuals.online logoBrands
  • About & Mission
  • Contact us
  • Privacy Policy
  • Terms and Conditions

Copyright 2025 Manuals.Online. All Rights Reserved.