manuals.online logo
Brands
  1. Home
  2. •
  3. Brands
  4. •
  5. Pride
  6. •
  7. Wheelchair
  8. •
  9. Pride Jazzy 1170XL User manual

Pride Jazzy 1170XL User manual

Exeter, PA
St. Catharines, ON 1-800-800-8586
www.pridemobility.com
Owner’s Manual
ATTENTION:
Please read the content
of your owners manual
before operating your
power chair.
www.pridemobility.com Jazzy 1170XL
SAFETY GUIDELINES
Copyright © 2005
Pride Mobility Products Corp.
IN MANU1137/RevJ/June 2005
The symbols below are used throughout this owner's manual and on the power chair to identify warnings
and important information. It is very important for you to read them and understand them completely.
WARNING! Failure to follow designated procedures can cause either personal injury,
component damage, or malfunction ( lack sym ol on yellow triangle with lack order).
MANDATORY! These actions should e performed as specified. Failure to perform
mandatory actions can cause injury to personnel and/or damage to equipment (white
sym ol on lue dot with white order).
PROHIBITED! These actions should e prohi ited. These actions should not e performed
at any time or in any circumstances. Performing a prohi ited action can cause injury to
personnel and/or damage to equipment ( lack sym ol with red circle and red slash).
Jazzy 1170XL www.pridemobility.com 3
I. INTRODUCTION ........................................................................................................................ 4
II. SAFETY ......................................................................................................................................... 6
III. YOUR POWER CHAIR ........................................................................................................... 14
IV. ASSEMBLY ................................................................................................................................. 19
V. COMFORT ADJUSTMENTS ................................................................................................ 22
VI. BATTERIES AND CHARGING ........................................................................................... 28
VII. OPERATION ............................................................................................................................... 32
VIII.CARE AND MAINTENANCE ............................................................................................... 45
IX. WARRANTY ............................................................................................................................... 50
CONTENTS
This owners manual is compiled from the latest specifications and product information availa le at the
time of pu lication. We reserve the right to make changes as they ecome necessary. Any changes to our
products may cause slight variations etween the illustrations and explanations in this manual and the
product you have purchased.
4 www.pridemobility.com Jazzy 1170XL
I. INTRODUCTION
SAFETY
WELCOME to Pride Mo ility Products Corporation (Pride). The product you have purchased com ines
state-of-the-art components with safety, comfort, and styling in mind. We are confident the design features
will provide you with the conveniences you expect during your daily activities. Understanding how to
safely operate and care for this product should ring you years of trou le free operations and service.
Read and follow all instructions, warnings, and notes in this manual and all other accompanying literature
efore attempting to operate this product for the first time. In addition, your safety depends upon you, as
well as your provider, caretaker, or healthcare professional in using good judgement.
If there is any information in this manual which you do not understand, or if you require additional assis-
tance for setup or operation, please contact your authorized Pride Provider. Failure to follow the instruc-
tions, warnings, and notes in this manual and those located on your Pride product can result in
personal injury or product damage and void Prides product warranty.
PURCHASERS AGREEMENT
By accepting delivery of this product, you promise that you will not change, alter, or modify this product or
remove or render inopera le or unsafe any guards, shields, or other safety features of this product; fail,
refuse, or neglect to install any retrofit kits from time to time provided y Pride to enhance or preserve the
safe use of this product.
INFORMATION EXCHANGE
We want to hear your questions, comments, and suggestions a out this manual. We would also like to hear
a out the safety and relia ility of your new Pride product, and a out the service you received from your
authorized Pride Provider. Please notify us of any change of address, so we can keep you apprised of
important information a out safety, new products, and new options that can increase your a ility to use and
enjoy your Pride product. Please feel free to contact us at the address elow:
Pride Mo ility Products Corporation
Attn.: Customer Care Department
182 Susquehanna Ave.
Exeter, PA 18643-2694
NOTE: If you ever lose or misplace your product registration card or your copy of this manual, contact
us and we will be glad to send you a new one immediately.
Jazzy 1170XL www.pridemobility.com 5
I. INTRODUCTION
PRIDE OWNERS CLUB
As an owner of a Pride product, you are encouraged to enroll in the Pride Owners Clu . Complete and
return your enclosed product registration card or visit Pride's we site at www.pridemo ility.com.
From our home page, select Owners Clu  to enter a page dedicated to current and potential Pride product
owners. You will gain access to interviews, stories, recreation ideas, daily living tips, product and funding
information, and interactive message oards. These message oards invite you to communicate with other
Pride customers as well as Pride representatives who are availa le to assist you with any questions or
concerns.
My authorized Pride Provider is
Name:_____________________________________________________________________________________
Address:_______________________________________________________________________________
Phone Num er:_________________________________________________________________________
Purchase Date:__________________________________________________________________________
6 www.pridemobility.com Jazzy 1170XL
II. SAFETY
SAFETY
MANDATORY! Do not operate your new power chair for the first time without completely
reading and understanding this owners manual.
Your power chair is a state-of-the-art life-enhancement device designed to increase mo ility. Pride pro-
vides an extensive variety of products to est fit the individual needs of the power chair user. Please e
aware that the final selection and purchasing decision regarding the type of power chair to e used is the
responsi ility of the power chair user, who is capa le of making such a decision, and his/her healthcare
professional (i.e., medical doctor, physical therapist, etc.).
The contents of this manual are ased on the expectation that a mo ility device expert has properly fitted
the power chair to the user and has assisted the prescri ing healthcare professional and/or the authorized
Pride Provider in the instruction process for the use of the product.
There are certain situations, including some medical conditions, where the power chair user will need to
practice operating the power chair in the presence of a trained attendant. A trained attendant can e defined
as a family mem er or care professional specially trained in assisting a power chair user in various daily
living activities.
As you egin using your power chair during daily activities, you will pro a ly encounter situations in
which you will need some practice. Simply take your time and you will soon e in full and confident
control as you maneuver through doorways, on and off of elevators, up and down ramps, and over moder-
ate terrain.
Below are some precautions, tips, and other safety considerations that will help the user ecome accus-
tomed to operating the power chair safely.
Modifications
Pride has designed and engineered your power chair to provide maximum mo ility and utility. A wide
range of accessories is availa le from your authorized Pride Provider to further customize your power chair
to etter suit your needs and/or preferences. However, under no circumstances should you modify, add,
remove, or disa le any feature, part, or function of your power chair.
ARNING! Do not modify your power chair in any way not authorized by Pride. Unauthorized
modifications may result in personal injury and/or damage to your power chair.
Pre-Ride Safety Check
Get to know the feel of your power chair and its capa ilities. Pride recommends that you perform a safety
check efore each use to make sure your power chair operates smoothly and safely. See VIII. Care and
Maintenance.
Jazzy 1170XL www.pridemobility.com 7
II. SAFETY
Perform the following inspections prior to using your power chair:
nCheck for proper tire inflation. Maintain 35 psi in each tire if equipped with pneumatic tires.
nCheck all electrical connections. Make sure they are tight and not corroded.
nCheck all controller connections to the electronics tray. Make sure they are secured properly.
nCheck the rakes. See VIII. Care and Maintenance.
nCheck attery charge. See VI. Batteries and Charging.
NOTE: If you discover a problem, contact your authorized ride rovider for assistance.
Weight Limitations
Your power chair is rated for a maximum weight capacity. Please refer to the specifications ta le for this
limit.
ARNING! Exceeding the weight capacity voids your warranty and may result in personal
injury and/or damage to your power chair. Pride will not be held responsible for injuries
and/or property damage resulting from failure to observe weight limitations.
ARNING! Do not carry passengers on your power chair. Carrying passengers on your
power chair may result in personal injury and/or property damage.
Tire Inflation
If your power chair is equipped with pneumatic tires, you should check or have the air pressure checked at
least once a week. Proper inflation pressures will prolong the life of your tires and help ensure the smooth
operation of your power chair.
ARNING! It is important that 35 psi tire pressure be maintained in pneumatic tires at all
times. Do not underinflate or overinflate your tires. Low pressure may result in loss of
control, and overinflated tires may burst. Failure to maintain 35 psi tire pressure in
pneumatic tires at all times may result in tire and/or wheel failure, causing serious personal
injury and/or damage to your power chair.
ARNING! Inflate your power chair drive tires from a regulated air source with an available
pressure gauge. Inflating your tires from an unregulated air source could overinflate them,
resulting in a burst tire and/or personal injury.
Incline Information
More and more uildings have ramps with specified degrees of inclination, designed for easy and safe
access. Some ramps may have turning switch acks (180-degree turns) that require you to have good cor-
nering skills on your power chair.
nProceed with extreme caution as you approach the downgrade of a ramp or other incline.
nTake wide swings with your power chairs front wheels around any tight corners. If you do that, the
power chairs rear wheels will follow a wide arc, not cut the corner short, and not ump into or get hung
up on any railing corners.
nWhen driving down a ramp, keep the power chairs speed adjustment set to the slowest speed setting to
ensure a safely controlled descent. See VII. Operation.
nAvoid sudden stops and starts.
8 www.pridemobility.com Jazzy 1170XL
When clim ing an incline, try to keep your power chair moving. If you must stop, start up again slowly and
then accelerate cautiously. When driving down an incline, set your power chair to the slowest setting and
drive in the forward direction only. If your power chair starts to move down the incline faster than you
anticipated or desired, allow it to come to a complete stop y releasing the joystick, then push the joystick
forward slightly to ensure a safely controlled descent.
ARNING! hen climbing an incline, do not zigzag or drive at an angle up the face of the
incline. Drive your power chair straight up the incline. This greatly reduces the possibility
of a tip or a fall. Always exercise extreme caution when negotiating an incline.
ARNING! You should not travel up or down a potentially hazardous incline (i.e., areas
covered with snow, ice, cut grass, or wet leaves).
ARNING! hen on any sort of an incline or decline, never place the power chair in
freewheel mode while seated on it or standing next to it. Doing so may result in personal
injury and/or damage to your power chair.
ARNING! Never travel down an incline backwards. This may result in personal injury.
ARNING! Even though your power chair is capable of climbing slopes greater than those
illustrated in figure 1, do not, under any circumstances, exceed the incline guidelines or
any other specifications presented in this manual. Doing so could cause instability in
your power chair, resulting in personal injury and/or damage to your power chair.
In compliance with the Americans with Disa ilities Act of 1990, all handicap pu lic access ramps are
required to have a maximum slope of 5° (8.7%). Therefore, Pride recommends that the maximum slope of
an incline you attempt to safely ascend or descend on your power chair does not exceed 5° (8.7%). See
figure 1.
ARNING! Any attempt to climb or descend a slope steeper than 5° (8.7%) may put your
power chair in an unstable position and cause it to tip, resulting in personal injury.
II. SAFETY
Figure 1. Maximum Safe Angle (Ascending and Descending)
Braking Information
Your power chair is equipped with two powerful rake systems:
1. Regenerative  uses electricity to rapidly slow the vehicle when the joystick returns to the center/stop
position.
2. Disc Park Brake  activates mechanically after regenerative raking slows the vehicle to near stop, or
when power is removed from the system for any reason.
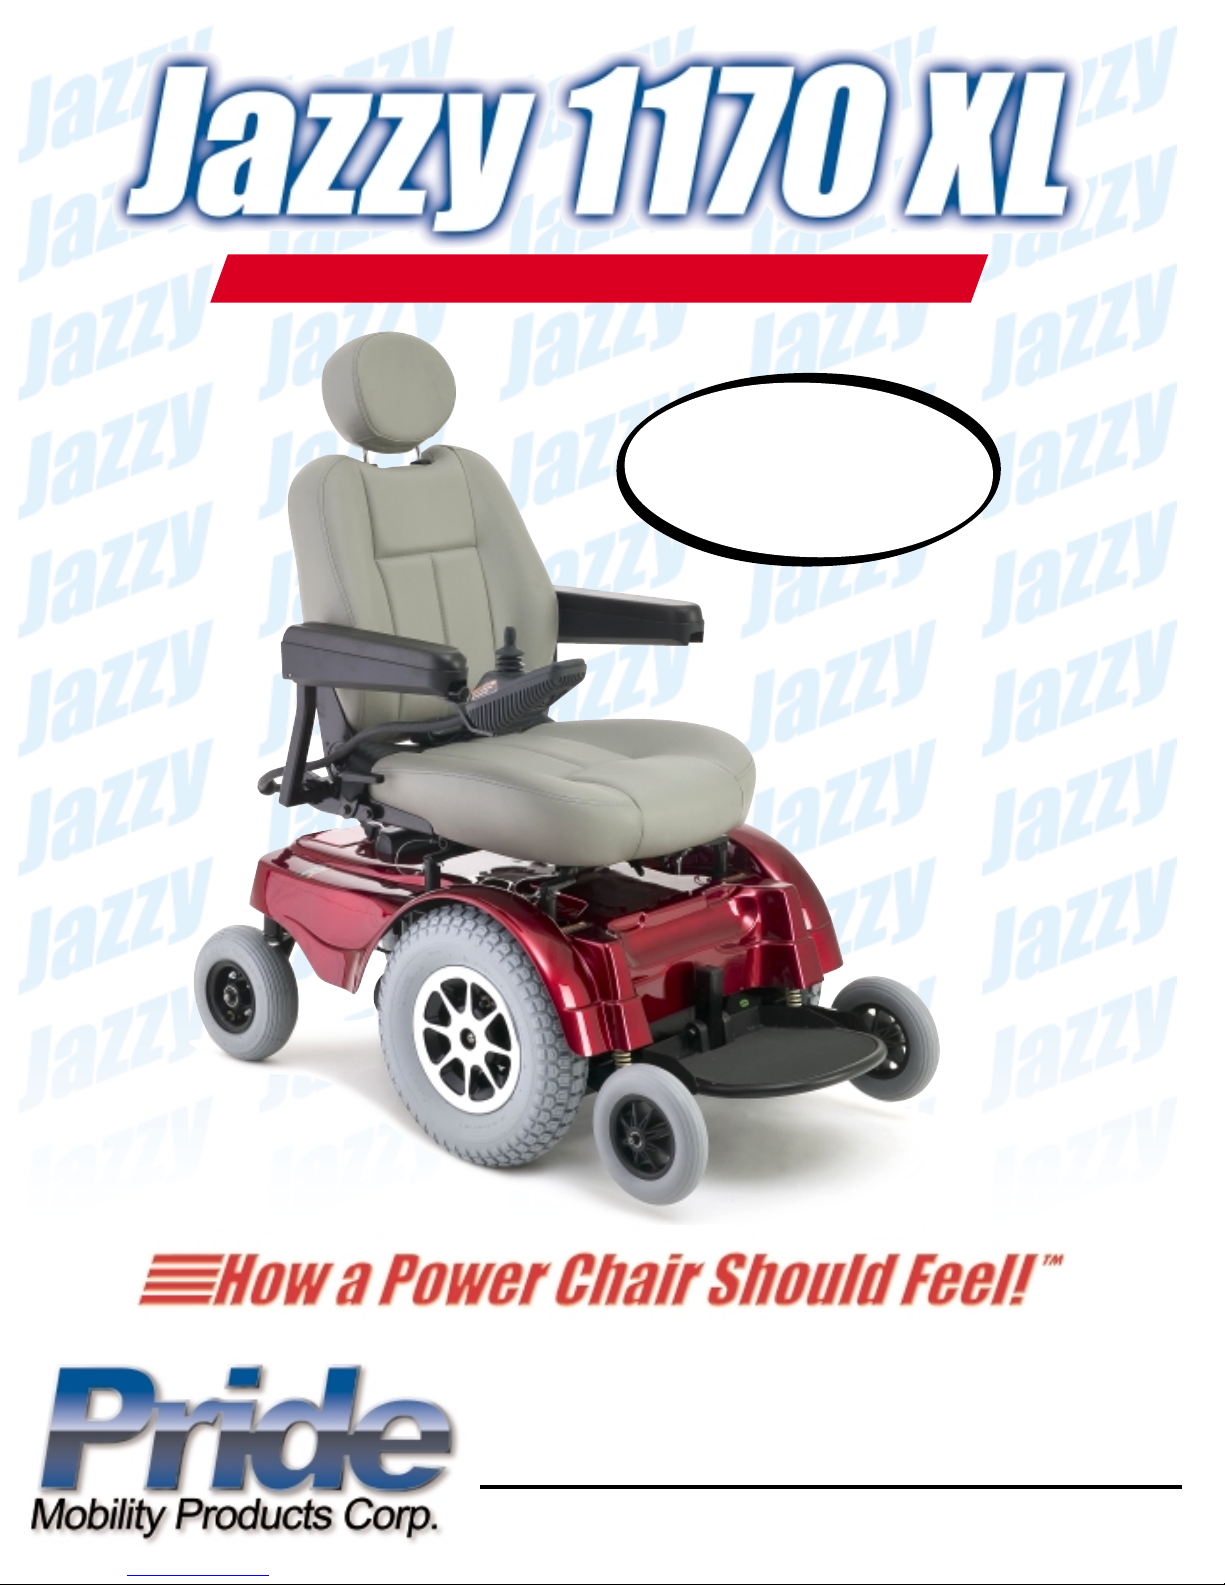
Jazzy 1170XL www.pridemobility.com 9
Cornering Information
While your power chair is equipped with caster wheels in ack and anti-tip wheels in front, excessively
high cornering speeds can still create the possi ility of tipping. Factors which affect the possi ility of
tipping include, ut are not limited to: cornering speed, steering angle (how sharply you are turning),
uneven road surfaces, inclined road surfaces, riding from an area of low traction to an area of high traction
(such as passing from a grassy area to a paved area  especially at high speed while turning), and a rupt
directional changes. High cornering speeds are not recommended. If you feel that you may tip over in a
corner, reduce your speed and steering angle (i.e., lessen the sharpness of the turn) to prevent your power
chair from tipping.
ARNING! hen cornering sharply, reduce your speed. This greatly reduces the possibility
of a tip or fall. To avoid personal injury and/or property damage, always exercise common
sense when cornering.
Outdoor riving Surfaces
Your power chair is designed to provide optimum sta ility under normal driving conditionsdry, level
surfaces composed of concrete, lacktop, or asphalt. However, Pride recognizes that there will e times
when you will encounter other surface types. For this reason, your power chair is designed to perform
admira ly on packed soil, grass, and gravel. Feel free to use your power chair safely on lawns and in park
areas.
nReduce your power chairs speed when driving on uneven terrain and/or soft surfaces.
nAvoid tall grass that can entangle the running gear.
nAvoid loosely packed gravel and sand.
nIf you feel unsure a out a driving surface, avoid that surface.
Freewheel Mode
Your power chair is equipped with a manual freewheel lever system to allow for manual maneuvera ility
y a trained attendant. For more information a out how to place your power chair into and out of freewheel
mode, see III. Your Power Chair.
ARNING! Do not use your power chair in freewheel mode without an attendant present.
Personal injury may result.
ARNING! Do not attempt to personally place your power chair in freewheel mode while
seated on it. Personal injury may result. Ask an attendant for assistance if necessary.
ARNING! Do not place your power chair in freewheel mode while on an incline. The chair
could roll uncontrollably on its own, causing personal injury.
Stationary Obstacles (Steps, Curbs, etc.)
Proceed with extreme caution when driving near raised surfaces, unprotected ledges and/or drop-offs (cur s,
porches, stairs, etc.). The correct method for approaching a cur is illustrated in figure 2.
ARNING! Do not attempt to have your power chair climb or descend an obstacle that is
higher than two inches unless you have the assistance of an attendant.
ARNING! Do not attempt to have your power chair proceed backward down any step,
curb, or other obstacle. This may cause the power chair to tip and cause personal injury.
II. SAFETY
10 www.pridemobility.com Jazzy 1170XL
Public Streets and Roadways
ARNING! You should not operate your power chair on public streets and roadways. Be
aware that it may be difficult for traffic to see you when you are seated on your power
chair. Obey all local pedestrian traffic rules. ait until your path is clear of traffic, and
then proceed with extreme caution.
Stairs and Escalators
Power chairs are not designed to travel up or down stairs or escalators. Always use an elevator.
ARNING! Never use your power chair to negotiate steps or escalators. You may cause
injury to yourself and to others and/or damage your power chair.
oors
nDetermine if the door opens toward or away from you.
nDrive your power chair gently and slowly forward to push the door open. Or drive your power chair
gently and slowly ackward to pull the door open.
Elevators
Modern elevators have a door edge safety mechanism that, when pushed, reopens the elevator door(s).
nIf you are in the doorway of an elevator when the door(s) egin to close, push on the ru er door edge
or allow the ru er door edge to contact the power chair and the door will reopen.
nUse care that pocket ooks, packages, or power chair accessories do not ecome caught in elevator
doors.
Lift/Elevation Products
If you will e traveling with your power chair, you may find it necessary to use a lift/elevation product to
aid in transportation. Pride recommends that you closely review the instructions, specifications, and safety
information set forth y the manufacturer of the lift/elevation product efore using that product.
II. SAFETY
Figure 2. Correct Curb Approach Figure 3. Incorrect Curb Approach
Jazzy 1170XL www.pridemobility.com 11
Motor Vehicle Transport
Currently, there are no standards approved for tie-down systems in a moving vehicle of any type to trans-
port a person while seated in a power chair.
ARNING! Do not sit on your power chair while it is in a moving vehicle. Personal injury
and/or property damage may result.
ARNING! Always be sure your power chair and its batteries are properly secured when
it is being transported. Failure to do so may result in personal injury and/or damage to
your power chair.
II. SAFETY
Figure 4. Ideal Transfer Position
Transfers
Transferring onto and off of your power chair requires
a good sense of alance. Always have an attendant or
healthcare professional present while learning to prop-
erly transfer yourself.
To eliminate the possi ility of injury, Pride recom-
mends that you or a trained attendant perform the fol-
lowing tasks efore attempting a transfer:
nTurn off the power to the controller. See VII.
Operation.
nEnsure your power chair is not in freewheel mode.
See III. Your Power Chair.
nTurn oth caster wheels toward the transfer desti-
nation to improve power chair sta ility during
transfer.
nMake sure oth armrests are flipped up or removed
from your power chair.
nFlip the footrest up, or move the leg rests aside;
this will help to keep your feet from getting caught
on the foot rigging during the transfer.
nReduce the distance etween your power chair and the o ject you are transferring onto.
ARNING! Before transferring, position yourself as far back as possible in the power
chair seat to prevent the power chair from tipping forward during transfer and causing
injury.
ARNING! Avoid using your armrests for weight bearing purposes. Such use may cause
the power chair to tip and cause personal injury.
ARNING! Avoid putting all of your weight on the foot rigging. Such use may cause the
power chair to tip and cause personal injury.
Positioning Belts
Your authorized Pride Provider, therapist(s), and other healthcare professionals are responsi le for deter-
mining your requirement for a positioning elt in order to operate your power chair safely.
12 www.pridemobility.com Jazzy 1170XL
ARNING! If you require a positioning belt to safely operate your power chair, make sure
it is fastened securely. Serious personal injury may result if you fall from the power chair.
ARNING! The positioning belt is not designed for use as a seat belt in a motor vehicle.
Nor is your power chair suitable for use as a seat in any vehicle. Anyone traveling in a
vehicle should be properly belted into seats approved by the vehicle manufacturer.
Inclement Weather Precautions
Exposure of your power chair to inclement weather conditions should e avoided whenever possi le. If suddenly
caught up in rain, snow, severe cold or heat while operating your power chair proceed to shelter at the earliest
opportunity. Thoroughly dry your power chair efore storing, charging, or operating your power chair.
ARNING! Operating in rain, snow, salt, mist/spray conditions, and on icy/slippery surfaces
can cause personal injury and/or damage to the power chair and electrical system. Maintain
and store your power chair in a dry and clean condition.
Reaching and Bending
Never reach, lean, or end while driving your power chair. If it is a solutely necessary to reach, lean, or
end while seated on your power chair, it is important to maintain a sta le center of gravity and keep the
power chair from tipping. Pride recommends that the power chair user determine his/her personal limita-
tions and practice ending and reaching in the presence of a qualified healthcare professional.
ARNING! Do not bend, lean, or reach for objects if you have to pick them up from the
floor by reaching down between your knees. Movements such as these may change your
center of gravity and the weight distribution of the power chair. This may cause your
power chair to tip, possibly resulting in personal injury.
ARNING! Prevent personal injury! Keep your hands away from the tires when driving. Be
aware that loose fitting clothing can become caught in drive tires.
Batteries
In addition to following the warnings elow, e sure to comply with all other attery handling information.
For more information a out your power chairs atteries, see VI. Batteries and Charging.
ARNING! Power chair batteries are heavy. See specifications table. If you are unable to
lift that much weight, be sure to get help. Lifting beyond your capacity can result in
personal injury.
ARNING! Battery posts, terminals, and related accessories contain lead and lead
compounds. ash hands after handling.
ARNING! Always protect the batteries from freezing and never charge a frozen battery.
Charging a frozen battery may result in personal injury and/or damage to the battery.
Preventing Unintended Movement
ARNING! If you anticipate being seated in a stationary position for an extended period
of time, turn off the power. This will prevent unexpected motion from inadvertent joystick
contact. This will also eliminate the possibility of unintended chair movement from
electromagnetic (EM) sources. Failure to do so may result in personal injury.
II. SAFETY
Jazzy 1170XL www.pridemobility.com 13
Prescription rugs/Physical Limitations
Users must exercise care and common sense when operating a power chair. This includes awareness of
safety issues when taking prescri ed or over-the-counter drugs or when the user has specific physical
limitations.
ARNING! Consult your physician if you are taking prescribed or over-the-counter
medication or if you have certain physical limitations. Some medications and limitations
may impair your ability to operate your power chair in a safe manner.
Alcohol
The power chair user must exercise care and common sense when operating his/her power chair. This
includes awareness of safety issues while under the influence of alcohol.
ARNING! Do not operate your power chair while you are under the influence of alcohol,
as this may impair your ability to operate your power chair in a safe manner.
Removable Parts
ARNING! Do not attempt to lift or move a power chair by any of its removable parts.
Personal injury and/or damage to the power chair may result.
Electromagnetic and Radio Frequency Interference (EMI/RFI)
ARNING! Laboratory tests have shown that electromagnetic and radio frequency waves
can have an adverse affect on the performance of electrically-powered mobility vehicles.
Electromagnetic and Radio Frequency Interference can come from sources such as cellular phones, mo ile
two-way radios (such as walkie-talkies), radio stations, TV stations, amateur radio (HAM) transmitters,
wireless computer links, microwave signals, paging transmitters, and medium-range mo ile transceivers
used y emergency vehicles. In some cases, these waves can cause unintended movement or damage to the
control system. Every electrically-powered mo ility vehicle has an immunity (or resistance) to EMI. The
higher the immunity level, the greater the protection against EMI. This product has een tested and has
passed at an immunity level of 20 V/m.
PROHIBITED! To prevent unintended movement, turn off the power to the electrically-
powered mobility vehicle before using a cell phone, two-way radio, laptop, or any other
type of radio transmitter. Avoid coming into close proximity of radio or TV stations.
ARNING! The addition of accessories or components to the electrically-powered mobility
vehicle can increase the susceptibility of the vehicle to EMI. Do not modify your power
chair in any way not authorized by Pride.
ARNING! The electrically-powered mobility vehicle itself can disturb the performance
of other electrical devices located nearby, such as alarm systems.
NOTE: For further information on EMI/RFI, go to the Resource Center on www.pridemobility.com. If
unintended motion or brake release occurs, turn your power chair off as soon as it is safe to do so. Call
ride at 800-424-8205 to report the incident.
II. SAFETY
14 www.pridemobility.com Jazzy 1170XL
III. YOUR POWER CHAIR
SEATBACK
ARMRESTS
CONTROLLER
(VSI SHOWN)
BODY SHROUD
ANTI-TIP WHEELS
DRIVE WHEEL
CASTER WHEEL
Figure 5. The Jazzy 1170 XL
POWER BASE
ASSEMBLY
FOOT RIGGING
(FOOT PLATFORM SHOWN)
THE JAZZY 1170XL
Your power chair has two main assem lies: the seat and the power ase. See figures 5 and 6. Typically, the
seat assem ly includes the armrests, seat ack, and seat ase. The power ase assem ly includes two motor/
rake assem lies, two drive wheels, two anti-tip wheels, two caster wheels, two atteries, and wiring
harnesses.
JOYSTICK
HEADREST
SEAT BASE
SEAT ASSEMBLY
Jazzy 1170XL www.pridemobility.com 15
III. YOUR POWER CHAIR
JAZZY 1170XL SPECIFICATIONS
Suspension: Active-Trac Suspension
Drive Wheels: 16 in., pneumatic, center-mounted (solid tires are optional)
Caster Wheels: 9 in., pneumatic, rear-articulating (solid tires are optional)
Anti-tip Wheels: in., solid, front-mounted
Maximum Speed: Up to 6 mph
Brakes: Intelligent Braking electronic regenerative, disc park brake
Ground Clearance: 4 in.
Turning Radius: 23 in.
Overall Size: Length: 46 in.
Width: 26.5 in.
Seating Options: Medium-back (standard)
High-back with headrest
Power Elevating Seat
Synergy Seating Systems
TRU-Balance Power Positioning Systems
Drivetrain: Two motor, mid wheel
Batteries: Two 12-volt, Group 24 batteries (standard)
Two 12-volt NF-22 batteries (with power elevating seat option)
Range: Up to 25 miles
Battery Charger: 5-amp, onboard (standard)
5-amp onboard/ -amp off-board combo
Electronics: 70-amp PG Drives VSI Controller (standard)
70-amp PG Drives Remote Plus Controller
70-amp Dynamic Europa Controller
Weight Capacity: 400 lbs.
300 lbs. with Synergy Manual Recline
160 lbs. with Synergy Manual Tilt
Component Weights: Base: 132 lbs.
Seat: 33 lbs.
Batteries: 53.5 lbs. each (Group 24)
3 lbs. each (NF-22)
*Based on user weight and terrain.
16 www.pridemobility.com Jazzy 1170XL
III. YOUR POWER CHAIR
AMMETER
CONTROLLER CONNECTOR
(VSI SHOWN)
CHARGER INHIBIT CONNECTOR
(VSI ONLY)
CHARGER POWER CORD
ELECTRONICS TRAY
Figure 6. Jazzy 1170XL Power Base (Shroud Removed)
Figure 7. Jazzy 1170XL Electronics Tray
MANUAL FREEWHEEL LEVER
MAIN CIRCUIT
BREAKER
BATTERIES
MOTOR/BRAKE ASSEMBLY
FRONT TRAPEZE BAR
FRONT SEAT TOWER
REAR TRAPEZE BAR
REAR SEAT TOWER
Jazzy 1170XL www.pridemobility.com 17
Electronics Tray
The electronics tray is located on the ack of the power ase. See figures 6 and 7. The ammeter, the charger
power cord, the main circuit reaker, the controller connector, and the charger inhi it connector are all
located on the electronics tray.
Ammeter The ammeter displays the chargers current output in amps. See VI. Batteries and Charging.
Charger Power Cord The charger power cord plugs into a standard wall outlet to supply power to the
on oard attery charger during attery charging.
Main Circuit Breaker The main circuit reaker is a safety feature uilt into your power chair. When the
atteries and the motors are heavily strained (e.g., from excessive loads), the main circuit reaker trips to
prevent damage to the motors and the electronics. If the circuit trips, allow your power chair to rest for
approximately one minute. Next, push in the circuit reaker utton, turn on the controller, and continue
normal operation. If the main circuit reaker continues to trip repeatedly, contact your authorized Pride
Provider.
Controller Connector This is where the controller connects to the power ase. The VSI controller uses a
large 9-pin connector. The Remote Plus and the Europa use smaller, multi-pin communications ca le con-
nectors (not shown).
Charger Inhibit Connector The VSI controller is equipped with a charger inhi it connector. The charger
inhi it ena les the on oard attery charger to disa le the controller during charging. The charger inhi it
connector is coded with colored dots. The dots are positioned so that you can align the flat side of the male
connector with the flat side of the female connector efore making the connection.
ARNING! Failure to properly align the connectors can result in damage to the controller,
the charger power cord, and the connectors.
Lighting System Connector (Not Shown) This is where the lighting system connects to the power ase.
Standard lighting systems have a single pin connector. Full lighting systems use a 3-pin connector.
Active-Trac System
Your power chair is equipped with an Active-Trac System (ATS). ATS is a suspension system designed to
make your power chair traverse different types of terrain and o stacles while maintaining smooth opera-
tion. With ATS, your front anti-tip wheels work in conjunction with your motor suspension to help you
maneuver over o stacles in excess of three inches in height.
As your front anti-tip wheels come in contact with an o stacle, the front anti-tip wheel assem ly is drawn
upward. At the same time, your motors are forced downward. This allows the motors to push your power
chair over an o stacle without the possi ility of ecoming hung up.
ATS also helps in day-to-day operating conditions. For instance, when you release the joystick, your power
chair egins to slow down. As the chair slows down, the front anti-tip wheels will automatically drop toward
the ground. This will reduce the forward tip that is typically encountered with center-wheel drive chairs.
III. YOUR POWER CHAIR
18 www.pridemobility.com Jazzy 1170XL
Manual Freewheel Lever(s)
For your convenience, your power chair is equipped with a manual freewheel lever system, which allows
you to disengage the drive motors and maneuver the chair manually.
ARNING! Do not use your power chair while the drive motors are disengaged unless you
are in the presence of an attendant! Do not disengage the drive motors when your power
chair is on an incline. The chair could roll down on its own, causing injury!
To engage or disengage the dual freewheel feature
1. Turn the manual freewheel levers outward to disengage the drive motors. See figure 8.
2. Turn the manual freewheel levers inward to engage the drive motors. See figure 9.
To engage or disengage the single freewheel feature
1. Flip up the safety latch and pull the manual freewheel lever up to disengage the drive motors. See figure 10.
2. Push the manual freehweel lever down to engage the drive motors. See figure 11.
ARNING! It is important to remember that when your power chair is in freewheel mode,
the braking system is disengaged.
If a lever is difficult to move in either direction, rock your power chair ack and forth slightly. The lever
should then move to the desired position.
III. YOUR POWER CHAIR
Figure 8. Drive Disengaged (Dual Levers) Figure 9. Drive Engaged (Dual Levers)
Figure 10. Drive Disengaged (Single Lever) Figure 11. Drive Engaged (Single Lever)
MANUAL
FREEWHEEL LEVER
MANUAL
FREEWHEEL LEVER
MANUAL FREEWHEEL LEVERS
SAFETY LATCH
Jazzy 1170XL www.pridemobility.com 19
IV. ASSEMBLY
INITIAL ASSEMBLY
Your power chair may require some assem ly either efore initial use or after transportation. It may also
require disassem ly to make some comfort adjustments. Figure 12 details those parts of the power chair
that are designed to e disassem led and assem led y an end user or y a qualified caregiver efore using
the product or making comfort adjustments.
Figure 12. Jazzy 1170XL Assembly View
CONTROLLER POSITION
SEAT HEIGHT/ANGLE ADJUSTMENT
SEAT INSTALLATION
SEATBACK ANGLE ADJUSTMENT
FOOTREST HEIGHT/
ANGLE ADJUSTMENT
TIRE/WHEEL REPLACEMENT
ANTI-TIP WHEEL ADJUSTMENT
20 www.pridemobility.com Jazzy 1170XL
IV. ASSEMBLY
SEAT INSTALLATION
It may e necessary to install the seat either prior to initial operation or after transporting your power chair.
Most seats are attached to the power ase with the Universal Mounting System (UMS). The UMS consists
of universal parts that may e attached to any medium- ack or high- ack seat, regardless of seat width or
seat depth. The two main components are aluminum extrusions mounted to the seat ase. These extrusions
attach to a pair of trapeze ars that are mounted to the power ase. If your power chair is equipped with a
Synergy or TRU-Balance Seating System, refer to the installation instructions provided in separate manuals.
ARNING! Do not pick up the seat frame by the armrests. They are free to pivot, and you
may lose control of the seat if they do so, resulting in personal injury or damage to the
chair.
To install the seat
1. Set the trapeze ars to the desired height. To change the trapeze ar height, see V. Comfort Adjustments.
2. Tilt the seat ack and slide the rear extrusion onto the rear trapeze ar. See figures 6 and 13.
3. Lower the front extrusion onto the front trapeze ar until the seat locks into place.
4. Flip the seat latch safety down. See figure 14.
ARNING! Make sure the seat latch safety is flipped down before using your power chair.
5. Install the controller into one of the armrests. See V. Comfort Adjustments.
6. Route the ca le to ensure that the ca le cannot e pinched in the seat hinge.
7. Plug the controller ca le into the connector on the electronics tray. See figure 7.
8. Secure the controller ca le to the armrest receiver with one or more wire ties.
Figure 14. Seat Latch SafetyFigure 13. Universal Mounting System (UMS)
REAR EXTRUSION
FRONT EXTRUSION
SEAT LATCH
SEAT LATCH SAFETY

Other manuals for Jazzy 1170XL

1

Other Pride Wheelchair manuals

Pride Jazzy 600 XL User manual

Pride

Pride Jazzy 600 XL User manual

Pride Quantum litestream junior User manual

Pride

Pride Quantum litestream junior User manual

Pride Jazzy 100 User manual

Pride

Pride Jazzy 100 User manual

Pride Air User manual

Pride

Pride Air User manual

Pride I-Go 5513 User manual

Pride

Pride I-Go 5513 User manual

Pride JAZZY User manual

Pride

Pride JAZZY User manual

Pride STYLUS User manual

Pride

Pride STYLUS User manual

Pride Go-Chair User manual

Pride

Pride Go-Chair User manual

Pride JAZZY 1101 User manual

Pride

Pride JAZZY 1101 User manual

Pride Z11 User manual

Pride

Pride Z11 User manual

Pride Jazzy 600 2S User manual

Pride

Pride Jazzy 600 2S User manual

Pride Quantum Rehab edge User manual

Pride

Pride Quantum Rehab edge User manual

Pride Quantum 610 User manual

Pride

Pride Quantum 610 User manual

Pride Versa Seat User manual

Pride

Pride Versa Seat User manual

Pride JAZZY SELECT 14 Guide

Pride

Pride JAZZY SELECT 14 Guide

Pride Jazzy 610 2SP User manual

Pride

Pride Jazzy 610 2SP User manual

Pride Quantum Q6 Edge User manual

Pride

Pride Quantum Q6 Edge User manual

Pride Celebrity DX Sport User manual

Pride

Pride Celebrity DX Sport User manual

Pride Dynamo ATS User manual

Pride

Pride Dynamo ATS User manual

Pride Quantum Q6 Edge User manual

Pride

Pride Quantum Q6 Edge User manual

Pride Jazzy Select 14 Series User manual

Pride

Pride Jazzy Select 14 Series User manual

Pride Jazzy 600 Series User manual

Pride

Pride Jazzy 600 Series User manual

Pride Jazzy 1122 User manual

Pride

Pride Jazzy 1122 User manual

Pride STYLUS LS User manual

Pride

Pride STYLUS LS User manual

Popular Wheelchair manuals by other brands

Sunrise Medical Guardian Escort User instruction manual & warranty

Sunrise Medical

Sunrise Medical Guardian Escort User instruction manual & warranty

Merits P301 Series Service manual

Merits

Merits P301 Series Service manual

Breezy Breezy 90 Directions for use

Breezy

Breezy Breezy 90 Directions for use

Airwheel A6T user manual

Airwheel

Airwheel A6T user manual

Handicare LI2161.121 Series manual

Handicare

Handicare LI2161.121 Series manual

alerta ALT-1100 user manual

alerta

alerta ALT-1100 user manual

Ortopedia ALLROUND 970 operating manual

Ortopedia

Ortopedia ALLROUND 970 operating manual

C.T.M. HS-2850 user manual

C.T.M.

C.T.M. HS-2850 user manual

Invacare Arrow 4M900 parts catalog

Invacare

Invacare Arrow 4M900 parts catalog

Invacare TDX SC parts list

Invacare

Invacare TDX SC parts list

Travel Buggy CITY 2 PLUS manual

Travel Buggy

Travel Buggy CITY 2 PLUS manual

Nuprodx MULTICHAIR BIG WHEEL Series ASSEMBLY & PACKING INSTRUCTIONS

Nuprodx

Nuprodx MULTICHAIR BIG WHEEL Series ASSEMBLY & PACKING INSTRUCTIONS

panthera S3 operating instructions

panthera

panthera S3 operating instructions

KneeRover HYBRID user manual

KneeRover

KneeRover HYBRID user manual

Invacare Spree XT Specifications

Invacare

Invacare Spree XT Specifications

identités Aston 822165 instruction manual

identités

identités Aston 822165 instruction manual

SUMED Syst'am Polyair Setup guide

SUMED

SUMED Syst'am Polyair Setup guide

Home Care Medical HCM9095 introduction

Home Care Medical

Home Care Medical HCM9095 introduction

manuals.online logo
manuals.online logoBrands
  • About & Mission
  • Contact us
  • Privacy Policy
  • Terms and Conditions

Copyright 2025 Manuals.Online. All Rights Reserved.