manuals.online logo
Brands
  1. Home
  2. •
  3. Brands
  4. •
  5. Primera
  6. •
  7. Printer
  8. •
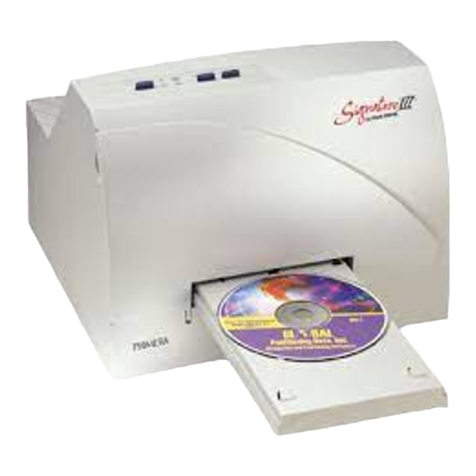
  9. Primera III User manual

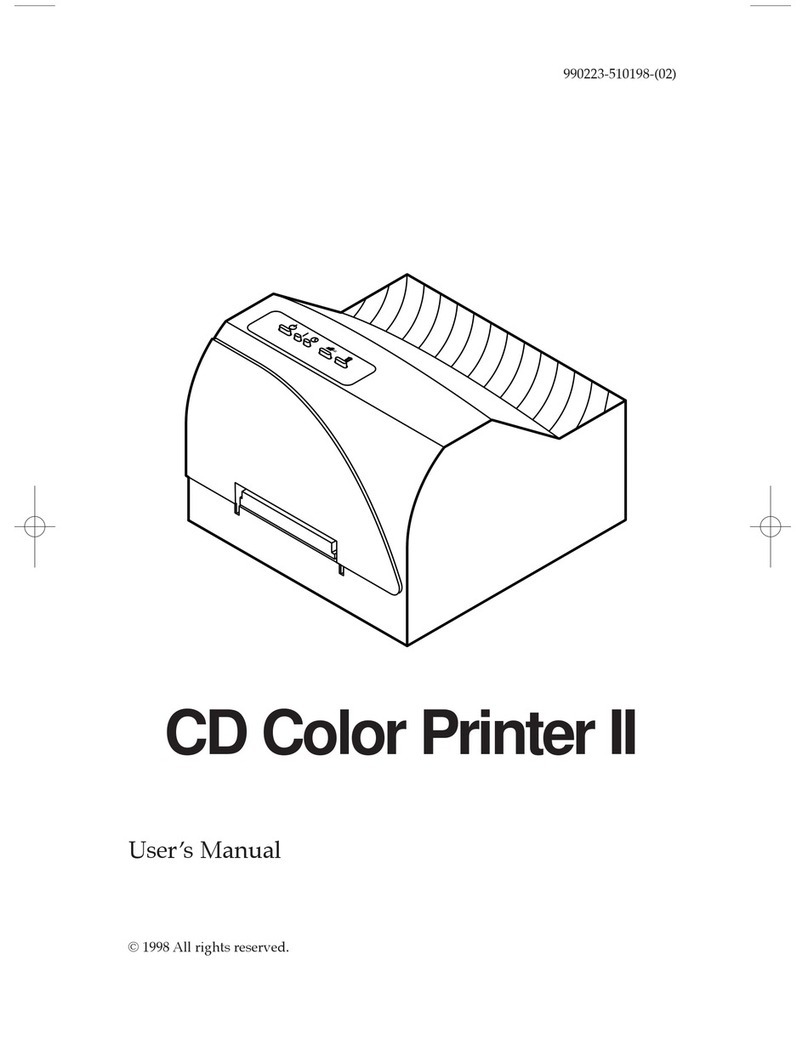
Primera III User manual

000424-510171-(05)
Users Manual
© 2000 All rights reserved.
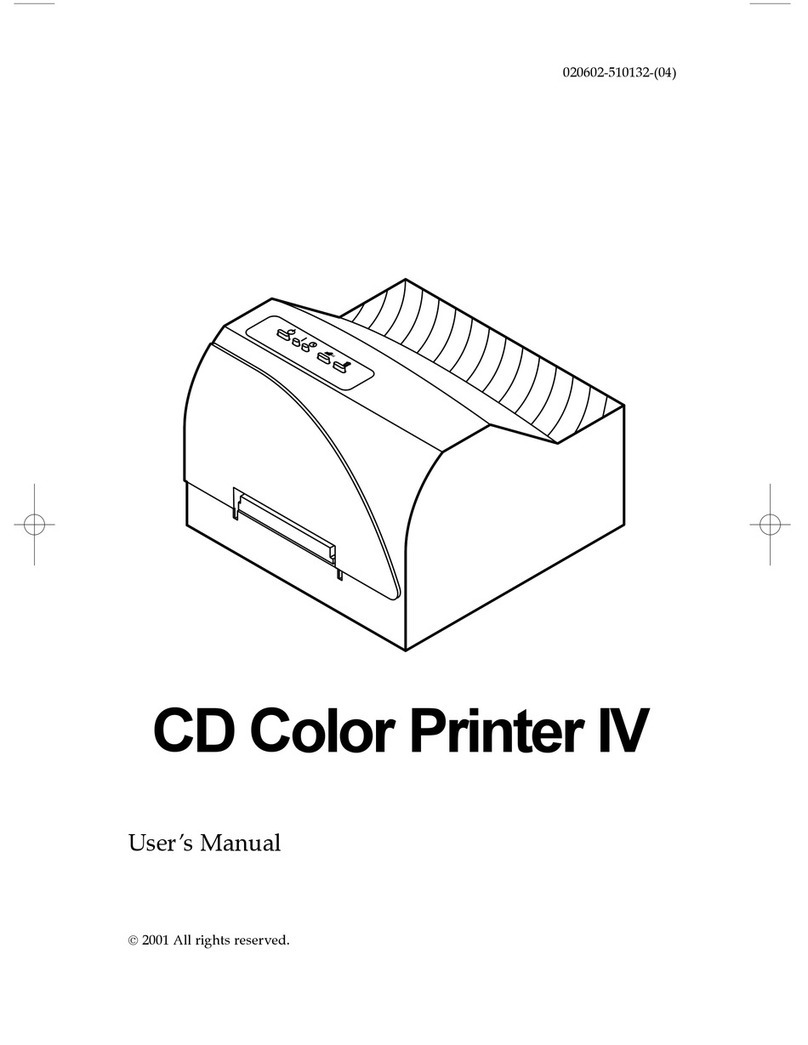
CD Color Printer III
510171Pr5.qxd 5/2/2000 3:39 PM Page i
Notices: The inf rmati n in this d cument is subject t change with ut n tice.
NO WARRANTY OF ANY KIND IS MADE WITH REGARD TO THIS MATERIAL, INCLUDING, BUT
NOT LIMITED TO, THE IMPLIED WARRANTIES OF MERCHANTABILITY AND FITNESS FOR A
PARTICULAR PURPOSE. N liability is assumed f r err rs c ntained herein r f r incidental r
c nsequential damages in c nnecti n with the furnishing, perf rmance, r use f this material. This
d cument c ntains pr prietary inf rmati n which is pr tected by c pyright. All rights are reserved.
N part f this d cument may be ph t c pied, repr duced, r translated int an ther language
with ut pri r written c nsent.
Trademark Acknowledgments: IBM is a registered trademark f Internati nal Business
Machines C rp rati n. Wind ws is a trademark f Micr s ft C rp rati n. Apple and Macint sh are
registered trademarks and QuickDraw and AppleTalk are trademarks f Apple C mputer, Inc. All
ther trademarks are the pr perty f their respective wners. CandelaC l r®Charged by Pict graphics
is a registered trademark f Pict graphics Internati nal C rp rati n.
Printing History
Editi n 1.3, #000424, © C pyright 2000, All rights reserved.
FCC Compliance Statement: This device c mplies with part 15 f the FCC rules. Operati n
is subject t the f ll wing tw c nditi ns: (1) this device may n t cause harmful interference, and (2)
this device must accept any interference received, including interference that may cause undesired
perati n.
For Users in the United States: This equipment has been tested and f und t c mply with
the limits f r a Class B digital device, pursuant t Part 15 f the FCC Rules. These limits are designed
t pr vide reas nable pr tecti n against harmful interference in a residential installati n. This
equipment generates, uses, and can radiate radi frequency energy and, if n t installed and used in
acc rdance with the instructi ns, may cause harmful interference t radi c mmunicati ns. H wever,
there is n guarantee that interference will n t ccur in a particular installati n. If this equipment d es
cause harmful interference t radi r televisi n recepti n, which can be determined by turning the
equipment ff and n, the user is enc uraged t try t c rrect the interference by ne r m re f the
f ll wing measures:
 Re- rient r rel cate the receiving antenna.
 Increase the separati n between the equipment and receiver.
 C nnect the equipment int an utlet n a circuit different fr m that t which the receiver is
c nnected.
 C nsult the dealer r an experienced radi /TV technician f r help.
Use f a shielded cable is required t c mply with the Class B limits f Part 15 f the FCC Rules. Y u
are cauti ned that any changes r m dificati ns n t expressly appr ved in this manual c uld v id
y ur auth rity t perate and/ r btain warranty service f r this equipment.
For Users in Canada: This digital apparatus d es n t exceed the Class B limits f r radi n ise
f r digital apparatus set ut n the Radi Interference Regulati ns f the Canadian Department f
C mmunicati ns. Le present appareil numerique nemet pas de bruits radi electriques depassant les
limites applicables aux appareils numeriques de la class B prescrites dans le Reglement sur le
br uillage radi electrique edicte par le ministere des C mmunicati ns du Canada.
CAUTION
TO PREVENT FIRE OR SHOCK HAZARD, DO NOT EXPOSE THE UNIT TO RAIN OR MOISTURE.
TO REDUCE THE RISK OF ELECTRIC SHOCK, DO NOT REMOVE EXTERIOR PANELS. NO USER-
SERVICEABLE PARTS INSIDE. REFER SERVICING TO QUALIFIED SERVICE PERSONNEL. OPERATE
THE UNIT WITH ONLY THE PROPER ELECTRICAL SPECIFICATIONS AS LABELED ON THE
PRINTER AND AC ADAPTER
ii
510171Pr5.qxd 5/2/2000 3:39 PM Page ii
iii
Read Me First!
C ngratulati ns n the purchase f y ur new CD C l r Printer. T
begin printing with y ur new printer immediately, please refer t the
f ll wing quick start instructi ns. F r m re c mplete inf rmati n
regarding all aspects f y ur printers perati n, please refer t the
printers main Users Manual.
HARDWARE SETUP
1. Unpackage y ur printer, and check that the f ll wing
items are included:
 P wer Adapter: P wer C rd (220-240V units)
 Printer S ftware CD
 C l r Ink Cartridge
 Spare Ink Cartridge H lder
 Cardb ard CD Templates (5)
 Warranty Statement and Registrati n Card
 Operat rs Manual and Other Printed Inf rmati n
2. C nnect y ur printers p wer.
3. Install the included c l r ink cartridge by pressing the
Ink Cartridge Butt n and inserting the cartridge
c pper-end first int the ink cartridge carrier. Then, push
the t p f the cartridge back until it snaps int place. When
the cartridge is in place, press the Ink Cartridge Butt n
again t reset the cartridge carrier.
4. Press the CD Tray Butt n, and install ne f the
cardb ard CD templates int the CD Tray.
5. Run a self test acc rding t the instructi ns in Secti n 2-D
f the printer Users Manual. This will ensure that b th the
printer and the ink cartridge are functi ning pr perly. This
procedure should also be done whenever you install a
new ink cartridge or if your printer has sat for a few days
without printing. If s me f the n zzles d n t seem t be
firing, perf rm a clean perati n after the printer driver
has been installed. Refer t the cleaning pr cedure
explained within the cartridge butt n descripti n f secti n
3-D r 4-D in the manual t clean the cartridge n zzles.
510171Pr5.qxd 5/2/2000 3:39 PM Page iii
iv
The self-test should look like this:
6. C nnect the printer t y ur c mputer using the pr per
interface cable. F r best results, use a IEEE 1284-C mpliant
cable and d n t c nnect t an A/B switch b x. Als , n te
that the printer will print fastest if y ur c mputers
parallel p rt is set t ECP m de (m st new c mputers are
set t ECP). Y ur c mputers manual will have inf rmati n
n changing the parallel p rt m de if y u need t switch it
t ECP.
SOFTWARE INSTALLATION
Once y u have set up y ur printer, y u must then install all f
the appr priate s ftware required f r printing. The included
CD c ntains all f the necessary s ftware. At a minimum, y u
must install the printer driver appr priate f r y ur c mputers
specific perati n system (Wind ws®95/98, Wind ws
NT/2000, r Macint sh®). Bel w is a descripti n f the CD
c ntents as well as installati n instructi ns f r each s ftware
c mp nent.
CD Contents:
 CD C l r Printer Driver III f r Wind ws 95/98
 CD C l r Printer Driver III f r Wind ws NT/2000
 CD C l r Printer Driver III f r Macint sh
 32-Bit Print Sp ler f r Wind ws 95/98 (pr vides
ptimum print pr cessing under Wind ws 95/98)
 2 Sample CD Designs (TIFF f rmat)
510171Pr5.qxd 5/2/2000 3:39 PM Page iv
v
nstallation nstructions:
Wind ws 95/98 r Wind ws NT/2000 Printer Drivers:
1. Insert the included CD int y ur c mputers CD-ROM
drive.
2. Click n the Start butt n n the task bar, p int t Settings,
and select Printers.
3. D uble-click n the Add Printer ic n. This will launch the
Add Printer Wizard. Click Next, then click Next again.
4. Click the Have Disk butt n.
5. Click Browse, select y ur CD-ROM drive.
6. F r Wind ws 95/98, pen the Win95-98 f lder, then select
the Driver f lder and select the file named
CDCOLOR3. NF. F r Wind ws NT r Wind ws 2000,
pen the NT f lder and select the file named
OEMSETUP. NF.
(Example: If y u are installing the Wind ws 95/98, and
y ur CD-ROM drive is drive D:, then y u w uld br wse
t : D:\Wind ws and NT S ftware\Wind ws Driver. Y u
w uld then select the file named CDCLOR3. NF). F ll w
the n-screen instructi ns t c mplete installati n.
Macintosh Printer Driver:
1. Insert the included CD int y ur c mputers CD-ROM
drive.
2. D uble-click n the CD Color Printer nstaller t install
the printer driver.
32 Bit Print Spooler: (MUST INSTALL if using Wind ws 95/98
nly)
1. Insert the included CD int y ur c mputers CD-ROM
drive.
2. Cl se d wn all ther s ftware applicati ns.
3. Click the Start butt n, p int t Settings, and select Control
Panel.
4. D uble-click n the Add/Remove Programs ic n, and
select the nstall butt n.
5. Click Next, the click n the Browse butt n.
510171Pr5.qxd 5/2/2000 3:39 PM Page v
vi
6. Select y ur CD-ROM drive, pen the f lder named
Win95-98 folder, then pen the f lder named 32 Bit Print
Spooler.
7. D uble-click n the Setup.exe file then select the Finish
butt n t c mplete installati n.
IMPORTANT
Once the printer driver software is installed, the Image
Placement values labeled on your printers rear panel must
be entered into the printer drivers Calibrate window. These
values have been optimized specifically for your printer and
allow images to be centered on a C when printed.
510171Pr5.qxd 5/2/2000 3:39 PM Page vi
vii
Please Note
The Spare Ink Cartridge Holder provides a convenient
place to store an extra ink cartridge and also prevents an
opened ink cartridge from drying out. To use this holder,
simply set it next to the printer. The Spare Ink Cartridge
Holder must always remain in an upright or vertical
position. Insert an Ink Cartridge into the holder, copper-end
first, until it snaps into place. To remove the Ink Cartridge,
push ack on the holders securing ta and lift the Ink
Cartridge out.
Please Note
To fully utilize Signature IIIs high-speed printing, you must
set your PC parallel printer port to the ECP setting.
Otherwise, you may find that print speed is up to 50%
slower than you might expect.
Please refer to your computer systems documentation for
instructions on ena ling ECP. It is almost always found in
the CMOS settings which are entered upon power-up.
Interactive Feature in this
PDF Document
There are interactive features that will allow you to jump to
different locations within the document. Each listing in the
Ta le of Contents is interactive. Place the cursor on either
the words or the page num er. A small hand with a pointing
finger icon appears. Click on the line with the icon and the
document will jump to that page. If you want to return to the
Ta le of Contents, move the icon to the top of the page and
click on the arrow marked TOC. Navigating through the
Index is similar. Place the icon on one of the listings or
page num ers, click on it, and it will move to that page. The
text relating to the Index listing will appear in red. Returning
to the Index can e done y clicking on the arrow marked
Index.
510171Pr5.qxd 5/5/2000 4:50 PM Page vii
viii
510171Pr5.qxd 5/2/2000 3:39 PM Page viii
ix
Table of Contents
Section 1: Getting Started
A. Choosing a Good Location...............................................................................1
B. Unpacking and Inspection ...............................................................................1
C. Identifying the Parts..........................................................................................2
D. Applying Power.................................................................................................
Section 2: Ink Cartridges and Printable CDs
A. About Ink Cartridges and Printable CDs ......................................................4
B. Installing an Ink Cartridge ..............................................................................4
C. Loading Blank CD Media.................................................................................6
D. Printing a Self Test .............................................................................................7
E. Replacing or Switching Ink Cartridges..........................................................8
Section 3: Using the CD Color Printer III with Windows
A. Connecting the Printer to Your Computer ..................................................11
B. Installing the Printer Driver...........................................................................12
C. Installing the 2-Bit Spooler for Windows 95/98.......................................14
D. Setting Up the Printer Driver ........................................................................16
E. Printing a CD....................................................................................................24
Section : Using the CD Color Printer III with Macintosh
A. Connecting the Printer to Your Computer ..................................................26
B. Installing the Printer Driver...........................................................................27
C. The Chooser......................................................................................................28
D. Setting Up the Printer Driver ........................................................................29
E. Printing a CD.................................................................................................... 4
Section 5: Using the Print Backgrounder for Macintosh
A. Installing the Backgrounder........................................................................... 6
B. Printing with the Backgrounder.................................................................... 6
C. The Backgrounder Status Window............................................................... 7
D. Backgrounder Menus...................................................................................... 8
E. Problems During a Background Print..........................................................40
Section 6: Interpreting the Printer Indicator Lights...............................................41
Section 7: Maintaining the Printer
A. Cleaning the Ink Cartridge Nozzles.............................................................4
B. Cleaning the CD Tray and Printer Casing...................................................4
C. Clearing a CD Media Jam ..............................................................................4
D. Technical Support ............................................................................................4
Section 8: Technical Specifications ...........................................................................44
Appendix A: Interfacing Information
A. Introduction......................................................................................................45
B. Mini 8-Pin Serial Interface..............................................................................46
C. 6-Pin Minicircular Auxiliary Interface .........................................................47
Index ................................................................................................................................48
Warranty..........................................................................................................................49
Supplies and Technical Support Information
510171Pr5.qxd 5/5/2000 6:21 PM Page ix
x
510171Pr5.qxd 5/2/2000 3:39 PM Page x
Getting Started 1
Section 1: Getting Started
THANK YOU
...f r ch sing the CD C l r Printer III. This printer is the
perfect way f r y u t label all f y ur cust m CDs quickly,
easily, and with a t uch f class. The CD C l r Printer III lets
y u print raz r-sharp text, vibrant sp t c l rs, and even
stunning ph t -realistic ph t graphs directly nt the surface
f printable CDs. Operati n is simple, quality is high, and
printed images are durable and highly smudge-resistant.
T begin using the printer, please refer t the remainder f this
manual. This Users Manual is y ur c mplete step-by-step
guide t quickly and easily setting up and printing with y ur
new CD C l r Printer!
A. CHOOSING A GOOD LOCATION
 Place the printer in a l cati n with adequate air circulati n
t prevent internal heat build up.
 D n t place the printer near heat s urces such as radiat rs
r air ducts, r in a place subject t direct sun-light,
excessive dust, mechanical vibrati n r sh ck.
 All w f r adequate clearance in fr nt f the printer t
acc mm date the length f the unit with its CD Tray pen.
B. UNPACKING AND INSPECTION
While unpacking y ur printer, inspect the cart n t ensure that
n damage has ccurred during shipping. Make sure that all
supplied access ries are included with y ur unit. The
f ll wing items sh uld be included:
 Printer
 P wer C rd
 Printer S ftware CD
 C l r Ink Cartridge
 Spare Ink Cartridge H lder
 Cardb ard CD Templates (5)
 Warranty Statement and Registrati n Card
 This manual and ther printed inf rmati n
Save the cart n and packing materials. They will c me in
handy when transp rting the printer.
510171Pr5.qxd 5/2/2000 3:39 PM Page 1
2 Getting Started
C. IDENTIFYING THE PARTS
This illustrati n sh ws the extended CD Tray and all f the
c ntr l butt ns and LED indicat r lights f und n the printer.
ThePower Buttonturns the printers p wer ON and OFF.
This butt n als serves t cancel the current print j b if a print
err r ccurs and t reset the printer f r the next print j b.
The CD Tray Buttonpens r cl ses the CD Tray f r
l ading and ejecting CDs.
Thenk Cartridge Buttonp siti ns the Cartridge Carrier f r
easy ink cartridge replacement.
ThePower Lightindicates that p wer is ON. TheBusy
Lightindicates that the printer is printing, pr cessing, r is in
s me way busy. B th f these lights can als indicate several
ther printer c nditi ns. F r c mplete inf rmati n n these
lights, please refer t Secti n 6.
Front Cover
Power Button
Power Light
Busy Light
CD Tray Button
Ink Cartridge Button
CD Tray
510171Pr5.qxd 5/2/2000 3:39 PM Page 2
Getting Started 3
This illustrati n sh ws the input p rts f und n the rear panel
f the printer. B th a parallel and a serial interface p rt are
pr vided. If using the printer with Wind ws, y u will use its
Parallel Interface Prt. If using the printer with an Apple®
Macint sh, y u will use its Serial Interface P rt (use a USB-t -
parallel c nverter cable f r a USB-nly Mac). N te that the
printers auxiliary p rt is f r fact ry use nly unless therwise
directed. F r m re inf rmati n n each f the interface p rts,
please refer t Appendix A.
D. APPLYING POWER
1. L cate the p wer adapter supplied with y ur printer.
2. Place ne end f the adapter c rd int the p wer p rt n
the rear panel f the printer.
3. Plug the p wer c rd f the adapter int an available wall
utlet. Once the p wer c rd is c nnected, the printer will
aut matically turn ON.
Power Port
Auxiliary Port
Serial Interface Port
Parallel Interface Port
510171Pr5.qxd 5/2/2000 3:39 PM Page 3
4 Ink Cartridges and Printable CDs
Section 2: nk Cartridges and
Printable CDs
A. ABOUT INK CARTRIDGES AND PRINTABLE CDS
Fr full-c l r printing, a 3-c l r ink cartridge is available. This
cartridge c ntains the three pr cess-c l r inks f yell w,
magenta, and cyan, which c mbine t pr duce up t 16.7
milli n printable c l rs. A m n chr me ink cartridge is als
available f r fast, inexpensive black and white printing.
With either f these ink cartridges, y u can print directly nt
virtually any brand f printable-surface CD media. Since
different brands f CDs have different printable c atings,
h wever, y u may need t adjust the printer driver settings t
acc mm date y ur specific brand f CD media. Refer t
Secti n 3 r 4 f r further printer driver inf rmati n.
Due t the wide variety f printable-surface CD media, y u
may find that certain brands f CDs pr vide higher print
quality than thers. F r maximum print quality, use CD media
auth rized by the printer manufacturer. C ntact y ur l cal CD
C l r Printer reseller r c ntact the printer manufacturer
directly f r selecti n and pricing n all printer supplies and
access ries.
B. INSTALLING AN INK CARTRIDGE
1. With the CD Tray cl sed, pen the printers fr nt c ver by
pulling d wn n its t p-left c rner.
510171Pr5.qxd 5/2/2000 3:39 PM Page 4
Ink Cartridges and Printable CDs
2. Rem ve the ink cartridge fr m its packaging.
3. Rem ve the tape c vering the cartridges printhead.
DO NOT TOUCH THE COPPER AREA!
4. Press and release the Ink Cartridge butt n t m ve the
carrier t the l ad p siti n.
5. Insert the ink cartridge int the cartridge carrier, c pper
end first.
6. Push the cartridge back until it snaps int place.
7. Press and release the Ink Cartridge butt n again t reset
the cartridge carrier.
8. Cl se the printers fr nt c ver.
NOTE:
When changing to subsequent new cartridges, refer to Section E.
NOTE:
A Spare Ink Cartridge Holder is included with your printer. This
holder provides a convenient place to store an extra ink cartridge and
also prevents an opened ink cartridge from drying out. To use this
holder, simply insert an Ink Cartridge into the holder, copper-end
first, until it snaps into place.
510171Pr5.qxd 5/2/2000 3:39 PM Page 5
6 Ink Cartridges and Printable CDs
C. LOADING BLANK CD MEDIA
The CD C l r Printer III is capable f printing nt a variety f
CD related media including printable CDs and DVDs, and
cardb ard CD templates. Each f these items is l aded ne at a
time, bef re the start f each print j b.
Loading a Blank CD
1. With the printers fr nt c ver shut, press and release the
CD Tray butt n.
2. Once the CD Tray is fully extended, place the blank CD
nt the tray with the printable side facing upward.
Handle the CD nly al ng its edges and DO NOT t uch
its printable surface.
3. Press and release the CD Tray butt n t cl se the CD
Tray. If y u wish, y u may als leave the CD Tray pen
and it will aut matically cl se at the start f the print j b.
Once the CD has been printed, the CD Tray will
aut matically re- pen s the next blank CD can be l aded
(if Manual L ad is selected in the printer driver then y u
must press the CD Tray butt n t manually pen and cl se
the tray).
NOTE:
Blank Cardboard C templates are available for printing inexpensive
test prints and can be printed on both sides. Load in the exact same
fashion as an actual C .
510171Pr5.qxd 5/2/2000 3:39 PM Page 6
Ink Cartridges and Printable CDs 7
D. PRINTING A SELF TEST
N w that the printer is set up and print supplies are l aded, a
self test sh uld be perf rmed t check f r pr per perati n f
the printer. A sample f the self test print is sh wn bel w.
Refer t the f ll wing steps t run a self test:
1. If p wer is ON, turn it OFF n w. The P wer light sh uld
be OFF. Verify that print supplies are installed and that the
CD Tray is cl sed. Als , disc nnect the interface cable fr m
the printer if c nnected.
2. With the printers fr nt c ver shut, press and h ld the
CD Tray butt n as y u turn the printer p wer ON.
3. C ntinue t h ld the CD Tray butt n d wn f r a few
sec nds, until y u hear the self test begin t print.
510171Pr5.qxd 5/2/2000 3:39 PM Page 7
8 Ink Cartridges and Printable CDs
E. REPLACING OR SWITCHING INK CARTRIDGES
Once y u begin using y ur CD C l r Printer III n a regular
basis, y u will eventually need t replace an empty ink
cartridge r switch between c l r and m n chr me cartridges.
To do this from a Macintosh use the same steps described in
Part B of this section. T d this fr m Wind ws 95/98 r
Wind ws NT, please refer t the f ll wing steps:
1. With the CD Tray cl sed, pen the printers fr nt c ver by
pulling d wn n its t p-left c rner.
2. If installing a new, replacement ink cartridge, rem ve the
cartridge fr m its packaging and rem ve the tape c vering
the cartridges printhead. DO NOT TOUCH THE
COPPER AREA!
3. If switching between c l r and m n chr me cartridges,
simply rem ve the extra cartridge fr m the Spare Ink
Cartridge H lder by grasping the t p f the cartridge and
firmly pulling it straight t ward y u. Y u will hear the
cartridge snap ut f p siti n.
510171Pr5.qxd 5/2/2000 3:39 PM Page 8
Ink Cartridges and Printable CDs 9
4. Fr m within the printer driver setup wind w, click n the
Cartridge butt n and then n the Change butt n t m ve
the carrier t the l ad p siti n. N te that the printer driver
must be installed and that the printer must be c nnected t
y ur c mputer (see Secti n 3) in rder t c mplete this
step.
5. Rem ve the installed ink cartridge by grasping the t p f
the cartridge and firmly pulling it straight t ward y u. Y u
will hear the cartridge snap ut f p siti n. Rem ve it
fr m the printer.
6. Insert the replacement r extra ink cartridge int the
cartridge carrier, c pper-end first.
510171Pr5.qxd 5/2/2000 3:39 PM Page 9
10 Ink Cartridges and Printable CDs
7. Push the cartridge back until it snaps int place.
8. G back t the printer driver setup wind w and click n
either the New Cartridge nstalled r the Old Cartridge
nstalled butt n t indicate whether y u installed a fresh,
new cartridge r simply switched between a previ usly
used c l r cartridge and a previ usly used m n chr me
cartridge. The cartridge carrier will return t its h me
p siti n. See Secti n 3-D f r m re inf rmati n n these
butt ns.
9. Cl se the printers fr nt c ver.
NOTE:
When you choose New Cartridge, the ink levels are cleared and the
ink level indicator should go back to full capacity (for either color or
monochrome).
510171Pr5.qxd 5/2/2000 3:39 PM Page 10

This manual suits for next models

1

Other Primera Printer manuals

Primera Pictura 310cs User manual

Primera

Primera Pictura 310cs User manual

Primera Signature IV User manual

Primera

Primera Signature IV User manual

Primera AP362e User manual

Primera

Primera AP362e User manual

Primera Signature User manual

Primera

Primera Signature User manual

Primera trio User manual

Primera

Primera trio User manual

Primera Inscripta User manual

Primera

Primera Inscripta User manual

Primera Catalyst User manual

Primera

Primera Catalyst User manual

Primera CX1200 Pre?Die Cut Quick start guide

Primera

Primera CX1200 Pre?Die Cut Quick start guide

Primera BravoPro Optical Disc Printing System User manual

Primera

Primera BravoPro Optical Disc Printing System User manual

Primera optical disc publisher pro User manual

Primera

Primera optical disc publisher pro User manual

Primera Bravo Pro Use and care manual

Primera

Primera Bravo Pro Use and care manual

Primera Signature Pro User manual

Primera

Primera Signature Pro User manual

Primera Digital Color Label Press CX1200e User manual

Primera

Primera Digital Color Label Press CX1200e User manual

Primera Automated Optical Disc Duplication & Printing System... User manual

Primera

Primera Automated Optical Disc Duplication & Printing System... User manual

Primera Disc Publisher Pro Disc Publisher Pro User manual

Primera

Primera Disc Publisher Pro Disc Publisher Pro User manual

Primera FX400 User manual

Primera

Primera FX400 User manual

Primera RX900e User manual

Primera

Primera RX900e User manual

Primera RX900 User manual

Primera

Primera RX900 User manual

Primera Signature User manual

Primera

Primera Signature User manual

Primera Primera Signature Z1 User manual

Primera

Primera Primera Signature Z1 User manual

Primera AutoPrinter SE User manual

Primera

Primera AutoPrinter SE User manual

Primera BravoPro Automated Optical Disc Printing... User manual

Primera

Primera BravoPro Automated Optical Disc Printing... User manual

Primera CD/DVD Printer 6 User manual

Primera

Primera CD/DVD Printer 6 User manual

Primera Signature User manual

Primera

Primera Signature User manual

Popular Printer manuals by other brands

MGI JETVARNISH 3DS user manual

MGI

MGI JETVARNISH 3DS user manual

IBM InfoColor 70 user guide

IBM

IBM InfoColor 70 user guide

Astro Machine ASTROJET 2650P quick start guide

Astro Machine

Astro Machine ASTROJET 2650P quick start guide

Printronix SMARTLINE SL4M Programmer's reference manual

Printronix

Printronix SMARTLINE SL4M Programmer's reference manual

Schulze PRETREATmaker LINE Maintenance manual

Schulze

Schulze PRETREATmaker LINE Maintenance manual

Intermec PB50 user guide

Intermec

Intermec PB50 user guide

Canon i250 Series specification

Canon

Canon i250 Series specification

Gainscha INTELLIGENT Series user manual

Gainscha

Gainscha INTELLIGENT Series user manual

Printekmobile I-820 Operator's manual

Printekmobile

Printekmobile I-820 Operator's manual

Xerox Phaser 6200N specification

Xerox

Xerox Phaser 6200N specification

Epson SureColor F6470H user manual

Epson

Epson SureColor F6470H user manual

MUTOH VJ-628 ValueJet Activation guide

MUTOH

MUTOH VJ-628 ValueJet Activation guide

Printronix T8000 Administrator's manual

Printronix

Printronix T8000 Administrator's manual

Star Micronics TSP100ECO Specifications

Star Micronics

Star Micronics TSP100ECO Specifications

MUTOH ValueJet VJ-1624 installation manual

MUTOH

MUTOH ValueJet VJ-1624 installation manual

VEVOR VG-L5 user guide

VEVOR

VEVOR VG-L5 user guide

Brother HL-L5100DNT Quick setup guide

Brother

Brother HL-L5100DNT Quick setup guide

Triumph Adler CLP 4630 Instruction handbook

Triumph Adler

Triumph Adler CLP 4630 Instruction handbook

manuals.online logo
manuals.online logoBrands
  • About & Mission
  • Contact us
  • Privacy Policy
  • Terms and Conditions

Copyright 2025 Manuals.Online. All Rights Reserved.