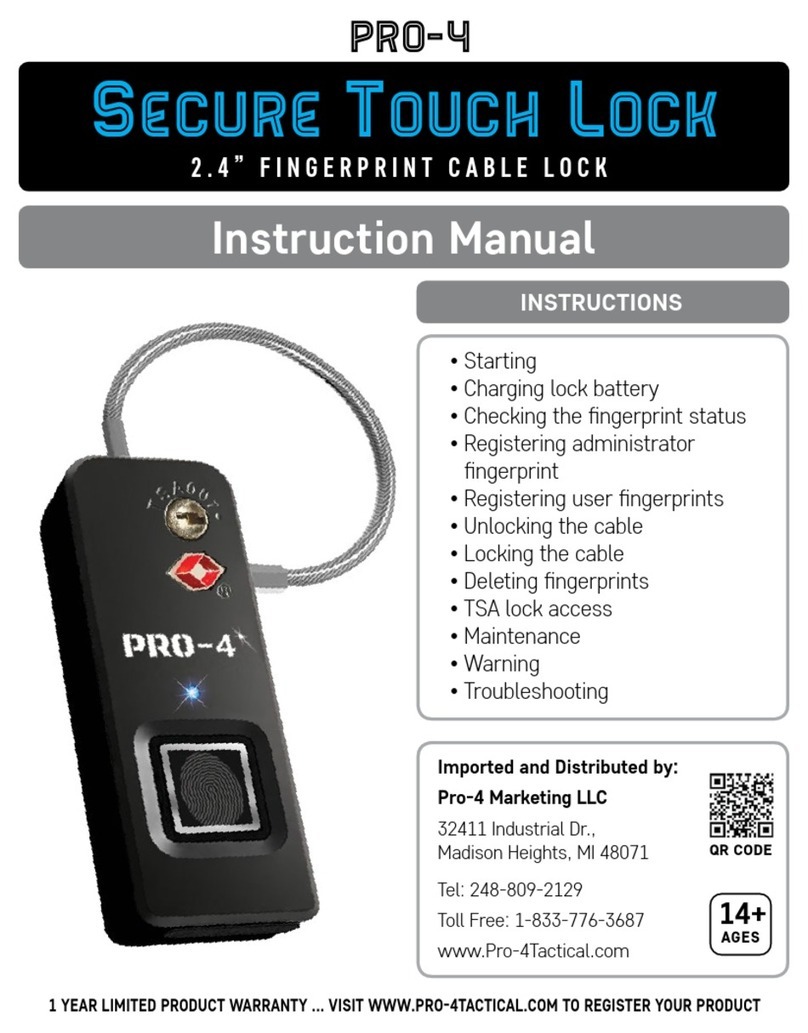
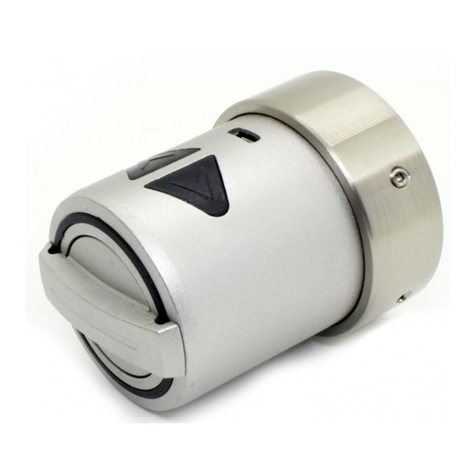
Pro-4 Tactical Secure Touch Lock User manual

• Starting
• Charging Lock Battery
• Registering the Administrator
Fingerprint
• Registering User Fingerprints
• Unlocking
• Deleting All Fingerprints
• Maintenance
• Warning
• Troubleshooting
14+
AGES
QR CODE
1 YEAR LIMITED PRODUCT WARRANTY ... VISIT WWW.PRO4TACTICAL.COM TO REGISTER YOUR PRODUCT
INSTRUCTIONS
Imported and Distributed by:
Pro-4 Marketing LLC
32411 Industrial Dr.,
Madison Heights, MI 48071
Tel: 248-809-2129
Toll Free: 1-833-776-3687
www.Pro-4Tactical.com
Pro-4
Secure Touch Lock
Instruction Manual
2.6” FINGERPRINT LOCK

Lock shackle
LED instruction
lights Fingerprint
sensor
TSA007 lock
cylinder
micro-USB
Charging interface
setting button
1.Registered fingerprint
2.Press the setting button after the red light is out.
Administrator can authorize up to 10 users and can delete all ngerprint settings on this lock. When entering
ngerprints, press ngerprints at various angles and locations on the ngerprint pad.
The Secure Touch Lock is a simple, easy-to-use ngerprint padlock. Users
can open lock quickly without a password.
When lock is in demonstration state, any ngerprint can open it. Please read
and follow complete instructions before using lock.
The battery is low if the RED light ashes 3 times while unlocking. Five
RED ashes indicate the lock cannot be used again until it is recharged.
Lock can be unlocked while charging.
WARNING: If setting button is pressed in Factory State, lock will set this as
the Admin’s ngerprint entry, even if no print is collected. Please be cautious.
STARTING
Lock shackle
LED instruction
lights Fingerprint
sensor
TSA007 lock
cylinder
micro-USB
Charging interface
setting button
1.Registered fingerprint
2.Press the setting button after the red light is out.
Lock shackle
LED instruction
lights Fingerprint
sensor
TSA007 lock
cylinder
micro-USB
Charging interface
setting button
1.Registered fingerprint
2.Press the setting button after the red light is out.
Lock shackle
LED instruction
lights Fingerprint
sensor
TSA007 lock
cylinder
micro-USB
Charging interface
setting button
1.Registered fingerprint
2.Press the setting button after the red light is out.
2. Press your nger three
times on the sensor
1. Click the bottom setting
button. BLUE light will
blink rapidly
Lock shackle
LED instruction
lights Fingerprint
sensor
TSA007 lock
cylinder
micro-USB
Charging interface
setting button
1.Registered fingerprint
2.Press the setting button after the red light is out.
A BLUE light will turn on, then turn o.
This indicates the Administrator ngerprint
has been registered successfully.
A RED light will indicate failure to
register the Administrator ngerprint.
Return to step 2.
Lock Shackle
Lock shackle
LED instruction
lights Fingerprint
sensor
TSA007 lock
cylinder
micro-USB
Charging interface
setting button
1.Registered fingerprint
2.Press the setting button after the red light is out.
1. 3 blinking RED lights indicate a
low battery; the lock cannot be
used until the USB charge cable is
connected to a power source
Lock shackle
LED instruction
lights Fingerprint
sensor
TSA007 lock
cylinder
micro-USB
Charging interface
setting button
1.Registered fingerprint
2.Press the setting button after the red light is out.
2. Open the micro-USB charge port
cover and insert the micro-USB
cable into the port. Connect the
micro-USB cable to a power source
A RED pulsing light indicates the
battery is charging.
Fingerprint
Pad
Setting
Button
Micro-USB
Charge Port
TSA007 Lock
Cylinder
LED
Instruction
Light
CHARGING LOCK BATTERY FULLY CHARGE BEFORE USING
REGISTERING THE ADMINISTRATOR FINGERPRINT
Lock shackle
LED instruction
lights Fingerprint
sensor
TSA007 lock
cylinder
micro-USB
Charging interface
setting button
1.Registered fingerprint
2.Press the setting button after the red light is out.
A solid BLUE light indicates the
battery is fully charged.

WARNING: This will delete ALL registered ngerprints, and reset the lock to factory settings. Please use caution.
Lock shackle
LED instruction
lights Fingerprint
sensor
TSA007 lock
cylinder
micro-USB
Charging interface
setting button
1.Registered fingerprint
2.Press the setting button after the red light is out.
1. Hold setting button
until RED light starts
blinking
2. Press once using
Administrator
ngerprint
Lock shackle
LED instruction
lights Fingerprint
sensor
TSA007 lock
cylinder
micro-USB
Charging interface
setting button
1.Registered fingerprint
2.Press the setting button after the red light is out.
Lock shackle
LED instruction
lights Fingerprint
sensor
TSA007 lock
cylinder
micro-USB
Charging interface
setting button
1.Registered fingerprint
2.Press the setting button after the red light is out.
BLUE light indicates entry is successful.
Fingerprints have been cleared.
RED
light indicates entry is not successful.
Fingerprints have not been cleared.
Lock shackle
LED instruction
lights Fingerprint
sensor
TSA007 lock
cylinder
micro-USB
Charging interface
setting button
1.Registered fingerprint
2.Press the setting button after the red light is out.
Lock shackle
LED instruction
lights Fingerprint
sensor
TSA007 lock
cylinder
micro-USB
Charging interface
setting button
1.Registered fingerprint
2.Press the setting button after the red light is out.
2. Press once using
Administrator
ngerprint. Light
will begin to rapidly
blink
BLUE
1. Firmly push the
setting button. The
light will ash BLUE.
and RED
Lock shackle
LED instruction
lights Fingerprint
sensor
TSA007 lock
cylinder
micro-USB
Charging interface
setting button
1.Registered fingerprint
2.Press the setting button after the red light is out.
Lock shackle
LED instruction
lights Fingerprint
sensor
TSA007 lock
cylinder
micro-USB
Charging interface
setting button
1.Registered fingerprint
2.Press the setting button after the red light is out.
REGISTERING USER FINGERPRINTS
Lock shackle
LED instruction
lights Fingerprint
sensor
TSA007 lock
cylinder
micro-USB
Charging interface
setting button
1.Registered fingerprint
2.Press the setting button after the red light is out.
Additional user ngerprints can only be registered after the Administrator ngerprint has been set.
Lock shackle
LED instruction
lights Fingerprint
sensor
TSA007 lock
cylinder
micro-USB
Charging interface
setting button
1.Registered fingerprint
2.Press the setting button after the red light is out.
3. New users; press nger
three times on the pad.
The blinking BLUE light
will turn solid after
each press
UNLOCKING
Lock shackle
LED instruction
lights Fingerprint
sensor
TSA007 lock
cylinder
micro-USB
Charging interface
setting button
1.Registered fingerprint
2.Press the setting button after the red light is out.
1. Press a registered
ngerprint to the
ngerprint pad
Lock shackle
LED instruction
lights Fingerprint
sensor
TSA007 lock
cylinder
micro-USB
Charging interface
setting button
1.Registered fingerprint
2.Press the setting button after the red light is out.
Lock shackle
LED instruction
lights Fingerprint
sensor
TSA007 lock
cylinder
micro-USB
Charging interface
setting button
1.Registered fingerprint
2.Press the setting button after the red light is out.
A BLUE light indicates a
successful entry and the
lock will open.
A RED light indicates an
unsuccessful entry and
the lock will not open.
DELETING ALL FINGERPRINTS
A BLUE light will turn on, then
turn o. This indicates the
Administrator ngerprint has
been registered successfully.
A RED light will indicate the
ngerprint has not been
registered.
Repeat steps if you need to add more users. In order to distinguish administrator from users, a
PURPLE light during unlocking indicates the administrator ngerprint, while BLUE indicates users.
A PURPLE light indicates a successful entry
has been made using the Administrator
ngerprint and the lock will open.

MAINTENANCE
• Clean Secure Touch Lock with a clean, dry cloth as needed
• Lubricate moving parts with standard consumer lubricant as needed
• Please only use provided charge cable to charge lock. Recommended charger output: DC5V 450mA. Light
will dim RED while charging, and will turn solid BLUE when complete
• Stop using lock if it starts smoking, starts smelling, is overheated, discolored, or deformed
• Do not use the lock in a violent manner
• If lock is left unused for a period of time, battery will drain and must be recharged
• Do not use if lock is thoroughly wet, electric shock can occur
• Children must use this lock with parental guidance. Recommended for Ages 14+
• If your padlock behaves abnormally, reset the lock. Press any registered User or Administrator ngerprint
onto the sensor; press the setting button after the RED light turns o
• See www.Pro-4Tactical.com for Warranty and Replacement Information
WARNING: This product can expose you to chemicals including Benzene and Ethylbenzene which are known to the
State of California to cause cancer. For more information, go to www.p65Warnings.ca.gov
WARNING
TROUBLESHOOTING
Other Pro-4 Tactical Lock manuals
Popular Lock manuals by other brands
Kwikset
Kwikset Smartcode 914 installation guide

Martindale Electric
Martindale Electric LOK6 Series instruction manual
CODELOCKS
CODELOCKS Pushbutton 500 Series Installation insrtuctions

Bewator
Bewator Codoor CD3500 Installation and user guide

Amadas
Amadas ADSL-1001 User and reference manual
Gelikom
Gelikom SK1 instruction manual

Burg Wächter
Burg Wächter TRSE 6000 FS user manual
Miles Nelson
Miles Nelson MN9000 installation instructions
Assa Abloy
Assa Abloy 118F A71 Series Mounting instructions
Aycorn
Aycorn AY-L1-10-UK instruction manual

NUKI
NUKI FOB installation guide
FUHR
FUHR autotronic 834 Installation, operation and maintenance instructions
