progeo Tekna Tilt User manual

TEKNA TILT 1
TEKNA
TILT
USER’S MANUAL
ENGLISH
REV.1 –30-03-10/ENG

TEKNA TILT 2

TEKNA TILT 3
Index:
1.0
General information
4
1.1
Introduction
4
1.2
Guide to symbols
4
1.3
General characteristics of the wheelchair
4
1.4
Use
5
1.5
General advises
5
2.0
Safety
5
2.1
Movements: getting in and out of the wheelchair
5
2.2
Tilt in space
6
2.3
Driving the wheelchair
7
2.4
Stability of the wheelchair
9
2.5
Tyre pressure
9
2.6
Quick release axles
11
2.7
Seat tubes check
11
2.8
Backrest opening check
11
2.9
Footplate
12
2.10
Calf strap
13
2.11
Desk armrests
13
2.12
Fasteners
14
2.13
Wheelchair lifetime
14
2.14
Avoiding accidents
14
3.0
Loading the wheelchair
14
4.0
General description of the wheelchair parts
17
16
5.0
Using the wheelchair
17
5.1
Use
17
5.2
Opening system
17
5.3
Closing system
18
5.4
Lifting the wheelchair
20
5.5
Quick release rear wheels
20
5.6
Using the brakes
21
5.7
Tilting the seat
22
5.8
Safety belts and harness
23
6.0
Adjustments
24
6.1
General
24
6.2
List of parts in standard set up
25
6.3
Backrest height adjustment
27
6.4
Backrest angle adjustment
27
6.5
Seat depth adjustment
28
6.6
Seat height adjustment
28
6.7
Front frame angle
29
6.8
Footplate height adjustment
32
6.9
Footplate adjustment
32
6.10
Brake adjustment
35
6.11
Rear wheel adjustment
36
6.12
Backrest upholstery adjustment
37
6.13
Armrest adjustment and removal
38
6.14
Anti tip wheels
39
7.0
Accessories
40
7.1
Anti tip wheels
40
7.2
Transit wheels
40
7.3
Tipping aid
41
7.4
Drum brakes
41
7.5
Other accessories
41
8.0
Maintenance
42
8.1
Replacement of worn parts
43
8.2
Inspection of components
45
8.3
Troubleshooting guide
45
9.0
Technical data
46
10.0
Warranty
47
11.0
Certification
48

TEKNA TILT 4
1.0 Informazioni generali
1.1 Introduction
At RehaTEAM® constant research into quality and creativity are the
cornerstone of our business. After many years in the industry we
remain genuinely focused on providing total customer satisfaction
while bringing innovative style and design to every one of our high-
quality wheelchairs.
We have become industry leaders by making excellence and service
our top priorities. All of our models are built from carefully selected
materials and provide multiple configurations allowing full
personalization. We perform continuous, meticulous
quality control and testing in order to offer the highest possible
quality combined with fast, reliable service.
We acknowledge that we owe our success to our clients as well as
to those who have believed in us and helped us quality is the best
differentiator.
1.2 Guide to symbols
In this manual you will often see the following symbols which are
used to highlight points which are of particular interest or importance
This symbol indicates actions that must be avoided at all times.
This symbol indicates that particular care should be taken
about a procedure or note in order to avoid causing harm to
people or things, or breakages and dangerous situations in
general.
.
General information for a better use of the wheelchair.
Essential tool: a flat screwdriver is necessary to perform this
procedure.
Essential tool: a pozidrive screwdriver is necessary to perform this
procedure.
Essential tool: a 6mm spanner is necessary to perform this
procedure.
Essential tool: a 6mm Allen key is necessary to perform this
procedure.
.
.
1.3 General characteristics of the wheelchair
The Progeo® TEKNA TILT wheelchair presents a new concept in
tilting and folding frame.
Simplicity and maximum personalization are but a few of the
important characteristics of this model. TEKNA TILT is a tilting
wheelchair with high precision crossbar folding system. Its
backrest folding system enrich and complete this new PROGEO
project. In TEKNA TILT you can find convenience ,functionality, as
well as rigidness, stability and linearity matched to an accurate
design research. The great possibility to personalise and adapt the
wheelchair, also guaranteed by the wide range of accessories
available, makes this model suitable for both indoor and outdoor
use.
6
6

TEKNA TILT 5
1.4 Use
The wheelchair TEKNA TILT is a manual propelled
model. It is usually pushed from the backrest handles by
an attendant, but it can also be propelled, by means of
the hand rims, by the user.
Thanks to its wide range of accessories and possible
configurations, the wheelchair can be safely used both
indoor and outdoor. It serves for changing the seat
inclination very easily so as to move the pressure areas
the user’s body is leant on. The presence of an attendant
is always necessary due to the serious pathologies of
users often unable to physically move with their own
strength, but also because the tilt-in-space function can
only be operated by an attendant.
We discourage use over hilly, particularly soft, sandy or
uneven ground, slopes exceeding the recommended
gradient and acid environments.
Its compact size and structure make the TEKNA TILT
wheelchair ideal for use by both child and adult.
1.5 General advises
Before using the wheelchair we recommend that you
carefully read Chapter 2.0 “Safety” and Chapter 5.0
“Using the wheelchair,” which are essential for safe use
of the wheelchair.
2.0 Safety
The Progeo® TEKNA TILT wheelchair is a medical
device and therefore it should not be lent to other
users even for short periods of time.
It is forbidden to make any unauthorised
modifications or using un-approved parts may
change the wheelchair structure and create unsafe
condition as well as possible harm to the chair and
occupant.
T H E M A N U FA C T U R E R W I L L A C C E P T
NO R E S P O N S I B I L I T Y I N C A S E S O F
N O N - COMPLIANCE WITH THE INSTRUCTIONS
OR RECOMMENDATIONS AS SET OUT IN
THIS MANUAL AND ANY SUCH ACTIVITY WILL
RESULT IN THE IMMEDIATE CANCELLATION OF
THE MANUFACTURER'S WARRANTY .
2.1 Movements: getting in and out of the
wheelchair
While getting into or out of the wheelchair do not place
your feet on the footplate. This could result in the
wheelchair tipping up, possibly causing harm both to the
chair and to the occupant.
Getting in and out of the wheelchair must always be done with
extreme care and caution, even by experienced users, and must be
performed only after receiving instruction from specialised and fully
trained personnel
To make the operation easier, it is necessary to tilt the seat
at its minimum inclination (see chapter 2.2 “Tilt in space”)

TEKNA TILT 6
All of these actions should in any case be performed based
on the user’s particular pathology.
The general rules to respect while getting in or out of the
wheelchair safely are:
Ensure the wheelchair is parked on a solid, flat or regular
surface. Do not get in or out of the wheelchair while on hills
or uneven ground which could render the wheelchair
unstable and cause the occupant to fall and/or the
wheelchair to overbalance.
The brakes should be engaged (see chapter 5.6 “Using the
brakes”)
Get the user’s feet off the footplate (see chapter 2.8
“Footplate”) when getting out, and bring them close to the
footplate when getting in.
Lean on the wheelchair and where possible on a stable
object nearby. Use the force of your arms to raise and move
your body (see fig. 1)
The attendant (see fig. 1) should take care of controlling the
movements with relation to the user’s pathology
Should the transfer be done sidewardly, we advise to
remove the armrest on the side of the transfer. (see
chapter 6.14 “Armrest adjustment and removal”)
While getting in or out of the wheelchair never lean
or sit on the clothes protector. It could bend or break,
possibly resulting in injury.
2.2 Tilt in space (figures 2, 3 e 4)
The tilt in space of the TEKNA TILT works with two independent
gas springs. Thus, it is necessary that the attendant presses the
two tilt in space levers at the same time.
The two controlled release gas springs helps the seat in its way to
the minimum inclination, while they slow the tilting movement down
in the opposite direction where the user’s weight tends to
accelerate it. This helps to easily control the tilt in space movement
speed in both directions.
The tilt in space movement stops when levers are released. At any
seat inclination point the wheelchair can be used incomplete safety.
The anti tip wheels, provided as standard in this model, work as
emergency device and they guarantee safety in case of a sudden
movement of the user (for instance a contraction) which might lead
the wheelchair to tip back.
Fig. 1

TEKNA TILT 7
The tilt in space function can not be performed if
only one lever is pressed. In fact the not working gas
spring inhibits the function. We strongly discourage
to force the tilt in space function in order to avoid
damage to the gas springs or to the wheelchair.
2.3 Driving the wheelchair
The attendant plays an important role since he/she drives the
wheelchair and carries out the tilt in space operation.
Driving the wheelchair does not arise particular difficulties thanks to
its fluency characteristics and the push handles position. However,
more attention should be taken when driving the wheelchair
outdoor.
The wheelchair can also be propelled by the user by means of the
hand rims on the rear wheels. However, due to the rearward
position of the rear wheels, this model is not suitable for long
distance when propelled by the user.
Avoid those holes that may lead the wheelchair to
overbalance and consequently cause harm to the
user and to the wheelchair.
Driving the wheelchair along slopes may involve
potential risks.
While driving along slopes it is highly suggested (see
chapters 7.4 “Drum brakes”) to assure an optimum
parking stability in case of a stop (even when driving
uphill), but also to better control the speed.
Fig. 2
Fig. 3
Fig. 4

TEKNA TILT 8
While driving downhill, tilt the seat as much as
necessary to prevent the user from slipping out of
the wheelchair; while driving uphill, we suggest to
turn the anti tip wheels so as to let them work as
emergency device (see chapter 6.14 “Ant tip wheels).
The maximum gradient the wheelchair can safely be
used is6%(3°).
Never leave the wheelchair on a slope without
engaging the brakes.
Going over steps (see figure 5)
Going over slopes or steps requires such a procedure to make this
operation safe. We suggest the attendant carrying out the following
steps with the seat tilted approximately 1/3 of its maximum
inclination. In fact, beyond that point the push handles could be so
low as to make this operation more difficult for the attendant.
Going down a step:
Turn the anti tip wheels inwardly (see chapter 6.14 “Anti tip
wheels”.
Drive the wheelchair as close as possible to the edge of the
step.
Firmly grip the push handles and exercise a downward force
so as to lift the front wheels.
Keep the wheelchair in this position and carefully drive it down
the step.
After the descent, tip the chair forward so that the front wheels
are once again touching the ground
Going up a step:
Move backwards towards the step so that the rear wheels of
the wheelchair touch it.
Grip the rear handles of the wheelchair tightly and pull hard
while keeping the wheelchair tilted (with the front wheels
raised in order to prevent the occupant from slipping out of the
chair) until the rear wheels are over the step.
Keeping the wheelchair tilted, move it away from the step
enough to allow the front wheels to touch the same level
ground.
Fig.5

TEKNA TILT 9
While going over steps, stairs, curbs, etc., deal with
the situation very carefully.
Never drive the wheelchair over steps or obstacles
over 20 cm. If particularly difficult obstacles or in
case of stairs with more than one step, it could be
necessary a second attendant who should take hold
and control the front side of the wheelchair and make
the operation both easier and safer.
In order to help the attendant to tilt the wheelchair we
advise the use of the tip-back assistance device which is
supplied as an accessory to this model (see chapter 7.2
“Tipping aid”).
2.4 Stability of the wheelchair
The stability of the wheelchair has to be such to prevent its tipping
back even the most disadvantageous situation on this point of view
that is with maximum seat inclination.
The wheelchair is originally assembled and delivered with its rear
wheels set to a safety position.
However, some parameters that are strictly related to the user (for
instance a backrest angle particularly open, the user’s weight, etc.)
can affect the stability of the wheelchair.
In such case it will be necessary to move the rear wheels backward
(see chapter 6.11 “Rear wheel adjustment”).
The stability of the wheelchair with its seat at maximum inclination
is considered as such in static situation. In fact, should the user be
subjected to frequent or sporadic spasms or contraction and if
these occur while the seat is at its maximum inclination, the stability
of the wheelchair may not be enough.
This is why the wheelchair is always provided with two anti tip
wheels (see chapter 6.14 “Anti tip wheels”) that will work as
emergency device against the risk of tipping back.
2.5 Tyre pressure
In order to guarantee consistent, precise running and braking, it is
necessary to ensure that the tyres are correctly inflated.
Remove the plastic valve cover on the valve that is found on
the rim of the rear wheel (see fig.6)
Use a compressor to bring the pressure to the correct level
(see table 1)
Screw up the plastic valve cover.
Check the tyre pressures weekly using “table 1” as a
guide.
Incorrect inflation of the tyres (especially if too low)
causes incorrect functioning of the brakes and the
wheelchair may not stop (see chapter 6.10 “Brake
adjustment”).

TEKNA TILT 10
Fig.6
A correct tyre pressure makes the wheelchair much
more fluent and easier to move and control
To inflate the tyres always use a compressor with a
gauge. Do not use hand pumps or other systems.
Do not exceed the pressure indicated in the pressure
table as the inner tube or the tyre may get damaged.
Pay particular attention to type of tyre fitted, as
shown in “table 1”.
Table 1: rear wheel tyre pressure
TYRE
PRESSURE
High pressure
7 BAR
700 kPA
High pressure profile
7 BAR
700 kPA
Marathon Plus
10 BAR
1000 kPA
Anti puncture Mako
Does not require inflation
Low pressure 300mm
2,4 BAR
240 kPA
Low pressure 400mm
2,8 BAR
280kPA
Solid 300mm
Does not require inflation
Solid 400mm
Does not require inflation
The anti puncture tyres does not require inflation. This
type of tyre needs less maintenance and eliminates the
costs and inconvenience due to repair or replacement of
the inner tube. However, during normal use, they are less
fluent than traditional tyres
2.6 Quick release axles
After each procedure carried out on the rear wheels, ensure that
the quick release axles are well inserted (see fig.7) (see chapter 5.5
“Quick release rear wheels”).
Check the correct functioning of the quick release axle without any
person sitting on the chair.
Disengage the brakes. With one hand on the backrest tube, lift the
chair a few centimetres on the side where the rear wheel will be
removed.
Take hold of the wheel hub with your fingers laced through one or
two spokes and pull and push hard (as indicated by the arrow) in
order to ensure that the wheel is properly fastened.
Checking that the rear axles are correctly positioned is one of the
regular maintenance procedures that should be carried out.

TEKNA TILT 11
If the axles are not correctly placed and fastened
they may work loose during normal use and could
result in the wheelchair overbalancing and possibly
causing injury to the patient.
2.7 Seat tubes check
After opening the
wheelchair (see
chapter 5.2 and 5.3
“Opening/closing
system”), carefully
check that the seat
tubes “A” are well
leant on the supports
“B” on the frame (see
fig.8)
2.8 Backrest opening check
Before using the wheelchair, carefully check that the backrest is
locked (the hook “A” has to be well inserted). With one hand hold
the wheelchair on the front frame and with the other hand on the
handle of the backrest, then try to move the backrest frontward and
backward to verify whether it is correctly locked (seefigure9).
Carry out the same operation on both backrest handles.
2.9 Footplate
For the model TEKNA TILT four kinds of footplates are available:
Double plastic footplate (STD) (fig. 10)
One piece flip-up plastic footplate (fig. 11)
One piece flip-up aluminium footplate (fig. 12)
One piece flip-up carbon fibre footplate (fig. 13)
Fig. 7
A
B
Fig.8
Fig. 9
A

TEKNA TILT 12
Should the wheelchair be equipped with double footplate (see fig.
10), make sure that both plates are totally down before using the
chair.
With one piece plastic flip-up footplate (fig. 11) make sure that the
locking tooth “A” is properly inserted in the slot “B”.
With one piece aluminium (figure 12) or carbon fibre (figure 13)
make sure that the locking tooth “A” is properly inserted in the bed
“B” (figure 13a).
To prevent the user’s feet from sliding backward it is
necessary using the calf strap (see charter 2.10 “Calf
strap”).
After each operation check the footplate is always in
the correct position for use.
2.10 Calf strap
In some cases, depending on the diameter of the front wheel and
the width of the wheelchair, the front wheel, as it rotates for turns
etc may come into contact with the occupant's heel.
In order to avoid any such contact (which could result in the chair
overbalancing), the chair is supplied with a calf restraining belt
which should be adjusted so that the occupant's feet do not
come into contact with the front wheels of the chair at any time
(see fig. 14).
Fig. 10
A B
Fig. 11
Fig.13a
Fig. 13
Fig. 12
A B

TEKNA TILT 13
2.11 Desk armrests
The model TEKNA TILT is provided, as standard, with the Desk
armrests(figure 15).
The Desk armrests are particularly useful for people with
reduced mobility of their hands or arms and for those with
limited upper body movement who require better stability
once seated in the wheelchair.
The armrests must not be used to carry the
wheelchair or as a support.
Do not use the armrest as hand hold to raise the
wheelchair; this may cause the armrests to come off
from their supports and in turn cause harm to the
user and to the wheelchair
Do not use the armrest as supports when making
transfer .We indeed recommend to swing the armrest
away on the side of the transfer so as to help the
operation.
2.12 Fasteners
After each maintenance cycle ensure that all nuts, bolts
and screws are correctly tightened as they may loosen
during normal daily use.
We recommend checking that all hardware is
correctly tightened at least once a month.
If necessary consult an authorized PROGEO dealer
or technician.
Fig. 15
Fig. 14

TEKNA TILT 14
2.13 Wheelchair lifetime
Under normal daily use the PROGEO® wheelchair has a lifetime
of 5 years provided that it receives careful maintenance at the
correct intervals.
The lifetime will considerably increased if the wheelchair is used
only indoors or not on a daily basis.
2.14 Avoiding accidents
Movements
Avoid sudden, jerky movements during use of the wheelchair as
this could cause it to overbalance.
If obstacles are run into, avoid sudden movements (such as abrupt
braking).
The risk of skidding increase on irregular or damp ground.
Going over obstacles as steps and ramps has to be done carefully
(ask an assistant for help ).
For greater safety, when moving across inclined or potentially
dangerous terrains it is recommended the presence of an attendant
behind the wheelchair.
Speed
Always adjust your speed with relation to the type of terrain and
conditions. As a general rule, we advise a constant, regular speed
avoiding sudden accelerations or changes in direction.
Brakes
The parking brakes have been designed to hold the
wheelchair stable when it is stationary.
For safety reasons we do not recommend using the
parking brakes while the wheelchair is in motion (see
chapter 6.10 “Brake adjustment”)
When using the brakes a great care should be taken
to avoid injury to the hands or fingers.
The wheelchair can also be provided, on request as accessory for
this model, with drum brakes. With this kind of brakes, the
attendant can easily brake the wheelchair while it is in motion; the
attendant can also better control the wheelchair speed especially
when driving along slopes.
The drum brakes can also work as parking brakes when the lock
lever is engaged (see chapter 7.4 “Drum brakes”)..
3.0 Loading the wheelchair
There is no single best way to load the wheelchair in a vehicle.
The kind and level of the patient disability (his/her ability to control
his/her upper body, arm and hand movements),physical strength
(for an old person or a child the operation may result too hard) and
the kind of vehicle that will be used are all factors.
It is clear that all this factors are too many to give a single precise
procedure to fit all cases, therefore this information has to be taken
as general advices.
Perform all car loading activities with extreme care
and only after receiving instruction from specialised
service personnel with our authorised dealers.

TEKNA TILT 15
Never transport in a vehicle an occupant sitted on
the wheelchair as these wheelchairs are not
designed for this kind of use.
If the occupant has to be transported while seated in
the chair you are reminded that the wheelchair in its
standard configuration is not supplied with seatbelts.
Any safety belts for vehicle transport must be
installed by specialised personnel.
Loading the wheelchair in the car
(see figures16, 17, 18, 19, 20, 21)
The lightness and reducibility of the TEKNA TILT are very important
because they allow the wheelchair to be moved easily and to be
located even in little room.
The examples hereafter reported shows a wheelchair
equipped with a complete posture system (rigid backrest,
headrest and cushion). The wheelchair is provided as
standard with a backrest upholstery (see chapter 6.12
“Backrest upholstery adjustment”) and not with a
complete posture system.
Tilt the seat at its minimum inclination (see chapter 2.2 “Tilt in
space”)
Remove the rigid backrest, cushion and armrests.
Fold the wheelchair (see chapter 5.3 “Closing system””).
To further reduce the encumbrance and weight of the
wheelchair, you can also remove the rear wheels (see chapter
5.5 “Quick release rear wheels”).
Take hold of the chair with one hand on the front frame and
the other hand on the rear of the frame (figures 16, 17) so as
to balance the weight of the wheelchair and make lifting it
easier
Load the wheelchair on boot of the car and then all the parts
that have been removed (figures 18, 19)
Fig. 16 Fig. 17
Fig. 18 Fig. 19
Fig. 20 Fig. 21

TEKNA TILT 16
Following the same procedure above described, it is even possible,
thanks to its reduced encumbrance, to load the folded wheelchair
leant on a side between the car front and rear seats as shown in
figure 20.
On larger cars or vans, the wheelchair can also be loaded unfolded
an with the rear wheels on but only with the backrest folded (see
figure 12).
4. Generaldescriptionofthewheelchairparts
General description(figure 22)
1Elevating footrest plate
2 Calf support (elevating footrest)
3 Elevating footrest
4 Seat with velcro straps for securing the seat cushion, supplied with a handy
pocket for personal belongings (the cushion is not provided with the wheelchair as standard).
5 Armrest depth adjustment plate
6 Desk armrest
7 Padded, breathable back support, fully adjustable with velcro straps
8 Backrest aluminium tube –height adjustable
9 Gas spring command lever
10 Seat frame
11 Backrest support
12 Anti tip wheel support
13 Wheelchair base frame
14 Rear wheel plate
15 Anti tip wheel
16 Quick release axle
17 Rear wheel -300mm -400mm - 22” - 24”
18 Brakes: -bent lever -straight lever
-folding extended lever
19 Cross brace
20 Plate for rear height adjustment and tilt in space
21 Gas spring
22 Caster -6” PUsolid rubber
- 6” pneumatic
-7” PU solid rubber
23 Front fork and support
24 Front frame
25 Footplate:
- double in plastic -one piece flip-up in plastic
-one piece flip-up in aluminium - one piece flip-up in carbon fiber
26 Footplate tubes with pre drilled holes for height adjustment
27 Calf strap
5.0 Using the wheelchair
TEKNA TILT
Fig. 22

TEKNA TILT 17
5.1 Use
The TEKNA TILT is a tilting wheelchair with high precision folding
crossbar system. Its new standards of convenience, adaptability
and manoeuvrability combined to its main function makes it ideal
for daily use both indoor (flats, gyms, schools, libraries, etc.) and
outdoor (roadways, pavements, courtyards, etc.).
During the day-to-day use of the wheelchair the occupant
could encounter rough or irregular grounds (such as
gravel, holes, etc) or slippery terrain (wet, sandy, dusty or
oily ground etc). In these cases and in all other cases
where the use of the wheelchair could be difficult or
even dangerous (both for the occupant and/or for the
assistance), we recommend using extreme care and
attention combined to smooth motion avoiding
sudden braking or acceleration (see chapter 2.0
“safety”).
In order to prevent overbalancing, the maximum
gradient recommended for this wheelchair is 3° (6%)
(see chapter 2.3 “Driving the wheelchair”).
The maximum load for the model Tekna Tilt is 125kg.
5.2 Opening system (figures 23, 24, 25, 26)
The examples hereafter reported show a wheelchair
equipped with a complete posture system (rigid backrest,
headrest and cushion) which is not provided as standard
for this wheelchair.
While opening the wheelchair, take great care not to
trap your fingers between the seat profile and the
frame tube.
Opening the backrest:
With the wheelchair completely folded, take a firm grip with one
hand on the backrest handle (see figure 23) and pull the backrest
tube backwardly until a clear click indicates that it is locked in the
Fig.23 Fig. 24

TEKNA TILT 18
position of use (figure 24). Repeat the same operation for the other
tube.
In case the rigid backrest support creates interference
with the seat profiles, hold the seat profiles with one hand
and keep them close to each other; with the other hand
take hold of one push handle and, while slightly pushing
it outwardly, raise the backrest tube over the seat
profiles. Proceed in the same manner for the other side.
Finally pull the backrest tubes until the locked position.
With crossbar open (figure 25) it is enough to pull both backrest
tubes until the locked position.
Should the armrests create interference with the
backrest tubes during the opening procedure, they
can easily removed (see chapter 6.13 “Desk armrest
adjustment and removal”) . Such operation is always
suggested.
Unfolding the crossbar:
To open the wheelchair, lean the palm of your hand on at the front
of one seat tube (as shown in figure 26) and push it down.
To make it easier, raise the wheelchair on one side so as
to avoid the friction of the rear wheel on the ground. To
do that grip one backrest handle and raise the chair a few
centimetres.
Check the seat tubes are leant on the frame tubes (see chapter 2.7
“Seat profiles insertion check”) and lower the footplate.
5.3 Closing system (figures 27, 28)
Closing the crossbar:
Remove the posture system.
Raise the footplate
With your hands in the middle at the back and in front of the
seat cloth as shown in figure 27, pull the seat cloth up.
Fig. 25
Fig. 26

TEKNA TILT 19
Before getting the two seat profiles close to each other, we suggest
to set the seat cloth within them and looking downward as shown in
figure 28.
Folding the backrest:
While folding the backrest, take great care not to trap
your fingers between the backrest tube and the
armrest.
To fold the backrest take grip on the push handles.
Pull the lock pin up (figure 29) and guide the backrest tube down
taking grip on its handle (figure 30). Repeat the same operation on
the other side.
It is possible to fold the backrest both with the crossbar open (figure
29) and with crossbar folded (figure 30). In both cases we suggest
to remove the armrest to avoid any interference with the rigid
backrest supports.
Complete closure of the wheelchair:
to fold the wheelchair completely , first fold the crossbar and then
the backrest. (see previous paragraphs of this chapter).
Raise the footplate before folding the wheelchair. The
manufacturer is not responsible for damages due to
neglecting this procedure
Fig. 27 Fig. 28
Fig. 30
Fig. 29

TEKNA TILT 20
To reduce the encumbrance at most, we suggest to fold
the wheelchair with its seat at the minimum inclination
(see charter 5.7 “Tilting the seat”) .
The crossbar can only be folded if the backrest is in the
upright position. The backrest can be folded with
crossbar both open and folded
The minimum encumbrance can be obtained by removing the rear
wheels, the armrests and, if the wheelchair is equipped with
removable footplates, the footplates (figure 31).
5.4 Lifting the wheelchair (figure 32)
The wheelchair can be lifted and transported in many
different ways. However it is advisable to fold the
wheelchair to facilitate this action. Remove the rear
wheels (see chapter 5.5 “Quick release rear wheels”) to
reduce the weight and close the backrest (see chapter
5.3 “Closing system”) in order to have a better balance
when lifting the wheelchair (see chapter 5.5 “Complete
closure of the wheelchair”).
Take hold of the chair with one hand on the front frame
and the other hand on the rear of the frame so as to
balance the weight of the wheelchair and make lifting it
easier (figure 32).
We suggest to tilt the seat at the minimum inclination
(see charter 5.7 “Tilting the seat”) .
5.5 Quick release rear wheels (figure 33)
On this model it is possible to remove the rear wheels quickly and
easily, thereby reducing the size of the wheelchair. This can be
particularly useful when the wheelchair needs to be loaded into a
car or place for storage or driven through a narrow passageway if
the wheelchair is provided with transit wheels (see chapter 7.1
“Transit wheels”)
Fig. 31
Fig. 16
Other manuals for Tekna Tilt
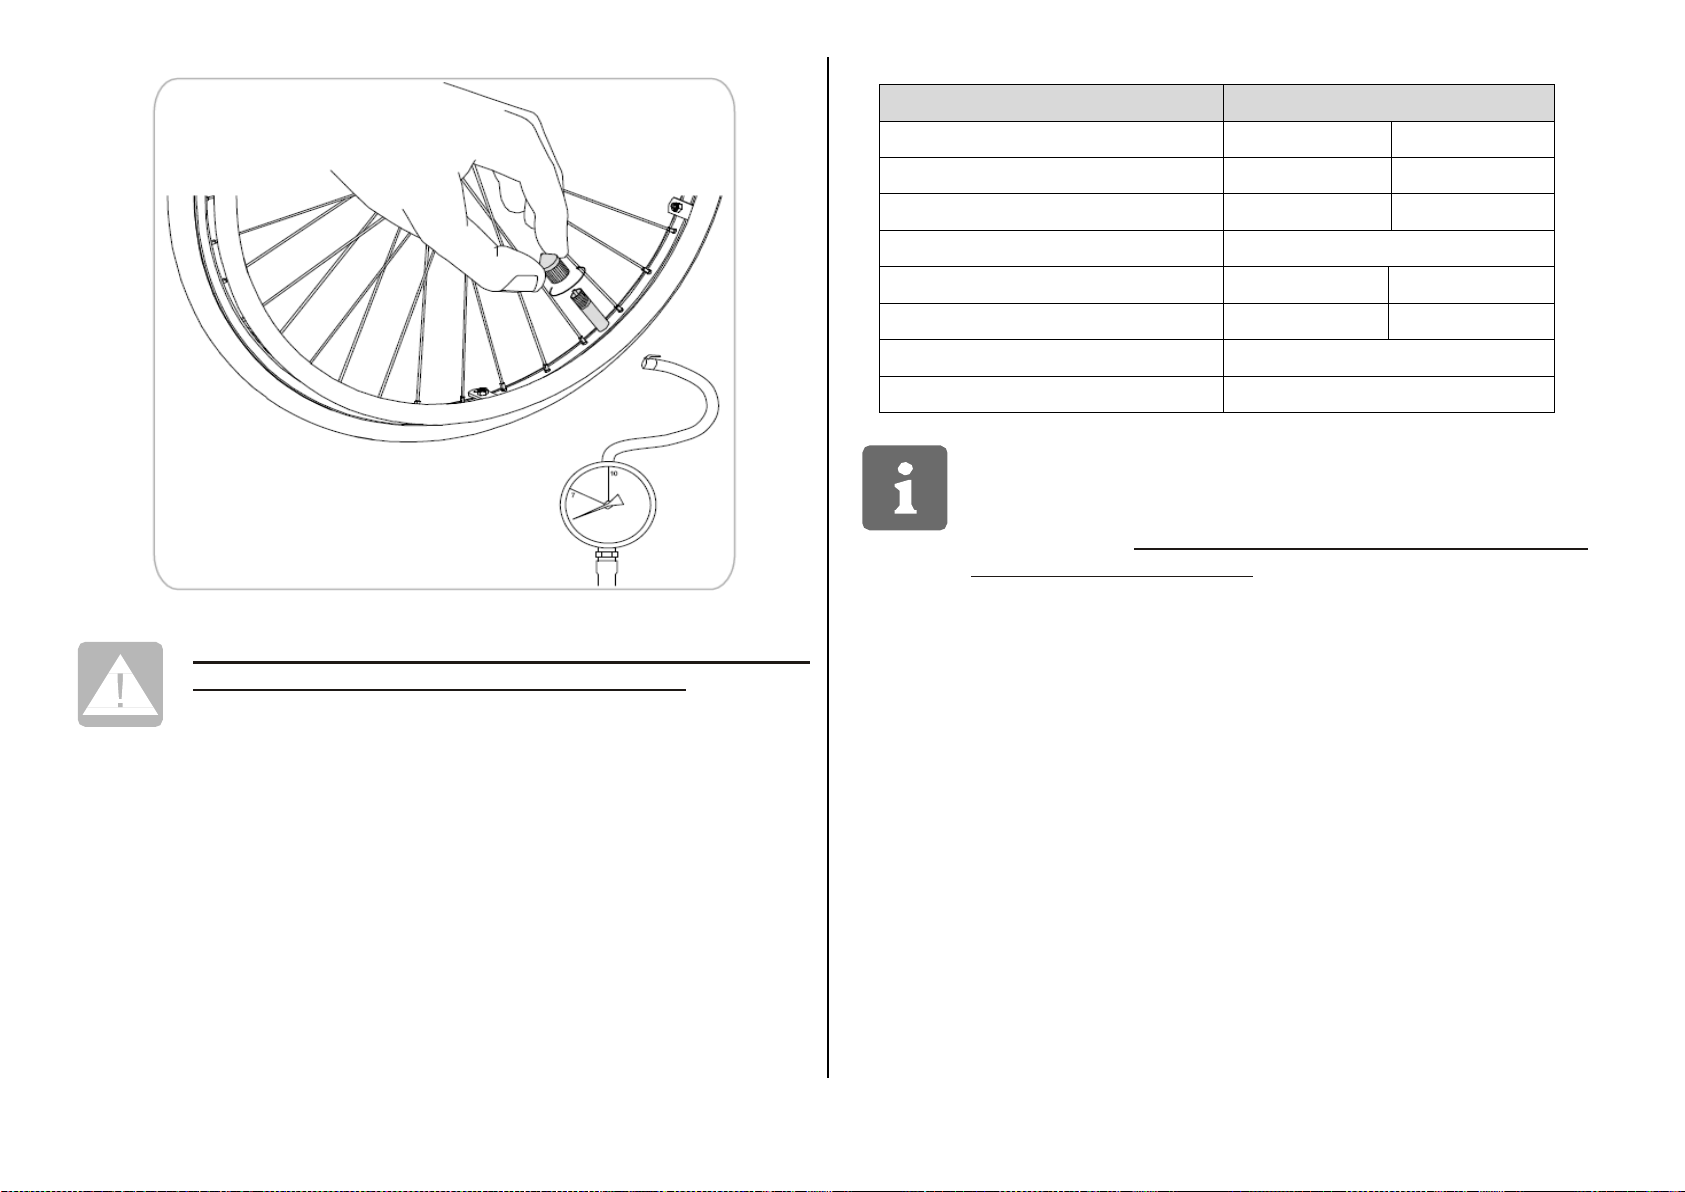
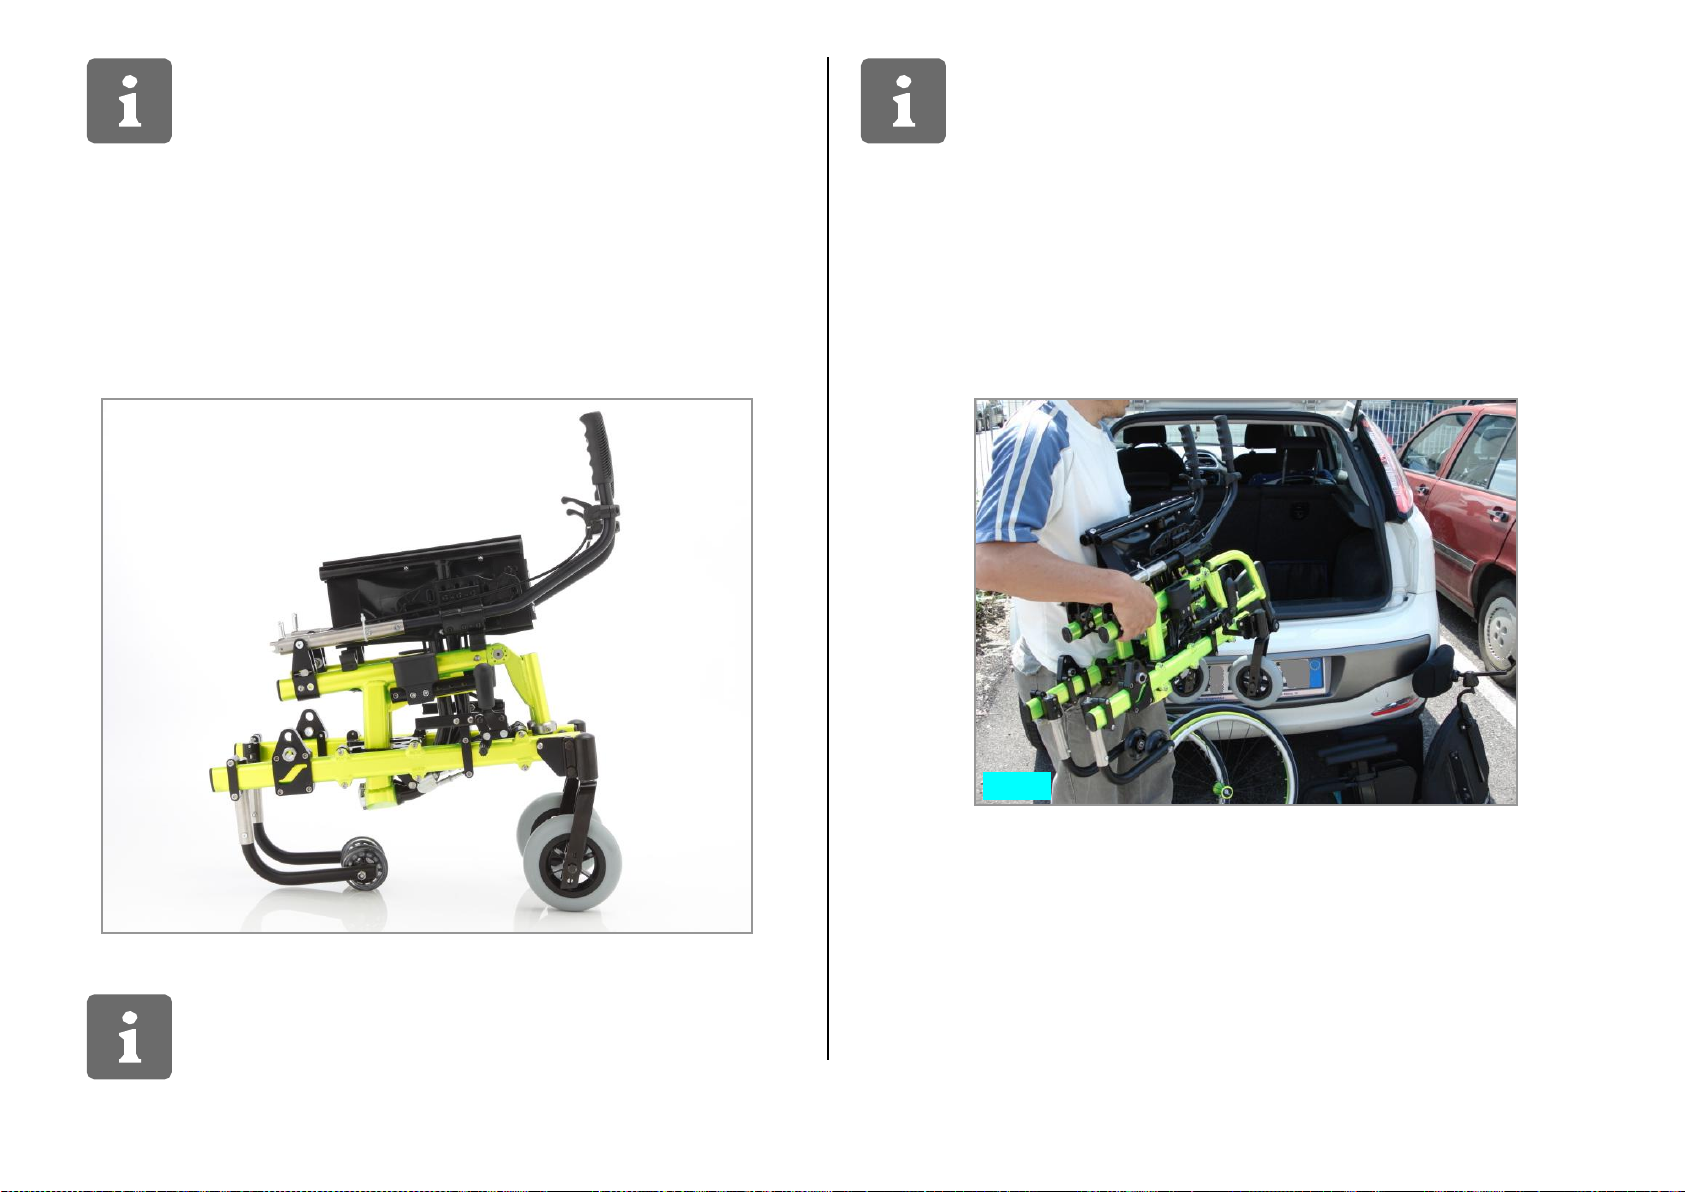
1
Table of contents
Other progeo Wheelchair manuals

progeo
progeo JOKER R2 User manual

progeo
progeo ego User manual

progeo
progeo JOKER ENERGY User manual

progeo
progeo Exelle User manual

progeo
progeo ego User manual

progeo
progeo Basic Light User manual

progeo
progeo YOGA User manual

progeo
progeo JOKER JUNIOR 2.0 User manual

progeo
progeo Tekna Tilt User manual

progeo
progeo Basic Light User manual

progeo
progeo VARIOTRONIC User manual

progeo
progeo MOTOTRONIK User manual

progeo
progeo Joker User manual

progeo
progeo Exelle User manual

progeo
progeo Physio Air User manual

progeo
progeo DUKE User manual

progeo
progeo EGO Series User manual

progeo
progeo TEKNA TILT 2.0 User manual

progeo
progeo Exelle User manual

progeo
progeo JOKER R2 User manual