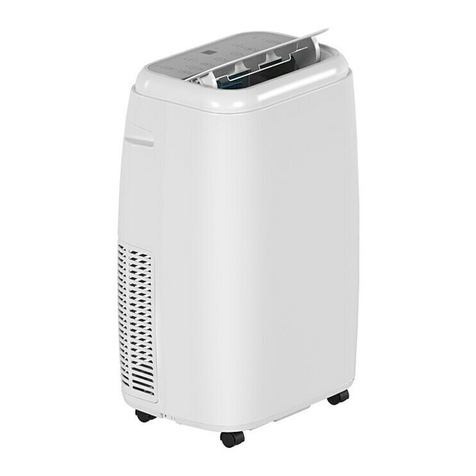
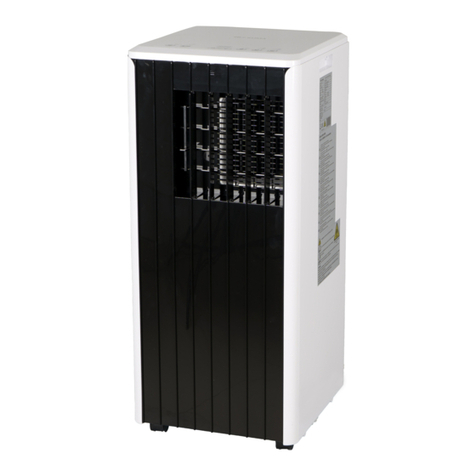
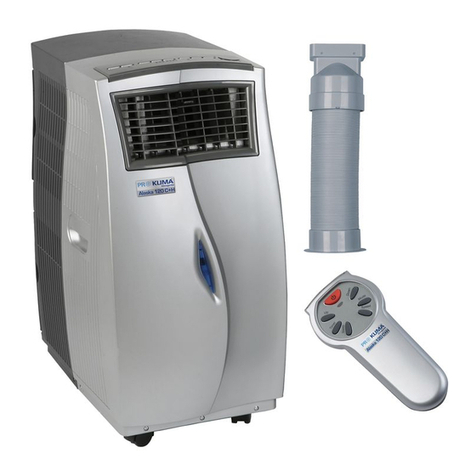
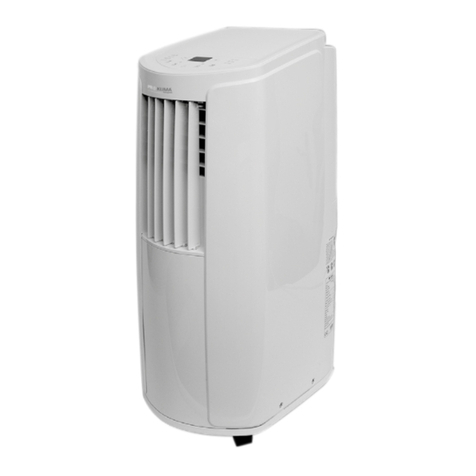
ProKlima ALASKA 110 User manual

Bedienungsanleitung
Klimagerät
Operating Instructions
Air Conditioner
Mode dʼemploi
Climatiseur
Istruzioni per lʼuso
Climatizzatore
Manual de instrucciones
Equipo de aire acondicionado
Bruksanvisning
Klimatanläggning
qKäyttöohje
Ilmastointilaite
BUpute za uporabu
Klimauređaj
jNávod k obsluze
Klimatizační přístroj
XNavodila za uporabo
Klimatska naprava
Art.-Nr.: 23.602.20 I.-Nr.: 01016 ALASKA 110
Anleitung Alaska 110_SPK7:Anleitung MKA 7000_D 07.11.2006 7:41 Uhr Seite 1

2
1
986
7
5
3
2
10
17
4
12 14
11
15
13
2
3
1
16
Anleitung Alaska 110_SPK7:Anleitung MKA 7000_D 07.11.2006 7:41 Uhr Seite 2

3
24 21
22 19 18
23 20
5
6
4
25 31 30
26
27
28
29
32
33
34
35
36
Anleitung Alaska 110_SPK7:Anleitung MKA 7000_D 07.11.2006 7:41 Uhr Seite 3

4
9
7
10
8
1
21
2
Anleitung Alaska 110_SPK7:Anleitung MKA 7000_D 07.11.2006 7:41 Uhr Seite 4

Inhaltsverzeichnis
1. Vor dem Gebrauch
2. Technische Daten
3. Sicherheitshinweise
4. Gerätebeschreibung
5. Inbetriebnahme des Gerätes
6. Montage des Abluftschlauches
7. Kondensatrückführung
8. Anschluss Kondeswasserschlauch
9. Reinigungsarbeiten durch den
Endverbraucher
10. Ersatzteilbestellung
11. Elektrisches Schaltbild
12. Hinweise zur Fehlerbeseitigung
Bitte lesen die Anleitung sorgfältig vor
Inbetriebnahme des Geräts und bewahren Sie diese
Unterlagen gut auf.
Mit dem Kauf dieses transportablen Klimagerätes
haben Sie einen guten Kauf getätigt. Das Gerät ist
sehr professionell konstruiert und bietet ein
Maximum an Komfort für viele Jahre, vorausgesetzt
es wird gemäß der Betriebsanleitung verwendet.
Lesen Sie also die Anleitung sorgfältig durch und
bewahren Sie diese für späteres Nachschlagen gut
auf.
1. Vor dem Gebrauch
1. Stellen Sie das transportable Gerät stets auf
einen stabilen waagerechten Untergrund.
2. Das Gerät muss immer in senkrechter Position
sein.
3. Kippen Sie das Gerät nie um mehr als 45°! Nach
Transport (Schrägstellen) das Gerät mindestens
1 Stunde nicht an die Steckdose anschließen.
4. Schließen Sie das Gerät an der richtigen
Steckdose an (Netzspannung beachten).
5. Bei Kühlfunktion muss die warme Abluft nach
über den Abluftschlauch nach aussen geleitet
werden. Eine Öffnung in der Wand oder im
Fenster ist dafür vorzusehen.
2. Technische Daten
Kältemittel R407 C
Kältemittelfüllmenge 580 g
Kühlleistung* 3266 Watt
Netzspannung 230 V ~ 50 Hz
Nenn-Leistungsaufnahme 1500 W
Energieeffizienzklasse* A (EER 2,51)
Luftdurchsatz max. 430 cbm/Std.
Raumgröße max. 95 m3
Entfeuchterleistung max.(30°C/80%RH) 70 l/Tag
Ventilatorgeschwindigkeitsstufen 3
Einsatzbereich Raumtemperatur: 18 - 30°C
Schalldruckpegel ≤ 55 dB(A)
Maße (BxTxH) 50 x 35 x 84 cm
Nettogewicht 34 kg
* Daten nach EN 14511
3. Sicherheitshinweise
Lesen Sie die zu befolgenden
Sicherheitshinweise vor dem Gebrauch des
Gerätes.
Nach dem Lesen bewahren Sie die
Betriebsanleitung gut auf und geben Sie die
Anleitung an Dritte weiter, die die Klimaanlage
ebenfalls bedienen.
Das Gerät so aufstellen, dass der Netzstecker
jederzeit zugänglich ist.
Die Netzleitung muss regelmäßig auf Defekte
oder Beschädigungen geprüft werden. Eine
beschädigte Netzleitung darf nur vom
Elektrofachmann oder der ISC GmbH unter
Berücksichtigung der einschlägigen
Bestimmungen ausgetauscht werden.
Das Gerät ist nicht für gewerbliche Zwecke
geeignet.
Das Gerät darf nicht im Bad verwendet werden.
Das Gerät darf von Kindern oder gebrechlichen
Personen nur unter Aufsicht bedient werden.
Kleine Kinder dürfen das Gerät nicht als
Spielzeug benutzen.
Die Klimaanlage ist nur zur Raumklimatisierung
kleinerer bis mittelgroßer Räume geeignet.
Verwenden Sie sie nicht für spezielle Zwecke
wie Aufbewahrung von Lebensmittel,
Präzisionsinstrumente, Pflanzen, Tiere, Farben
oder Kunstwerken, da diese Objekte Schaden
nehmen können.
Stellen Sie sicher, dass die vorhandene
Netzspannung und die Angabe der
Netzspannung auf dem Datenschild den gleichen
Wert haben.
Das Gerät darf nur an einer ordnungsgemäß
geerdete Schutzkontaktsteckdose betrieben
werden.
Installieren Sie zur elektrischen Sicherheit einen
Fehlerstromschutzschalter
(FI - Schutzschalter).
Achtung! Verlängern Sie nicht das Netzkabel
und benützen Sie keine Mehrfachstecker. Die
elektrische Sicherheit kann ansonsten nicht mehr
gegeben sein.
Ziehen Sie nie bei laufendem Gerät den
Netzstecker aus der Steckdose.
5
D
Anleitung Alaska 110_SPK7:Anleitung MKA 7000_D 07.11.2006 7:41 Uhr Seite 5

6
D
Schalten Sie sofort das Gerät ab und ziehen Sie
den Netzstecker, sofern Sie einen anormalen
Betriebszustand (z.B. Brandgeruch) feststellen.
Wird das Gerät weiterbetrieben können z.B.
Defekte an der Anlage, elektrische Schläge und
Brandschäden die Folgen sein.
Ziehen Sie den Netzstecker nicht am Kabel aus
der Steckdose. Halten Sie den Netzstecker fest
um ihn aus der Steckdose zu ziehen. Ansonsten
könnte das Netzkabel beschädigt werden.
Betätigen Sie keine Schalter mit nassen Händen.
Ansonsten besteht die Gefahr eines elektrischen
Schlages.
Lassen Sie sich von der kühlen Luft nicht direkt
anblasen und lassen Sie die Luft im Raum nicht
zu kalt werden. Unwohlsein und
Gesundheitsschäden können hervorgerufen
werden.
Platzieren Sie keine Pflanzen oder Tiere direkt in
den kühlen Luftstrom. Die Tiere und Pflanzen
können unter dem kühlen Luftstrom leiden.
Stecken Sie niemals Finger oder Gegenstände in
die Luftaustrittsöffnungen. Der rotierende Lüfter
kann zu Verletzungen führen.
Reparieren oder Warten Sie die Klimaanlage
nicht selbst. Unsachgemäße Reparaturen und
Wartungsarbeiten können das Gerät
beschädigen, Brände oder
Kondenswasserschäden verursachen.
Vor Reinigung des Gerätes schalten Sie es aus
und ziehen Sie den Netzstecker. Ansonsten
besteht Verletzungsgefahr.
Reinigen Sie das Klimagerät nicht mit Wasser.
Stromschlag oder Brand könnten die Folge sein.
Verwenden Sie keine brennbare
Reinigungsmittel. Feuer und Verformungen am
Gehäuse können entstehen.
Berühren Sie keine Metallteile des Innengerätes
während der Herausnahme des Luftfilters. Sie
könnten sich verletzen.
Wenn das Klimagerät längere Zeit verwendet
wird, muss der Raum von Zeit zu Zeit gelüftet
werden. Ansonsten kann ein Sauerstoffmangel
eintreten.
Installieren Sie das Gerät nicht in einem Raum,
in dem brennbare Gase ausströmen können.
Ausgetretenes Gas kann sich ansammeln und
eine Explosion verursachen.
Halten Sie keine brennenden Gegenstände in
der Nähe der Anlage, die von der austretenden
Luft direkt angeblasen werden könnten. Es
könnte eine unvollständige Verbrennung
hervorgerufen werden.
Ziehen Sie den Netzstecker, wenn das Gerät
längere Zeit nicht benützt wird.
Schalten Sie während eines Gewitters das Gerät
aus und ziehen Sie den Netzstecker. Elektrische
Teile könnten evtl. durch Überspannung
beschädigt werden.
Bei Undichtigkeiten im Kältemittelkreislauf
schalten Sie das Gerät sofort ab und
verständigen Sie bitte Ihren Servicepartner.
Tritt Kältemittel in einem Raum aus, kann der
Kontakt mit einer Flamme ein
gesundheitsschädliches Gas erzeugen. Schalten
Sie das Gerät sofort ab.
Um elektromagnetische Störungen zu vermeiden
halten Sie das Gerät von Fernseh- und Radioge-
räten fern.
Verpackung:
Das Gerät befindet sich in einer Verpackung um
Transportschäden zu verhindern. Heben Sie die
Verpackung zur späteren Lagerung (z.B. im Winter)
des Gerätes auf. Sollten Sie die Verpackung
dennoch entsorgen ist diese Rohstoff und somit
wiederverwendbar oder kann dem Rohstoffkreislauf
zurückgeführt werden.
4. Gerätebeschreibung
Vorderseite (Abb. 1)
1 Bedienfeld 2-fach klappbar, beleuchtet
2 Luftauslasslamellen
3 IR-Empfänger
4 Laufrollen
5 Griffmulde
Geräterückseite (Abb. 2)
6 Anschlussöffnung für Abluftschlauch
7 Anschluss für ständigen Kondenswasser-
ablauf
8 Netzleitungsstauraum mit Abdeckung
9 Luftansaugfilter
10 Anschluss für Kondensatauffangwannenablauf
Zubehör (Abb. 3)
11 Geräteadapter
12 Abluftschlauch
13 Wandanschlussadapter
14 Fensterabluftadapter
15 Fensteradapter
16 Wandadapter
17 Fernbedienung
Beschreibung Bedienfeld (Abb. 4)
18 Funktionstaster „Power – Ein/Aus“
19 Funktionstaster „Mode - Betriebsmodus“
20 Funktionstaster „Fan - Ventilatorgeschwindigkeit“
21 LCD Anzeigedisplay
22 Funktionstaster „Up - höher“
Anleitung Alaska 110_SPK7:Anleitung MKA 7000_D 07.11.2006 7:41 Uhr Seite 6

23 Funktionstaster „Down - niedriger“
24 Funktionstaster “Time - Einschaltdauer”
Hinweise:
Um von °C auf °F umzuschalten, drücken Sie die
Funktionstaster „höher“ und „niedriger“
gleichzeitig.
Alle Funktionen können auch von der
Fernbedienung geschaltet werden.
Die Funktion „Swing“ – die automatische vertikale
Lamellenverstellung“ kann nur von der
Fernbedienung aus geschaltet werden.
Beschreibung Fernbedienung (Abb. 5)
25 Funktionstaster „Gebläse schnell“
26 Funktionstaster „Gebläse mittel“
27 Funktionstaster „Gebläse langsam“
28 Funktionstaster „Swing – automatische vertikale
Lamellenverstellung“
29 Funktionstaster “Timer - Einschaltdauer”
30 Funktionstaster „höher“
31 Funktionstaster „niedriger“
32 Funktionstaster „Cool – Kühlmodus“
33 Funktionstaster „Dry – Entfeuchtermodus“
34 Funktionstaster „Fan – Gebläsemodus“
35 Funktionstaster “°C - °F Umschaltung“
36 Funktionstaster „Power – Ein/Aus“
Funktionsprinzip Kühlen:
Über den Luft-Wärmeaustauscher (Verdampfer), in
dem das Kältemittel zirkuliert, wird der Raumluft
Wärme entzogen und an den Außenluft-
Wärmeaustauscher (Verflüssiger) weitergeleitet.
Dieser gibt über den angeschlossenen, ins Freie
geführten Abluftschlauch die Wärme an die
Außenluft ab.
Funktionsprinzip Entfeuchten
Bei hoher relativer Luftfeuchtigkeit kann das Gerät
auch als Entfeuchter verwendet werden. Dabei muss
der Abluftschlauch vom Gerät entfernt werden, damit
die Luftzirkulation innerhalb des Raumes erfolgen
kann. Durch die Wechselwirkung von kalter und
warmer Luft wird der Luft Feuchtigkeit entzogen.
Energiespartipps
Benutzen Sie die Klimaanlage nur, wenn sie
auch wirklich gebraucht wird.
Schließen Sie Fenster, Türen und Jalousien um
Sonneneinstrahlung so weit wie möglich zu
verhindern.
5. Inbetriebnahme des Gerätes
(Abb. 1 – 4)
Hinweise:
Beachten Sie, dass der Mindestabstand vom
Gerät zur Wand seitlich und nach hinten 50cm
betragen muss. Der Mindestabstand zu
Gegenständen nach vorne muss 2m betragen.
Prüfen Sie ob die beiden Stopfen für ständigen
Kondenswasserablauf und Anschluss für
Kondensatauffangwannenablauf vorhanden und
fest angebracht sind.
Vor Verfahren des Gerätes ist die
Kondensatauffangwanne komplett zu entleeren.
Stecken Sie den Netzstecker in die
Netzsteckdose, es ertönt ein akustisches Signal,
das LCD-Anzeigedisplay leuchtet blau.
Anschließend kann mit dem Funktionstaster
„Power – Ein/Aus“ auf dem Bedienfeld oder der
Fernbedienung das Gerät eingeschaltet werden.
Die aktuelle Raumtemperatur erscheint im
Display. Sobald das Gerät eingeschaltet ist,
können die verschiedenen Funktionen eingestellt
werden.
Um den Kompressor zu schonen läuft er ggf. erst
3 Minuten nach Einschalten des Gerätes an
(Kühlen, Entfeuchten).
Sobald ein Funktionstaster gedrückt wird, ertönt
ein akustisches Signal.
Um das Gerät auszuschalten, drücken Sie
nochmals den Funktionstaster „Power – Ein/Aus“.
A) Kühlmodus (Cool)
1. Schieben Sie den Abluftschlauch von oben in die
Führungsschienen an der Geräterückseite.
Hinweis! Während der Kühlfunktion muss der
Abluftschlauch ins Freie geführt werden, damit
die warme Abluft nach außen strömen kann (s.
Kapitel 6).
2. Bedienfeld: Drücken Sie den Funktionstaster
„Betriebsmodus“ (MODE) um die Kühlfunktion
einzuschalten.
Fernbedienung: Drücken Sie den
Funktionstaster „Cool“.
LCD-Anzeigedisplay: Es erscheint ein
„Eiskristall“.
3. Bedienfeld: Pro Drücken des Funktionstasters
für die Ventilatorgeschwindigkeit (FAN) verändert
sich diese 3-stufig.
Fernbedienung: Drücken Sie den
entsprechenden Funktionstaster „High, Med,
Low“.
LCD-Anzeigedisplay: Es erscheint das
entsprechende Symbol für schnelle
Ventilatorgeschwindigkeit (□□□), mittlere
7
D
Anleitung Alaska 110_SPK7:Anleitung MKA 7000_D 07.11.2006 7:41 Uhr Seite 7

Ventilatorgeschwindigkeit (□□) oder langsame
Ventilatorgeschwindigkeit (□). Entsprechend
schnell dreht sich der integrierte Ventilator.
4. Bedienfeld: Drücken Sie den Funktionstaster
„Up -Höher“ oder „Down - Niedriger“ um die von
Ihnen gewünschte Solltemperatur (17°C - 30°C)
einzustellen.
Fernbedienung: Verwenden Sie die selben
Funktionstaster.
LCD-Anzeigedisplay: Es wird die von Ihnen
gewünschte Solltemperatur angezeigt.
5. Bedienfeld: Durch Drücken beider
Funktionstasten „Höher“ und „Niedriger“ können
Sie die Temperatureinheit wechseln (°C → °F
bzw. °F →°C).
Fernbedienung: Verwenden Sie hierzu die
Funktionstaste „°C ↔ °F“.
LCD-Anzeigedisplay: Abhängig von der
Einstellung erscheint °C oder °F.
Hinweis: Im Kühlbetrieb soll die Raumtemperatur
nicht mehr als 5°C unter der Außentemperatur liegen.
B) Entfeuchtermodus (Dry)
1. Stellen Sie sicher, dass der
Kondenswasserschlauch korrekt angeschlossen
ist (s. Kapitel 8.)
2. Bedienfeld: Drücken Sie den Funktionsschalter
„Betriebsmodus“ (MODE) um die
Entfeuchterfunktion einzuschalten.
Fernbedienung: Drücken Sie den
Funktionstaster „Dry – Entfeuchtermodus“.
LCD-Anzeigedisplay: Es erscheint ein
„Wasserbehälter“.
Hinweis! Die Ventilatorgeschwindigkeit kann nicht
verändert werden. Das Gerät bläst kühle Luft nach
vorne, warme Luft nach hinten aus. Die Temperatur
kann nicht eingestellt werden. Der Abluftschlauch
darf nicht angeschlossen sein.
C) Ventilationsmodus (Fan)
1. Bedienfeld: Drücken Sie den Funktionstaster
„Betriebsmodus“ (MODE) um die
Ventilationsfunktion einzuschalten.
Fernbedienung: Drücken Sie den Funktions-
taster „Fan – Ventilatorgeschwindigkeit“.
LCD-Anzeigedisplay: Es erscheint ein
„Ventilatorsymbol“.
2. Bedienfeld: Pro Drücken des Funktionstasters
für die Ventilatorgeschwindigkeit (FAN) verändert
sich diese 3-stufig.
Fernbedienung: Drücken Sie den entsprechen-
den Funktionstaster „High, Med, Low“.
LCD-Anzeigedisplay: Es erscheint das
entsprechende Symbol für schnelle
Ventilatorgeschwindigkeit (□□□), mittlere
Ventilatorgeschwindigkeit (□□) oder langsame
Ventilatorgeschwindigkeit (□). Entsprechend
schnell dreht sich der integrierte Ventilator.
D) Einschaltverzögerung (Time on)
Mit dieser Funktion können Sie das Gerät
automatisch einschalten lassen. Voraussetzung
ist, dass das Gerät an der Spannungsversorgung
angeschlossen ist. Den „Betriebsmodus“ und die
„Ventilatorgeschwindigkeit“ können Sie entweder
vor oder nach Einstellung der
„Einschaltverzögerung“ auswählen.
Bedienfeld: Drücken Sie den dem
Funktionstaster “Time - Einschaltdauer”.
Fernbedienung: Drücken Sie den Funktions-
taster „Timer – Einschaltdauer“.
LCD-Anzeigedisplay: Es blinken „Time On“ und
die aktuell eingestellte „Einschaltverzögerung“
(beginnend mit 0,5 HR).
Bedienfeld und Fernbedienung: Pro drücken
des Funktionstasters „Up - höher“ verändert sich
die Zeiteinstellung um 0,5h nach oben. Pro
drücken des Funktionstasters „Down - niedriger“
verändert sich die Zeiteinstellung pro drücken um
0,5h nach unten. Der Einstellbereich beträgt 0,5 –
24h. Drücken Sie bei Anzeige „0,5 HR“ den
„Down - niedriger“ Taster nochmals erscheint „0
HR“ und die „Einschaltverzögerung“ ist
ausgeschaltet.
Wird länger als 5 Sekunden keiner der beiden
Funktionstaster betätigt, leuchtet im LCD-
Anzeigedisplay „Time On“ und die aktuell
eingestellte „Einschaltverzögerung“ ständig und
im Anzeigedisplay erscheint die aktuelle
Raumtemperatur. Die Einschaltverzögerung ist
jetzt gespeichert.
Bedienfeld und Fernbedienung: Drücken Sie
den Funktionstaster “Time - Einschaltdauer”
erneut, blinken im LCD-Anzeigedisplay „Time On“
und die aktuell eingestellte „Einschaltver-
zögerung“. Sie können die Zeiten der
„Einschaltverzögerung“ nachträglich verändern.
Nach Ablauf der gespeicherten
„Einschaltverzögerung“ schaltet das Gerät
automatisch ein
Bedienfeld und Fernbedienung: Um das Gerät
auszuschalten, drücken Sie den Funktionstaster
„Power – Ein/Aus“. Das Gerät schaltet aus.
Bedienfeld und Fernbedienung: Um das Gerät
vor Ablauf der gespeicherten „Einschaltver-
zögerung“ einzuschalten, drücken Sie den
Funktionstaster „Power – Ein/Aus“. Das Gerät
schaltet ein.
8
D
Anleitung Alaska 110_SPK7:Anleitung MKA 7000_D 07.11.2006 7:41 Uhr Seite 8

9
D
E) Einschaltdauer (Time off)
Mit dieser Funktion können Sie das Gerät
automatisch ausschalten lassen. Voraussetzung ist,
dass sich das Gerät in Betrieb befindet.
Bedienfeld: Drücken Sie den dem Funktions-
taster “Time - Einschaltdauer”.
Fernbedienung: Drücken Sie den
Funktionstaster „Timer – Einschaltdauer“.
LCD-Anzeigedisplay: Es blinken „Time OFF“ und
die aktuell eingestellte „Einschaltdauer“
(beginnend mit 0,5 HR).
Bedienfeld und Fernbedienung: Pro drücken
des Funktionstasters „Up - höher“ verändert sich
die Zeiteinstellung um 0,5h nach oben. Pro
drücken des Funktionstasters „Down - niedriger“
verändert sich die Zeiteinstellung pro drücken um
0,5h nach unten. Der Einstellbereich beträgt 0,5 –
24h. Drücken Sie bei Anzeige „0,5 HR“ den
„Down - niedriger“ Taster nochmals erscheint „0
HR“ und die „Einschaltdauer“ ist ausgeschaltet.
Wird länger als 5 Sekunden keiner der beiden
Funktionstaster betätigt, leuchtet im LCD-
Anzeigedisplay „Time OFF“ und die aktuell
eingestellte „Einschaltdauer“ ständig und im
Anzeigedisplay erscheint die aktuelle
Raumtemperatur. Die Einschaltdauer ist jetzt
gespeichert.
Bedienfeld und Fernbedienung: Drücken Sie
den Funktionstaster “Time - Einschaltdauer”
erneut, blinken im LCD-Anzeigedisplay „Time
OFF“ und die aktuell eingestellte „Einschalt-
dauer“. Sie können die Zeiten der „Einschalt-
dauer“ nachträglich verändern. Sie können die
Zeiten der „Einschaltdauer“ nachträglich ver-
ändern.
Nach Ablauf der gespeicherten „Einschaltdauer“
schaltet das Gerät automatisch aus.
Bedienfeld und Fernbedienung: Um das Gerät
vor Ablauf der gespeicherten „Einschaltdauer“
auszuschalten, drücken Sie den Funktionstaster
„Power – Ein/Aus“. Das Gerät schaltet ab.
F) Mechanische / Automatische Verstellung der
Luftaustrittslamellen
Die Luftaustrittslamellen können Sie horizontal nach
oben und unten verstellen.
Fernbedienung: Drücken Sie den Funktionstaster
„Swing – automatische vertikale Lamellenverstellung“
so schwenken die vertikalen Lamellen ständig hin
und her.
LCD-Anzeigedisplay: Es werden „zwei nach unten
gerichtete Pfeile + FAN“ angezeigt.
6. Montage des Abluftschlauches
Verwenden Sie nur den mitgelieferten Abluftschlauch.
Die Länge des Abluftschlauches kann von 390 mm
bis 1500 mm variiert werden. Drehen Sie den
Schlauch in den Fensterabluftadapter und in den
Geräteadapter ein.
Die beste Kühlleistung erhalten Sie mit der kürzesten
Abluftschlauchlänge. Knicke oder starke
Krümmungen des Abluftschlauches (Abb. 5) sollten
vermieden werden, damit die Abluft ungehindert nach
außen strömen kann. Wenn dies nicht beachtet wird,
kann es zu Überhitzungen des ganzen Gerätes
kommen und das Gerät abschalten. Das Gerät
könnte dadurch beschädigt werden.
Achtung!
Die Länge des Abluftschlauches ist auf die
technische Spezifikation des Gerätes abgestimmt.
Verlängern Sie nicht den Schlauch, dies könnte zu
Störungen am Gerät führen.
Unter Umständen kann es zu einem Unterdruck im
Raum kommen, wodurch die Kühlleistung des
Gerätes vermindert wird. Um dies zu verhindern
muss für Luftzufuhr (Zimmertür einen Spalt offen
lassen) gesorgt werden.
A) Montage des Abluftschlauches durchs offene
Fenster (Abb. 6)
Verwenden Sie den Fensterabluftadapter und
längenverstellbaren Fensteradapter. Schieben Sie
den Fensterabluftadapter auf den Abluftschlauch.
Klemmen Sie den Fensteradapter in das einen Spalt
geöffnete Fenster. Sichern Sie das Fenster, sodass
der Fensteradapter zuverlässig hält. Stecken Sie den
Fensterabluftadapter in die dafür vorgesehene
Öffnung des Fensteradapters.
Hinweis: Treffen Sie Vorkehrungen gegen
unbefugtes Eindringen durch das Fenster.
B) Montage des Abluftschlauches durch die
Wand (Abb. 7)
Stemmen Sie ein ca. 130 mm Ø Loch in die
Wand. Beachten Sie mögliche Leitungen (Strom,
Wasser, Abwasser usw.) in diesem Bereich.
Befestigen Sie an der Innenseite der Wand den
Wandadapter mit Abdeckkappe. Bei Nichtbetrieb
der Anlage stecken Sie die Abdeckkappe auf den
Wandadapter auf.
Stecken Sie ein HT – Rohr, Größe DN 125 (nicht
im Lieferumfang) durch das erstellte Loch bis es
am Wandadapter mit Abdeckklappe ansteht.
Isolieren Sie das HT – Rohr und mauern Sie das
HT – Rohr ein.
An der Außenwand montieren Sie ein passendes
Anleitung Alaska 110_SPK7:Anleitung MKA 7000_D 07.11.2006 7:41 Uhr Seite 9

10
D
Lüftungsgitter (nicht im Lieferumfang) mit
Insekten- und Regenschutz.
7. Kondensatrückführung
Das Gerät ist im Kühlbetrieb mit einer
Kondensatrückführung ausgestattet. Das Kondensat
wird während des Kühlbetriebes in einer im Gerät
integrierten Auffangschale (ca. 1,2 ltr. Inhalt)
gesammelt, über den Verflüssiger verdampft und über
den Abluftschlauch nach außen geführt.
Sollte die Auffangschale voll sein, schaltet das Gerät
ab. Es erscheint im Anzeigedisplay „P2“ und ein
akustisches Signal ertönt kurzzeitig. Gehen Sie wie
folgt vor (Abb. 8):
Stecken Sie das Gerät aus.
Stellen Sie ein geeignetes Gefäß unter den
Kondensatablass (1) und entfernen Sie den
Stopfen (2). Die Auffangschale wird entleert.
Stecken Sie den Stopfen wieder in den
Kondensatablass. Das Gerät ist wieder
betriebsbereit.
Hinweis: Im Normalfall wird die
Kondensatauffangschale im Kühlbetrieb nie
vollständig gefüllt. Sollte dies dennoch öfter der Fall
sein, wenden Sie sich an Ihren Kundendienst.
8. Anschluss Kondenswasserschlauch
(Abb. 9)
Hinweise:
Wird das Gerät im Entfeuchtermodus betrieben,
muss der Kondenswasserschlauch an der
Gehäuserückseite angeschlossen werden. Das
Kondensat läuft nicht in die
Kondensatauffangschale
Achtung: Bei dieser unbeaufsichtigten Variante
besteht kein Überlaufschutz.
Achtung: Bei sehr kaltem Wetter sollten
Maßnahmen ergriffen werden, um ein Gefrieren
des Wassers im Ablaufschlauch zu verhindern.
Das Kondensat ist vorzugsweise in einen tiefer
liegenden Abfluss zu leiten. Sollte ein externer
Auffangbehälter (z.B. Wanne usw.) verwendet
werden ist das Gerät entsprechend höher zu
stellen.
Der Ablaufschlauch muss mit Gefälle verlegt
werden, darf nicht knicken und nicht verstopfen.
1. Entfernen Sie den Stopfen (1) vom Anschluss für
ständigen Kondenswasserablauf.
2. Verbinden Sie den Anschlussstutzen (2) mit
einem passenden Wasserschlauch mit 10mm
Innendurchmesser.
3. Beachten Sie unbedingt die zuvor aufgeführten
Hinweise.
9. Reinigungsarbeiten durch den
Endverbraucher
Vor allen Reinigungsarbeiten ziehen Sie den
Netzstecker, um einen Stromschlag oder
Feuergefahren zu vermeiden.
A) Luftfilter reinigen
Der Klimaanlage ist mit 2 Filter ausgestattet:
1. Staubfilter (engmaschiges Filternetz)
2. Aktivkohlefilter (bindet Partikel in der Luft und
verhindert das Entstehen von Bakterien)
Achtung: Betreiben Sie das Gerät nie ohne Luftfilter.
1) Staubfilter
Entnehmen Sie den Filterdeckel, in dem Sie den
Filterdeckel an der Griffmulde nach außen wegziehen.
Entfernen Sie anschließend den Aktivkohlefilter.
Verwenden Sie einen Staubsauger oder klopfen Sie
den Staubfilter leicht aus. Ist der Filter sehr
verschmutzt, waschen sie ihn mit warmen Wasser
vorsichtig aus. Anschließend gut trocknen lassen.
2) Aktivkohlefilter
Der Aktivkohlefilter befindet sich hinter dem
Staubfilter und ist nicht waschbar. Seine Lebensdauer
ist abhängig von den Betriebsbedingungen.
Der Filter sollte geprüft und falls nötig ersetzt werden.
Der Filterdeckel mit beiden Filtern wird anschließend
wieder am Gerät eingesetzt.
B) Gehäusereinigung
Verwenden Sie nur milde Reinigungsmittel und ein
weiches Tuch, um das Gehäuse zu reinigen.
Verwenden Sie niemals aggressive Mittel, Benzin,
Alkohol oder Verdünnung zur Reinigung. Setzen Sie
den Filter erst wieder ein, wenn er trocken ist.
C) Zum Saisonende
Am Ende der Saison lassen Sie das Gerät etwa 3
Stunden in der Ventilatorfunktion (FAN) laufen.
Anschließend rollen Sie das Netzkabel auf, und
verstauen es im dafür vorgesehenen Stauraum
auf der Geräterückseite.
Stellen Sie ein geeignetes Gefäß unter den
Kondensatablass und entfernen Sie den Stopfen.
Die Auffangschale wird entleert (s. Kapitel 7).
Anleitung Alaska 110_SPK7:Anleitung MKA 7000_D 07.11.2006 7:41 Uhr Seite 10

Stecken Sie den Stopfen wieder in den
Kondensatablass.
Achtung: Ein fehlender oder nicht richtig
aufgesteckter Stopfen führt zu Wasseraustritt bei
Wiederinbetriebnahme.
Reinigen den Filter und das Gehäuse.
Setzen Sie den Filter, wenn trocken, wieder ein.
Packen Sie das Gerät zur aufrechten Lagerung
an einem staubfreien, trockenen Ort am besten in
den Originalkarton.
10. Ersatzteilbestellung
Bei der Ersatzteilbestellung sollten folgende
Angaben gemacht werden:
앬Typ des Gerätes
앬Artikelnummer des Gerätes
앬Ident- Nummer des Gerätes
앬Ersatzteil- Nummer des erforderlichen Ersatzteils
Aktuelle Preise und Infos finden Sie unter
www.isc-gmbh.info
11. Elektrisches Schaltbild (Abb. 10)
12. Hinweise zur Fehlerbeseitigung
Wenn das Gerät richtig betrieben wird, dürften keine
Störungen auftreten. Bei Störungen prüfen Sie die
folgenden Möglichkeiten, bevor Sie den
Kundendienst verständigen.
11
D
Anleitung Alaska 110_SPK7:Anleitung MKA 7000_D 07.11.2006 7:41 Uhr Seite 11

12
D
Nach längerem Gebrauch sollte das Gerät durch eine Fachfirma überprüft werden.
Problem mögliche Ursache Abhilfe
Gerät arbeitet nicht oder schaltet
selbstständig ab
Stromausfall
Netzleitung oder Netzstecker
beschädigt?
Kondensatauffangwanne voll
Die Umgebungstemperatur liegt
außerhalb des Arbeitsbereiches
Spannung prüfen, ggf. auf Wieder-
einschalten warten.
Instandsetzung durch Fachbetrieb
Kondensatauffangwanne entleeren
Gerät nicht außerhalb des Arbeits-
bereiches betreiben
Gerät kühlt nicht oder nicht zu-
friedenstellend
Abluftschlauch abgeknickt, nach
unten geführt, verlängert, verstopft
Filter verunreinigt, Öffnungen durch
Fremdkörper blockiert
Mindestabstände zu klein
Unterdruck im Aufstellungsraum bei
Betrieb mit Wanddurchbruch
Betriebsmodus “Kühlen” nicht ein-
gestellt
Gerät wird mit Einschaltverzöge-
rung betrieben
Solltemperatur zu hoch eingestellt
Überspannung durch Blitzschläge
Für freien weg der Abluft sorgen
Filter reinigen, Fremdkörper ent-
fernen
Mindestabstände einhalten
Druckausgleich durch Öffnen von
Tür/Fenster schaffen
Betriebsmodus “Kühlen” einstellen
Gerät einschalten
Solltemperatur reduzieren
Gerät ausschalten, Netzstecker
ziehen, nach 5 Minuten Wartezeit
neu einschalten
Kondenswasseraustritt am Gerät Gerät steht schief
Stopfen der beiden Kondensat-Ab-
läufe sind nicht korrekt aufgesteckt
oder beschädigt
Gerät senkrecht stellen, auf
sicheren Stand achten
Stopfen korrekt anbringen oder ggf.
ersetzen
Anleitung Alaska 110_SPK7:Anleitung MKA 7000_D 07.11.2006 7:41 Uhr Seite 12

13
GB
Table of contents
1. Before using
2. Technical data
3. Important Safety Information
4. Layout
5. Starting the device
6. Installing the exhaust air hose
7. Condensate return
8. Connection for condensation water hose
9. Cleaning by the end user
10. Ordering spare parts
11. Circuit diagram
12. Troubleshooting
Please read the Operating Instructions thoroughly
before using the device for the first time and then
keep them in a safe place.
In purchasing this portable air conditioner you have
chosen a high quality product. The device is of a
highly professional design and will offer you
maximum comfort for many years, as long as you
use it in accordance with the Operating Instructions.
You should therefore read the Instructions thoroughly
and keep them in a safe place for future reference.
1. Before using
1. Always place the portable device on a firm,
horizontal footing.
2. The machine must always be in an upright
position.
3. Never tilt the device by more than 45°!
Whenever the device has been transported
(inclined positions), leave for at least one hour
before connecting to a socket outlet.
4. Connect the device to the correct socket outlet
(check the mains supply voltage).
5. In the cooling function the warm exhaust air must
be transferred outside by the exhaust air hose.
An opening in the wall or window must therefore
be provided.
2. Technical data
Coolant: R407 C
Coolant quantity 580 g
Cooling capacity* 3266 W
Mains voltage 230 V ~ 50 Hz
Nominal power rating: 1500 W
Energy efficiency class* A (EER 2.51)
Max. air throughput 430 cbm/h
Max. room size 95 m3
Max. dehumidifier output (30°C/80%RH) 70 l/day
Fan speed levels 3
Area of application: “Room temperature” 18-30°C
Sound pressure level ≤ 55 dB(A)
Dimensions (WxDxH) 50 x 35 x 84 cm
Net weight 34 kg
* data according to EN 14511
3. Important safety instructions
Read and comply with the safety instructions
before you start to use the equipment.
Keep the operating instructions in a safe place
once you have read them and give them to all
third parties who may also operate the air
conditioner.
Position the equipment in such a way that the
mains plug is accessible at all times.
Check the mains lead at regular intervals for
signs of defects or damage. A damaged mains
lead may only be replaced by an electrician or
ISC GmbH in compliance with the relevant
regulations.
This equipment is not designed for commercial
use.
The equipment must never be used in
bathrooms.
Children or infirm persons may use the
equipment only under supervision. Children are
not allowed to use the equipment as a toy.
The air conditioner is only suitable for air-
conditioning in small- to medium-sized rooms.
Never use it for special purposes such as for the
storage of food, precision instruments, plants,
animals, paints or works of art, since they could
become damaged.
Check that the actual mains voltage is the same
as the mains voltage specified on the rating
plate.
The equipment may only be operated from a
properly earthed shock-proof socket.
For electrical safety purposes we recommend
that you install a residual current device circuit-
breaker (earth-leakage circuit-breaker).
Important! Do not extend the cable and never
use multiple plugs. Otherwise there is a risk that
electrical safety can no longer be guaranteed.
Never pull the mains plug out of the socket while
the equipment is running.
In the event of any abnormalities in the operation
of the equipment (e.g. smell of burning),
immediately switch off the equipment and pull
the plug. There is a risk of electric shock or fire
Anleitung Alaska 110_SPK7:Anleitung MKA 7000_D 07.11.2006 7:41 Uhr Seite 13

14
GB
damage if the equipment is allowed to continue
running with possible defects.
Never pull the plug out of the socket by pulling
the cable. Hold the mains plug firmly to pull it out
of the socket. Otherwise there is a risk of
damaging the cable.
Never actuate any switches with wet hands.
Otherwise there is a danger of an electric shock.
Never allow the cool air to blow directly at you
and do not allow the air in the room to become
too cold. This may lead to discomfort and may
also be harmful to health.
Never place and plants or animals directly in the
path of the flow of cool air. Plants or animals may
suffer under the effect of the flow of cool air.
Never poke fingers or objects in the air outlet
vents. The rotating fan can cause injuries.
Never attempt to repair the air conditioner
yourself. Improper repair and maintenance work
can result in damage to the equipment and
cause fires or damage from condensation water.
Always switch off the equipment and pull the
plug before you start to clean it (risk of injury).
Never clean the air conditioner with water. This
could result in an electric shock or fire.
Do not use any inflammable agents for cleaning
purposes as they could cause a fire or
deformation.
Never touch any metal parts on the inside of the
equipment when removing the air filter. You may
injure yourself.
If the air conditioner is not used for a lengthy
period of time the room has to be ventilated
every now and then, otherwise there is a risk of
lack of oxygen.
Never install the equipment in a room in which
combustible gases can be emitted. Emitted
gases may collect and cause an explosion.
Never hold any burning objects close to the
equipment if they could be directly affected by
the emitted air. This may result in their not being
completely burnt.
Pull the mains plug out of the socket if the
equipment is not going to be used for some time.
Always switch off the equipment and pull out the
power plug during a storm. Electrical parts may
get damaged as a result of overvoltage.
If the coolant circuit should develop a leak,
switch off the equipment immediately and
contact your service partner.
There is a risk of harmful gas being generated if
any of the coolant escapes and comes into
contact with a flame. Switch off the equipment
immediately.
To avoid electromagnetic interference the device
should be kept away from televisions and radios.
Packaging:
The unit is supplied in packaging to prevent it from
being damaged in transit. Retain the packaging for
later storage (e.g. in winter) of the device. If you
should nevertheless wish to dispose of the
packaging, remember that it is raw material and
can therefore be reused or can be returned to the
raw material system.
4. Layout
Front (Fig. 1)
1 Control panel with double hinges, illuminated
2 Air outlet fins
3 IR receiver
4 Rollers
5 Recessed grip
Back (Fig. 2)
6 Connection opening for exhaust air hose
7 Connection for continuous condensation drain
8 Mains cable storage compartment with cover
9 Air intake filter
10 Connection for condensate collection tray drain
Accessories (Fig. 3)
11 Device adapter
12 Exhaust air hose
13 Wall connection adapter
14 Window exhaust air adapter
15 Window adapter
16 Wall adapter
17 Remote control
Control panel layout (Fig. 4)
18 “Power – ON/OFF” function key
19 “Mode” function key
20 “Fan” function key
21 LCD
22 “Up” function key
23 “Down” function key
24 “Time” function key
Notes
To switch from °C to °F press the “Up” and
“Down” function keys at the same time.
All the functions can be controlled from the
remote control.
The “Swing” function (automatic vertical fin
adjustment) can only be controlled from the
remote control.
Remote control layout (Fig. 5)
25 “High“ fan speed function key
26 “Medium“ fan speed function key
27 “Low“ fan speed function key
Anleitung Alaska 110_SPK7:Anleitung MKA 7000_D 07.11.2006 7:41 Uhr Seite 14

15
GB
28 “Swing” automatic vertical fin adjustment function
key
29 “Timer” function key
30 “Up” function key
31 “Down” function key
32 “Cool” mode function key
33 “Dry” dehumidifier mode function key
34 “Fan” mode function key
35 “°C - °F“ switch function key
36 “Power – ON/OFF” function key
Principle of operation for cooling
Heat is extracted from the air in the room by the air
heat-exchanger (evaporator) in which the coolant
circulates. This air is conveyed to the outside air
heat-exchanger (condenser). This transfers the
heat to the air outside via the exhaust air hose
which is connected to the device and leads out to
the open air.
Principle of operation for dehumidification
The device can also be used as a dehumidifier
whenever the relative air humidity is too high. In this
case the exhaust air hose has to be disconnected
from the device so that the air can circulate within the
room. The interchange of cold and warm air extracts
the moisture from the air.
Tips on saving energy
Only use the air conditioner when you really
need to.
Close all windows, doors and venetian blinds in
order to reduce incoming sunlight as far as
possible.
5. Starting the device (Fig. 1 – 4)
Notes
Please note that the minimum distance between
the device and the wall to the side and rear must
be 50 cm. The minimum distance to other objects
at the front must be 2 m.
Check that both stoppers for the continuous
condensation drain and the connection for the
condensation tray drain are present and secure.
Before moving the device the condensation
collection tray must be emptied completely.
Insert the mains plug into the socket outlet. An
acoustic signal will sound and the LCD will be lit
in blue. The device can then be switched on
using the “Power ON/OFF” function key on the
control panel or the remote control. The current
room temperature will appear in the display. The
various functions can be set as soon as the
device has been switched on.
To protect the compressor it will not start until the
device has been switched on for three minutes
(cooling, dehumidifying).
An acoustic signal will sound as soon as a
function key is pressed.
To switch the device off, press the “Power
ON/OFF” function key again.
A) Cooling mode (Cool)
Move the exhaust air hose from the top into the
guide rails on the reverse of the device.
Please note. The end of the exhaust air hose
must be placed outdoors whilst the device is in
cooling mode so that the warm exhaust air can
flow outwards (see section 6).
Control panel: Press the MODE function key to
activate the cooling function.
Remote control: Press the “Cool” function key.
LCD: An “ice crystal” will appear.
Control panel: Each time you press the function
key for the fan speed (FAN), the speed will
change to one of three settings.
Remote control: Press the appropriate function
key “High, Med, Low”.
LCD: The appropriate symbol for the high fan
speed (□□□), medium fan speed (□□) or slow
fan speed (□) will appear. The integral fan will
operate at the appropriate speed.
Control panel: Press the “Up” or “Down” function
key to set the nominal temperature (17°C – 30°C)
you require.
Remote control: Use the same function key.
LCD: The nominal temperature you have set will
be displayed.
Control panel: You can change the temperature
unit for the display (°C → °F or °F →°C) by
pressing the “Up” and “Down” function keys at the
same time.
Remote control: Use the “°C ↔ °F” function key
for this purpose.
LCD: Either °C or °F will appear depending on the
setting.
Note: In cooling mode the room temperature should
be no more than 5°C below the outdoor temperature.
B) Dehumidifier mode (Dry)
Ensure that the condensate hose is connected
correctly (see section 8).
Control panel: Press the MODE function key to
activate the dehumidifier function.
Remote control: Press the “Dry” function key.
LCD: A “water container” will appear.
Please note. The fan speed cannot be changed. The
device will blow cool air out of the front and warm air
out of the rear. The temperature cannot be adjusted.
Anleitung Alaska 110_SPK7:Anleitung MKA 7000_D 07.11.2006 7:41 Uhr Seite 15

16
GB
The exhaust air hose must not be connected.
C) Fan mode (Fan)
1. Control panel: Press the MODE function key to
activate the fan function.
Remote control: Press the “Fan” function key.
LCD: A “fan symbol” will appear.
2. Control panel: Each time you press the function
key for the fan speed (FAN), the speed will
change to one of three settings.
Remote control: Press the appropriate function
key “High, Med, Low”.
LCD: The appropriate symbol for the high fan
speed (□□□), medium fan speed (□□) or slow
fan speed (□) will appear. The integral fan will
operate at the appropriate speed.
D) Time on
This function can be used to start the device
automatically. The only requirement is that the
device is connected to a power supply. You can
select the “operating mode” and the “fan speed”
either before or after setting the “time on”.
Control panel: Press the “Time” function key.
Remote control: Press the “Timer” function key.
LCD: “Time On” will flash and the current “time
on” setting (start with 0.5 h) will be displayed.
Control panel and remote control: Each time
you press “Up”, the time setting will increase by
0.5 h. Each time you press “Down”, the time
setting will be reduced by 0.5 h. The setting range
is 0.5 to 24 hours. When “0.5 h” is displayed,
press the “Down” key again so that the display
changes to “0 h”, thus deactivating the “Time On”
function.
If you do not press either of the two function keys
for more than 5 seconds “Time On” will be
displayed on the LCD and the current “Time On”
will be displayed constantly together with the
current room temperature. The time on function is
now stored.
Control panel and remote control: Press the
“Time” function key again and “Time On” and the
current “Time On” will start to flash in the LCD.
You can change the “Time On” times
retrospectively.
After the elapse of the “Time On” time, the device
will switch on automatically.
Control panel and remote control: To switch
the device off, press the “Power ON/OFF”
function key. The device will switch off.
Control panel and remote control: To switch
the device on before the stored “Time On”, press
the “Power ON/OFF” function key. The device will
switch on.
E) Time off
This function can be used to switch off the device
automatically. The only requirement is that the unit is
in operation.
Control panel: Press the “Time” function key.
Remote control: Press the “Timer” function key.
LCD: “Time OFF” will flash and the current “time
off” setting (start with 0.5 h) will be displayed.
Control panel and remote control: Each time
you press “Up”, the time setting will increase by
0.5 h. Each time you press “Down”, the time
setting will be reduced by 0.5 h. The setting range
is 0.5 to 24 hours. When “0.5 h” is displayed,
press the “Down” key again so that the display
changes to “0 h”, thus deactivating the “Time off”
function.
If you do not press either of the two function keys
for more than 5 seconds, “Time OFF” will be
displayed on the LCD and the current “Time Off”
will be displayed constantly together with the
current room temperature. The time off function is
now stored.
Control panel and remote control: Press the
“Time Off” function key again and “Time Off” and
the current “Time OFF” will start to flash in the
LCD. You can change the “Time Off” times
retrospectively.
After the elapse of the “Time Off” time, the device
will switch off automatically.
Control panel and remote control: To switch
the device off before the stored “Time Off”, press
the “Power ON/OFF” function key. The device will
switch off.
F) Mechanical / Automatic adjustment of the air
outlet fins
You can adjust the air outlet fins horizontally upwards
and downwards.
Remote control: Press the “Swing” function key to
swing the vertical fins back and forth continuously.
LCD: “Two arrows pointing downwards + FAN” will be
displayed.
6. Installing the exhaust air hose
Use only the supplied exhaust air hose. The length
of the exhaust air hose can be varied between 390
mm and 1500 mm. Screw the hose into the exhaust
air adapter for the window and into the device
adapter. For maximum cooling performance the
exhaust hose should be as short as possible. Avoid
kinks and excessive bends in the hose (Fig. 5) so
that the exhaust air can be transferred out without
hindrance. If you ignore this advice, the device as a
whole may overheat and shut down. This could result
in damage to the device.
Anleitung Alaska 110_SPK7:Anleitung MKA 7000_D 07.11.2006 7:41 Uhr Seite 16

17
GB
Important!
The length of the exhaust air hose is matched to the
technical specifications of the device. Never extend
the hose as this could lead to malfunctions or faults
on the device. Under certain circumstances a partial
vacuum may develop in the room, which will lead to
a reduction in the cooling performance of the device.
To prevent this from happening you must ensure that
there is a supply of air to the room (leave the door to
the room slightly open).
A) Fitting the exhaust air hose through an open
window (Fig. 6)
Use the exhaust air adapter for the window and the
extendible window adapter. Slide the exhaust air
adapter for the window over the exhaust air hose.
Open the window slightly and clamp the window
adapter in the gap. Secure the window so that the
window adapter is kept firmly in place. Insert the
exhaust air adapter for the window in the opening
provided in the window adapter.
Note: Take appropriate precautions to
prevent unauthorized entry through the
window.
B) Fitting the exhaust air hose through a
wall (Fig. 7)
Chisel a hole with a diameter of approx. 130 mm
in the wall. Take care to avoid cables and pipes
(electricity, water, sewage, etc.) in the area of the
wall.
Secure the wall adapter with cap on the inside of
the wall. Fit the cap on the wall adapter
whenever the unit is not being used.
Insert an HT pipe (nominal size 125, not included
in delivery) through the hole you have made in
the wall until it is in contact with the wall adapter
with cover flap. Insulate the HT pipe and then fill
in and seal the wall around it.
Fit a suitable ventilation grille, with protection
against insects and rain, to the outside wall (not
included in delivery).
7. Condensate return
For the cooling mode the device is fitted with a
condensate return unit. When the system is in
operation the condensate is collected in a trough
(approx. contents 1.2 liters) integrated in the device.
From there it is evaporated by the condenser and
transferred outside by the exhaust air hose.
The device switches itself off automatically whenever
the trough is full. “P2” appears in the indicator
display and an acoustic signal sounds
temporarily. Proceed as follows (Fig. 8):
Unplug the device.
Place a suitable container beneath the
condensate drain (1) and remove the plug (2).
The trough then empties.
Reinsert the plug in the condensate drain. The
device is now ready for operation again.
Note: Under normal circumstances the condensate
trough never becomes full in cooling mode.
However, if this should happen, please contact
your customer services workshop.
8. Connection for condensation water
hose (Fig. 9)
Notes:
If the appliance is run in dehumidifier mode, the
condensation water hose must be connected to
the back of the housing. The condensate does
not run into the condensation water trough.
Important: There is no risk of overflowing with
this unsupervised version.
Important: If the water is very cold you will have
to take appropriate measures to prevent the
water from freezing in the drainage hose.
It is recommended that the condensate be
drained off to a drain which is at a lower level. If
you use an external collecting container (e.g. a
trough), the appliance must be positioned at a
higher level accordingly.
The drainage hose must be fitted with a gradient.
Do not kink the hose or allow it to become
clogged.
1. Remove the plug (1) from the connection for the
permanent condensation water drain.
2. Connect the suction port (2) with a matching
water hose (10 mm inside diameter).
3. Be sure to observe the previously described
instructions.
9. Cleaning by the end user
To avoid an electric shock or risk of fire,
always pull out the mains plug first before
starting any cleaning work .
A) Cleaning the air filter
The air conditioner is fitted with 2 filters.
1. Dust filter (close-meshed filter net)
2. Activated carbon filter (binds particles in the air
and prevents the development of bacteria)
Important: Never use the device without air filters.
Anleitung Alaska 110_SPK7:Anleitung MKA 7000_D 07.11.2006 7:41 Uhr Seite 17

18
GB
1) Dust filter
To remove the filter cover, press the latch on the
filter cover down and pull it out and away. Then
remove the activated carbon filter. Use a vacuum
cleaner or tap the dust filter gently to remove the
dust. If the filter is very dirty, wash it carefully with
warm water. Then allow to dry thoroughly.
2) Activated carbon filter
The activated carbon filter is located behind the dust
filter and cannot be washed. Its service life is
dependent on the operating conditions. The filter
should be inspected and replaced if necessary. The
filter cover then has to be fitted back on the device
with both filters.
B) Cleaning the housing
Use only gentle cleaner and a soft cloth to clean
the housing. Never use aggressive media, petrol,
alcohol or thinner. Only fit the filter back in place
when thoroughly dry.
C) At the end of the season
At the end of the season, let the device run for
approx. 3 hours in the fan function (FAN).
Then roll up the power cable and store it in the
storage compartment provided at the back of the
device.
Place a suitable container beneath the
condensate drain and remove the plug. The
trough then empties (see Chapter 7).
Re-insert the plug in the condensate drain.
Important: If the plug is not inserted or is not
inserted correctly, water will escape the next time
the device is used again.
Clean the filter and the housing.
Re-insert the filter when thoroughly dry.
Store the device in an upright position, preferably
packed in the original box, in a dry and dust-tight
location.
10. Ordering spare parts
Please provide the following information on all orders
for spare parts:
Model/type of appliance
Article number of the appliance
ID number of the appliance
Number of the required spare part
For our latest prices and information please go to
www.isc-gmbh.info
11. Circuit diagram (Fig. 10)
12. Troubleshooting
If the device is operated properly you should
experience no problems with malfunctions or faults. In
the event of any malfunctions or faults, please check
the following before you contact your customer
services.
Anleitung Alaska 110_SPK7:Anleitung MKA 7000_D 07.11.2006 7:41 Uhr Seite 18

19
GB
Problem Rectification measures
Device does not work Is the mains plug properly connected?
Is there a voltage supply at the mains socket outlet?
Was the ON/OFF button pressed?
Is the condensation water tank full or not properly inserted?
Device does not have a cooling effect or
cooling performance is not satisfactory
If the room temperature is below 18°C, the cooling mode
will not work.
If the room temperature is above 18°C, the cooling
compressor will automatically activate after a potential
defrosting phase.
Is the room exposed to direct sunlight?
Are any doors and windows open?
Are there a lot of people in the room?
Is a device in the room generating a lot of heat?
Weak ventilation performance Is the air hose blocked?
Is the filter soiled?
Is the air inlet or air outlet blocked?
The device is too loud Has the device been set up on an uneven surface/at an
angle?
The compressor does not work Is the condensation water tank full?
If the compressor has overheated and the overheating
cutout has switched off the compressor, wait until the
compressor cools down.
Have the device inspected by a specialist firm when you have used it for some time.
Anleitung Alaska 110_SPK7:Anleitung MKA 7000_D 07.11.2006 7:41 Uhr Seite 19

20
F
Table des matières
1. Avant l’utilisation
2. Caractéristiques techniques
3. Consignes de sécurité
4. Description de l’appareil
5. Mise en service de l’appareil
6. Montage du tuyau d’air d’échappement
7. Recyclage de l’eau de condensation
8. Raccord du tuyau d’eau de condensation
9. Travaux de nettoyage du consommateur final
10. Commande de pièces de rechange
11. Diagramme de connexion électrique
12. Consignes de dépannage
Veuillez lire ces instructions minutieusement avant la
mise en service de lʼappareil et bien conserver cette
documentation.
En achetant ce climatiseur transportable, vous avez
fait un bon choix. Cet appareil est très professionnel
et offre un maximum de confort pour de nombreuses
années, à condition quʼil soit employé conformément
à ce mode dʼemploi. Veuillez donc lire
minutieusement ces instructions et gardez-les bien
afin de pouvoir les utiliser plus tard.
1. Avant l’utilisation
1. Placez toujours l’appareil transportable sur un
support stable et horizontal.
2. L’appareil doit toujours être en position verticale.
3. Ne basculez jamais l’appareil de plus de 45° !
Après un transport (incliner), ne raccordez pas
l’appareil pendant au moins 1 heure à la prise de
courant.
4. Raccordez l’appareil à la bonne prise de courant
(attention à la tension secteur).
5. En fonction de refroidissement, l’air d’évacuation
chaud doit être évacué à l’extérieur via le tuyau
d’air d’échappement. Il faut prévoir à cet effet une
ouverture dans la paroi ou dans la fenêtre.
2. Caractéristiques techniques
Fluide frigorigène R407 C
Quantité de remplissage de réfrigérant 580 g
Puissance frigorifique* 3266 Watt
Tension du réseau 230 V ~ 50 Hz
Puissance absorbée 1500 W
Classe d’efficacité énergétique* A (EER 2,51)
Débit d’air maxi. 430 cbm/h.
Taille de la salle maxi. 95 m³
Puissance de déshydratation maxi.(30°C/80%RH)
70 l/jour
Paliers de vitesses du ventilateur 3
Température ambiante du site d’application :
18 - 30°C
Niveau de pression acoustique : ≤ 55 dB(A)
Cotes (laxprxh) 50 x 35 x 84 cm
Poids net 34 kg
* données selon EN 14511
3. Consignes de sécurité
Lisez les consignes de sécurité à respecter avant
d’employer l’appareil.
Une fois lu, conservez le mode d’emploi et
remettez-le à toute personne chargée de
commander le système de climatisation.
Mettez l’appareil en place de manière que la fiche
secteur soit toujours accessible.
Le câble réseau doit être régulièrement contrôlé
du point de vue d’éventuels défauts ou
endommagements. Un câble réseau endommagé
doit uniquement être remplacé par un(e)
spécialiste électricien(ne) ou par l’entreprise ISC
GmbH en prenant en considération les
prescriptions pertinentes.
L’appareil ne convient pas à une utilisation
industrielle.
Il est interdit d’utiliser l’appareil dans la salle de
bains.
Les enfants ou personnes fragiles sont
uniquement autorisées à utiliser cet appareil sous
surveillance. Il est interdit aux petits-enfants de
jouer avec cet appareil.
Le système de climatisation convient uniquement
à l’acclimatation de salles petites à moyenne. Ne
n’utilisez pas à des buts spéciaux (conservation
d’aliments, d’instruments de précision, de
plantes, animaux, de couleurs ou d’objets d’art).
Cela pourrait endommager ces choses.
Assurez-vous que la tension secteur disponible
ait la même valeur que celle indiquée comme
tension réseau sur la plaque signalétique.
Il est seulement autorisé de raccorder l’appareil à
une prise de courant de sécurité correctement
mise à la terre.
Pour la sécurité électrique, installez un
disjoncteur à courant de défaut (disjoncteur
protecteur FI).
Attention ! Ne rallongez pas câble réseau et
n’utilisez pas de prises multiples. La sécurité
électrique ne serait sinon plus assurée.
Ne retirez jamais la fiche secteur de la prise
lorsque l’appareil fonctionne.
Mettez immédiatement l’appareil hors circuit et
retirez le câble secteur dès que vous constatez
un état de fonctionnement anormal (par exemple
une odeur de brûlé). Si vous continuez à faire
Anleitung Alaska 110_SPK7:Anleitung MKA 7000_D 07.11.2006 7:41 Uhr Seite 20
This manual suits for next models
1
Table of contents
Languages:
Other ProKlima Air Conditioner manuals

ProKlima
ProKlima JHS-A030-09KR2/A-W User manual

ProKlima
ProKlima 23.651.66 User manual

ProKlima
ProKlima GPC10AL User manual

ProKlima
ProKlima Split 900 FLAT EQ C+H User manual

ProKlima
ProKlima GPC12AJ User manual

ProKlima
ProKlima AC120-16AR User manual

ProKlima
ProKlima KLW-018A1 User manual

ProKlima
ProKlima SPLIT 850 C User manual

ProKlima
ProKlima A018A-09C-PLUS-W User manual

ProKlima
ProKlima ALASKA 120 C+H User manual