Promate solarmate-10 User manual

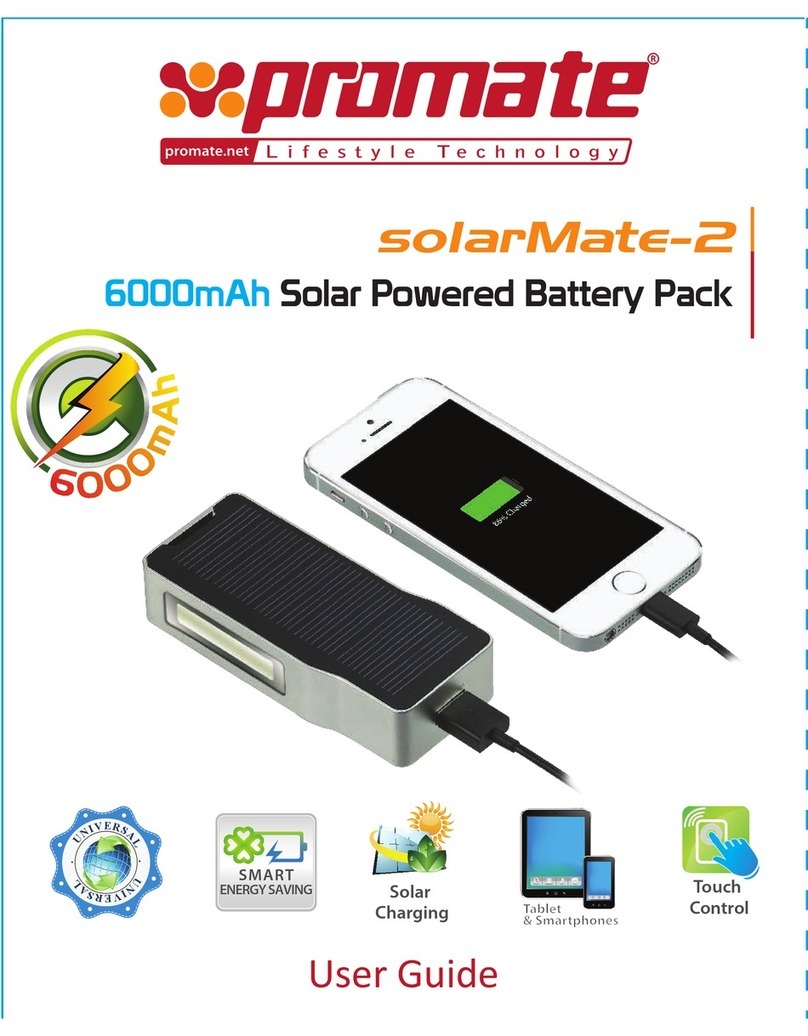
solarMate-10
10000mAh
Heavy Duty SOLAR Powered Battery Pack

10000mAh
Heavy Duty SOLAR Powered Battery Pack
• solarMate-10
• Micro-USB Charging Cable
• User Guide
Introduction
Packaging Contents
Thank you for purchasing solarMate-10. Get power-on-the go when outdoors
with solarMate-10. This revolutionary new solar powered battery pack is built
keeping durability and functionality in mind. Charge two devices simultane-
ously even when you are not around any electrical output. With solarMate-10’s
Monocrystalline Silicon Solar Panel, charge your device under incandescent
light indoors. Never run out of battery on long ights, extended meetings or
those outdoor events. Charge two devices at a lightning speed with two fast
USB charging interface’s and get to know the power level with the LED
indicator. Utilize the best renewable energy source known to mankind at its
optimum level with solarMate-10.
English
1

Specication
• Battery Type: Li-polymer.
• Capacity: 10000mAh
• Input: Micro USB 5V/1.5A(Max),
• Solar Charging: 5V/200mA(Max),
• Output:USB1: 5V/1.3A(Max),
USB2: 5V/2.1A(Max)
• Charging Time: via Solar Power: 55-60 hrs
via USB: 7-8 hrs.
Features
• Powerful 10000mAh Capacity Li-polymer Battery.
• Charge two devices simultaneously.
• Monocrystalline Silicon Solar Panel
• Fast USB Charging Interface.
• Power on-the-go.
• Key Chain Design.
• Heat Dissipating ABS Plastic Shell
• LED battery level indicator.
• Intelligent Power Management with 7 Protection: Overvoltage protection,
Overcurrent protection, overcharge protection, short-circuit protection,
over power protection, over discharge protection. Temperature protection
• Compatible with all Smartphones and Tablets.
• LED Light.
English
1
2

Precautions
Please read all safety instructions and warnings thoroughly before using this
product. Improper use of this product may result in damage to this or
attached products.
1. Do not disassemble the back-up battery or attempt to x it.
2. Kindly use an original charging cable provided to charge the product.
3. Do not attempt to replace any part of this Back-up battery or battery
inside.
4. Do not crush, puncture, dispose of in re, short the contacts or expose the
battery to water or other liquids.
5. Do not connect input and output in reverse.
6. Do not store or use the battery in a high temperature environment,
including intense sunlight or heat.
7. Avoid drops, bumps, abrasions and impacts.
8. If there is any reason to believe that there is damage to the battery,
discontinue use immediately.
9.If you nd that the battery is too hot, is emitting an odor, or is deformed,
punctured or exhibits any suspicious or abnormal behavior, discontinue use
immediately and contact our customer service.
10. Always charge this product before extended storage.
English
2
3

Tap the Multi-Function button once to view the amount of power remaining in
solarMate-5
1. Checking the remaining power left in solarMate-10 back-up battery
Appearance & Interface Description:
1. Solar Panel
2. LED Indicators
3. Multi-function button.
4. USB Output
5. LED Light
6. USB Output
7. Micro USB Input
Operation Instructions:
English
4

Tap the Multi-Function button once to view the amount of power remaining in
solarMate-5
Plug the Micro-USB end of the charging cable provided into the Micro-USB
charging port in solarMate-10 back-up battery. Connect the other end of the
Micro-USB charging cable to a USB power adapter or computer USB port. The LED
battery level indicator light’s up indicating that the back-up battery is charging
normally.
solarMate-10, can be recharged by solar energy when kept under the sun rays or in
the environment with strong sunlight. solarMate-10 may also be charged using
incandescent light.
of power remaining %
No of LED’s Active
<=25% <=50% <=75% <=100%
1 2 3 4
2. Charging solarMate-10 back-up battery
English
4
5

3. Charging USB chargeable devices using solarMate-10
• Press and hold the Multi-function button for 3 seconds to turn ‘on’ the LED Light.
• Again press the Multi-function button for 3 seconds to turn ‘o’the LED Light.
4. Using the LED Light on solarMate-10
There are 2 ports available on solarMate-10. It is recommended to use the 1.3A
charging output port to charge smartphones and the 2.1A charging output port to
charge tablet devices. Plug the USB cable into the USB output port on solarMate-10
back-up battery and the other end into the device. Press the multi-function button
once to start charging your device. Detach the USB cable once charging is
complete.
English
5
6

Instrucciones de funcionamiento:
1. Vericar la carga restante en la batería de respaldo solarMate-10
2. Para cargar la batería de respaldo solarMate-10
Pulse el botón multifunción una vez para ver la cantidad de energía restante en
solarMate-10.
Conecte el extremo Micro USB del cable de recarga provisto en el puerto
Micro USB de la batería de respaldo solarMate-10. Conecte el otro extremo
del cable de recarga Micro USB en el puerto USB del cargador eléctrico o en
el puerto USB del ordenador. El indicador LED de nivel de batería se
encenderá indicando que la batería de respaldo está cargando
correctamente.
La batería SolarMate-10, puede ser cargada con energía solar siempre que se
mantenga una exposición directa a los rayos del sol o en un entorno
fuertemente iluminado por los rayos del sol. SolarMate-10 puede también
ser cargada mediante luz incandescente.
No of LED’s Active
<=25% <=50% <=75% <=100%
1 2 3 4
% de la energía
restante
Use the image on the operation page but add more devices and dierent cables)
There are 2 ports available on solarMate-10. It is recommended to use the 1.3A
charging output port to charge smartphones and the 2.1A charging output port to
charge tablet devices. Plug the USB cable into the USB output port on solarMate-10
back-up battery and the other end into the device. Press the multi-function button
once to start charging your device. Detach the USB cable once charging is
complete.
Spanish
6
7

Existen 2 puertos disponibles en solarMate-10. Se recomienda utilizar el puerto de
carga de salida 1.3A para recargar smartphones y el puerto de salida 2.1A para
recargar las tabletas. Conecte el cable USB en el puerto de salida USB de la batería
de respaldo solarMate-10 y el otro extremo en el dispositivo. Presione una vez el
botón multifunción para comenzar la carga de su dispositivo. Desconecte el cable
USB una vez que la carga ha sido terminada.
3. Para Cargar dispositivos alimentados por USB utilizando solarMate-10
• Para encender la luz LED, presione y mantenga el botón multifunción
durante 3 segundos.
• Para apagar la luz LED, presione de nuevo el botón multifunción durante
3 segundos.
4. Para utilizar la luz de LED de la batería de respaldo solarMate-10
Spanish
7
8

de batterie restante %
Nbre de LED actives
<=25% <=50% <=75% <=100%
1 2 3 4
Appuyez une fois sur le bouton multifonction an d’acher la quantité de batterie
restante du solarMate-10.
Branchez l'extrémité Micro-USB du câble de chargement fourni dans le port
Micro-USB de chargement de la batterie de secours solarMate-10. Connectez l'autre
extrémité du câble de chargement Micro-USB au port USB de l'adaptateur secteur
ou au port USB de l’ordinateur. L’indicateur de niveau de batterie LED indique que la
batterie back-up se charge normalement.
solarMate-10, peut être rechargé grâce à l'énergie solaire lorsqu’il est placé sous les
rayons du soleil ou dans un environnement présentant un fort ensoleillement.
solarMate-10 peut également être rechargé en utilisant la lumière incandescente.
Mode d’emploi:
1. Vérication de la batterie de secours restante du solarMate-10
2. Chargement de la batterie de secours solarMate-10
French
8
9

Il existe deux ports disponibles sur le solarMate-10. Il est recommandé d'utiliser la
de sortie USB de la batterie de secours solarMate-10 et l'autre extrémité dans le
charger votre appareil. Débranchez le câble USB une fois le chargement terminé.
3. Charger des appareils USB à l'aide du solarMate-10
d’allumer la lumière LED.
lumière LED.
4. Utilisation de la lumière LED sur le solarMate-10
French
9
10

%din energia rămasă
Nr de LED-uri active
<=25% <=50% <=75% <=100%
1 2 3 4
Apăsaţi butonul Multi-funcţie o dată pentru a vedea cantitatea de energie rămasă în
bateria solarMate-10.
Conectaţi micro-USB-ul de la capătul cablului de încărcare furnizat, la portul de
încărcare al bateriei solarMate-10. Conectaţi celălalt capăt prevăzut cu micro-USB al
cablului de conectare, la un adaptor de curent cu USB sau la portul USB al unui
computer. LED-ul indicator de nivel de încărcare al bateriei se va aprinde indicând
că bateria se încarcă în mod normal.
Bateria solarMate-10 se poate reîncărca cu energie solară când se ţine în bătaia
razelor soarelui sau într-un mediu puternic iluminat de soare. Se mai poate încărca
bateria solarMate-10 folosindu-se lumină incandescentă.
Instrucțiuni de utilizare
1. Vericarea energiei rămase în bateria de rezervă solarMate-10
2. Încărcarea bateriei de rezervă solarMate-10
Romanian
11

Pe bateria solarMate-10 sunt 2 porturi disponibile. Se recomandă să se folosească
portul 1.3A pentru încărcarea smartphon-urilor şi portul 2.1A pentru încărcarea
tabletelor. Conectaţi cablul USB la portul USB de pe bateria de rezerva solarMate-10,
iar capătul celălalt la dispozitiv. Apăsaţi o dată butonul multi-funcţie pentru a se
începe încărcarea dispozitivului dvs. Deconectaţi cablul USB când încărcarea este
completă.
3. Încărcarea dispozitivelor cu USB, reîncărcabile, folosind bateria
solarMate-10
•Apăsaţi şi menţineţi apăsat timp de 3 secunde butonul multi-funcţie, pentru a se
aprinde LED-ul indicator.
• Apăsaţi din nou butonul multi-funcţie timp de trei secunde pentru a se stinge
LED-ul indicator.
4. Folosirea LED-ului indicator de pe bateria solarMate-10
Romanian
11 12

(Vedeţi imaginea de la pagina cu instrucţiuni de folosire dar adăugaţi mai multe
dispozitive şi diferite cabluri)
Pe bateria solarMate-10 sunt 2 porturi disponibile. Se recomandă să se folosească
portul 1.3A pentru încărcarea smartphon-urilor şi portul 2.1A pentru încărcarea
tabletelor. Conectaţi cablul USB la portul USB de pe bateria de rezerva solarMate-10,
iar capătul celălalt la dispozitiv. Apăsaţi o dată butonul multi-funcţie pentru a se
începe încărcarea dispozitivului dvs. Deconectaţi cablul USB când încărcarea este
completă.
•Apăsaţi şi menţineţi apăsat timp de 3 secunde butonul multi-funcţie, pentru a se
aprinde LED-ul indicator.
• Apăsaţi din nou butonul multi-funcţie timp de trei secunde pentru a se stinge
LED-ul indicator.
% оставшейся энергии
Кол-во активных
индикаторов СИД
<=25% <=50% <=75% <=100%
1 2 3 4
Инструкция по эксплуатации:
1. Проверка оставшейся энергии в резервной солнечной батареи
solarMate-10
2. Подзарядка резервной солнечной батареи solarMate-10
Нажмите мультифункциональную кнопку один раз, чтобы на экране
отобразились данные по остатку энергии в солнечной батареи solarMate-10.
Вставьте зарядный кабель концом с разъемом микро-USB в порт USB на
резервной батареи solarMate-10. Подключите другой конец зарядного
кабеля микро-USB к USB адаптеру питания или USB-порту на вашем
компьютере. Индикатор уровня зарядки батареи загорится, указывая,
что процесс зарядки резервной солнечной батареи проходит
нормально.
Зарядить батарею solarMate-10 можно также от солнечного света, если
разместить ее под прямыми солнечными лучами, либо положить в
солнечном месте. Также батарея solarMate-10 может зарядиться и при
воздействия света от лампы накаливания.
Russian
Russian
12 13

1. Проверка оставшейся энергии в резервной солнечной батареи
solarMate-10
Нажмите мультифункциональную кнопку один раз, чтобы на экране
отобразились данные по остатку энергии в солнечной батареи solarMate-10.
3. Зарядка устройств через USB порт с помощью батареи solarMate-10
• Нажмите и удерживаете в таком положении мультифункциональную кнопку
в течение 3-х секунд, пока не загорится индикатор СИД
• Чтобы отключить светодиодный индикатор также следует нажать и
удерживать универсальную кнопку в течение 3-х секунд.
4. Правила использования индикатора СИД в батареи solarMate-10
Солнечная батарея solarMate-10 поддерживает два вида портов. Для
зарядки
смартфонов рекомендуется использовать выходной порт для зарядки
устройств 1.3A, для зарядки портативных устройств, наподобие планшета
иноутбука, используйте выходной порт 2.1A. Для начала зарядки вашего
устройства нажмите универсальную кнопку, расположенную на батареи,
один раз. По завершении зарядки отсоедините USB кабель от батареи и
заряжаемого устройства.
Russian
13 14

Kalan Güç Yüzdesi
Aktif LED sayısı
<=25% <=50% <=75% <=100%
1 2 3 4
Kullanım Talimatları:
1. solarMate-10 Yedek pilde kalan pili control etme:
2. SolarMate-10 Yedek Pili Şarj Etme:
Çoklu-Fonksiyon tuşuna 1 kez basarak solarMate-10’da kalan pili görebilirsiniz.
Ürünle birlikte verilen şarj kablosunun mikro-USB ucunu solarMate-10’daki
mikro-USB yuvasına takın. Mikro-USB şarj kablosunun diğer ucunu USB güç
adaptörüne veya bilgisayarın USB yuvasına takın. Yedek pilin normal şekilde
şarj olduğunu gösteren, gösterge ışıkları yanar.
solarMate-10, güneş ığı altına konulduğunda güneş ışınlarıyla da şarj
edilebilir. solarMate-10 parlak ışık altında da şarj edilebilir.
Turkish
14 15

3. solarMate-10 kullanarak USB’den şarj olan şarj cihazlarını şarj etme.
• LED ışıkları açmak için çoklu-fonksiyon tuşuna 3 saniye basılı tutun.
•LED ışıkları kapatmak için yine çoklu-fonksiyon tuşuna 3 saniye basılı tutun.
4. solarMate-10 üzerindeki LED ışıkları kullanma
solarMate-10’da 2 adet yuva vardır.Akıllı telefonlar için 1.3 amper olan şarj
çıkışını kullanmanız tavsiye edilir. Tabletler için 2.1 amper olan şarj çıkışı
tavsiye edilir. USB kablosunu solarMate-10 yedek pilin USB yuvasına takın ve
diğer ucu şarj edilecek cihaza bağlayın. Şarja başlamak içib çoklu-fonksiyon
tuşuna 1 kez basın.Şarj bitince USB kablosunu çıkarın.
Turkish
1615

占剩余电量百分比
LED亮度级别
<=25% <=50% <=75% <=100%
1 2 3 4
1. 检查SOLARMATE-10后备电池的剩余电量
2. 给 SOLARMATE-10后备电池充电
轻按多功能按钮一次,查看solarMate-10的剩余电量。
将所提供充电线的微型USB一端插入solarMate-10后备电池的微型USB充电
端口。将微型USB充电线的另一端与USB电源适配器或电脑USB端口相连。
LED电量指示灯亮起,表明后备电池正常充电。
solarMate-10可在放置在太阳光线或具有强烈阳光的环境下通过太阳能进
行再充电。solarMate-10也可使用白炽灯充电。
操作说明:
Chinese
16 17

4. 使用SOLARMATE-10上的LED灯
· 按住多功能按钮3秒,“打开”LED灯。
· 再次按住多功能按钮3秒,“关闭”LED灯。
ﺔﯿطﺎﯿﺘﺣﻻا ﺔﻳرﺎﻄﺒﻠﻟ جرﺪﻤﻟا ﺮﻐﺼﻤﻟا USB ﻦﺤﺷ ﺬﻔﻨﻣ ﻲﻓ ﺔﺟرﺪﻤﻟا ﻦﺤﺸﻟا ﻞﺒﻛ ﺔﻳﺎﮭﻧ ﻞﯿﺻﻮﺘﺑ ﻢﻗ
وأ USB ﺔﻗﺎﻄﻟا لﻮﺤﻣ ﺬﻔﻨﻤﺑUSB ﻦﺤﺸﻟا ﻞﺑﺎﻜﻟ ﺮﺧﻵا فﺮﻄﻟا ﻞﯿﺻﻮﺘﺑ ﻢﻗ .solarMate-10 زﺎﮭﺠﻟ
ﻢﺘﺗ ﻲطﺎﯿﺘﺣﻻا ﺦﺴﻨﻟا ﺔﻳرﺎﻄﺑ ﻦﺤﺷ ﻪﯿﻠﻤﻋ نأ ﻰﻟإ ﺮﯿﺸﺘﻟ LED ﺔﺒﻤﻟ ىﻮﺘﺴﻣ ءﻲﻀﻳ فﻮﺳ .ﺮﺗﻮﯿﺒﻤﻜﻟا
.ﻲﻌﯿﺒط ﻞﻜﺸﺑ
ﺔﺌﯿﺒﻟا ﻲﻓ وأ ﺲﻤﺸﻟا ﺔﻌﺷأ ﺖﺤﺗ ﻪﻌﺿو ﺪﻨﻋ ﺔﯿﺴﻤﺸﻟا ﺔﻗﺎﻄﻟﺎﺑ solarMate-10 ﻦﺤﺷ دﺎﻌﻳ نأ ﻦﻜﻤﻳ
.ﻊطﺎﺴﻟا ءﻮﻀﻟا ماﺪﺨﺘﺳﺎﺑ solarMate-10 ﻦﺤﺷ ﻦﻜﻤﻳ .ﺔﻳﻮﻘﻟا ﺲﻤﺸﻟا ﺔﻌﺷأ ﺎﮭﺑ ﺮﻓاﻮﺘﻳ ﻲﺘﻟا
solarMate-10 زﺎﮭﺟ ﻲﻓ ﺔﯿﻘﺒﺘﻤﻟا ﺔﻗﺎﻄﻟا راﺪﻘﻣ ضﺮﻌﻟ ةﺪﺣاو ةﺮﻣ ةدﺪﻌﺘﻤﻟا ﺔﻔﯿظﻮﻟا رز ﻰﻠﻋ ﻂﻐﺿا
تﺎﻣﺎﻤﺼﻟا دﺪﻋ
ﺔﻄﺸﻨﻟا ءﻮﻀﻠﻟ ﺔﺜﻋﺎﺒﻟا ﺔﯿﺋﺎﻨﺜﻟا
3. 使用SOLARMATE-10给USB充电设备充电
solarMate-10上配有2个端口。建议使用1.3A充电输出端口给智能手机充
电,而使用2.1A充电输出端口给平板设备充电。将USB线插入
solarMate-10后备电池上的USB输出端口,另一端插入设备。按下多功能
按钮一次开始给您的设备充电。一旦充电完成,拔掉USB线。
Chinese
1817

:ﻞﯿﻐﺸﺘﻟا تﺎﻤﯿﻠﻌﺗ
solarMate-10 ﺔﯿطﺎﯿﺘﺣا ﺔﻳرﺎﻄﺑ ﻦﺤﺷ .2
ﺔﯿطﺎﯿﺘﺣﻻا ﺔﻳرﺎﻄﺒﻠﻟ جرﺪﻤﻟا ﺮﻐﺼﻤﻟا USB ﻦﺤﺷ ﺬﻔﻨﻣ ﻲﻓ ﺔﺟرﺪﻤﻟا ﻦﺤﺸﻟا ﻞﺒﻛ ﺔﻳﺎﮭﻧ ﻞﯿﺻﻮﺘﺑ ﻢﻗ
وأ USB ﺔﻗﺎﻄﻟا لﻮﺤﻣ ﺬﻔﻨﻤﺑUSB ﻦﺤﺸﻟا ﻞﺑﺎﻜﻟ ﺮﺧﻵا فﺮﻄﻟا ﻞﯿﺻﻮﺘﺑ ﻢﻗ .solarMate-10 زﺎﮭﺠﻟ
ﻢﺘﺗ ﻲطﺎﯿﺘﺣﻻا ﺦﺴﻨﻟا ﺔﻳرﺎﻄﺑ ﻦﺤﺷ ﻪﯿﻠﻤﻋ نأ ﻰﻟإ ﺮﯿﺸﺘﻟ LED ﺔﺒﻤﻟ ىﻮﺘﺴﻣ ءﻲﻀﻳ فﻮﺳ .ﺮﺗﻮﯿﺒﻤﻜﻟا
.ﻲﻌﯿﺒط ﻞﻜﺸﺑ
ﺔﺌﯿﺒﻟا ﻲﻓ وأ ﺲﻤﺸﻟا ﺔﻌﺷأ ﺖﺤﺗ ﻪﻌﺿو ﺪﻨﻋ ﺔﯿﺴﻤﺸﻟا ﺔﻗﺎﻄﻟﺎﺑ solarMate-10 ﻦﺤﺷ دﺎﻌﻳ نأ ﻦﻜﻤﻳ
.ﻊطﺎﺴﻟا ءﻮﻀﻟا ماﺪﺨﺘﺳﺎﺑ solarMate-10 ﻦﺤﺷ ﻦﻜﻤﻳ .ﺔﻳﻮﻘﻟا ﺲﻤﺸﻟا ﺔﻌﺷأ ﺎﮭﺑ ﺮﻓاﻮﺘﻳ ﻲﺘﻟا
تﻼﺑﺎﻜﻟاو ةﺰﮭﺟﻻا ﻦﻣ ﺪﻳﺰﻤﻟا ﺔﻓﺎﺿﺈﺑ ﻢﻗ ﻦﻜﻟو ﻞﯿﻐﺸﺘﻟا ﺔﺤﻔﺻ ﻲﻓ ةدﻮﺟﻮﻤﻟا ةرﻮﺼﻟا ماﺪﺨﺘﺳا)
Aﻦﺤﺷ ﺬﻔﻨﻣ جﺮﺨﻣ ماﺪﺨﺘﺳا ﻦﺴﺤﺘﺴﻤﻟا ﻦﻣ . solarMate-10 ﻲﻓ ﺬﻔﻨﻣ 2دﺪﻋ ﺪﺟﻮﻳ (ﺔﻔﻠﺘﺨﻤﻟا
ﻞﯿﺻﻮﺘﺑ ﻢﻗ .ﻲﺣﻮﻠﻟا ﺮﺗﻮﯿﺒﻤﻜﻟا ةﺰﮭﺟأ ﻦﺤﺸﻟ A 2.1 ﻦﺤﺷ ﺬﻔﻨﻣ جﺮﺨﻣ و ﺔﯿﻛﺬﻟا ﻒﺗاﻮﮭﻟا ﻦﺤﺸﻟ 1.3
.زﺎﮭﺠﻟا ﻰﻟإ ﺮﺧﻵا فﺮﻄﻟاو ﻦﺤﺸﻟا ﺬﻔﻨﻣ جﺮﺨﻤﻟ ﺔﯿطﺎﯿﺘﺣﻻا ﺔﻳرﺎﻄﺒﻟﺎﺑ USB ﺬﻔﻨﻣ جﺮﺨﻣ ﻲﻓ USB ﻞﺒﻛ
دﺮﺠﻤﺑ USB ﻞﺑﺎﻛ ﻞﺼﻔﺑ ﻢﻗ .ﻚﺑ صﺎﺨﻟا زﺎﮭﺠﻟا ﻦﺤﺷ ءﺪﺒﻟ ةﺪﺣاو ةﺮﻣ ةدﺪﻌﺘﻤﻟا ﺔﻔﯿظﻮﻟا رز ﻰﻠﻋ ﻂﻐﺿا
.ﻦﺤﺸﻟالﺎﻤﺘﻛا
solarMate-10 زﺎﮭﺠﻟ ﺔﯿطﺎﯿﺘﺣﻻا ﺔﻳرﺎﻄﺒﻟا ﻲﻓ ﺔﯿﻘﺒﺘﻤﻟا ﺔﻗﺎﻄﻟا ﻦﻣ ﻖﻘﺤﺘﻟا .1
solarMate-10 زﺎﮭﺟ ﻲﻓ ﺔﯿﻘﺒﺘﻤﻟا ﺔﻗﺎﻄﻟا راﺪﻘﻣ ضﺮﻌﻟ ةﺪﺣاو ةﺮﻣ ةدﺪﻌﺘﻤﻟا ﺔﻔﯿظﻮﻟا رز ﻰﻠﻋ ﻂﻐﺿا
<=25% <=50% <=75% <=100%
1 2 3 4
تﺎﻣﺎﻤﺼﻟا دﺪﻋ
ﺔﻄﺸﻨﻟا ءﻮﻀﻠﻟ ﺔﺜﻋﺎﺒﻟا ﺔﯿﺋﺎﻨﺜﻟا
ﺔﻄﺸﻨﻟا LED تﺎﺒﻤﻟ دﺪﻋ
Arabic
1918
Other Promate Batteries Pack manuals
Popular Batteries Pack manuals by other brands

LSI
LSI ServeRAID M5000 Series user guide

Stryten Energy
Stryten Energy M Series Installation and operating instructions

Sony
Sony infoLITHIUM NP-FM50 operating instructions

Sony
Sony BP-LX1A operating instructions

MPVTruma
MPVTruma Microdrop mini instruction manual

Nosram
Nosram VTEC lithium-polymer power LiPo Pack-7.4V-2S user manual