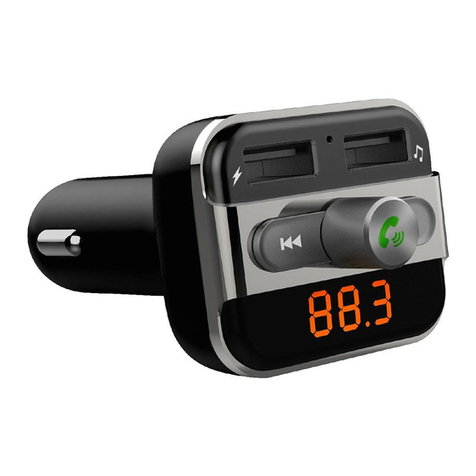
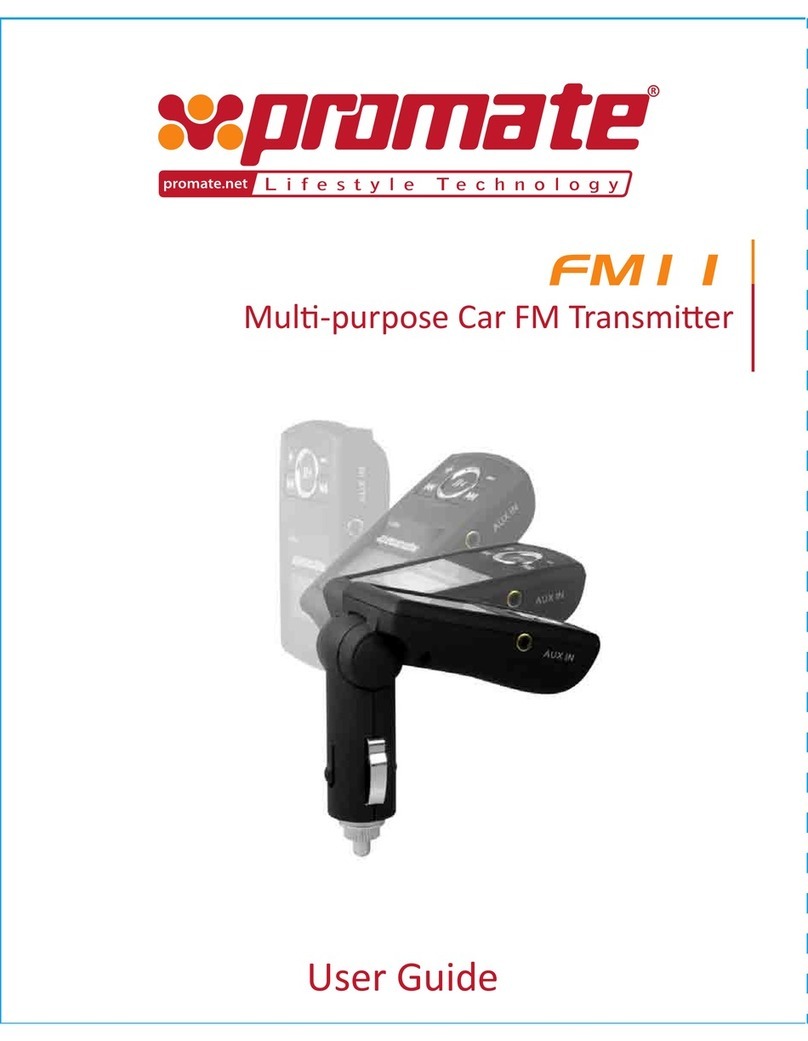
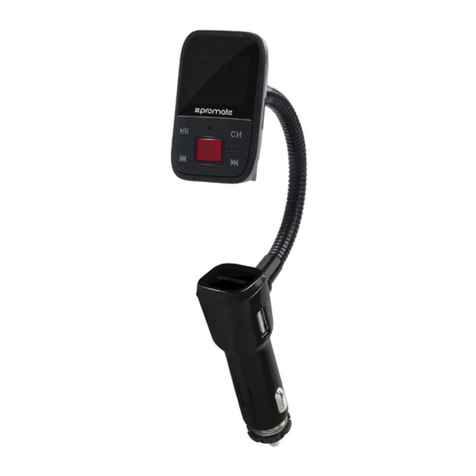
Promate FM12 User manual

Multi-Function Car FM Transmitter
FM-12
1 3 4 5
6 7 8 9 10 11
12 13 14 15 16 17
18 19 20 21 22 23
24 25 26 27 28 29
30 31 32 33 34
36 37 38
35
2
39 40 41
4 2 43 44 45 46 47
48 49 50 51 52 53
54 55 56 57 58 59
60 61 62 63 64 65
66 67 68 69 70 71
72 73 74 75 76 77
78 79 80 81 82 83
84 85 86 87 88 89
90 91 92 93 94 95
96 97 98 99 100 101
102 103 104 105 106 107
108 109 110

English
Introduction
Promate FM12 is a top-of-the-line FM transmitter designed for safe driving while listening with high
quality music. This patented design ts any car lighter socket. The unit is tuned to an open channel on
your car's stereo so you can play music from your MP3/MP4 player, iPod, USB drives or SD/MMC
Card(MP3 or WMA les). Its FM technology routes the sound to the car stereo speaker for clean and
clear music playback. The large screen provides you with the current track information and functions
may be accessed from the remote controller.
• FM12
• Remote Control
• Extra Fuse
• Audio Cable
• User Guide
Packaging Content Specication
• Transmission range: 10M
• Power sourc: 12V DC(Car lighter socket)
• FM channel: 87.5~108.0 MHz
• Left-to right separation:>=40dB
• Distortion:0.3%
Features
• Panel-button with Power On/O switch
• Frequency phase lock loop technology and exible sound coding technology
• Supports line-in for input exibility
• Supports folder selection function
• Supports SD/MMC card and USB devices
• Supports MP3/WMA playback
• 16-bit large screen to display track information
• FM channel range between 87.5 ~ 108.0 Mhz (Total 206 channels)
• 20-key remote control for easy navigational control
• Made from ABS plastic
Precautions
Please read all safety instructions and warnings thoroughly before using this product. Improper use of
this product may result in damage to this or attached products.
1. Do not disassemble the device or attempt to x it.
2. Do not attempt to replace any part of this product. Remote control battery is replaceable.
3. Do not crush, puncture or dispose of in re.
4. Do not store or use the device in a high temperature environment, including intense sunlight or heat.
5. Avoid excessive drops, bumps, abrasions and impacts.
6. If there is any reason to believe that there is internal damage to the device, discontinue use
immediately.
7. If you nd that the device is too hot, is emitting an odor, or is deformed, punctured or exhibits any
suspicious or abnormal behavior, discontinue use immediately and contact our customer service.
1
3 4 5
6 7 8 9 10 11
12 13 14 15 16 17
18 19 20 21 22 23
24 25 26 27 28 29
30 31 32 33 34
36 37 38
35
2
39 40 41
4 2 43 44 45 46 47
48 49 50 51 52 53
54 55 56 57 58 59
60 61 62 63 64 65
66 67 68 69 70 71
72 73 74 75 76 77
78 79 80 81 82 83
84 85 86 87 88 89
90 91 92 93 94 95
96 97 98 99 100 101
102 103 104 105 106 107
108 109 110

English
Functions
1. LCD Display
2. Previous Track & Reduce Volume Button (USB Flash Memory & SD Card)
Press the button once to return to the previous track.
Press and hold to decrease the volume
3. Press the button
To switch to the below/previous broadcast frequency
4. Press the button
To switch to the above/next broadcast frequency
5. Next Track and Increase Volume Button
(USB Flash Memory and SD Card)
Press the to go to the Next Track
Press and hold to increase the volume.
6. Play/Pause
(USB Flash Memory and SD Card)
Press this button once to start playing an MP3 File
Press it again to Pause.
7. SD Memory Card Slot
8. USB Port
9. Aux-in Jack
NO DEVICE
LINE IN
Car mp3
90.3
Fm12
1
2
3
4
5
6
Remote Control
1. CH-: Switch to Below/Previous Frequency
2. CH+: Switch to Above/ Next Frequency
3. Previous Track
4. Next Track
5. Play/Pause
6. VOL -: Volume Decrease
7. VOL +: Volume Increase
8. EQ : EQ Mode Selection
9. 0~9 Number Key: For Music Selection or Frequency
10. Pick Song: Press a Number Key, then press this key to
select a song.
11. CH SET: Press number key, then press this key select
transmission frequency between 87.5MHZ to 108MHz
2
1
7
4
6
3
11
5
8
9
10
7
8
9
1 3 4 5
6 7 8 9 10 11
12 13 14 15 16 17
18 19 20 21 22 23
24 25 26 27 28 29
30 31 32 33 34
36 37 38
35
2
39 40 41
4 2 43 44 45 46 47
48 49 50 51 52 53
54 55 56 57 58 59
60 61 62 63 64 65
66 67 68 69 70 71
72 73 74 75 76 77
78 79 80 81 82 83
84 85 86 87 88 89
90 91 92 93 94 95
96 97 98 99 100 101
102 103 104 105 106 107
108 109 110

English
• Insert the device into car cigarette socket (12V-24V DC Power)
You will see the screen as shown channel in LCD Display
• Follow the instructions in the“Set-Up”of this manual.
• Insert the SD Memory Card into the SD Card Slot to the player.
• Press the“ ”button to Play/Pause. Keep pressing ” ” key to switch to Play
Mode
(ALL/FOLDER/SINGLE/RANDOM)
• Press the “ ” button once to go to previous track. Press and hold the button to
decrease the volume.
• Press the “ ” button once to go to the next track. Press and hold the button to
increase the volume.
Set-up
SD Memory Card & USB Flash Memory
• Plug in one end of the Aux cable into
FM12 Aux-in Jack and the other end
into the device you wish to connect
and then follow the steps mentioned
above.
Aux-in Jack
Pre-set Broadcast Frequency
• Tune your FM Radio to one of the pre-set FM frequencies used by the player.
• Press the button “ ” or “ ” to set the player’s broadcast frequency to match
the frequency you have set on your radio.
USB
USB
SD
1
3
4 5
6 7 8 9 10 11
12 13 14 15 16 17
18 19 20 21 22 23
24 25 26 27 28 29
30 31 32 33 34
36 37 38
35
2
39 40 41
4 2 43 44 45 46 47
48 49 50 51 52 53
54 55 56 57 58 59
60 61 62 63 64 65
66 67 68 69 70 71
72 73 74 75 76 77
78 79 80 81 82 83
84 85 86 87 88 89
90 91 92 93 94 95
96 97 98 99 100 101
102 103 104 105 106 107
108 109 110

Spanish
Funciones
1. Pantalla LCD
2. Pista Anterior y Botón para Bajar Volumen
(Memoria Flash USB y Tarjeta SD)
Presione el botón una vez para regresar a la pista anterior.
Manténgalo presionado para bajar el volumen.
3. Presione el botón
Para cambiar a la frecuencia de transmisión de abajo/anterior
4. Presione el botón
Para cambiar a la frecuencia de transmisión de arriba/siguiente
5. Pista Siguiente y Botón para Subir Volumen
(Memoria Flash USB y Tarjeta SD)
Presione el botón para ir a la Pista Siguiente
Manténgalo presionado para subir el volumen.
6. Reproducir/Pausar
(Memoria Flash USB y Tarjeta SD)
Presione este botón una vez para empezar a reproducir un Fichero MP3
Presiónelo de nuevo para Pausar.
7. Ranura de Tarjeta de Memoria SD
8. Puerto USB
9. Conector de entrada auxiliar
Control Remoto 1. CH-: Cambiar a la Frecuencia de Abajo/Anterior
2. CH+: Cambiar a la Frecuencia de Arriba/Siguiente
3. Pista Anterior
4. Pista Siguiente
5. Reproducir/Pausar
6. VOL-: Bajar Volumen
7. VOL+: Subir Volumen
8. EQ: Selección del Modo EQ
9. Tecla Numérica 0~9: Para Selección de Música o
Frecuencia
10. Elegir Canción: Presione una Tecla Numérica,
luego presione esta tecla para seleccionar una
canción.
11. CH SET: Presione una tecla numérica, luego
presione esta tecla para seleccionar frecuencia de
transmisión entre 87.5MHZ a 108MHz
NO DEVICE
LINE IN
Car mp3
90.3
Fm12
1
2
3
4
5
6
2
1
7
4
6
3
11
5
8
9
10
7
8
9
1 3
4
5
6 7 8 9 10 11
12 13 14 15 16 17
18 19 20 21 22 23
24 25 26 27 28 29
30 31 32 33 34
36 37 38
35
2
39 40 41
4 2 43 44 45 46 47
48 49 50 51 52 53
54 55 56 57 58 59
60 61 62 63 64 65
66 67 68 69 70 71
72 73 74 75 76 77
78 79 80 81 82 83
84 85 86 87 88 89
90 91 92 93 94 95
96 97 98 99 100 101
102 103 104 105 106 107
108 109 110

Spanish
• Introduzca el dispositivo en un encendedor de cigarrillos de coche (corriente
continua 12V-24V)
Verá la pantalla como canal mostrado en la Pantalla LCD
• Siga las instrucciones en la "Conguración” de este manual.
• Introduzca la Tarjeta de Memoria SD en la Ranura de Tarjeta SD del productor.
• Presione el botón“ ”para Reproducir/Pausar. Siga presionando el “ ”
botón paracambiar a Modo Reproducir
(TODO/CARPETA/INDIVIDUAL/ALEATORIO)
• Presione el botón“ ”una vez para ir a la pista anterior. Mantenga presionado
el botón para bajar el volumen.
• Presione el botón“ ”una vez para ir a la pista siguiente. Mantenga
presionado el botón para subir el volumen.
Conguración
Tarjeta de Memoria SD y Memoria Flash USB
• Enchufe un extremo del cable Auxiliar en
el conector de entrada auxiliar FM12 y el
otro extremo en el dispositivo que desea
conectar y después siga los pasos
mencionados arriba.
Conector de entrada auxiliar
Pre-set Broadcast Frequency
• Sintonice su Radio FM una de las frecuencias FM programadas usadas por el
reproductor.
• Presione el botón ” “ o“ “ para jar la frecuencia de transmisión del
reproductor para igualar la frecuencia que ha jado en su radio.
USB
USB
SD
1 3 4
5
6 7 8 9 10 11
12 13 14 15 16 17
18 19 20 21 22 23
24 25 26 27 28 29
30 31 32 33 34
36 37 38
35
2
39 40 41
4 2 43 44 45 46 47
48 49 50 51 52 53
54 55 56 57 58 59
60 61 62 63 64 65
66 67 68 69 70 71
72 73 74 75 76 77
78 79 80 81 82 83
84 85 86 87 88 89
90 91 92 93 94 95
96 97 98 99 100 101
102 103 104 105 106 107
108 109 110

Fonctions
1. Écran LCD
2. Piste précédente & Bouton de réduction du volume
(Mémoire Flash USB Flash & Carte SD)
Appuyez une fois sur le bouton “ ” pour revenir à la piste précédente.
Appuyez et maintenez enfoncé pour diminuer le volume
3. Appuyez sur le bouton
Pour changer la fréquence d’émission vers le bas/la précédente
4. Appuyez sur le bouton
Pour changer la fréquence d’émission vers le haut/la suivante
5. Piste suivante et Bouton d’augmentation du volume
(Mémoire Flash USB Flash & Carte SD)
Appuyez sur “ ” pour passer à la piste suivante
Appuyez et maintenez enfoncé pour augmenter le volume.
6. Lecture/Pause
(Mémoire Flash USB Flash & Carte SD)
Appuyez une fois sur ce bouton pour commencer à lire un chier MP3
Appuyez de nouveau pour mettre sur pause.
7. Fente de carte mémoire SD
8. Port USB
9. Jack aux-in
Télécommande 1. CH-: Passer à la fréquence du bas/précédente
2. CH+: Passer à la fréqence du haut/suivante
3. Piste précédente
4. Piste suivante
5. Lecture/Pause
6. VOL-: Diminution du volume
7. VOL+: Augmentation du volume
8. EQ: Mode de sélection EQ
9. Touches numériques 0~9: Pour sélection de
musique ou fréquence
10. Pick Song: Appuyez sur la touche numérique, et
appuyez ensuite sur
cette touche pour sélectionner une chanson.
11. CH SET: Appuyez sur la touche numérique, et
appuyez ensuite sur cette
touche pour sélectionner la fréquence entre
87,5MHZ et 108MHz
NO DEVICE
LINE IN
Car mp3
90.3
Fm12
1
2
3
4
5
6
2
1
7
4
6
3
11
5
8
9
10
French
7
8
9
1 3 4 5
6
7 8 9 10 11
12 13 14 15 16 17
18 19 20 21 22 23
24 25 26 27 28 29
30 31 32 33 34
36 37 38
35
2
39 40 41
4 2 43 44 45 46 47
48 49 50 51 52 53
54 55 56 57 58 59
60 61 62 63 64 65
66 67 68 69 70 71
72 73 74 75 76 77
78 79 80 81 82 83
84 85 86 87 88 89
90 91 92 93 94 95
96 97 98 99 100 101
102 103 104 105 106 107
108 109 110

French
• Insérez le dispositif dans la prise allume-cigare (Alimentation DC 12V-24V)
Vous verrez l'écran comme le canal aché sur l’écran LCD
• Suivez les instructions dans la « Conguration » de ce manuel.
• Insérez la carte mémoire SD dans la fente de carte SD du lecteur.
• Appuyez sur le bouton “ ”pour Lire/Pause. Continuez d’appuyer sur le bouton
“ ” pour passer au mode Lecture (ALL/FOLDER/SINGLE/RANDOM)
Appuyez une fois sur le “ ” bouton pour revenir à la piste précédente. Appuyez
et maintenez enfoncé le bouton pour diminuer le volume.
• Appuyez une fois sur le bouton “ ”pour passer à la piste suivante. Appuyez et
maintenez enfoncé le bouton pour augmenter le volume.
Conguration
Carte Mémoire SD & Mémoire Flash USB
• Branchez une extrémité du câble Aux dans
l'entrée AUX FM12 et l'autre extrémité dans
l'appareil que vous souhaitez connecter,
puis suivez les étapes mentionnées
ci-dessus.
Jack aux-in
Pre-set Broadcast Frequency
• Réglez votre radio FM sur une des fréquences FM préréglées utilisées par le
lecteur.
• Appuyez sur le bouton ” “ ou “ “ pour régler la fréquence d’émission du
lecteur et la faire correspondre à celle que vous avez réglée sur votre radio
USB
SD
1 3 4 5
6
7
8 9 10 11
12 13 14 15 16 17
18 19 20 21 22 23
24 25 26 27 28 29
30 31 32 33 34
36 37 38
35
2
39 40 41
4 2 43 44 45 46 47
48 49 50 51 52 53
54 55 56 57 58 59
60 61 62 63 64 65
66 67 68 69 70 71
72 73 74 75 76 77
78 79 80 81 82 83
84 85 86 87 88 89
90 91 92 93 94 95
96 97 98 99 100 101
102 103 104 105 106 107
108 109 110

Пульт управления
Funktionen
NO DEVICE
LINE IN
Car mp3
90.3
Fm12
1
2
3
4
5
6
2
1
7
4
6
3
11
5
8
9
10
1.LCD-Display
2.Vorherige Spur und Taste zur Verringerung der Lautstärke
(USB-Flash-Speicher und SD-Karte)
Drücken Sie die Taste ein Mal, um zur vorherigen Spur
zurückzukehren.
Drücken und halten, um die Lautstärke zu verringern.
3.Drücken Sie die Taste,
zum Umschalten auf die untere/vorherige Rundfunkfrequenz
4.Drücken Sie die Taste,
um auf die obere/nächste Rundfunkfrequenz zu schalten.
5.Nächste Spur und Taste zur Erhöhung der Lautstärke
(USB-Flash-Speicher und SD-Karte).
Drücken sie die und Sie gehen auf die nächste Spur.
Drücken und halten, um die Lautstärke zu verringern.
6.Spielen/Pause
(USB-Flash-Speicher und SD-Karte)
Drücken Sie die Taste ein Mal, um eine MP3 Datei abzuspielen.
Drücken sie diese erneut, um auf Pause einzustellen.
7.SD Speicher Kartenschlitz
8.USB-Anschluss
9.Aux-in-Buchse
1. CH-: Nach unten schalten/Vorherige Frequenz
2. CH+: Nach oben schalten/ Nächste Frequenz
3. Vorherige Spur
4. Nächste Spur
5. Abspielen/Pause
6. VOL-: Lautstärke verringern
7. VOL+: Lautstärke erhöhen
8. EQ: EQ- Modus Auswahl
9. 0~9 Nummerntaste: Für Musikauswahl oder Frequenz
10. Lied auswählen: Drücken Sie auf eine Nummerntaste,
dann drücken Sie diese Taste um ein Lied auszuwählen.
11. CH-EINSTELLUNG: Drücken sie die Nummerntaste,
dann drücken Sie diese Taste, um eine
Übertragungsfrequenz zwischen 87,5MHz bis 108MHz
German
7
8
9
1 3 4 5
6 7
8
9 10 11
12 13 14 15 16 17
18 19 20 21 22 23
24 25 26 27 28 29
30 31 32 33 34
36 37 38
35
2
39 40 41
4 2 43 44 45 46 47
48 49 50 51 52 53
54 55 56 57 58 59
60 61 62 63 64 65
66 67 68 69 70 71
72 73 74 75 76 77
78 79 80 81 82 83
84 85 86 87 88 89
90 91 92 93 94 95
96 97 98 99 100 101
102 103 104 105 106 107
108 109 110

German
• Stecken Sie das Gerät in den Zigarettenanzünder-Sockel (12V-24V DC
Stromleistung) Sie sehen den Bildschirm so, wie im Kanal auf dem LCD-Display
angezeigt
Abstimmung
SD-Speicherkarte und USB-Flash-Speicher
Pre-set Broadcast Frequency
• Stellen Sie Ihr FM-Radio auf voreingestellte FM-Frequenzen ein, die von dem
Abspielgerät benutzt werden.
• Drücken Sie die Taste ” “ oder ” “
zur Einstellung der Rundfunkfrequenz, damit
diese Frequenz mit der übereinstimmt, die Sie an Ihrem Radio eingestellt haben
USB
SD
• Folgen Sie den Anleitungen unter„Abstimmung" in dieser Betriebsanleitung.
• Stecken Sie die SD-Speicherkarte in den SD -Kartenschlitz des Abspielgerätes.
• Drücken Sie die “ ” Taste für Abspielen/Pause. Halten Sie die“ ” Taste gedrückt, um auf
den Abspielmodus (ALLE/ORDNER/EINZEL/ZUFALL) auszuwählen.
• Drücken Sie die“ ” Taste ein Mal, um auf die vorherige Spur zugehen. DieTast drücken
und halten, um die Lautstärke zu erhöhen.
• Drücken Sie die“ ” Taste ein Mal, um auf die nächste Spur zu gehen. DieTaste
drücken und halten, um die Lautstärke zu erhöhen.
AUX-IN-Buchse
• Stecken Sie ein Ende des AUX-Kabels in die
FM12 AUX-IN-Buchse und das andere Ende
in das Gerät, das Sie verbinden möchten
und führen dann die oben genannten
Schritte durch.
1 3 4 5
6 7 8
9
10 11
12 13 14 15 16 17
18 19 20 21 22 23
24 25 26 27 28 29
30 31 32 33 34
36 37 38
35
2
39 40 41
4 2 43 44 45 46 47
48 49 50 51 52 53
54 55 56 57 58 59
60 61 62 63 64 65
66 67 68 69 70 71
72 73 74 75 76 77
78 79 80 81 82 83
84 85 86 87 88 89
90 91 92 93 94 95
96 97 98 99 100 101
102 103 104 105 106 107
108 109 110

• Stellen Sie Ihr FM-Radio auf voreingestellte FM-Frequenzen ein, die von dem
Abspielgerät benutzt werden.
• Drücken Sie die Taste ” “ oder ” “ zur Einstellung der Rundfunkfrequenz, damit
diese Frequenz mit der übereinstimmt, die Sie an Ihrem Radio eingestellt haben
Funções
1. Ecrã LCD
2. Botão para faixa anterior e baixar volume
(Memória Flash USB e Cartão SD)
Prima o botão “ ”uma vez para voltar à faixa anterior.
Prima e mantenha premido para baixar o volume
3. Prima o botão
para passar para a frequência de rádio abaixo/anterior
4. Prima o botão
para passar para a frequência de rádio acima/próxima
5. Botão para próxima faixa e aumentar volume
(Memória Flash USB e Cartão SD)
Prima o botão “ ”para passar para a próxima faixa
Prima e mantenha premido para aumentar o volume.
6. Reproduzir/Pausa
(Memória Flash USB e Cartão SD)
Prima este botão uma vez para começar a reproduzir um cheiro MP3
Prima outra vez para fazer pausa.
7. Ranhura para cartão de memória SD
8. Porta USB
9. Tomada de Entrada AUX-IN
Controlo remoto 1. CH-: Passar para a frequência abaixo/anterior
2. CH+: Passar para a frequência acima/anterior
3. Faixa anterior
4. Próxima faixa
5. Reproduzir/Pausa
6. VOL-: Baixar volume
7. VOL+: Aumentar volume
8. EQ: Seleção de modo EQ
9. Teclas numéricas 0~9: para seleção de música
ou de frequência
10. Pick Song: prima uma tecla numérica, depois
prima esta tecla para selecionar uma música.
11. CH SET: Prima uma tecla numérica, depois
prima esta tecla para selecionar uma frequência
de rádio entre 87,5 MHZ e 108 `
NO DEVICE
LINE IN
Car mp3
90.3
Fm12
1
2
3
4
5
6
2
1
7
4
6
3
11
5
8
9
10
Portuguese
7
8
9
1 3 4 5
6 7 8 9
10
11
12 13 14 15 16 17
18 19 20 21 22 23
24 25 26 27 28 29
30 31 32 33 34
36 37 38
35
2
39 40 41
4 2 43 44 45 46 47
48 49 50 51 52 53
54 55 56 57 58 59
60 61 62 63 64 65
66 67 68 69 70 71
72 73 74 75 76 77
78 79 80 81 82 83
84 85 86 87 88 89
90 91 92 93 94 95
96 97 98 99 100 101
102 103 104 105 106 107
108 109 110

Portuguese
• Insira o dispositivo na tomada de isqueiro do automóvel (Voltagem 12V-24V DC)
No ecrã LCD surgirá a imagem abaixo com a frequência programada de emissão
• Siga as instruções da seção“Instalação”deste manual.
• Insira o cartão de memória SD na ranhura para o cartão SD do dispositivo.
• Prima o botão “ ” para Reproduzir/Pausa. Mantenha o botão “ ”premido
para alterar o modo de reprodução (ALL-todas/FOLDER-pasta/SINGLE-
uma/RANDOM-aleatório)
• Prima o botão “ ” uma vez para voltar à faixa anterior. Prima e mantenha
premido para baixar o volume.
• Prima o botão “ ”uma vez para passar à próxima faixa. Prima e mantenha
premido para aumentar o volume.
Instalação
Cartão de memória SD e Memória Flash USB
• Ligue uma das extremidades do cabo
auxiliar ao conector auxiliar de entrada
FM12 e a outra extremidade ao
dispositivo a que se deseja conectar e, em
seguida, siga os passos acima
mencionados.
Conector auxiliar de entrada
Pre-set Broadcast Frequency
• Sintonize o seu autorrádio FM para uma das frequências FM utilizadas pelo
dispositivo.
• Prima o botão ” “ ou ” “ para congurar o dispositivo para utilizar a mesma
frequência programada de emissão que sintonizou no seu autorrádio.
USB
SD
1 3 4 5
6 7 8 9 10
11
12 13 14 15 16 17
18 19 20 21 22 23
24 25 26 27 28 29
30 31 32 33 34
36 37 38
35
2
39 40 41
4 2 43 44 45 46 47
48 49 50 51 52 53
54 55 56 57 58 59
60 61 62 63 64 65
66 67 68 69 70 71
72 73 74 75 76 77
78 79 80 81 82 83
84 85 86 87 88 89
90 91 92 93 94 95
96 97 98 99 100 101
102 103 104 105 106 107
108 109 110

Romanian
Funcții
1. Așaj LCD
2. Buton pentru melodia anterioară & de reducere a volumului
(USB Flash Memory & Card SD)
Apăsați butonul o singură dată, pentru a reveni la melodia anterioară.
Țineți apăsat butonul pentru a reduce volumul.
3. Apăsați butonul
pentru a schimba frecvența de transmisie anterioară/de mai jos
4. Apăsați butonul
pentru a schimba frecvența de transmisie anterioară/de mai sus
5. Buton pentru melodia următoare & de mărire a volumului
(USB Flash Memory și Card SD)
Apăsați butonul pentru a merge la melodia următoare.
Țineți apăsat butonul pentru a mări volumul.
6. Redare/Pauza
(USB Flash Memory și Card SD)
Apăsați acest buton o singură dată pentru a începe redarea unui șier MP3
Apăsați din nou pentru a da pauză.
7. Slot Card Memorie SD
8. Port USB
9. Mufa cablu auxiliar
Telecomanda 1. CH-: Schimbă frecvența de transmisie anterioară/ de
mai jos
2. CH+: Schimbă frecvența de transmisie următoare/
de mai sus
3. Melodia anterioară
4. Melodia următoare
5. Redare/Pauza
6. VOL-: Reducere Volum
7. VOL+: Mărire Volum
8. EQ: Selecție Mod EQ
9. Taste numerice 0~9: Pentru selecții muzicale sau
frecvențe
10. Pick song: Apăsați o tastă numerică, apoi apăsați
aceeași tastă pentru a selecta un cântec.
11. CH SET: Press Apăsați o tastă numerică, apoi
apăsați aceeași tastă pentru a selecta o frecvență între
87.5MHZ și 108MHz
NO DEVICE
LINE IN
Car mp3
90.3
Fm12
1
2
3
4
5
6
2
1
7
4
6
3
11
5
8
9
10
7
8
9
1 3 4 5
6 7 8 9 10 11
12
13 14 15 16 17
18 19 20 21 22 23
24 25 26 27 28 29
30 31 32 33 34
36 37 38
35
2
39 40 41
4 2 43 44 45 46 47
48 49 50 51 52 53
54 55 56 57 58 59
60 61 62 63 64 65
66 67 68 69 70 71
72 73 74 75 76 77
78 79 80 81 82 83
84 85 86 87 88 89
90 91 92 93 94 95
96 97 98 99 100 101
102 103 104 105 106 107
108 109 110

Romanian
USB
SD
• Introduceți dispozitivul în bricheta de la mașină (Putere DC 12V-24V)
Veți vedea pe așajul LCD canalul, precum în imaginea de mai jos
• Urmați instrucțiunile din secțiunea “Instalare” a acestui manual.
• Introduceți Cardul de memorie SD în slotul pentru card SD al aparatului.
• Apăsați butonul pentru redare/ pauză. Țineți apăsat butonul pentru a
vedea opțiunile de la Modul Redare (TOATE/FIȘIER/INDIVIDUAL/LA ÎNTÂMPLARE)
• Apăsați butonul o singură dată, pentru a merge la melodia anterioară.
Țineți apăsat butonul pentru a reduce volumul.
• Apăsați butonul o singură dată, pentru a merge la melodia următoare.
Țineți apăsat butonul pentru a mări volumul.
Instalare
Card memorie SD & USB Flash Memory
• Conectați un capăt al cablului Aux la
mufa FM12 Aux-in și celălalt capăt la
dispozitivul pe care doriți să îl
conectați, apoi executați pașii
menționați mai sus.
Mufa Aux-in
Pre-set Broadcast Frequency
• Reglați radioul dumneavoastră pe una dintre frecvențele FM ale aparatului.
• Apăsați butonul sau pentru a seta frecvența de transmisie a
aparatului, in concordanță cu frecvența pe care o aveți setată la radioul
dumneavoastră.
1 3 4 5
6 7 8 9 10 11
12
13
14 15 16 17
18 19 20 21 22 23
24 25 26 27 28 29
30 31 32 33 34
36 37 38
35
2
39 40 41
4 2 43 44 45 46 47
48 49 50 51 52 53
54 55 56 57 58 59
60 61 62 63 64 65
66 67 68 69 70 71
72 73 74 75 76 77
78 79 80 81 82 83
84 85 86 87 88 89
90 91 92 93 94 95
96 97 98 99 100 101
102 103 104 105 106 107
108 109 110

Russian
Пульт управления
1. CH-: Переход к меньшей/предыдущей частоте
вещания
2. CH+: Переход к большей/следующей частоте
вещания
3. Предыдущая дорожка
4. Следующая дорожка
5. Play/Pause
6. VOL-: Уменьшение громкости
7. VOL+: Увеличение громкости
8. EQ: Выбор режима EQ
9. Цифровые кнопки 0~9: Выбор композиции или
частоты
10. Выбор композиции: Нажмите цифровую кнопку, а
затем нажмите эту кнопку, чтобы выбрать композицию.
11. CH SET: Нажмите цифровую кнопку, а потом эту
клавишу. Выберите частоту вещания между 87.5MHZ и
108MHz
Функции
1. LCD-дисплей
2. Кнопка Предыдущей дорожки и уменьшения громкости
(USB Flash Memory и SD-карта)
Нажмите кнопку , чтобы вернуться к предыдущей
дорожке.
Нажмите и удерживайте, чтобы уменьшить громкость
3. Нажмите кнопку
Чтобы перейти к меньшей/предыдущей частоте вещания
4. Нажмите кнопку
Чтобы перейти к большей/следующей частоте вещания
5. Кнопка Следующая дорожка и увеличение громкости
(USB Flash Memory и SD-карта)
Нажмите , чтобы перейти к следующей дорожке
Нажмите и удерживайте, чтобы увеличить громкость
6. Play/Pause
(USB Flash Memory и SD-карта)
Чтобы проиграть файл MP3, нажмите один раз эту кнопку
Чтобы сделать паузу, нажмите ее еще один раз.
7. Слот для карты памяти SD
8. Порт USB
9. Разъём Aux-in
NO DEVICE
LINE IN
Car mp3
90.3
Fm12
1
2
3
4
5
6
2
1
7
4
6
3
11
5
8
9
10
7
8
9
1 3 4 5
6 7 8 9 10 11
12 13
14
15 16 17
18 19 20 21 22 23
24 25 26 27 28 29
30 31 32 33 34
36 37 38
35
2
39 40 41
4 2 43 44 45 46 47
48 49 50 51 52 53
54 55 56 57 58 59
60 61 62 63 64 65
66 67 68 69 70 71
72 73 74 75 76 77
78 79 80 81 82 83
84 85 86 87 88 89
90 91 92 93 94 95
96 97 98 99 100 101
102 103 104 105 106 107
108 109 110

USB
SD
• Вставьте устройство в автомобильный прикуриватель (Напряжение 12V-24V
DC) На LCD-дисплее Вы увидите отображение канала
• Следуйте инструкциям в разделе "Настройка" данного руководства.
• Вставьте карту памяти SD в SD-слот плеера.
• Для проигрывания/паузы нажмите клавишу . Удерживайте клавишу
нажатой, чтобы перейти в режим Play (ALL/FOLDER/SINGLE/RANDOM)
• Нажмите кнопку один раз, чтобы вернуться к предыдущей дорожке.
Нажмите и удерживайте клавишу, чтобы уменьшить громкость
• Нажмите кнопку , чтобы перейти к следующей дорожке. Нажмите и
удерживайте клавишу, чтобы увеличить громкость
Настройка
Карта памяти SD и USB Flash Memory
• Подсоедините один конец кабеля Aux к
разъёму Aux-in, а другой конец - к
подключаемому устройству, а затем
выполните описанные выше шаги.
Разъём Aux-in
Pre-set Broadcast Frequency
• Выберите Ваше FM-радио через одну из предустановленных частот.
• Нажмите клавишу или ,чтобы выбрать нужную частоту вещания.
Russian
1 3 4 5
6 7 8 9 10 11
12 13 14
15
16 17
18 19 20 21 22 23
24 25 26 27 28 29
30 31 32 33 34
36 37 38
35
2
39 40 41
4 2 43 44 45 46 47
48 49 50 51 52 53
54 55 56 57 58 59
60 61 62 63 64 65
66 67 68 69 70 71
72 73 74 75 76 77
78 79 80 81 82 83
84 85 86 87 88 89
90 91 92 93 94 95
96 97 98 99 100 101
102 103 104 105 106 107
108 109 110

Turkish
Uzaktan Kumanda 1. CH-: Alttaki/Önceki Frekansa Geçiş
2. CH+: Yukarıdaki/ Sonraki Frekansa Geçiş
3. Önceki Parça
4. Sonraki Parça
5. Oynat/Durdur
6. VOL-: Ses Kısma
7. VOL+: Ses Yükseltme
8. EQ: Ekolayzır mod seçimi
9. 0~9 Sayı Tuşları: Müzik veya Frekans seçimi
10. Pick Song: Bir şarkı seçmek için sayı tuşlarına
basın, sonra bu butona basın.
11. CH SET: 87.5MHZ ile 108MHz arasında bir
radyo frekansı seçmek için sayı tuşlarına basın,
sonra bu butona basın.
Fonksiyonlar
1. LCD Ekran
2. Önceki Parça & Ses Kısma Butonu
(USB Flash Hafıza & SD Kart)
Önceki parçaya geçmek için butonuna bir defa basın.
Sesi kısmak için butona basın ve basılı tutun.
3. Alttaki/Önceki yayın frekansına geçmek için butonuna basın.
4. Yukarıfaki/Sonraki yayın frekansına geçmek için butonuna
basın.
5. Sonraki Parça ve Ses Yükseltme Butonu
(USB Flash Hafıza ve SD Kart)
Sonraki parçaya geçmek için butonuna bir defa basın.
Sesi yükseltmek için butona basın ve basılı tutun.
6. Oynat/Durdur
(USB Flash Hafıza ve SD Kart)
Bir MP3 dosyasını oynatmak için bu butona bir defa basın.
Durdurmak için
bir defa daha basın.
7. SD Hafıza Kartı Yuvası
8. USB Port
9. Aux girişi yuvası
NO DEVICE
LINE IN
Car mp3
90.3
Fm12
1
2
3
4
5
6
2
1
7
4
6
3
11
5
8
9
10
7
8
9
1 3 4 5
6 7 8 9 10 11
12 13 14 15
16
17
18 19 20 21 22 23
24 25 26 27 28 29
30 31 32 33 34
36 37 38
35
2
39 40 41
4 2 43 44 45 46 47
48 49 50 51 52 53
54 55 56 57 58 59
60 61 62 63 64 65
66 67 68 69 70 71
72 73 74 75 76 77
78 79 80 81 82 83
84 85 86 87 88 89
90 91 92 93 94 95
96 97 98 99 100 101
102 103 104 105 106 107
108 109 110

• Cihazı çakmak soketine yerleştirin (12V-24V DC Güç)
LCD ekranda yazan kanalı aşağıdaki gibi göreceksiniz
• Bu kılavuzun“Kurulum”bölümündeki yönergeleri izleyin.
• SD Hafıza kartını oynatıcının SD kart yuvasına yerleştirin.
• Oynatmak/Durdurmak için butonuna basın. Oynatma moduna geçmek için
butonuna basmaya devam edin (TÜMÜ/DOSYA/TEK/RASTGELE)
• Önceki parçaya geçmek içi butonuna bir defa basın. Sesi kısmak için butona
basın ve basılı tutun.
• Sonraki parçaya geçmek için butonuna bir defa basın. Sesi yükseltmek için
butona basın ve basılı tutun.
Kurulum
SD Hafıza Kartı & USB Flash Hafıza
• Aux-in kablosunun bir ucunu FM12 Aux-in
girişine takın; diğer ucunu istediğiniz
cihaza takın ve yukarıda bahsedilen
adımları tekrarlayın.
Yardımcı girişi Jakı
Pre-set Broadcast Frequency
• FM radyonuzu oynatıcı tarafından kullanılan önceden ayarlanmış FM
frekanslarından birine ayarlayın.
• Oynatıcının yayın frekansını radyonuzda ayarladığınız frekansa uygun şekilde
ayarlamak için veya butonlarını kullanın.
USB
SD
Turkish
1 3 4 5
6 7 8 9 10 11
12 13 14 15 16
17
18 19 20 21 22 23
24 25 26 27 28 29
30 31 32 33 34
36 37 38
35
2
39 40 41
4 2 43 44 45 46 47
48 49 50 51 52 53
54 55 56 57 58 59
60 61 62 63 64 65
66 67 68 69 70 71
72 73 74 75 76 77
78 79 80 81 82 83
84 85 86 87 88 89
90 91 92 93 94 95
96 97 98 99 100 101
102 103 104 105 106 107
108 109 110

Chinese
功能
1.LCD显示屏
2.上一首和减小音量按钮(USB闪存和SD卡)
按 按钮一次,返回到上一首。
按住减小音量
3.按 按钮
切换到下一个/上一个广播频率
4.按 按钮
切换到上一个/下一个广播频率
5.下一首和增大音量按钮(USB闪存和SD卡)
按 转至下一首
按住增大音量。
6.播放/暂停(USB闪存和SD卡)
按该按钮开始播放MP3文件
再次按下可以暂停。
7.SD记忆卡插槽
8.USB 端口
9.音频输入插孔
NO DEVICE
LINE IN
Car mp3
90.3
Fm12
1
2
3
4
5
6
遥控
1.CH-:切换到下一个/上一个频率
2.CH+:切换到以上一个/下一个频率
3. 上一首
4. 下一首
5. 播放/暂停
6.VOL-:减小音量
7.VOL+:增大音量
8.EQ:EQ模式选择
9.0~9 数字键:用于选择音乐或频率
10.挑选歌曲:按数字键,然后按下该按键来选择歌曲。
11.CH SET:按下数字键,然后按该按键选择87.5MHZ到
108MHz的传输频率
2
1
7
4
6
3
11
5
8
9
10
7
8
9
1 3 4 5
6 7 8 9 10 11
12 13 14 15 16 17
18
19 20 21 22 23
24 25 26 27 28 29
30 31 32 33 34
36 37 38
35
2
39 40 41
4 2 43 44 45 46 47
48 49 50 51 52 53
54 55 56 57 58 59
60 61 62 63 64 65
66 67 68 69 70 71
72 73 74 75 76 77
78 79 80 81 82 83
84 85 86 87 88 89
90 91 92 93 94 95
96 97 98 99 100 101
102 103 104 105 106 107
108 109 110

USB
SD
•将设备插入汽车点烟器插座(12V-24伏直流电源)
将看到液晶显示屏上显示的频道
•请按照本手册“设定”的说明操作。
•将SD存储卡插入播放器的SD卡插槽。
•按 按钮,播放/暂停。按住 键切换播放模式(全部 /文件夹/单
曲/随机)
•按 按钮一次转到上一首。按住该按钮可减小音量。
•按 按钮一次转到下一首。按住按钮可增大音量。
设定
SD存储卡和USB闪存
•音频线的一端插入FM12 的音频输入
插孔,另一端插入要连接的设备,
然后按照上述步骤操作。
音频输入
Pre-set Broadcast Frequency
•调整FM收音机到播放器的一个预设FM频率。
•按 或 按钮设置播放器的广播频率,以适应你在广播上设置的频率。
USB
Chinese
””””
1 3 4 5
6 7 8 9 10 11
12 13 14 15 16 17
18
19
20 21 22 23
24 25 26 27 28 29
30 31 32 33 34
36 37 38
35
2
39 40 41
4 2 43 44 45 46 47
48 49 50 51 52 53
54 55 56 57 58 59
60 61 62 63 64 65
66 67 68 69 70 71
72 73 74 75 76 77
78 79 80 81 82 83
84 85 86 87 88 89
90 91 92 93 94 95
96 97 98 99 100 101
102 103 104 105 106 107
108 109 110
Other manuals for FM12
1
Table of contents
Other Promate Transmitter manuals
Popular Transmitter manuals by other brands

Endress+Hauser
Endress+Hauser Liquisys CUM 252 operating instructions

RKI Instruments
RKI Instruments 65-2658RK-CH4-4 Operator's manual

EUTECH INSTRUMENTS
EUTECH INSTRUMENTS alpha-pH 2000D instruction manual

Data Industrial
Data Industrial 340 Series owner's manual

AUREL
AUREL TX2-HCS-433 user manual

SILENTSYSTEM
SILENTSYSTEM TX-400-MOBI owner's guide

Comnet
Comnet FVT4014SHR Installation and operation manual

Technaxx
Technaxx FMT100 user manual

BNB Solutions
BNB Solutions BAS-1000 User & installation manual

aci
aci Room Series Installation & operation instructions

Omega
Omega DMD4059 user guide

Sentera Controls
Sentera Controls DSMFX-2R Mounting and operating instructions