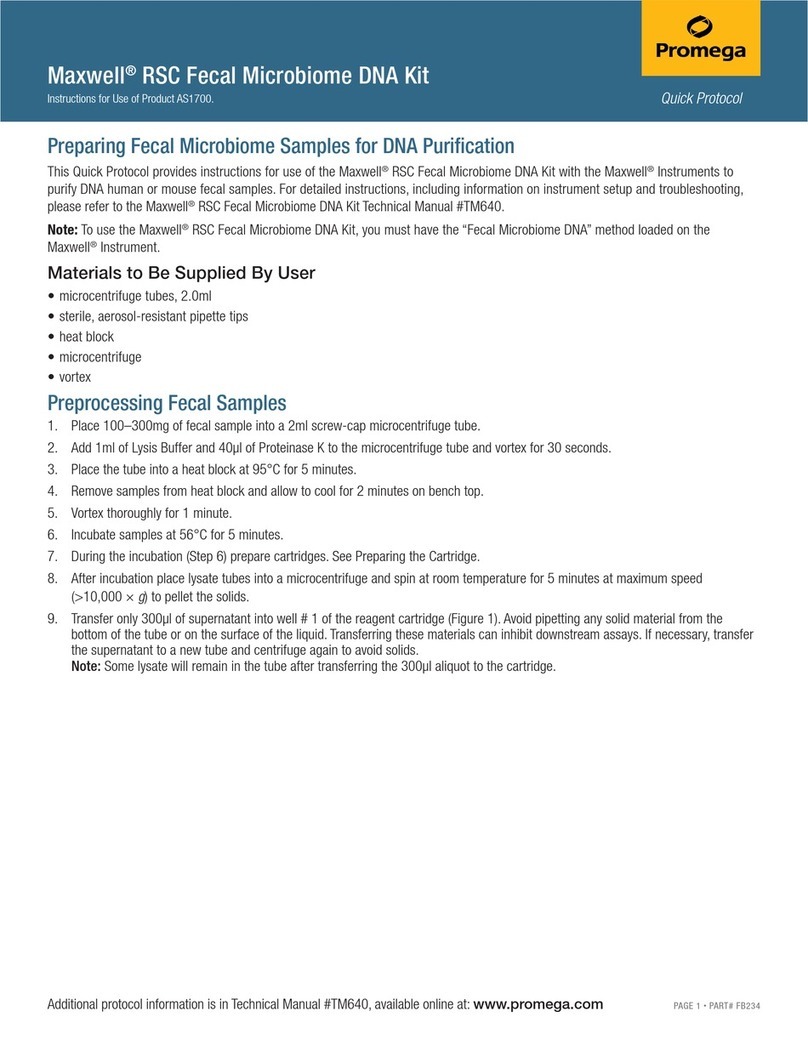
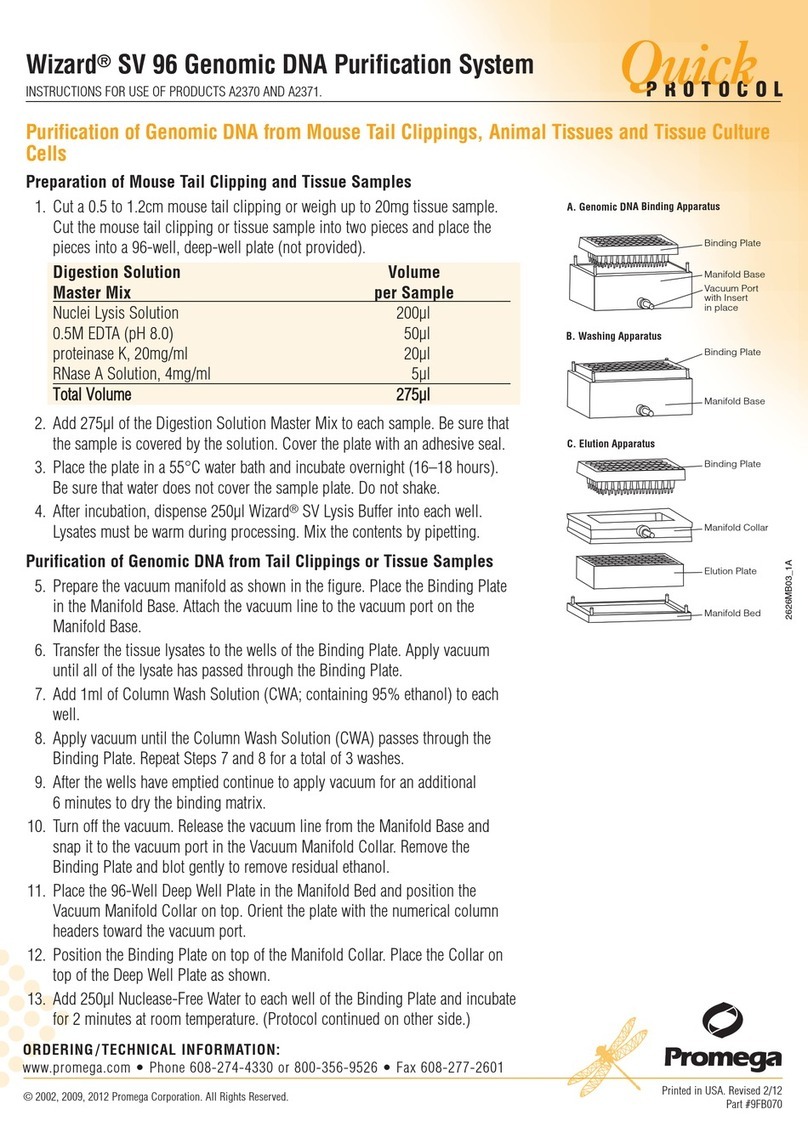
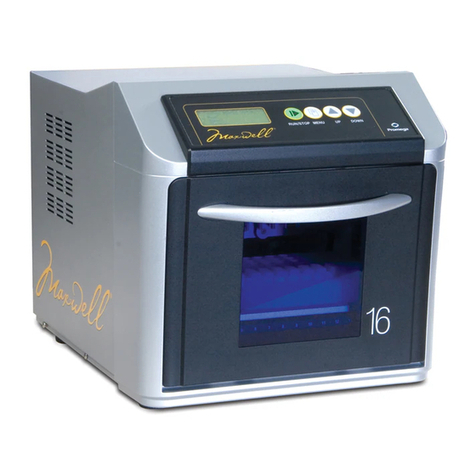
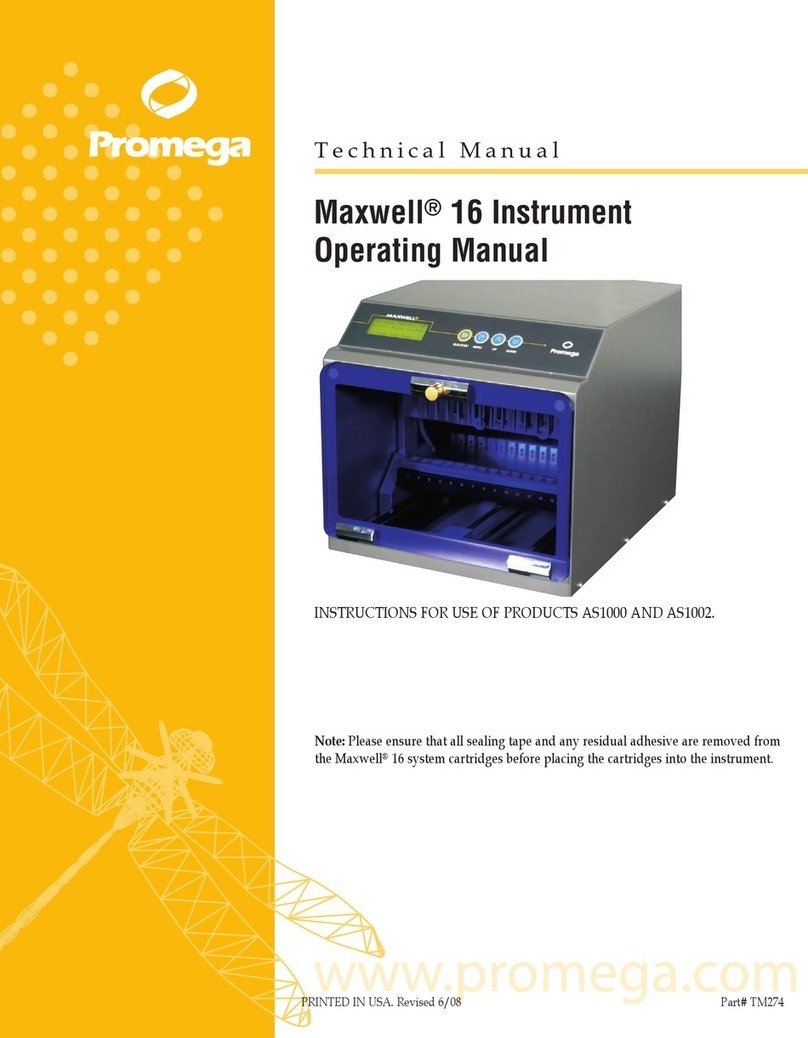
Promega Maxwell 16 User manual

Maxwell®16 Clinical Instrument
Operating Manual
INSTRUCTIONS FOR
USE OF PRODUCT
AS2050
MDSS GmbH
Schiffgraben 41
30175 Hannover, Germany
In Vitro Diagnostic
Medical Device
PRINTED IN USA. 2/08Part# TM300
tm300.0208_Corrected.qxp 3/11/2008 10:36 AM Page a

Promega Corporation · 2800 Woods Hollow Road ·Madison, WI 53711-5399 USA ·Toll Free in USA 800-356-9526 ·Phone 608-274-4330 ·Fax 608-277-2516 · www.promega.com
Printed in USA. Part# TM300
2/08 Page 1
I. Introduction...................................................................................................................................................................3
A. Intended Use of the Maxwell® 16 System .......................................................................................................3
B. Maxwell®16 Blood DNA Purification Procedure..........................................................................................4
C. Maxwell®16 Instrument Specifications...........................................................................................................5
D. Product Components and Symbol Key...........................................................................................................6
E. Inspection.............................................................................................................................................................7
F. Precautions...........................................................................................................................................................8
G. Environmental Requirements .........................................................................................................................10
II. Hardware Overview...................................................................................................................................................10
III. Unpacking and Setting Up the Maxwell®16 Instrument ..................................................................................12
A. Setup ...................................................................................................................................................................12
B. Removal of Magnetic Rod Assembly/Plunger Bar and Platform Shipping Anchors ...........................12
C. Operational Mode Setup..................................................................................................................................13
(i) Plugging the Instrument into the Power Outlet ..................................................................................13
(ii) Hardware Configuration and Operational Mode Setup Requirements...........................................14
(iii) Setting the Maxwell®16 Instrument Operational Mode ....................................................................15
(iv) Changing the Maxwell®16 Instrument Display Language................................................................15
IV. Operating the Maxwell®16 Instrument.................................................................................................................16
A. Navigation .........................................................................................................................................................16
B. Operational Qualification................................................................................................................................16
C. Sample Purification .........................................................................................................................................17
D. Minimizing Cross-Contamination .................................................................................................................17
V. Periodic Cleaning and Maintenance ......................................................................................................................18
A. General Care ......................................................................................................................................................18
B. Removal of Magnetic Rod Assembly ............................................................................................................19
C. Periodic Maintenance.......................................................................................................................................19
VI. Troubleshooting .........................................................................................................................................................20
A. General Troubleshooting .................................................................................................................................20
B. Power Failure ....................................................................................................................................................21
C. Error Messages .................................................................................................................................................22
All technical literature is available on the Internet at: www.promega.com/tbs/
Please visit the web site to verify that you are using the most current version of this Technical Manual.
Please contact Promega Technical Services if you have questions on the use of this product. Email: techs[email protected]
Maxwell®16 Clinical
Instrument Operating Manual
tm300.0208_Corrected.qxp 3/11/2008 10:36 AM Page 1

VII. Appendix I: Firmware Updates, Instrument Return, and Warranty Information ........................................23
A. Updating Firmware..........................................................................................................................................23
B. Instrument Return ............................................................................................................................................23
C. Instrument Disposal .........................................................................................................................................24
D. Certificate of Decontamination.......................................................................................................................25
E. Warranty Information ......................................................................................................................................26
VIII. Appendix II: Research and Forensic Applications of the Maxwell®16 System ...........................................27
A. Operational Mode Setup Requirements........................................................................................................27
B. Reconfiguring the Maxwell®16 Instrument Hardware..............................................................................30
C. Instrument Accessories and Purification Kits for Research and Forensic Use .......................................33
Promega Corporation · 2800 Woods Hollow Road ·Madison, WI 53711-5399 USA ·Toll Free in USA 800-356-9526 ·Phone 608-274-4330 ·Fax 608-277-2516 · www.promega.com
Part# TM300 Printed in USA.
Page 2 2/08
tm300.0208_Corrected.qxp 3/11/2008 10:36 AM Page 2

Promega Corporation · 2800 Woods Hollow Road ·Madison, WI 53711-5399 USA ·Toll Free in USA 800-356-9526 ·Phone 608-274-4330 ·Fax 608-277-2516 · www.promega.com
Printed in USA. Part# TM300
2/08 Page 3
I. Introduction
I.A. Intended Use of the Maxwell
®
16 System (Cat.# AS2050 and AS1015)
The Maxwell
®
16 System, which consists of the Maxwell
®
16 Clinical Instrument
(a)
(Cat.# AS2050) and the
Maxwell
®
16 Blood DNA Purification Kit
(b,c)
(Cat.# AS1015), is used to perform automated isolation of
DNA from human whole blood or buffy coat samples. Samples collected in blood collection tubes treated
with EDTA, heparin or citrate can be used with the Maxwell
®
16 System. The nucleic acid isolation
methodology used by the Maxwell
®
16 System produces DNA suitable for direct, downstream analysis by
standard amplification methods. These methods include a variety of polymerase chain reaction (PCR) tests
for human in vitro diagnostic purposes. The Maxwell
®
16 System is not intended for use as part of a
specific in vitro diagnostic test.
The Maxwell
®
16 Clinical Instrument displays the CE conformity marking to identify it as fulfilling the
requirements of the Low Voltage Directive, Electromagnetic Compatibility Directive, and the In Vitro
Diagnostic Medical Device Directive and associated harmonized standards.
The Maxwell
®
16 System is intended for professional use only. Diagnostic results obtained using DNA
purified with this system must be interpreted in conjunction with other clinical or laboratory data.
Product Use Limitations
The Maxwell
®
16 System is not intended for use with tissue samples or samples from body fluids other
than blood. It is not intended for use with non-human samples or for purification of RNA.
The Maxwell
®
16 System performance has been evaluated by isolating DNA from 300µl whole blood
samples, or 250µl buffy coat samples, obtained from healthy individuals with a white blood cell count
ranging from 4.2 ×10
6
to 1.2 ×10
7
.
The user is responsible for establishing performance characteristics necessary for downstream
diagnostic applications. Appropriate controls must be included in any downstream diagnostic
applications using DNA purified using the Maxwell
®
16 System.
Compliance with EU Directive 98/79/EC on in vitro diagnostic medical devices has been demonstrated
for, and only applies to, use of the Maxwell
®
16 Instrument (Cat.# AS2050) in the clinical mode with the
Maxwell
®
16 Blood DNA Purification Kit (Cat.# AS1015).
tm300.0208_Corrected.qxp 3/11/2008 10:36 AM Page 3

I.B. Maxwell
®
16 Blood DNA Purification Procedure
The Maxwell
®
16 Clinical Instrument provides automated nucleic acid purification from up to 16
samples using cell lysis and binding of magnetized silica particles to nucleic acid as the primary
separation principle. Used in conjunction with the Maxwell
®
16 Clinical Instrument, the Maxwell
®
16
Blood DNA Purification Kit (Cat.# AS1015) provides high purity DNA extraction from blood and buffy
coat samples. The purified DNA is eluted in a 300µl volume.
The automated steps performed by the Maxwell
®
16 System include:
• Sample lysis in the presence of a chaotropic agent and detergent
• Binding of nucleic acids to magnetized silica particles
• Washing of the bound particles away from other cellular components
• Elution of nucleic acids into a formulation that can be added directly to standard PCR.
The user selects the clinical protocol as prompted by the Maxwell
®
16 Instrument, places samples into
the reagent cartridges, places the cartridges onto the instrument platform and closes the door. The user
then starts the instrument, which automatically performs all the steps in the protocol, allowing the user
to walk away and do other work.
The temperature of samples is regulated by a heating system that is controlled by the protocol.
The extracted nucleic acid can be used for PCR amplification.
Promega Corporation · 2800 Woods Hollow Road ·Madison, WI 53711-5399 USA ·Toll Free in USA 800-356-9526 ·Phone 608-274-4330 ·Fax 608-277-2516 · www.promega.com
Part# TM300 Printed in USA.
Page 4 2/08
tm300.0208_Corrected.qxp 3/11/2008 10:36 AM Page 4

Promega Corporation · 2800 Woods Hollow Road ·Madison, WI 53711-5399 USA ·Toll Free in USA 800-356-9526 ·Phone 608-274-4330 ·Fax 608-277-2516 · www.promega.com
Printed in USA. Part# TM300
2/08 Page 5
Maxwell
®
16 System Features:
•CompliantwiththefollowingEUDirectives:
98/79/EC In vitro Diagnostic Medical Devices.
2004/108/EC Electromagnetic Compatibility.
2006/95/EC Low Voltage Directive.
•Easy-to-useandeasy-to-maintainsystemoperationthatstandardizesnucleicacidsample
preparation workflow in the clinical laboratory.
•Comprehensivetechnicalsupport.
•Thesystemiscontrolledviaamulti-languageLCDreadoutandthedefaultoperationalmodeis
clinical SEV blood. Additional operational modes and kits are available for Research and Forensic
applications (See Appendix II).
I.C. Maxwell
®
16 Instrument Specifications
Processing Time: 30–40 minutes
Number of Samples: up to 16
Standard Configuration: 300µl elution volume
Weight: 18.9kg
Dimensions (W ×D ×H): 325.5 ×438.2 ×326.5mm
Power Requirements: 100–240VAC, 50–60Hz, 2.1A
tm300.0208_Corrected.qxp 3/11/2008 10:36 AM Page 5

I.D. Product Components and Symbol Key
Product Cat.#
Maxwell
®
16 Clinical Instrument AS2050
Includes:
• 1 Maxwell
®
16 Instrument
• 1 Power Cable
• 1 RS-232 Cable for Firmware Upgrades
• 1 CD Containing the Technical Manual
• 1 Quick Start Guide
Product Cat.#
Maxwell
®
16 Clinical SEV Hardware Kit AS2250
Required for configuration of the Maxwell
®
16 Instrument in SEV (standard elution volume) format for
clinical use. Includes:
• 1 Standard Magnetic Rod/Plunger Bar Assembly
• 1 Maxwell
®
16 Cartridge Rack
• 1 Maxwell
®
16 Magnetic Elution Rack
Promega Corporation · 2800 Woods Hollow Road ·Madison, WI 53711-5399 USA ·Toll Free in USA 800-356-9526 ·Phone 608-274-4330 ·Fax 608-277-2516 · www.promega.com
Part# TM300 Printed in USA.
Page 6 2/08
MDSS GmbH
Schiffgraben 41
30175 Hannover, Germany
In Vitro Diagnostic
Medical Device
Symbol Key
Symbol Explanation Symbol Explanation
6008TA
In Vitro Diagnostic Medical
Device Authorized Representative
Conformité
Européenne
Consult your local Promega
Representative regarding
instrument disposal
Important Catalog number
Manufacturer Serial number
!
SN
tm300.0208_Corrected.qxp 3/11/2008 10:36 AM Page 6

Promega Corporation · 2800 Woods Hollow Road ·Madison, WI 53711-5399 USA ·Toll Free in USA 800-356-9526 ·Phone 608-274-4330 ·Fax 608-277-2516 · www.promega.com
Printed in USA. Part# TM300
2/08 Page 7
I.E. Inspection
Upon receiving your Maxwell
®
16 Instrument, please inspect the package carefully to make sure all
accessories are present. Standard accessories are shown in Figure 1
Figure 1. Maxwell
®
16 Instrument (AS2050) accessories. A. Operating Manual (provided on CD). B. Quick Start Guide;
C. RS-232 Cable for firmware upgrades; D. Maxwell
®
16 Magnetic Elution Rack; E. Power Cable; F. Maxwell
®
16
Cartridge Rack.
6917TC
A
BCD
E F
tm300.0208_Corrected.qxp 3/11/2008 10:38 AM Page 7

I.F. Precautions
IMPORTANT SAFETY INSTRUCTIONS. SAVE THESE INSTRUCTIONS.
Changes or modifications to this unit not expressly approved by the party responsible for compliance could void
the user’s authority to operate the equipment.
This equipment has been designed and tested to CISPR 11 Class A. In a domestic environment it may cause radio
interference, in which case, you may need to take measures to mitigate the interference.
Do not use this device in close proximity to sources of strong electromagnetic radiation (e.g., unshielded intentional
RF sources), as these may interfere with the proper operation.
It is recommended that the user evaluate the electromagnetic environment of the instrument prior to operation.
Promega Corporation · 2800 Woods Hollow Road ·Madison, WI 53711-5399 USA ·Toll Free in USA 800-356-9526 ·Phone 608-274-4330 ·Fax 608-277-2516 · www.promega.com
Part# TM300 Printed in USA.
Page 8 2/08
Safety Symbols and Markings
Danger. Hazardous voltage. Risk of electrical shock.
Warning. Risk of personal injury to the operator or a safety hazard to the instrument or
surrounding area.
Warning. Pinch point hazard.
Warning. Hot surface. Burn hazard.
Warning. Lifting hazard.
Warning. Biohazard.
Warning. It is important to understand and follow all laws regarding the safe and proper disposal
of electrical instrumentation. Please contact your local Promega Representative for disposal of the
instrument. Please follow your institutional requirements for disposal of the accessories.
tm300.0208_Corrected.qxp 3/11/2008 10:38 AM Page 8

Promega Corporation · 2800 Woods Hollow Road ·Madison, WI 53711-5399 USA ·Toll Free in USA 800-356-9526 ·Phone 608-274-4330 ·Fax 608-277-2516 · www.promega.com
Printed in USA. Part# TM300
2/08 Page 9
IMPORTANT SAFETY INSTRUCTIONS. SAVE THESE INSTRUCTIONS.
Safety Precautions
Do not use this instrument for anything other than its intended use.
Always disconnect the power before cleaning or performing routine maintenance.
Do not disassemble unit.
Do not override the door sensor. Moving parts may cause personal injury.
Ensure cartridges, elution tubes and plungers have been securely inserted in their correct positions and
orientation. Failure to do so may result in damage to the instrument.
After each run, verify that the plungers have been completely removed from the magnet rods before
pressing “Run/Stop” to extend the platform.
Use only Promega Maxwell®16 cartridges and plungers designed for use with the instrument.
Do not reuse cartridges or plungers.
If the equipment is used in a manner other than that specified by Promega, the protection provided by
the equipment may be impaired.
Keep hands clear of instrument platform as it moves in and out of the instrument.
During elution, the heated elution block at the front of the platform becomes very hot. Do not touch.
To avoid muscle strain or back injury, use lifting aids and proper lifting techniques when removing or
replacing the instrument. The Maxwell®16 Instrument weighs 18.9kg (41.7lb) and should be handled
by two people.
Equipment can be hazardous due to the use of chemical and biohazardous substances.
tm300.0208_Corrected.qxp 3/11/2008 10:38 AM Page 9

I.G. Environmental Requirements
Power Requirements: 100–240VAC, 50–60Hz, 2.1A
Temperature: 5–40°C
Humidity: up to 80% relative humidity
The Maxwell
®
16 Instrument is intended for indoor use only. Wipe up spills immediately. Install the
instrument on a clean, level surface. To avoid shortening the expected lifespan of the instrument, install
in a location that meets the following criteria:
•Locate on a sturdy, level surface.
•Avoid dusty areas.
•Choose a location that has good air circulation and is not exposed to direct sunlight.
•Avoid noisy electrical power sources (e.g., power generators).
•Do not install in a location where there is large temperature variability or high humidity.
•Do not position the instrument so that it is difficult to unplug from the power source.
•Do not place next to heat sources.
•Do not use near flammable gases or liquids.
•Do not place near other electrically sensitive instruments.
II. Hardware Overview
Promega Corporation · 2800 Woods Hollow Road ·Madison, WI 53711-5399 USA ·Toll Free in USA 800-356-9526 ·Phone 608-274-4330 ·Fax 608-277-2516 · www.promega.com
Part# TM300 Printed in USA.
Page 10 2/08
6914TA
Display panel
and keypad
Door handle
Power
switch
Power
connection
Serial port. Connect to
computer using the RS-232
Cable to obtain firmware
upgrades.
Label
Maxwell®16 Instrument Front Maxwell®16 Instrument Back
tm300.0208_Corrected.qxp 3/11/2008 10:39 AM Page 10

Promega Corporation · 2800 Woods Hollow Road ·Madison, WI 53711-5399 USA ·Toll Free in USA 800-356-9526 ·Phone 608-274-4330 ·Fax 608-277-2516 · www.promega.com
Printed in USA. Part# TM300
2/08 Page 11
6915TA
Display panel Keypad
Figure 2. Maxwell
®
16 Instrument display panel. The LCD display panel and keypad, including Run/Stop,
Menu, Scroll Up and Scroll Down buttons, are shown.
Figure 3. Maxwell
®
16 components. Standard (SEV) configuration magnetic rod assembly and plunger bar,
and Maxwell
®
16 platform.
Maxwell®16 Components
Linear slides
Magnetic rods
Plunger bar
Magnetic rod
assembly
Maxwell®16 Platform
Heated elution
tube slots
Reagent
cartridge slots
5182TA
tm300.0208_Corrected.qxp 3/11/2008 10:39 AM Page 11

III. Unpacking and Setting Up the Maxwell
®
16 Instrument
III.A. Setup
1. Remove the accessories and literature from the shipping container. Slide the Maxwell
®
16 Instrument
out of the box.
Note: Do not lift the instrument out of the box by the door handle.
2. Remove the foam packaging from the sides of the instrument and remove the clear plastic cover.
3. Check that all parts have been included. Refer to Figure 1 for a list of parts.
4. Set the Maxwell
®
16 Instrument on a flat, level, solid surface in a dust-free location with reasonable air
circulation. If possible, move the instrument back from the edge of the surface to prevent
inadvertently bumping the open door.
Important: Save the packaging material in case the instrument needs to be returned for service or
repair at a later date.
III.B. Removal of Magnetic Rod Assembly/Plunger Bar and Platform Shipping Anchors
1. Ensure that the instrument is turned off and is not plugged in.
2. The magnetic rod assembly, plunger bar and platform are anchored in place during shipment to
prevent movement of and damage to these parts.
Note: Do not plug in or turn on the machine before removing the shipping anchors. Turning on the
Maxwell
®
16 Instrument before the shipping anchors are removed will cause a lot of noise but will not
result in permanent damage to the instrument. If this occurs, immediately turn off and unplug the
instrument. Proceed with removal of the shipping anchors.
3. Open the instrument door.
4. Locate the Magnetic Rod Assembly/Plunger Bar shipping anchor thumbscrews labeled with red
stickers (Figure 4). Unscrew and remove these shipping anchor thumbscrews.
5. Locate the Platform shipping anchor thumbscrews with the red stickers (Figure 4). Unscrew and
remove the Platform shipping anchor thumbscrews.
6. Your Maxwell
®
16 Instrument is now ready for operation.
Important: Save the shipping anchor thumbscrews in case the instrument needs to be returned for
service or repair at a later date.
Promega Corporation · 2800 Woods Hollow Road ·Madison, WI 53711-5399 USA ·Toll Free in USA 800-356-9526 ·Phone 608-274-4330 ·Fax 608-277-2516 · www.promega.com
Part# TM300 Printed in USA.
Page 12 2/08
!
!
!
tm300.0208_Corrected.qxp 3/11/2008 10:39 AM Page 12

Promega Corporation · 2800 Woods Hollow Road ·Madison, WI 53711-5399 USA ·Toll Free in USA 800-356-9526 ·Phone 608-274-4330 ·Fax 608-277-2516 · www.promega.com
Printed in USA. Part# TM300
2/08 Page 13
III.C. Operational Mode Setup
(i) Plugging the Instrument into the Power Outlet
1. Once the Magnetic Rod Assembly/Plunger bar shipping anchors, Platform shipping anchors and all
packaging materials have been removed, you can connect the instrument to a power outlet.
2. Ensure that the power switch is in the off position. The power switch is located next to the power cord
connection on the back of the instrument.
3. Connect the power cord to the back of the Maxwell
®
16 Instrument.
4. Plug the power cord into a wall outlet. See Section I.G for power requirements.
5. Close the door.
6. Turn the instrument on.
7. Once turned on, the instrument will display the firmware version number and operational mode
setting, and proceed through a self-check.
8. Connecting to the serial port on the back of the instrument is not required. Store the RS-232 Cable in a
location near the instrument for future use.
Figure 4. The upper (magnetic rod assembly/plunger bar) shipping anchors and the platform shipping anchors on the
Maxwell
®
16 Instrument.
Platform shipping anchors
6923TA
Upper shipping anchors
6922TA
tm300.0208_Corrected.qxp 3/11/2008 10:40 AM Page 13

(ii) Hardware Configuration and Operational Mode Setup Requirements
The Maxwell®16 Instrument has multiple operational modes, depending on the purification procedure
and the Maxwell®16 Purification Kit being used. Compliance with Directive 98/79/EC on in vitro
diagnostic medical devices has only been demonstrated for, and only applies to, use of the Maxwell®16
Instrument (Cat.# AS2050) in clinical mode with the Maxwell®16 Blood DNA Purification Kit (Cat.#
AS1015). Table 1 lists the hardware configuration and operational mode requirements for the Maxwell®16
Blood DNA Purification Kit. The Maxwell®16 Instrument (Cat.# AS2050) is supplied configured for use in
clinical mode with SEV hardware.
Table 1. Hardware Configuration and Operational Mode Setup Requirements.
Failure to use the operational mode required for your selected hardware configuration will cause
damage to the instrument.
Maxwell®16 Kit Purification
Procedure
Firmware
Operational Mode
Hardware
Configuration
Maxwell®16 Blood DNA
Purification Kit gDNA Clinical
Standard Elution
Volume
(SEV)
!
Promega Corporation · 2800 Woods Hollow Road ·Madison, WI 53711-5399 USA ·Toll Free in USA 800-356-9526 ·Phone 608-274-4330 ·Fax 608-277-2516 · www.promega.com
Part# TM300 Printed in USA.
Page 14 2/08
tm300.0208_Corrected.qxp 3/11/2008 10:41 AM Page 14

Promega Corporation · 2800 Woods Hollow Road ·Madison, WI 53711-5399 USA ·Toll Free in USA 800-356-9526 ·Phone 608-274-4330 ·Fax 608-277-2516 · www.promega.com
Printed in USA. Part# TM300
2/08 Page 15
(iii) Setting the Maxwell
®
16 Instrument Operational Mode
(iv) Changing the Maxwell
®
16 Instrument Display Language
1. Go to the “Menu” screen. The instrument will default to the Menu screen at start-up.
2. Select “Setup”. This will open the language screen.
3. Scroll up or down and select the language required.
4. Once the language is selected press “Run/Stop”, and then return to Menu. The display should now be
in your selected language.
1. Make sure the instrument door is closed and turn on the Maxwell
®
16 Instrument. The screen will
display both the firmware version number and the current operational mode setting. The Maxwell®16
Instrument (Cat.# AS2050) is supplied configured for use in clinical mode with SEV hardware.
2. Verify that the operational mode is displayed as shown in the
image on the right. If the operational mode is not as shown
here, you will need to change the instrument setting (see
Appendix II, Section VIII.A(ii) “Changing the Maxwell®16
Instrument Operational Mode”).
Compliance with Directive 98/79/EC on in vitro diagnostic
medical devices has not been demonstrated for use of the
Maxwell
®
16 Instrument with reagent kits other than
Cat.# AS1015, or with methods other than those provided in
the clinical mode.
6033MD
Promega MAXWELL 16
Purification System
Version 4.40
SEV IVD
Operational Mode Setting
SEV = Standard Elution Volume
IVD = Clinical Mode
!
tm300.0208_Corrected.qxp 3/11/2008 10:41 AM Page 15

6962MB
Calibration Error!
Continue?
Error Code: 3
Yes No
After completion,
Refer to
Tech. Manual #TM300
for troubleshooting
Turn off instrument!
Refer to
Tech. Manual #TM300
for troubleshooting
Yes No
Refer to Troubleshooting
Section for a detailed list
of error codes.
IV. Operating the Maxwell
®
16 Instrument
IV.A. Navigation
The system firmware will prompt you through initiation of a purification run. Follow the directions
displayed on the LCD screen. Use the “Scroll Up” and “Scroll Down” buttons to move the cursor to
the desired position. Once the cursor is moved to the desired position in the list, press the “Run/Stop”
button to make the selection. At any time during the selection process, you may press the “Menu”
button to return to the beginning.
IV.B.Operational Qualification
With instrument power on:
Each time you turn the instrument on, it will automatically go through a self-diagnostic test during
which the platform, plunger bar and magnetic rod assembly are moved to check that the instrument is
functioning properly. Upon completion of this test, the screen will display either “Diagnostic Check
Successful” or “Calibration Error”.
During instrument runs:
During runs, the instrument will automatically do periodic self-diagnostic tests to verify that the
platform, plunger bar and magnetic rod assembly are within calibration during the purification
procedure. If the instrument detects that any of these parts are not within calibration during a run,
the method will pause and display “Calibration Error”.
If calibration error occurs:
If a calibration error occurs, you will see the “Calibration Error” screen. Note the Error Code Number
displayed on the LCD screen, and refer to the Troubleshooting section of this manual (Section VI.C) for
more information on each Error Code. If you are in the middle of a run, you can choose to continue the
purification procedure or abandon the run by turning off the instrument. Continuing the run will not
damage the Maxwell
®
16 Instrument but may result in suboptimal recovery of purified nucleic acid.
Promega Corporation · 2800 Woods Hollow Road ·Madison, WI 53711-5399 USA ·Toll Free in USA 800-356-9526 ·Phone 608-274-4330 ·Fax 608-277-2516 · www.promega.com
Part# TM300 Printed in USA.
Page 16 2/08
tm300.0208_Corrected.qxp 3/11/2008 10:41 AM Page 16

IV.C. Sample Purification
Placement of sample cartridges in the Maxwell
®
16 Instrument is illustrated in Figure 5. Please refer to the
Maxwell
®
16 Blood DNA Purification Kit Technical Manual (#TM301) for detailed instructions on cartridge
and sample preparation and purification.
The Maxwell
®
16 reagent cartridges are designed to be used with potentially infectious substances.
Users should wear the appropriate protection (i.e., gloves, goggles, etc.) when handling infectious
substances. Users should adhere to their institutional guidelines for the handling and disposal of all
infectious substances when used with this system.
The Maxwell
®
16 reagent cartridges contain potentially hazardous chemicals. Users should wear
protective gloves when handling the reagent cartridges. Users should follow their institutional
guidelines for disposal.
IV.D. Minimizing Cross-Contamination
Users should follow standard laboratory procedures to avoid cross-contamination of samples. Wear
gloves during all procedures, and change gloves often. Use aerosol-resistant pipet tips when
transferring samples to minimize the potential for cross-contamination.
Promega Corporation · 2800 Woods Hollow Road ·Madison, WI 53711-5399 USA ·Toll Free in USA 800-356-9526 ·Phone 608-274-4330 ·Fax 608-277-2516 · www.promega.com
Printed in USA. Part# TM300
2/08 Page 17
6916TB
Figure 5. Placement of sample cartridges
into the Maxwell
®
16 Instrument.
Sample cartridges are placed in the
Maxwell
®
16 Cartridge Rack. The sample
cartridges are then removed from the
Maxwell
®
16 Cartridge Rack and placed onto
the instrument platform.
tm300.0208_Corrected.qxp 3/11/2008 10:41 AM Page 17

V. Periodic Cleaning and Maintenance
The Maxwell
®
16 Instrument requires minimal maintenance. However, it is important to clean the
instrument at regular intervals. If samples or reagents have been spilled, it is important to clean the
instrument to avoid damage. Most parts of the Maxwell
®
16 Instrument have an anodization coating,
which forms a durable, easily cleaned barrier with the metal.
Always turn off and unplug the instrument before cleaning.
V.A. General Care
• Wipe up any spills immediately.
• After each use, clean the instrument by wiping off the magnetic rod assembly, plunger bar, and
platform using a cloth dampened with deionized water or 70% ethanol. Do not use other
solvents or abrasive cleaners.
Note: Wear gloves. If the instrument is used with biohazardous materials, dispose of any
cleaning materials used in accordance with your institutional guidelines.
• Periodically wipe the outside of the instrument using a cloth dampened with deionized water
or 70% ethanol.
• Keep the cooling vents in the back of the machine clear of dust.
• Do not remove the Maxwell
®
16 Instrument case for cleaning. This will void the warranty.
• Do not use a spray bottle to soak instrument surfaces with large volumes of liquid.
• Never allow liquids to sit on instrument surfaces for extended periods of time.
• Keep all moisture away from the heated elution tube slots to prevent damage to the heating
elements.
• If the linear slides (see Figure 3, Section II) for the platform need to be cleaned, use only a dry
paper towel. If they have been contaminated with any liquid, wipe off excess liquid and follow
the lubrication guidelines in Section V.C., or contact Promega Technical Services for assistance.
• If any of the hardware accessories need to be cleaned (i.e., cartridge or elution racks), wipe
them with a cloth dampened with deionized water or 70% ethanol.
Promega Corporation · 2800 Woods Hollow Road ·Madison, WI 53711-5399 USA ·Toll Free in USA 800-356-9526 ·Phone 608-274-4330 ·Fax 608-277-2516 · www.promega.com
Part# TM300 Printed in USA.
Page 18 2/08
tm300.0208_Corrected.qxp 3/11/2008 10:41 AM Page 18

V.B. Removal of Magnetic Rod Assembly
If the plungers are inadvertently left out during a run or placed in the wrong starting position, the
machine may go through a run with the magnetic rods unprotected. If this happens, the magnetic
rod assembly must be removed for cleaning.
1. Turn off the power and unplug the instrument. This will release the motors so that the heads
can be gently moved to allow easier access to the magnetic rod assembly.
2. Gently and slowly, with constant pressure on both the right and left side, push the plunger
bar and the magnetic rod assembly down to their lowest positions. Do not push the plunger
bar and magnetic rod assembly too fast. Doing so could result in damage to the instrument’s
electronics.
3. Unscrew and remove the three thumbscrews on top of the magnetic rod assembly (Figure 6).
4. Once the three thumbscrews are removed, gently lift up the magnetic rod assembly to remove it.
5. To clean the magnetic rod assembly, wipe with a soft paper towel dampened with deionized
water or 70% ethanol. Removal of paramagnetic particles from the magnetic rod assembly
will require multiple wipes with a damp cloth.
6. If the magnetic rod assembly cannot be cleaned, please contact Promega for assistance.
7. Replace the magnetic rod assembly, and firmly tighten the three thumbscrews.
V.C. Periodic Maintenance
Linear Slides: If the linear slides become sticky, they may be lubricated with light machine oil. Use
a cotton swab, and apply only as much as is needed to make the heads and plate slide easily. Do
not get oil on the black drive belts.
Belts: Inspect the belts periodically. If excessive wear or excessive slack is noted, contact Promega
or your local Promega representative, and arrangements will be made to service the instrument.
Promega Corporation · 2800 Woods Hollow Road ·Madison, WI 53711-5399 USA ·Toll Free in USA 800-356-9526 ·Phone 608-274-4330 ·Fax 608-277-2516 · www.promega.com
Printed in USA. Part# TM300
2/08 Page 19
Figure 6. The thumbscrews on the top of the magnetic rod assembly.
5189TB
tm300.0208_Corrected.qxp 3/11/2008 10:41 AM Page 19
Table of contents
Other Promega Laboratory Equipment manuals

Promega
Promega GloMax User manual
Promega
Promega Maxprep AS9100 User manual
Promega
Promega E8051 User manual

Promega
Promega GloMax User manual

Promega
Promega Maxwell 16 MDx User manual

Promega
Promega Maxwell CSC 48 User manual
Promega
Promega Maxwell RSC Instrument User manual
Promega
Promega GloMax 96 User manual
Promega
Promega Maxwell AS1840 User manual

Promega
Promega Maxwell 16 MDx User manual
