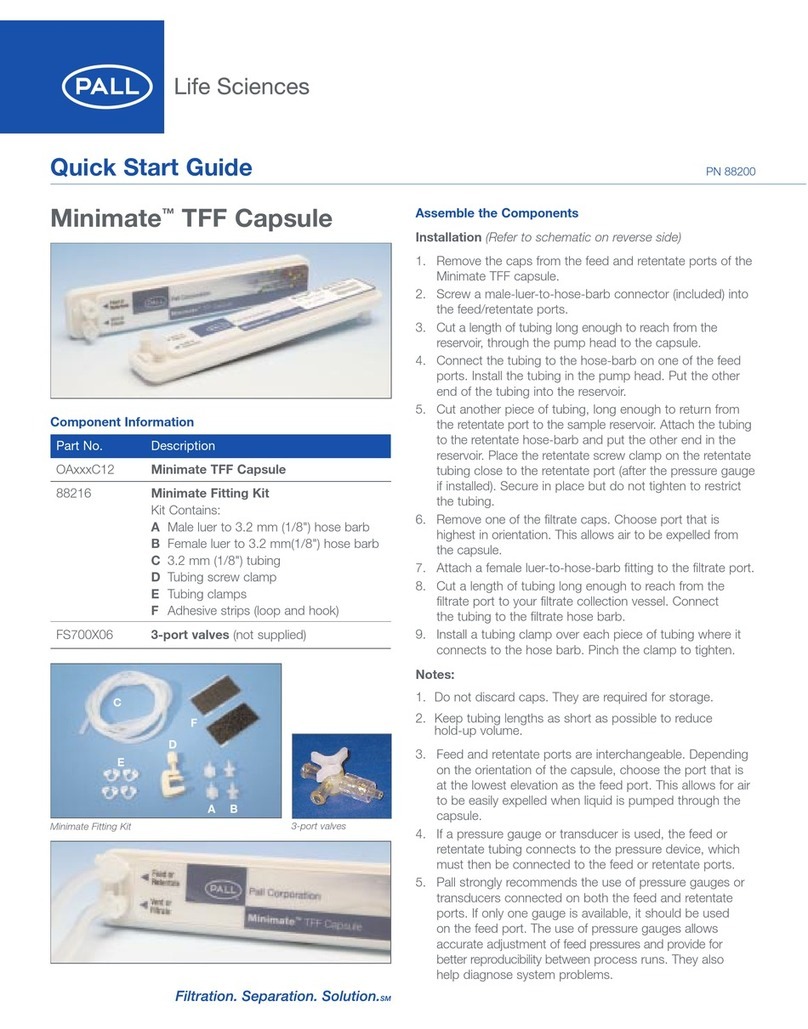
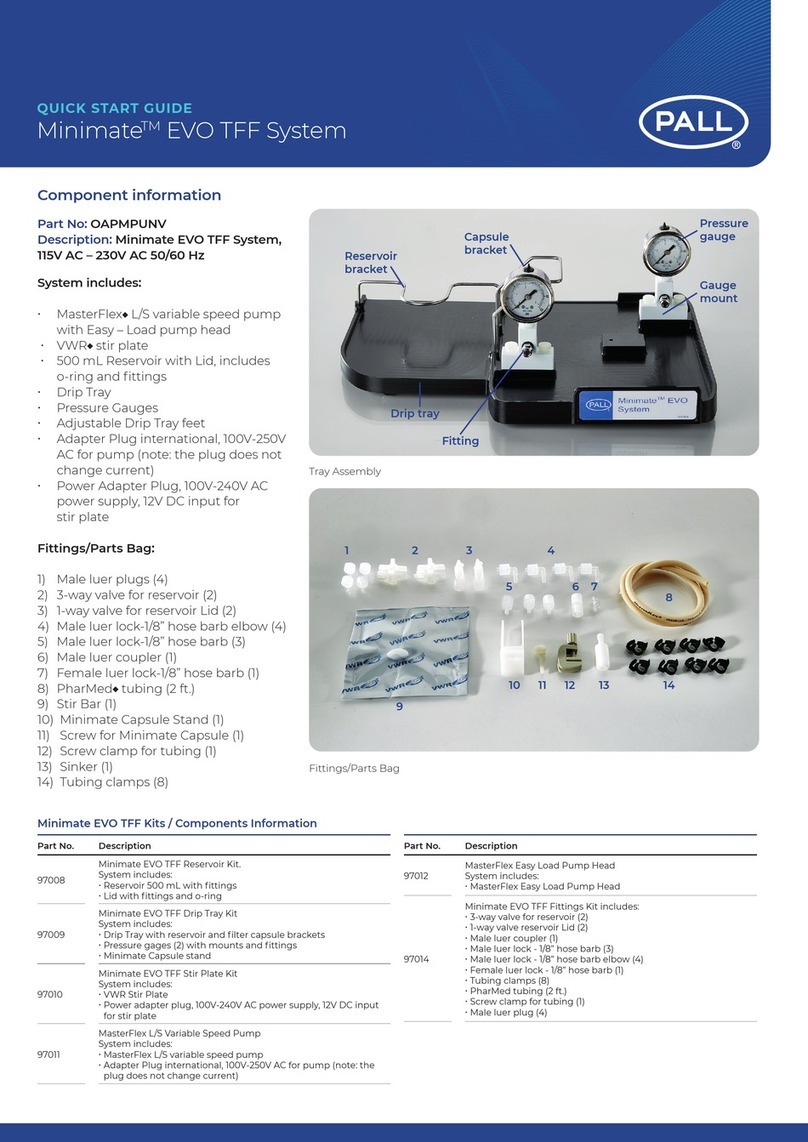
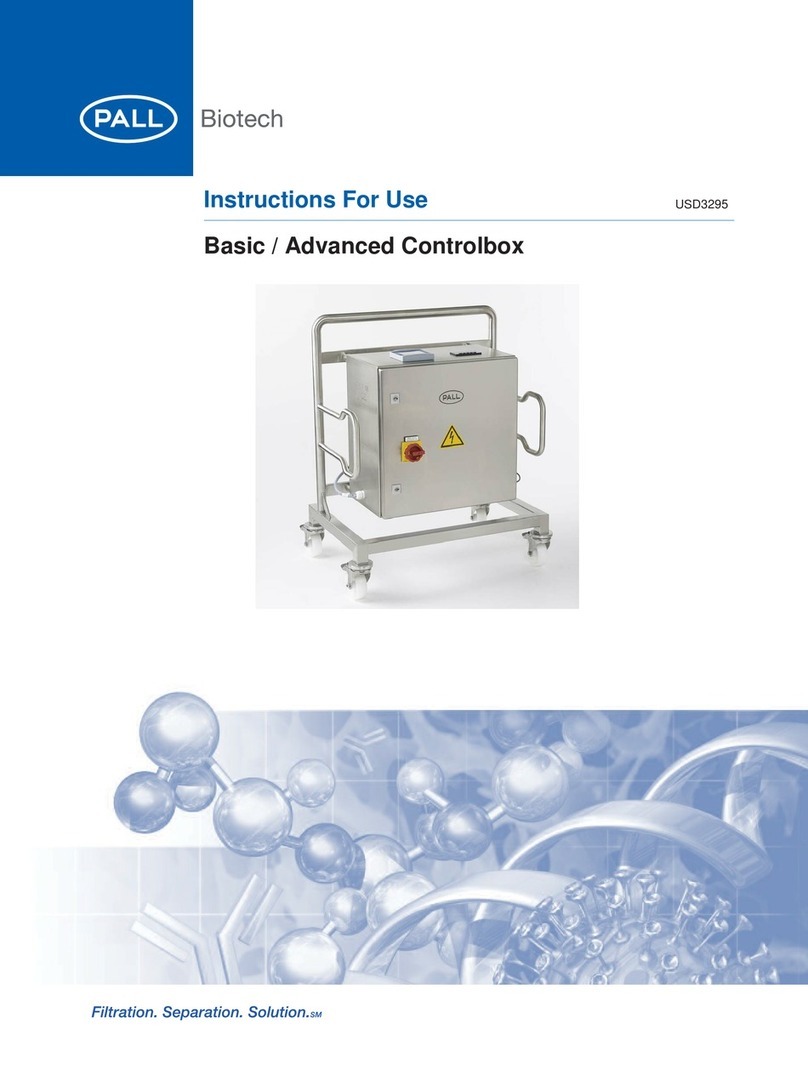
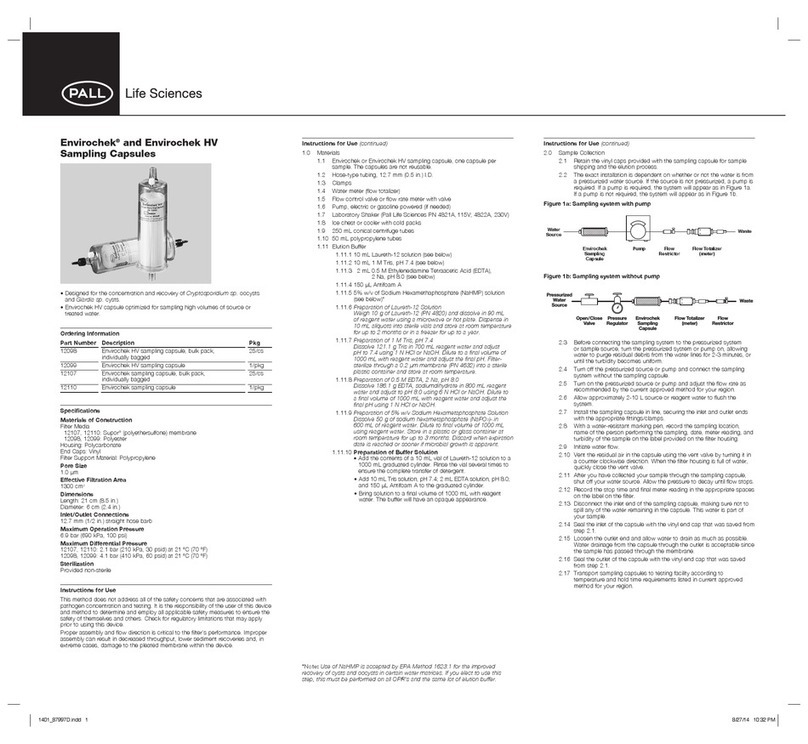
Pall T Series Guide

User Guide
T-Series TFF Cassettes
with Ome a™ Membrane
Care and Use Procedures
For use with Centramate™ and Centrasette™ TFF Systems
USTR 2433b

Contents
Safety Notice ..........................................................................................................................
Learn About Safety ...............................................................................................................5
Important — Read First ........................................................................................................5
Safety Conventions in this Manual .......................................................................................6
1. Introduction .......................................................................................................................6
1.1 Applications in TFF ........................................................................................................6
1.2 Tangential Flow Filtration Process ..................................................................................6
1.3 The TFF Process ..........................................................................................................7
1.4 System Hardware Configurations ..................................................................................8
1.4.1 Options ................................................................................................................8
1.4.2 System Design ....................................................................................................9
1.4.3 Ports and Flow Rate ............................................................................................9
2. T-Series Cassettes with Omega Membrane Installation .................................................9
2.1 First-time Use of Cassette Holder/TFF System ..............................................................9
2.1.1 Flush and Clean the System ................................................................................9
2.1.2 Making a Flushing Gasket ..................................................................................10
2.1.3 System Flushing Protocol ..................................................................................10
2.2 Installing T-Series Membrane Cassettes with Omega Membrane into Autotorque (AT)
and Manual Torque (MT) Holders ................................................................................11
2.2.1 Preparation for Loading Cassettes ....................................................................11
2.2.2 Unpacking the Cassettes ....................................................................................11
2.2.3 Installing Cassettes and Gaskets ......................................................................13
2.3 How to Torque Pall AT and MT Cassette Holders ......................................................14
3. Operating Specifications ................................................................................................17
3.1 Recommended Cross Flow Rates for T-Series Cassettes with Omega Membrane ......17
3.2 Operating Pressures, Temperatures and pH ................................................................18
3.3 Hold-up Volume and Minimum Working Volume ........................................................18
3.3.1 Determining Feed/Retentate Hold-up Volume ....................................................18
3.3.2 Determining Permeate Hold-up Volume ............................................................19
3.3.3 Determining the Non-recoverable Volume ..........................................................20
3.3.4 Determining the System Minimum Working Volume ..........................................20
. Preconditioning T-Series Cassettes and Systems .........................................................21
4.1 Using a Cassette for the First Time ............................................................................22
4.2 Initial Flushing of the Cassette and Assembly (WFI Flush) ............................................22
4.2.1 Flush the Feed/Retentate and Permeate Line to Waste ....................................22
4.3 Sanitizing and Depyrogenating the Cassette and Assembly ........................................23
4.3.1 Add and Recirculate Sanitizing Solution ............................................................24
4.4 Flushing the Cassette and Assembly after Sanitization ................................................24
4.4.1 Flush the Retentate and Permeate Line to Waste ..............................................24
4.4.2 Water Recirculation ............................................................................................25
4.4.3 Flush the Retentate and Permeate Line to Drain ................................................26
2

4.5 Determine Normalized Water Permeability (NWP20 °C) for Cassettes ........................27
4.5.1 Remove Air from Cassette and System ............................................................28
4.5.2 Determine Initial Water Permeability (Dead-end Method) ....................................28
4.5.3 Normalize the Water Permeability ......................................................................30
4.5.4 An Example of How to Determine Membrane Water Permeability ......................30
4.6 System and Membrane Cassette Integrity Test ..........................................................31
4.6.1 Drain the System (Feed/Retentate Flow Path) ....................................................32
4.6.2 System Integrity Test (External Test) ..................................................................33
4.6.3 Membrane Cassette Integrity Test ......................................................................33
4.6.4 Troubleshooting System Integrity Failure ............................................................34
4.6.5 Troubleshooting Membrane Integrity Failure ......................................................34
4.6.6 Integrity Testing Systems with Multiple Cassettes ..............................................34
4.7 Buffer Conditioning ....................................................................................................35
4.7.1 Flush the Retentate and Permeate Lines with Buffer ..........................................35
4.7.2 Remove Trapped Air from the Retentate Line ....................................................36
5. Post-use Treatment of Cassettes and System ..............................................................37
5.1 Flushing Cassettes after Use ......................................................................................37
5.1.1 Flush the Feed/Retentate Line to Waste ............................................................37
5.1.2 Flush the Permeate Line to Waste ....................................................................38
5.2 Cleaning Cassettes ....................................................................................................38
5.2.1 Adding Cleaning Agent to System ....................................................................38
5.2.2 Recirculate Cleaning Solution ............................................................................39
5.3 Flush Cleaning Agent from Cassettes and Assembly ..................................................39
5.3.1 Flush the Retentate Line to Waste ....................................................................40
5.3.2 Flush the Permeate Line to Waste ....................................................................40
5.3.3 Recirculation Procedure to Reduce pH, TOC, and Extractables (optional) ........40
5.4 Determine Membrane Recovery for the Cassettes ......................................................41
5.4.1 Remove Air from Cassette and System ............................................................42
5.4.2 Determine the Water Permeability after Cleaning ................................................42
5.4.3 Normalize the Water Permeability ......................................................................44
5.4.4 Determine the Membrane Recovery ..................................................................44
5.4.5 Evaluate the Effectiveness of the Cleaning Regimen ..........................................44
5.5 Post-Use Air Integrity Test (optional) ............................................................................44
5.6 Storage of Membrane Cassettes ................................................................................45
5.6.1 Recommended Storage Agents for Omega Membranes ....................................45
5.6.2 Adding Storage Agent to System ......................................................................45
5.6.3 Recirculate Storage Solution ..............................................................................46
5.6.4 Cassette Storage ..............................................................................................46
6. Appendix .......................................................................................................................... 7
6.1 Omega Membrane Chemical Compatibility Chart ........................................................47
6.2 Alternative Cleaning Agents ........................................................................................48
7. Glossary ........................................................................................................................... 9
www.pall.com/biopharm 3
Safety Notice
This guide is designed for T-Series cassettes with Omega membrane only. The specifications detailed in this
document do not apply to other Pall tangential flow filtration membranes and cassettes.
Important Notice
Refer to safety instructions before use.
Safety instructions in this language are
available from Pall.
Viktigt att notera
Läs säkerhetsinstruktionerna före
Säkerhetsinstruktioner på svenska finns
att få frän Pall.
Viktig melding
Les Sikkerhetsinstruksjonen før bruk.
Sikkerhetsintruksjon på norsk vil være
tilgjengelig fra Pall.
Belangrijke informatie:
Voor gebruik veiligheidsinstructies goed
doornemen.
Veiligheids instructies in het
Nederlands zijn bij Pall verkrijgbaar.
Avvertenza importante
Prima dell’uso leggere le istruzioni
per la sicurezza.
Le istruzioni per la sicurezza in
Italiano possono essere richieste
a Pall.
Aviso importante
Antes de utilzar, consultar instruçöes de
segurança.
Instruçöes de segurança em Português,
encontram-se disponiveis na Pall.
Aviso importante
Antes de usar, consultar Instrucciones de
Seguridad.
Instrucciones de Seguridad en este
idioma están disponibles por Pall.
Important
Se référer aux instructions
concernant la sécurité d’utilisation avant
usage.
Les instructions concernant la
sécurité d’utilisation sont disponibles en
français chez Pall.
Vigtigt
Læs sikkerhedsinstruktioner før
Sikkerhedsinstruktioner på dansk
kan fås fra Pall.
Tärkeä tiedote
Lue turvallisuusohjeet ennen käyttöä.
Pall toimittaa tarvittaessa suomenkieliset
turvallisuusohjeet.
Wichtige Anmerkung
Vor Gebrauch bitte die
Sicherheitsrichtlinien lesen. Die
Sicherheitsrichtlinien in dieser Sprache
erhalten Sie von Pall.
användandet.
ibrugtagning.
4

Learn About Safety
Please read and follow the safety instructions in this User Guide.
Important — Read First
Storage solutions recommended for sanitizing, cleaning, flushing, and storage may be hazardous or corrosive.
Follow proper safety procedures when preparing, mixing, and handling these reagents. Refer to Material Safety
Data Sheets (MSDS) — available from your supplier — to learn about the specific characteristics, necessary
precautions, and suitable remedies for each reagent used.
1. Always wear protective clothing including safety glasses and gloves when working with membrane cassettes,
equipment, samples, and reagents.
2. Provide sufficient space for assembling all system components and operating the system.
3. Disconnecting a system component or dismantling an installed cassette holder without first isolating and
depressurizing it can result in personal injury and equipment damage. Depressurize a TFF system and cassette
holder before dismantling any component.
4. Some system components may be very heavy. Take proper precautions when moving or lifting equipment to
prevent personal injury. In some cases, hoists or other lifting equipment may be required.
5. You should always use pressure gauges or pressure sensing devices in your system so you can monitor the
system pressure and differential pressure across the membrane cassette.
6. Take suitable precautions before sterilizing the holder with steam or using the holder with hot fluids.
7. Do not use your cassette holder as a coded pressure vessel.
8. Wipe up spills promptly to prevent injury from contact or slipping.
9. Complete the following safety procedures:
a. Read about the operating limits of the membrane cassette and the proper methods for use detailed in this
User Guide.
b. Ensure that your process and cleaning conditions do not exceed the operating limits of the cassette holder,
membrane cassette, and sealing materials.
c. Check that your process equipment and the cassette holder meet local safety codes.
d. Inspect the holder and seals regularly to detect damaged components.
Pre-use Recommended Stora e Conditions
Pall cassettes can be expected to perform within specifications if stored and handled in a manner consistent
with the parameters below:
The cassette is stored unopened in the original packaging at 4 to 25 ºC and in a dry environment.
The cassette is protected from direct sunlight, radiation, or weather conditions.
Care is taken to avoid physical damage while handling.
Thermal shock is avoided.
www.pall.com/biopharm 5

Safety Conventions in this Manual
Safety information is identified in this instruction manual by the following convention:
Information
Information: Identifies important information about the current topic.
Caution
Caution: Identifies a situation that may cause product damage and may pose a safety risk that can
cause personal injury.
Warnin
Warning: Identifies a dangerous or potentially dangerous situation that may cause irreversible damage to
equipment and poses a safety risk that can cause serious personal injury.
1. Introduction
1.1 Applications in TFF
Tangential Flow Filtration (TFF) is an efficient method for concentrating, desalting, or exchanging
buffer solutions of biomolecules ranging in volume from several milliliters to thousands of liters.
It can be used to fractionate large from small biomolecules, depyrogenate buffer solutions,
harvest cell suspensions, and clarify fermentation broths and cell lysate.
TFF is utilized to perform various steps on a wide range of applications in the biopharmaceutical
industry, such as:
Concentration and desalting of solutions of proteins, peptides and oligonucleotides
Purification and recovery of antibodies or recombinant proteins from cell culture media
Clarification of cell lysate or tissue homogenates
Recovery of products expressed into the media from cell culture
Preparation of samples (concentrate, desalt, or buffer exchange) before or after
column chromatography
Caution: This guide is designed only for T-Series cassettes with Omega membrane. Its contents
and specifications do not apply to other Pall tangential flow filtration membrane cassettes.
1.2 Tan ential Flow Filtration Process
The process conditions for using membrane cassettes in a Tangential Flow Filtration system
depend on the specific application. Important process parameters that must be considered
include:
Retentate flow rate (cross flow rate)
Transmembrane pressure
Temperature
Product characteristics (such as concentration, viscosity, and additives)
Variations in any of these parameters can affect the quality and reproducibility of the TFF
process.
The operating conditions for any TFF process must be established by performing trials,
evaluating results, and then modifying conditions as necessary to achieve the required results.
Because tangential flow filtration membrane cassettes and assemblies are used in repeated
processing modes, proper care and use is crucial to ensure reliable and reproducible
performance from run to run, and to maximize the life of the membrane cassettes.
This manual contains detailed steps for the proper installation, preparation, cleaning and
storage of a tangential flow filtration (TFF) membrane cassette and assembly. The procedures
6

7www.pall.com/biopharm
include protocols for Pall T-Series screen channel cassettes with Omega membrane.
Some processes may require adaptations to suit the specific requirements of a given system
configuration or application, but essential protocols should not be omitted.
To perform these procedures, it is recommended that the TFF assembly include 3 pressure
gauges/transducers and 2 valves for proper execution of the protocols presented,
see Figure 2. To include integrity testing capability (highly recommended), additional valves may
be required (Figure 22).
1.3 The TFF Process
The steps required in a Tangential Flow Filtration process are displayed in Figure 1.
Preconditioning and post-use conditioning are covered in Sections 4 and 5 of this manual.
Information on product process optimization and processing can be found in other supporting
literature, at www.pall.com or through Pall Life Sciences Technical Support:
PN33289 Diafiltration: A Fast Efficient Method for Desalting or Buffer Exchange of Biological
Samples
PN33213 Introduction to TFF for Laboratory and Process Development Applications
Figure 1
The TFF Process
Pre-use
Conditioning Processing Post-use
Conditioning
1. Installation
2. Flushing
3. Sanitization
2. Flushing
4. Normalized Water
Permeability (NWP)
5. Integrity Test
6. Buffer
Conditioning
8 and 9.
Concentration
and/or
Diafiltration
10. Product
Recovery
11. Buffer Flush
12. Clean In
Place (CIP)
2. Flushing
4. Normalized
Water Permeability
13. Storage
7. Optimization
(Once only)

1.4 System Hardware Confi urations
System hardware configurations vary, but should all have key components (Figure 2).
All TFF systems should have:
Feed/Retentate Flow Path
Sample/feed tank
Feed pump
Feed and retentate pressure gauges or transducers
Adjustable retentate valve
Connecting piping
Permeate Flow Path
Pressure gauge/transducer
Valve
Figure 2
Typical TFF Hardware Setup
1. .1 Options
In addition to the basic configuration, a valve on the feed side may be added to
isolate the system for integrity testing or to separate it from the feed tank. A flow
meter is also typically included with larger systems to allow feed or retentate flow rate
measurement. A second flow meter may be used on the permeate. Alternatively, the
permeate receptacle may be placed on a balance. The weight of permeate collected
can be used to calculate permeate volumes.
Temperature sensors may also be located at the feed tank, on the feed line after the
pump, and on the permeate line.
Measuring temperature right after the pump will indicate if the pump is causing
excessive heating and possible denaturing of proteins.
Measuring the temperature in the feed tank will only show gradual heating.
Measuring the temperature of the permeate gives the actual temperature of
the fluid passing through the membrane for determining normalized water
permeability (NWP).
8
Retentate Permeate
Feed
Tank
Waste
Feed
Pump
Rp
Pp
Fp

1. .2 System Design
The specific type, size and location of components in a system can significantly
affect the performance and cleanability of the system (elimination of bioburden).
Critical evaluation of the system design and components should be performed by
qualified design engineers, especially when the system will be used in process
development and production and will require appropriate validation. Pall process
engineers have extensive experience in TFF system design and are available to help
you with your engineering questions.
1. .3 Ports and Flow Rate
The permeate side of most TFF cassette holders have two ports. While these ports in
Pall TFF holders are internally connected through the cassettes, closing off one of the
ports can create an internal pressure drop in the cassette at high permeate flow
rates, > 100 LMH (L/m2/hr). These high flow rates are frequently encountered when
performing water permeability measurements on the cassettes. Since the pressure
drop is before the permeate pressure gauge/transducer, it is not measured by the
system. This results in a transmembrane pressure (TMP) measurement/calculation
(Equation 1: Transmembrane Pressure Calculation) that is in error on the high side
resulting in a low calculated value for water permeability (Equation 2: Water
Permeability Calculation). In applications where the process is controlled by TMP,
the result may be a low process flux.
Equation 1
Transmembrane Pressure Calculation
Equation 2
Water Permeability Calculation
2. T-Series Cassettes with Ome a Membrane Installation
2.1 First-time Use of Cassette Holder/TFF System
2.1.1 Flush and Clean the System
Before using your TFF system for the first time, flush the system (without cassettes
installed) to remove any oil and particulates from the manufacturing process that
could damage the cassette or contaminate your product.
Use a detergent-based cleaning solution to clean the system. The solution you
choose should be chemically compatible with the components in your system.
Typically, detergent cleaning solution concentrations between 0.5 and 1.0 percent at
temperatures from 25 to 45 °C are used.
A flushing gasket or SIP/CIP Plate (available from Pall Life Sciences) should be
installed in the holder in place of a cassette.
You can make a flushing gasket from the silicone gaskets supplied with membrane
cassettes. To prepare a flushing gasket, cut the center out of two spare silicone
gaskets (also available as spare parts). Use the two gaskets in place of one flushing
gasket.
TMP = Pfeed + Pretentate
2– Ppermeate
( )
Water Permability = Permeate Flux Rate (LMH)
TMP
9www.pall.com/biopharm

2.1.2 Making a Flushing Gasket
Flushing gaskets (also called SIP/CIP plates) are not supplied with holders, but
flushing gaskets for Centramate and Centrasette holders may be purchased (see
Table 20 in Appendix).
In the generic drawing (Figure 3), the dotted line illustrates where to cut the gasket.
The cut line should bisect the channel holes while providing about 2 cm (0.75 in.) of
space around the outside of the gasket.
Figure 3
Preparing a Flushing Gasket
2.1.3 System Flushing Protocol
1. Fill the feed tank with water.
2. Direct the retentate and permeate lines to drain.
3. Open retentate and permeate valves.
4. Pump the water out through both the retentate and permeate lines to drain.
5. Prepare a sufficient amount of detergent-based solution to fill the system flow path
and add to feed tank. (You should be able to run the system without drawing air
into the pump.)
6. Position both the retentate and permeate lines to return to the feed tank.
7. Adjust the pump to provide an aggressive recirculation flow rate. Use the
recommended CFF for cleaning listed in Table 3. Do not exceed a feed pressure
of 0.34 barg (5 psig). Higher pressures can distort the gasket and cause leaks.
8. Allow the detergent solution to circulate through both the retentate and permeate
lines for 30 to 60 minutes.
9. Drain the system.
10. Wash and then refill feed tank with water.
11. Flush the system thoroughly to drain using deionized water to remove the
detergent solution. If caustic detergent was used, measure the pH of the waste
streams and continue flushing until the pH matches that of the influent.
12. Drain the system and remove the flushing gasket.
13. Install the cassettes.
Silicone Gasket
Channel Hole
Cut Line
Cut out the area
inside the dotted
lines
0

2.2 Installin T-Series Membrane Cassettes with Ome a Membrane into Autotorque (AT)
and Manual Torque (MT) Holders
2.2.1 Preparation for Loading Cassettes
Procedure
1. Remove the retaining nuts, spacers and washers. Separate the sliding end plate
from the fixed flow-distribution manifold:
(i) for horizontal units, lift the end plate off the manifold;
(ii) for vertical units, slide the end plate away from the manifold about 15 to 22 cm
(6 to 9 in.).
2. Inspect and, if necessary, clean the cassette holder sealing surfaces. Inspect the
cassettes and gaskets prior to installation for any damage or foreign material
which could hamper sealing of the cassettes.
Figure
T-Series TFF Cassettes with Omega Membrane Product Packaging
2.2.2 Unpacking the Cassettes
Warning: This product is stored in 0.3 N Sodium Hydroxide. Refer to the MSDS for
proper protection and handling instructions.
Open the cassette package carefully
To avoid accidental exposure to the storage reagent, open the cassette package
over a container or sink. Please see photos below for proper handling:
1. Remove cassette package from shipping container.
Figure 5
Cassette Package in Shipping Container
www.pall.com/biopharm

2. Use scissors to cut below the seal of the outer bag. Do not to cut the inner
bag seal.
Figure 6
Opening Outer Bag
3. Remove cassette (still in the inner bag) from the outer bag.
Figure 7
Cassette Package in Inner Bag
4. Turn the cassette so that the seal is turned upright. Use scissors to cut
the seal of the inner bag while holding the cassette upright.
Figure 8
Opening Inner Bag
2

5. Discard the storage solution from the inner bag package.
Proceed to flushing step.
Figure 9
Preservative Solution Level
2.2.3 Installing Cassettes and Gaskets
Preparation
Remove the film cover from the gaskets and discard before installation.
Caution: Use only the gaskets supplied with the cassettes. Using thinner gaskets
(as supplied with C and F Series cassettes) may not allow proper sealing of the
cassette into the holder.
Procedure
1. Rinse the silicone gaskets (supplied with the cassettes) with deionized or
pharmaceutical grade water. Place a gasket flat against the manifold, aligning the
holes in the gasket with the holes in the manifold.
2. Place the cassette into the holder against the gasket.
Place another gasket flat against the cassette. Ensure the holes in the manifold,
gaskets, and the cassette line up.
3. If your application requires multiple cassettes, continue the same gasket-cassette-
gasket pattern, ending with a gasket between the last cassette and the end plate
(Figure 10).
Install multiple cassettes with the printed cassette information all facing the same
side and direction. Try to position cassettes so that they can be read without having
to reopen the holder.
4. Place or slide the end plate against the last gasket of the cassette stack:
(i) for horizontal units, place the end plate on top of the cassette stack;
(ii) for vertical units, slide the end plate against the cassette stack.
5. For hardware assemblies that require tie-rod spacers (Centramate, Centrasette LV,
Centrasette 5), place the spacers and washers on each bolt leaving a minimum of
18 mm (0.75 in.) of thread exposed on the rod. Screw the nut on each bolt and
hand tighten firmly.
For auto-torque holders, ensure that the piston is fully retracted into the hydraulic
cylinder before hand tightening the nuts. If it is not, push the piston in by hand (with
no hydraulic pressure applied to the system).
Preservative
Solution Level
3www.pall.com/biopharm

6. Set the clamping force on the cassettes in the holder to the recommended torque
for manual torque (MT) holders or hydraulic pressure for auto-torque (AT) holders
according to the instructions found in Section 2.3.
Two gaskets are supplied with each cassette. Installing the first cassette in a holder
requires two gaskets. Installing each additional cassette requires only one gasket. In
holders where cassettes are installed on each side of the central manifold, two
gaskets will be required for each first cassette. Save extra gaskets to replace worn or
damaged gaskets.
Gaskets lose their resiliency over time. Therefore, it is recommended that you replace
gaskets every six months, or more frequently if a gasket appears to be damaged or
you repeatedly open and close the holder.
Figure 10
Example of Multiple Cassette Installation
2.3 How to Torque Pall AT and MT Cassette Holders
1. Install the membrane cassette and gaskets in the holder according to Section 2.2.
2. Choose the value at the low end of the hydraulic pressure range for AT assemblies (Table 1)
or the torque range for MT holders (Table 2) — unless experience has established a different
value for use.
3. Compress the holder:
AT Assemblies
(i) Ensure that the nuts are screwed up against the end plate. They need not be tight.
(ii) Close the bypass valve on the hydraulic pump.
(iii) Turn on the air supply (1) to the hydraulic pump.
(iv) Increase the hydraulic pressure (2) on the hydraulic pump until it reaches the pressure value
you determined in step 2.
4
Hardware End-plate
Hardware Manifold
Gasket
Gasket
Gasket
Pall Omega 10 kD
Centrasette Cassette
Pall Omega 10 kD
Centrasette Cassette

Figure 11
Hydraulic Pump
Figure 12
Example of 1⁄4-turn Torque Procedure
MT Assemblies
(i) Tighten the nuts firmly by hand.
(ii) Set the calibrated torque wrench (supplied with the cassette holder) to the torque value
you determined in step 2. Refer to the instruction sheet for the wrench for additional
calibration details.
(iii) Using the torque wrench in the sequence displayed in Figure 12 for your holder, tighten each
nut no more than 1⁄4turn at a time. For example, tighten the first nut 1⁄4turn, and then tighten
the next nut in the sequence 1⁄4turn.
Figure 13
Pall Manual-Torque Cassette Holders and Torquing Sequence
www.pall.com/biopharm 5
A Air Pressure Gauge
B Hydraulic Pressure Gauge
C Air Supply Filter
D Bypass Valve
E Pressure Relief Valve
Factory Set
(Do not adjust or remove seal)
F Air Pressure Control Valve (2)
G On/Off Switch (1)
H Sight Tube
AB
D
C
E
G
H
F
Step 1 Step 2
Step 4 Step 5, etc.
Step 3
¼ turn ¼ turn
¼ turn¼ turn
¼ turn
Centramate LV
Centramate
1
3
4
2
Centrasette LV
Centrasette 5
1
2
Centrasette P
Centrasette 10
34
2
1

6
(iv) Stop tightening each nut immediately when the torque wrench “clicks,” or the wrench arm
pivots slightly away from the socket indicating that the nut has reached the correct torque.
Continue torquing each nut in sequence until the torque wrench “clicks” immediately on
each nut in sequence. If torqued properly, the nuts should reach the set torque value at
about the same time. The indication that the torque wrench has reached the set value may
be very subtle. Therefore, tighten the nuts slowly to prevent exceeding the required torque
value.
Note: At this point in the installation, the hold-up volume and minimum working volume should
be determined. See Section 3.3.
4. After cassettes have been installed and flushed with water, the system should be inspected
for leaks. If liquid is found leaking from around the cassettes, increase manual torque in 10%
increments or the hydraulic pressure in increments of 3 barg (45 psig). Flush the system with
water and check again for leaks. Stop increasing the hydraulic pressure when no more leaks
are observed. With the system filled with water, pressurize it to exceed the maximum
expected process operating pressure by about 10%.
Warning: Do not exceed pressure limits for the cassettes and system components or torque
and hydraulic compression limits.
Check for leaks. If liquid is found leaking from around the cassette, increase manual torque in
10% increments or the hydraulic pressure in increments of 3 barg (45 psig). Stop increasing
when no more leaks are observed.
Warning: Do not exceed the maximum recommended torque or hydraulic pressure.
If liquid is found leaking from around fittings, check the fittings and gaskets. Replace if
necessary. Once properly installed and compressed in the holder, cassettes can be pre-
conditioned and used in a process. A forward flow air integrity test including a system integrity
(pressure hold) test should be performed prior to adding product to the system (Section 4.6).
5. Periodically check the torque on each bolt for MT holders. Cassettes will compress initially
upon installation and will require adjustment. Temperature changes to the environment or
feed solution may require a torque adjustment to the holder. AT holders compensate for
reduced cassette compression and normally do not require periodic adjustment of the
hydraulic pressure.
Caution: Increasing the temperature of the feed solution will cause expansion of the cassettes,
causing the clamping force to increase unless the torque on MT assemblies or hydraulic
pressure on AT assemblies is relieved or reduced. It is possible that the maximum clamping
force may be exceeded. If a heated solution will be pumped into the cassette system, set the
clamping force on both MT and AT holders just below the minimum setting prior to adding the
heated fluid.
When finished using a calibrated torque wrench, adjust the wrench to its minimum force setting
for storage. Leaving a torque wrench set to a higher value can cause it to go out of calibration.
The torque required to apply the correct clamping force on cassettes depends on the size and
number of tie rods and the surface area over which the force is applied. On Pall AT hydraulic
closure systems, it also depends on the diameter of the pistons. Values listed in Table 1 and
Table 2 are recommended for cassettes from Pall Life Sciences. When installing cassettes from
Pall Life Sciences in holders from other manufacturers, contact Pall with the specifications of
the holder so that the correct torque or hydraulic pressure can be determined.
Caution: Excessive compression can permanently damage the cassette.

Table 1
Recommended Hydraulic Pressure Range for Pall AT Cassette Holders
Nu ber of Hydraulic Reco ended Hydraulic
Holder Type Pistons on Holder Pressure Range for AT Holders
T-Series Cassettes with Omega Membrane
(barg) (psig)
Centrasette LV AT 4 34 – 54 500 – 800
Centrasette 5 AT 4 34 – 54 500 – 800
Centrasette 10 AT 2 75 – 110 1100 – 1600
Centrastak™ AT 2/level 75 – 110 1100 – 1600
Table 2
Recommended Torque Values for Pall MT Cassette Holders
Nu ber of Bolts on Reco ended Torque Range for Manual –
Holder Type Holder Torque Cassette Holders1
T-Series Cassettes with Omega Membrane
(in – lb.) (Nm)
Centramate LV 4 50 – 70 6 –8
Centramate 4 70 – 90 8 – 10
Centrasette 5, 4 350 – 550 40 – 60
Centrasette LV
Centrasette 10, 2 700 – 1100 80 – 120
Centrasette P
Centrasette 10 4 350 – 550 40 – 60
1Pall membrane cassettes
3. Operatin Specifications
3.1 Recommended Cross Flow Rates for T-Series Cassettes with Ome a Membrane
Table 3 lists recommended cross flow flux (CFF) rates for operating Pall TFF cassettes with
Omega membrane. Other parameters such as TMP and temperature can be evaluated at these
CFF values.
CFF = L/min/ft2or m2[retentate flow rate/membrane area]
The values listed under Processing Mode are recommended for use when processing a
sample. Higher flow rates are recommended for cleaning and sanitization (Cleaning Mode).
Table 3
Recommended Retentate Cross Flow Flux Rates (CFF) for Pall T-Series Cassettes
with Omega Membrane
Mini u CFF Reco ended CFF1Reco ended CFF1
Holder Type Units Processing Mode Processing Mode Cleaning Mode
Screen Channel Screen Channel Screen Channel
Cassettes Cassettes Cassettes
Centramate and L/min/m23 5 – 8 7 – 12
Centrasette
L/min/ft20.3 0.5 – 0.8 0.7 – 1.2
1Trials must be performed to determine the most effective cross flow rate to use for any specific application.
www.pall.com/biopharm 7

8
3.2 Operatin Pressures, Temperatures and pH
Operating limit specifications for pressure, temperature, and pH are listed in Table 4.
Table
Cassette Operating Limits of Pressure, Temperature, and pH for T-Series Cassettes with Omega
Membrane (All Formats)
Maxi u Reco ended
Operating Pressure** Maxi u TMP Te perature Range pH Range
6 barg (87 psig) @ 23 °C 4 barg (58 psig) -5 to 55 °C 2 to 14 @ 4 barg (58 psig)
4 barg (58 psig) @ 55 °C @ 55 °C @ 50 °C
** Clamping pressure must be set to the recommended level to avoid leaks.
3.3 Hold-up Volume and Minimum Workin Volume
It is imperative to determine the hold-up volume and minimum working volume for your system
following installation of cassettes and prior to flushing out the system.
Feed/Retentate Hold-up Volume is the total volume, most of which is recoverable, contained
within the feed/retentate flow path.
Minimum Working Volume is the hold-up volume plus a minimum volume of liquid that must
remain in the bottom of the feed tank at the operating flow rate to prevent air from being drawn
into the cassette system.
The minimum working volume limits the maximum concentration factor achievable. It is affected
by the cross flow rate. At a higher cross flow rate, a greater liquid volume in the bottom of the
feed tank is required to prevent air from getting drawn into the pump. Tank design significantly
affects the minimum volume required to prevent air from getting into the system.
Permeate Hold-up Volume is the total volume contained within the permeate flow path.
Non-Recoverable Volume is the volume remaining in the Feed/Retentate flow path after the flow
channel has been pumped out and drained. Optimization of the product recovery step will
ensure high product recovery.
3.3.1 Determining Feed/Retentate Hold-up Volume
This procedure assumes the system is dry and cassettes have just been installed,
and that the retentate line is flexible and can be directed either to the feed tank
or the drain.
1. Add a measured volume of water into the feed tank that will be at least three times
the expected hold-up volume for the system. Record the volume. (If insufficient
volume was used, more can be added later.) Use the following table as a guide.
Table 5
Required Volumes for Determining Feed/Retentate Hold-up Volume
Syste Approxi ate Volu e to Add1
Centramate 300 – 500 mL
Centrasette 1 – 3 L
1Actual volume will depend on tubing / piping diameter and lengths, as well as amount of membrane area
installed.
Note: For bench-top systems with flexible hoses on the feed and retentate lines, add
a measured volume of water to a graduated cylinder and place the ends of the feed
and retentate tubing into the cylinder.
2. Close the permeate valve.
3. Open the retentate valve completely.

www.pall.com/biopharm 9
4. Start the pump and circulate the water through the system until no air bubbles exit
the retentate line. Adjust the flow rate so the feed pressure is about 0.3 barg
(5 psig). If the feed tank or graduated cylinder is completely drained, add an
additional measured volume of water so that residual liquid is left in the feed tank
or cylinder when circulated.
5a. If the liquid was initially poured into the feed tank, put the retentate line into a
graduated cylinder, leaving the feed line in the feed tank, and slowly pump out
the water just until the level reaches the very bottom of the feed tank.
Do not allow air to be drawn into the feed line.
5b. If a graduated cylinder was initially used as the feed tank, carefully remove the
feed and retentate lines from the graduated cylinder. Hold up the ends so that
water does not run out. If the tubing is not completely filled with water, use a little
water from the cylinder to fill them back up.
6. Record the volume in the graduated cylinder (B). The difference between the
starting volume, plus any volume added (A), and the volume in the graduated
cylinder (B) is the feed/retentate hold-up volume (C), Table 6.
Table 6
Feed/Retentate Hold-up Volume Calculation Chart
Total Volume Added A ___________ mL (A)
Remaining Volume
In Cylinder B–___________ mL (B)
Feed/retentate Hold-up
Volume (A – B) = ___________ mL (C)
3.3.2 Determining Permeate Hold-up Volume
Procedure
1. Add the volume collected in the graduated cylinder to the feed tank (or leave in the
graduated cylinder if it was used as a feed tank). If the volume collected (B) was
not at least double the retentate hold-up volume (C), add an additional measured
volume to the feed tank or cylinder to increase the total volume in the system to
more than 3 hold-up volumes.
2. Open the retentate and permeate valves.
3. Direct the feed, retentate and permeate lines into the feed tank or
graduated cylinder.
4. Start the pump and circulate the water for a few minutes through the system
until no more air bubbles are seen exiting from the retentate or permeate line.
(Adjust the flow rate so feed pressure is 1 to 2 barg (15 to 30 psig). Restrict the
retentate valve if necessary.
5. If the liquid was initially poured into the feed tank, put the retentate line into a
graduated cylinder, close the permeate valve, and slowly pump out the water just
until the level reaches the very bottom of the feed tank. If a graduated cylinder was
initially used as the feed tank, carefully remove the feed, retentate, and permeate
lines from the graduated cylinder. Hold up the ends so that water does not run
out. If the tubing is not completely filled with water, use a little water from the
cylinder to refill them.
6. Record the volume remaining in the cylinder (D). The difference between the total
volume added (A*) and the volume remaining in the cylinder (D) is the total system
hold-up volume (feed/retentate and permeate). Subtract the feed/retentate hold-up
volume (C) to get the permeate hold-up volume (F), Table 7.

20
Table 7
Total System Hold-up Volume Calculation Chart
Total Volume Added A*1___________ mL (A*)
Remaining Volume In
Graduated Cylinder D–___________ mL (D)
Total System Hold-up
Volume (feed/retentate/
permeate) (A* – D) = ___________ mL (E)
Feed/Retentate Hold-up
Volume from Table 6 C–___________ mL (C)
Permeate Hold-up
Volume (E – C) = ___________ mL (F)
1A* = initial volume of water added (A from Table 6) plus any additional volume added from Section 3.3.2 in
Step 1.
3.3.3 Determining the Non-recoverable Volume
Procedure
1. If the liquid was initially poured into the feed tank, close the permeate valve, then
put the retentate line into the graduated cylinder and slowly pump out the
remaining water in the system (combining with the volume collected from the
previous step), allowing air to purge out the lines. If a graduated cylinder was
initially used as the feed tank, close the permeate valve, then carefully remove the
feed line leaving the retentate and permeate lines in the cylinder and slowly pump
out the remaining water in the system, allowing air to purge out the lines.
2. Carefully remove the permeate line from the graduated cylinder.
3. Hold the end up and fill the line with water from the cylinder.
4. Record the total volume in the graduated cylinder (G).
5. Subtract the volume in the graduated cylinder (G) plus the permeate hold-up
volume (F) from the total volume added (A*).
The difference between the total volume added and the volume in the graduated
cylinder plus the permeate hold-up volume is the Non-recoverable Volume (X),
(Table 8).
Table 8
Non-recoverable Volume Calculation Chart
Total Volume Added A*2___________ mL (A*)
Volume in Graduated
Cylinder G–___________ mL (G)
Permeate Hold-up Volume F+___________ mL (F)
Non-recoverable Volume,
Feed/Retentate A*– (G + F) = ___________ mL (X)
2A* = initial volume of water added (A from Table 6) plus any additional volume added from Section 3.3.2 in
Step 1.
3.3. Determining the System Minimum Working Volume
Note: For this measurement, the actual feed tank must be used. This procedure may
be performed after the cassettes have been sanitized.
Table of contents
Other Pall Laboratory Equipment manuals

Pall
Pall Minimate EVO User manual

Pall
Pall USD3295 User manual

Pall
Pall WandMixer RDUA003A User manual

Pall
Pall Allegro User manual

Pall
Pall Biotech RDUA007BT User manual

Pall
Pall Allegro 200 L User manual

Pall
Pall PadMixer 1000 Premium User manual

Pall
Pall Allegro User manual

Pall
Pall Minimate EVO TFF User manual

Pall
Pall Allegro 1000 L User manual
Popular Laboratory Equipment manuals by other brands

Endress+Hauser
Endress+Hauser Analytik Jena TOPwave operating manual

Christ
Christ Epsilon 1-4 LSCplus operating manual

Raven
Raven Sidekick Pro Installation and operation manual

Agilent Technologies
Agilent Technologies 7890B Operation manual

RWD
RWD DSC-400 user manual

Thermo Scientific
Thermo Scientific 2112 Series Installation