Page 2 of 2
09-13-504-Rev6
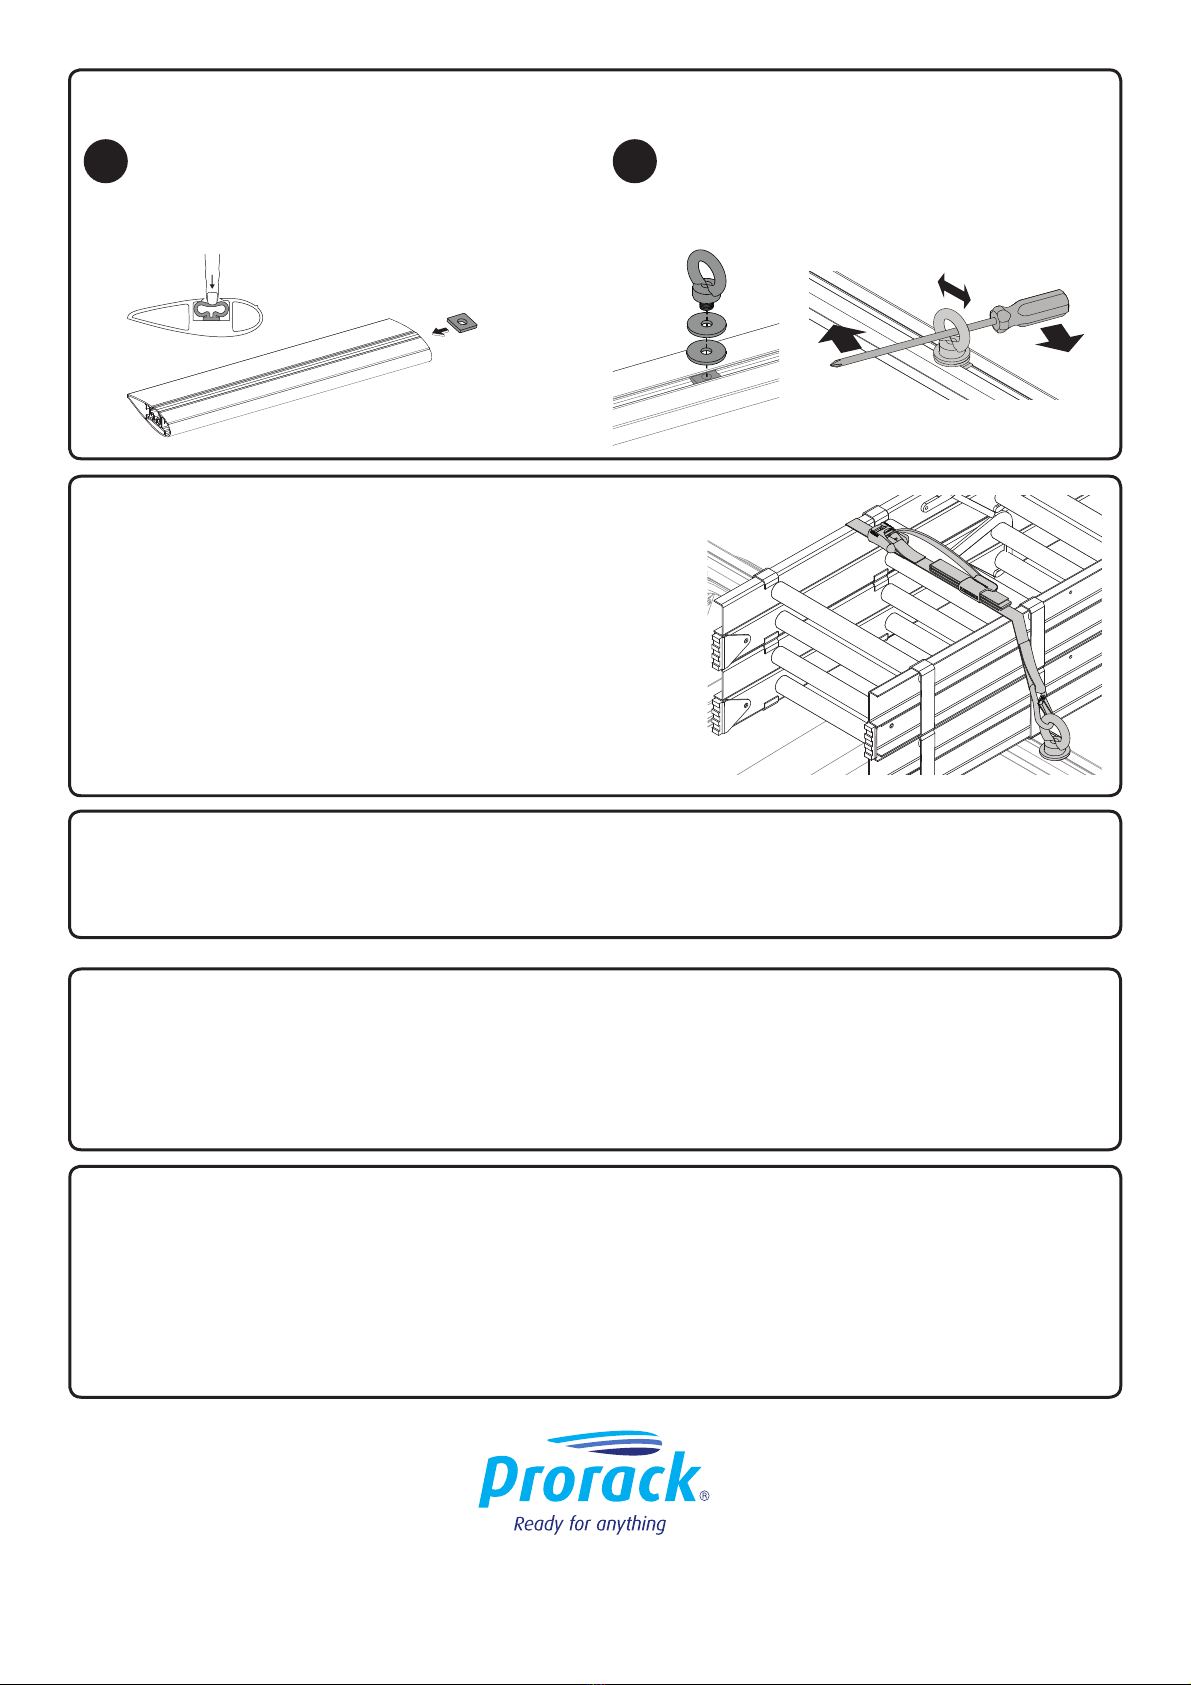
Installation with Prorack S-wing and international T-slot crossbars
Push down rubber infill and slide a M10
Square Nut into crossbar channel. Position
where you want the accessory to be.
12Assemble 2x Washers with Eye Bolt. Position the
Eye Bolt then tighten it using a screwdriver to
gain enough leverage to tighten it to 8-10 Nm.
Recommendations
• Check accessory is securely attached whenever you refit it to the vehicle. If the unit feels loose, refer to the fitting
instructions and readjust.
• Regularly check all fasteners. This includes all attached accessories and roof racks.
• Ensure that all loads are distributed evenly across the roof racks and are fastened securely.
Caution
• A loaded roof rack system can alter the performance of your vehicle. Be especially aware of the effects of side winds,
changing of direction, and braking performance. Avoid rapid acceleration and deceleration. Drive Carefully.
• Make sure all loads are securely fastened with non-elastic straps. Check regularly during longer journeys.
• Never drive into a car wash with a roof rack system or accessories fitted.
• Do not exceed the vehicle manufacturer’s roof load rating. Total load equals weight of roof racks + accessories + cargo/
equipment.
Loading
• Load your gear onto your crossbars
• Secure your load by tying to the Eye Bolts.
• Attach a safety flag when carrying long loads.
• Check that your gear is secure by tugging at it in all directions.
Re-tighten if necessary.
Removal
• Using a large screwdriver, loosen and remove Eye Bolts.
Prorack
17 Hinkler Court, Brendale
QLD 4500, Australia
Freephone
AU: 1800 143 548 www.prorack.com.au
NZ: 0800 4776 722 www.prorack.co.nz


