PSA Panacom PAN920SKHD User manual

PAN920SKHD


One Door Staon
One indoor monitor One angle bracket
Accessory pack
One adapter
One bracket for indoor monitor
Picture memory when MicroSD card fied (MicroSD card
not supplied)
Support 32G MicroSD for pictures or video recording
Digital Photo Frame (Displays photos from MicroSD card)
Moon picture recording when MicroSD card installed
(MicroSD card not supplied)
Ringtone volume adjustable sengs for morning /
aernoon / evening
IP 65 surface mount Door Staon

48mm 17.5mm
133mm
3.DOOR STATION SPECIFICATION
Power source
Front of surface mount
camera PAN921SCHD

4.INSTALLATION OF DOOR STATION
to Door Station specification for regulator location)
Default setting of door volume is already set as HIGH. Do not overturn
the volume regulator as it can be damaged easily.

Setting Confirm/Enter to main menu
Transmit the voice to Door Station
Power Indicator
For the models with MicroSD card, Insert the MicroSD card for recording
Navigation
Exit or Return to previous menu
MicroSD card slot
LED indicate the status of Door Station
LED indicate the status of Door Station
Start conversation with Door Station
12
13
14
11
10
1
3
4 5 9 18 7 6
2
13
14

7" (1024x600 pixels)
Working current
Mounting
Motion picture recording when MicroSD card installed
(MicroSD card not supplied)
MicroSD card
Yes (Displays photo from MicroSD Card). “Displays photos ...”
Yes (Uses ringtones)
Maximum 250mA
Maximum 600mA
Custom Ringtone
Keep a distance of 30cm or more from AC power to avoid
electrical interference.
Avoid installation of the device near strong radiation source,
eg. TV, DVR, Pcs etc.
Do not drop, shake or knock the device to avoid damage
to its components.
Keep intercom wires more than 30cm away from AC mains power to avoid
interference The electric lock is not included in the package, Use 12VDC
electric strike only. Do not exceed 500mA.
Panacom
Cable Requirements
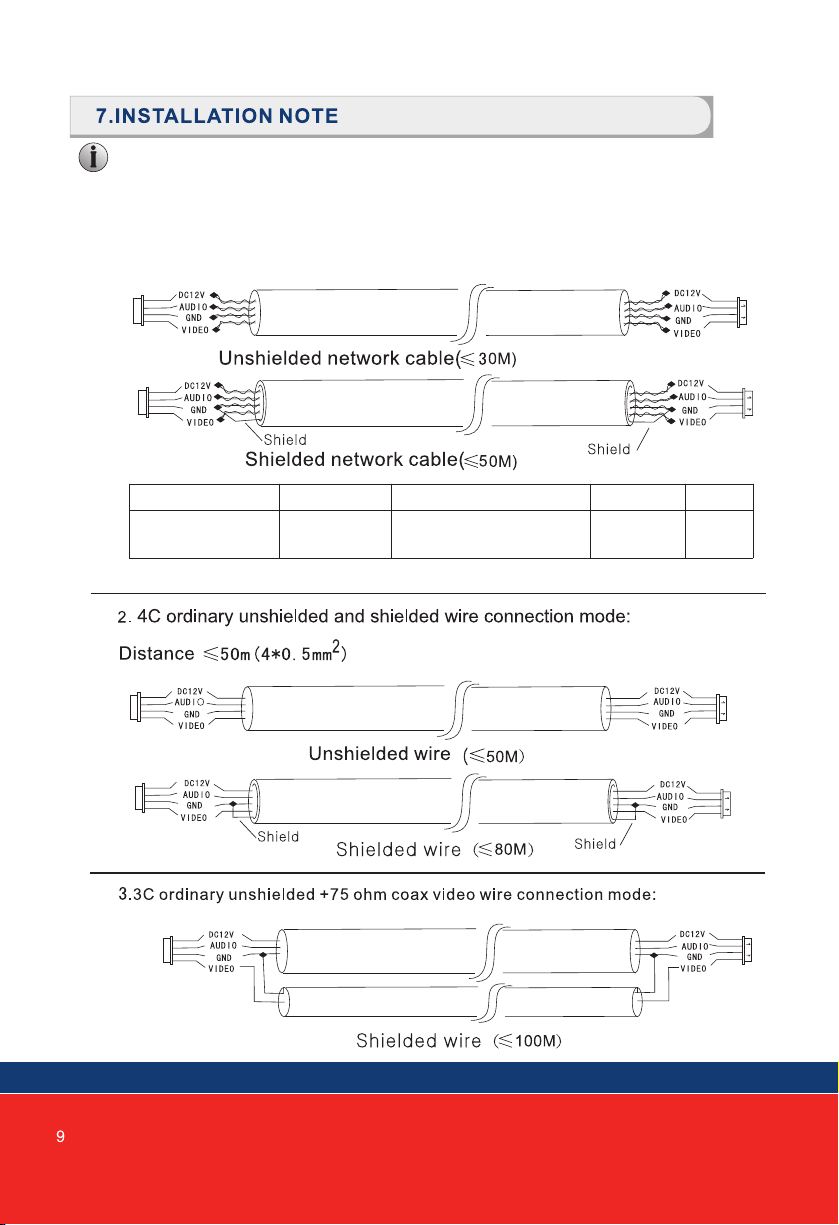
1. CAT5e or CAT6 network cable connection mode:
CAT5e or CAT6***
*** Cable distance≤50 meters
BLK
BRN, BLU
RED
BRN/WHT, BLU/WHT
GRN/WHT,ORG/WHT
WHT YEL
GRN ORG


CAM1 and CAM2 each have an alarm input. If an ALM and GND cables are shorted together,
its NO-alarm will activate. The Indoor monitor will continue to ring for 120 seconds until
button is pressed. The monitor will then return to Standby mode.
For models with installed MicroSD card, an alarm will also trigger a snapshot or recording
(depending on which setting is selected). The recording time is 120 seconds, or until
button is pressed. The monitor will then return to Standby mode.
There is an alarm input for each of the two camera channels. Each alarm input can be
configured to accept either a Normally Closed (NC) or Normally Open (NO) alarm inputs;
or be turned OFF.
A NO-alarm input will trigger an alarm event when the ALM & GND cables are shorted
together. Conversely, a NC-alarm will trigger an alarm event when the ALM & GND
cables are disconnected (open circuit).
WHITE=ALM
BLACK=GND
YELLOW=VIDEO
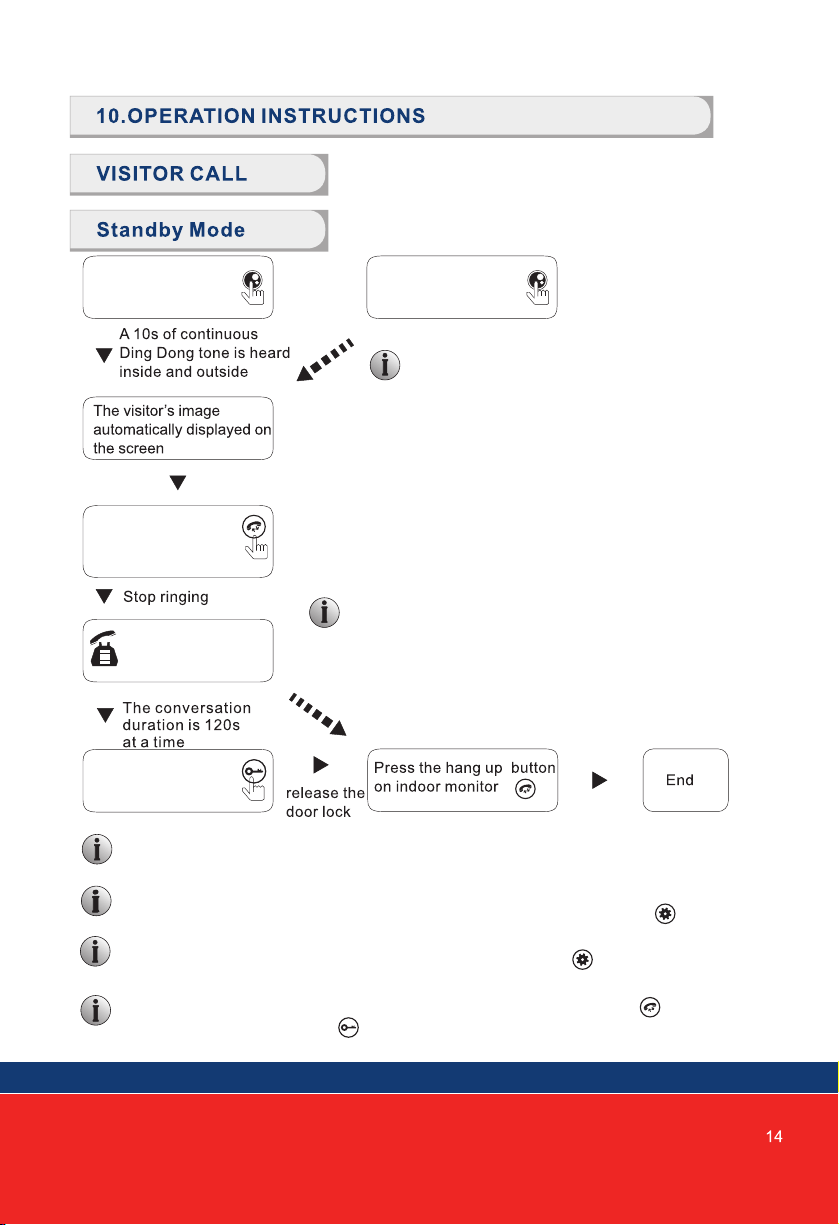
The visitor presses
the Call button on
Door Station 1
Press the Talk
button on indoor
monitor
Press the Unlock
button on indoor
monitor
Start conversation
with Door Station
The Monitor will stay active for 20 seconds for the viewer to confirm that the visitor has
entered the door.
In Monitoring mode, the monitor can listen to the door station. Press button to
begin a conversation. Press button to unlock the door.
For models with a MicroSD card installed and Record function active: Recording will start
from the beginning of a call, and can be manually stopped by pressing Button.
For models with a MicroSD card installed and snapshot function active: A snapshot will
be taken at the start of the call. The user can also press button to take another
snapshot manually.
If the call buttons of both Door Stations are pressed
about the same time, preference would be given to
the Door Station whose call button was pressed first.
Please be aware there is no indication at the second
Door Station. After the indoor monitor returns to
Standby Mode, it can accept calls from the second
Door Station.
The indoor monitor will automatically go into Standby
Mode, if you are not at home, or have not answered
the call within 60s.
The visitor presses
the call button on
Door Station 2
Note:
Note:

By default, Door1, Door2, CAM1 and CAM2 can be monitored. To disable monitoring of Door2,
set "Door2 Status" to OFF in the Mode menu. To disable monitoring of CAM1 and/or CAM2, set
their corresponding "CAM1" and "CAM2" switch to OFF in the Alarm menu.
If you are only using one Door Station, you can exit Monitoring mode by pressing the
again (when Door2, Cam1 and Cam2 have been disabled in the menu).
If you are using two indoor units, both can simultaneously monitor the same door
station. The same image will be displayed on both monitors.
If either door station calls while the user is in Monitoring mode, the monitor will ring,
exit monitoring mode and display video of the new caller.
With an MicroSD card installed, the first press of button will start recording (if
the recording setting is active); or will take a snapshot (if the snapshot setting is
active).
Each monitoring time is 60s
Press the Unlock button
on the indoor unit, the
electric lock will be opened
Press the
Hang up button
to end the call
Close display
Note:

Note:
Note:
Internal communication function requires at least two Indoor Monitors and one Door Station to be
connected.
At least 2 indoor units are required.
The target monitor
will ring
Press the Talk button of
the receiving monitor to
accept the incoming call
Press & hold the
“Transfer” Call
button
If a visitor presses the call button of either Door Station, the
Internal Communication mode will exit. The visitor's image
will be displayed with ringing. Press button to start a
conversation with the visitor.
After transferring a call to another extension, the first monitor
will return to Standby mode. Whereas the target monitor will
ring, and display video.
Door Station calls indoor
monitor and conversation
is underway
Press & hold
button to see choice of
extensions to transfer
the call to
The target monitor will ring
Press the Talk button
of the receiving
monitor to accept
the incoming call

Photo Frame mode.
P
If no MicroSD card had been inserted, this function will not operate.
MicroSD card.
MicroSD card
Using your computer, create the “USER” folder manually on the MicroSD card. Then
create a "Photo" subfolder, and store your picture files for display by the Digital Photo
Frame. All Music MP3 files should be put into the “\USER\Music” directory.

While in Standby mode, press button to open the Main menu. While in the Main
menu (see below) press & to navigate through the menu. Press button
again to choose an item. Press button to go back to the previous menu or
Standby screen.
Navigate to the System panel using & buttons; and press button to select.
The System menu contains the following settings: Language, Time, Information, Ring,
Volume and Return.
The system language can be changed. In the System menu, move cursor selection to
“Language”, press button to enter the “Language” menu. Press button again; the
arrow icons on both sides will change colour. Press & to change the system
language. Press button again to confirm change. Then press button to return
to previous menu.
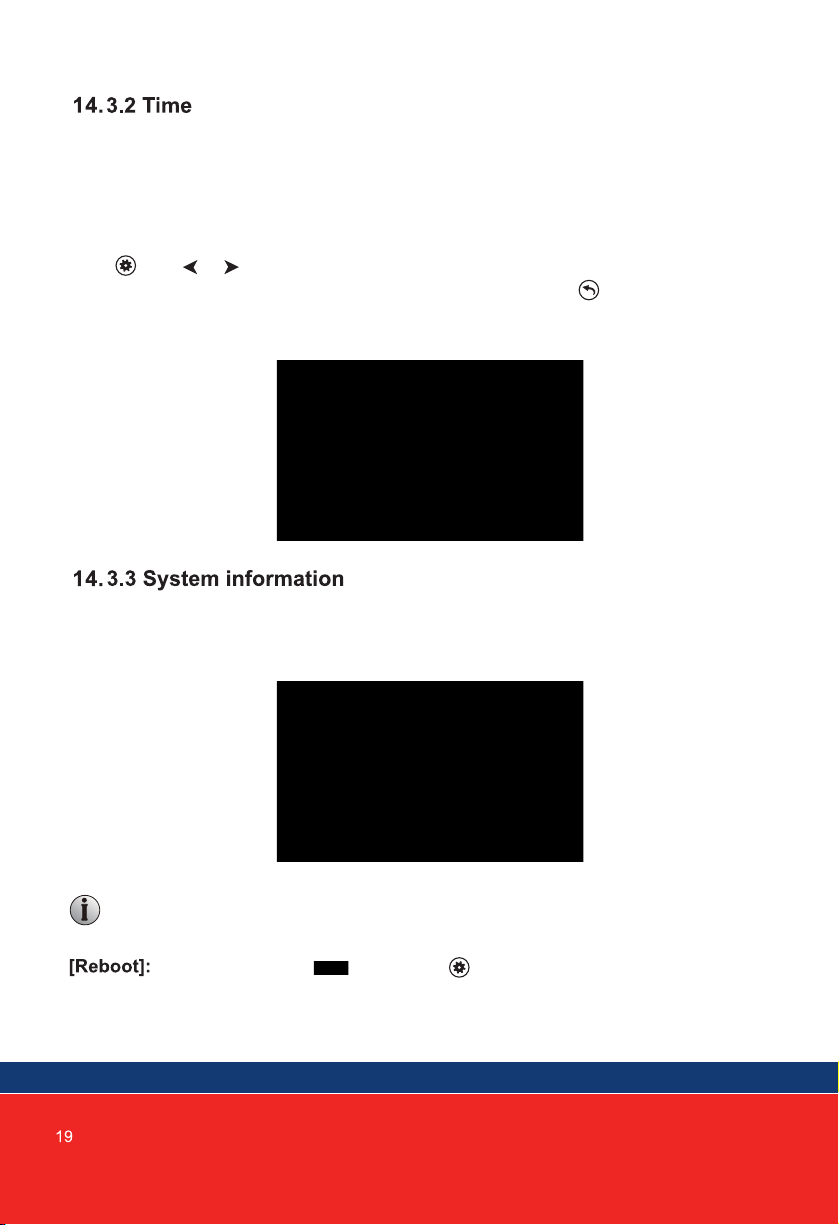
The Time settings adjusts the system date and time and what will be displayed in
Standby mode.
The clock switch controls whether the clock is displayed in Standby mode. When
turned off, the screen will be all black, without displaying neither clock nor digital
photo frame display.
Use and & buttons to adjust the current time. Set the display format
of the clock, using the "Date Format". Once completed , press button to return
to the system menu.
The "Information" screen shows the software version, MCU version, release date, and
MicroSD card free space; plus Reboot and Format MicroSD functions.
Move the cursor to “ ” and press button to confirm. It will pop-up a
window, choose “Yes” to restart the machine, choose “No” to cancel.
Note: The product only supports the MicroSD cards that are written at a
speed of more than 10MB/s with a memory of less than 32G.
Table of contents
Other PSA Intercom System manuals


