manuals.online logo
Brands
  1. Home
  2. •
  3. Brands
  4. •
  5. LEGRAND
  6. •
  7. Intercom System
  8. •
  9. LEGRAND Easy Kit Connected User manual

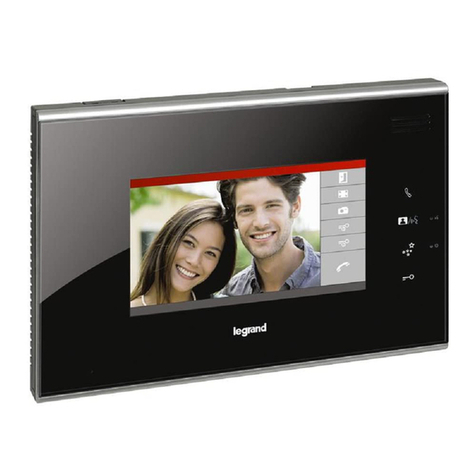
LEGRAND Easy Kit Connected User manual

369420 - 369430
Easy Kit Connected
Installationsanleitung • Installation manual
LE11336AB_DE20W22
Easy Kit Connected
2Telephone twisted pair
Verdrillte Telefonadern 573999 (SCS Legrand)
2 x 0.28 mm2(0.13 Ohm/m) 2 x 0.5 mm2(0.04 Ohm/m)
0 – 80 m 0 – 100 m
• Cables and distances (mm2)
•Distance between the last internal unit and the last entrance panel
•rot: +
•red: +
•
Max. length of the covered cable: 20m
•Ca
ble loop impedance: 0.08/m
•Maximale Kabellänge: 20m
•Kabel-Schleifenimpedanz: 0.08/m
-
•schwarz: -
•black: -
•Kabel und Leitungslängen (mm2)
•Abstand zwischen der letzten Hausstation und der letzten Türstation
•rot: +
•red: +
•schwarz: -
•black: -
• One-family diagram
•Schema Einfamilienhaus
(*)(*)
(*)
(*)
(*)
ADMD
(**)
(*)
* Can be purchased separately
** Distance between CCTV camera and SEP (secondary entrance panel): coaxial 100m
* Separat erhältlich
** Abstand zwischen Kamera CCTV und 2. Aussenstelle (SEP): Koaxial 100m
Licht
Schloss
TOR
Schloss
TÜR
Innen-
stelle
Easy Kit Connected
• Note: depending on the configuration (F1 or F2) of the internal units, the external call button can be adapted for single or two-family call
* If there are several Connected Indoor units, just one per family can be connected to the home Wi-Fi network and to the Door Entry EASYKIT App.
•Anmerkung: Je nach Konfiguration (F1 oder F2) der Hausstation passt sich die externe Ruftaste an ein Ein- oder Zweifamiliengespräch an.
* Bei mehreren Hausstationen kann nur eine pro Familie an das Wi-Fi-Netzwerk und an die Door Entry EASYKIT App angeschlossen werden.
Maximum Expansion - Maximale Erweiterung
2 X
369339
3 X
369115
369225
369235
369425 *
369435 *
2 X
369400
2 X
door locks
Türschlösser
2 X
gate locks
Torschlösser
2 X
• Two-family diagram
•Schema Zweifamilienhaus
ADMD
ADMD
(*) (*) (*)
(*)
(*)
(*)
(*) (*)
(**)
(*)
(*)
* Can be purchased separately
** Distance between CCTV camera and SEP (secondary entrance panel): coaxial 100m
* Separat erhältlich
** Abstand zwischen Kamera CCTV und 2. Aussenstelle (SEP): Koaxial 100m
Licht
Schloss
TOR
Schloss
TÜR
Innen-
stelle
Licht
Schloss
TOR
Schloss
TÜR
TOR
Schloss
TÜR
Innen-
stelle
Easy Kit Connected
Maximum Expansion - Maximale Erweiterung
2 X
369339
3 X
369115
369225
369235
369425 *
369435 *
3 Family 1 + 3 Family 2
3 Familie 1 + 3 Familie 2
2 X
369400
2 X
door locks
Türschlösser
2 X
gate locks
Torschlösser
2 X
• Note: depending on the configuration (F1 or F2) of the internal units, the external call button can be adapted for single or two-family call
* If there are several Connected Indoor units, just one per family can be connected to the home Wi-Fi network and to the Door Entry EASYKIT App.
•Anmerkung: Je nach Konfiguration (F1 oder F2) der Hausstation passt sich die externe Ruftaste an ein Ein- oder Zweifamiliengespräch an.
* Bei mehreren Hausstationen kann nur eine pro Familie an das Wi-Fi-Netzwerk und an die Door Entry EASYKIT App angeschlossen werden.
• Dimensional data
•Abmessungen
• Field of view
•Aufnahmebereich
• Recommended height, unless different regulations are specified
•
•Empfohlene Höhe falls die gesetzlichen Vorschriften nichts anderes vorschreiben
50 cm
105°
140 cm
80°
115 cm
50cm
160 – 165 cm
90 – 130 cm
215 mm
140 mm
22,3 mm 36,6 mm
100 mm
160,5 mm
Easy Kit Connected
• Entrance panel
•Türstation
2
1
3
5
4
ON
9
8
7
6
10
11
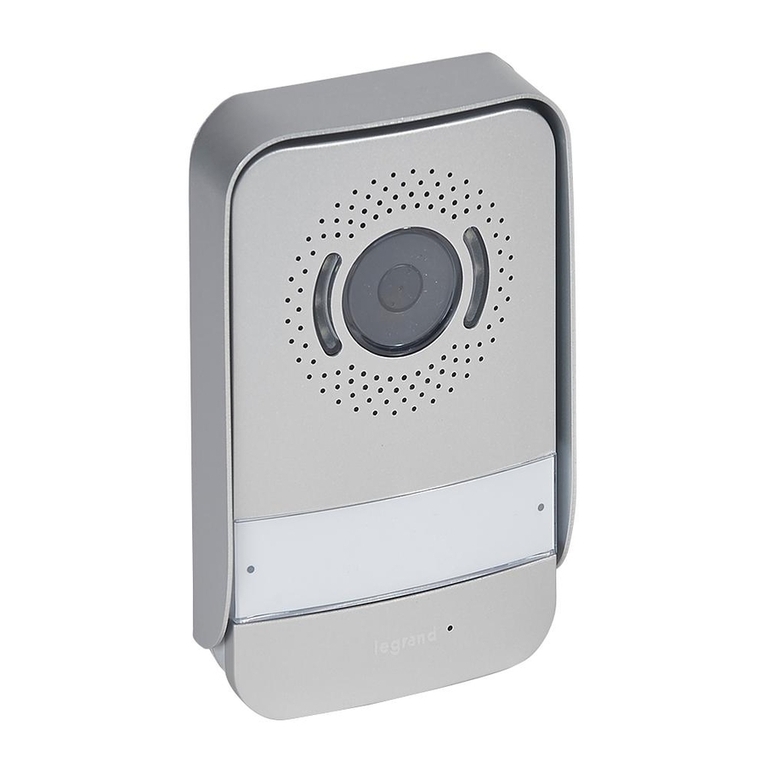
1. Speaker
2. Camera
3. Viewing field lighting LED
4. Call pushbuttons
5. Microphone
6. Removable connection clamps
• CCTV analog camera
• D1 - D2 Internal unit
• Light (+/-) 12/24V AC/DC
• Gate lock (G+/G-): 12/24 V AC/DC, 1A
• Door lock (L+/L-): 18 V, 4 A impulsive,
250mA holding current
7. Speaker adjustment
8. Microphone ajustment
9. Dip switch for CCTV camera configuration
Dip switch 1 OFF = No additional CCTV camera (N)
Dip switch 1 ON = With additional CCTV camera (Y)
10. Not used
11. Dip switch for entrance panel configuration
Dip switch 2 OFF = Main device (MD)
Dip switch 2 ON = Additional device (AD)
1. Lautsprecher
2. Kamera
3. LED Beleuchtung des Aufnahmefelds
4. Ruftasten
5. Mikrofon
6. Abnehmbare Anschlussklemmen
• CCTV Analogkamera
•D1 - D2 Hausstation
• Beleuchtung (+/-) 12/24V AC/DC
• Torschloss (G+/G-): 12/24 V AC/DC, 1A
•
Türschloss (L+/L-): 18 V, 4 A impulsiv, 250mA Haltestrom
7. Einstellung des Lautsprechers
8. Einstellung des Mikrofons
9. Dip-Schalter zur Konfiguration der CCTV-Kamera
Dip-Schalter 1 OFF = keine zusätzliche CCTV-Kamera (N)
Dip-Schalter 1 ON = mit zusätzlicher CCTV-Kamera (Y)
10. Nicht verwendet
11. Dip-Schalter zur Konfiguration der Türstation
Dip-Schalter 2 OFF = Hauptvorrichtung (MD)
Dip-Schalter 2 ON = Zusätzliche Vorrichtung (AD)
Easy Kit Connected
• Handset • Hausstation
9
2
3
4
5
6
7
8
1
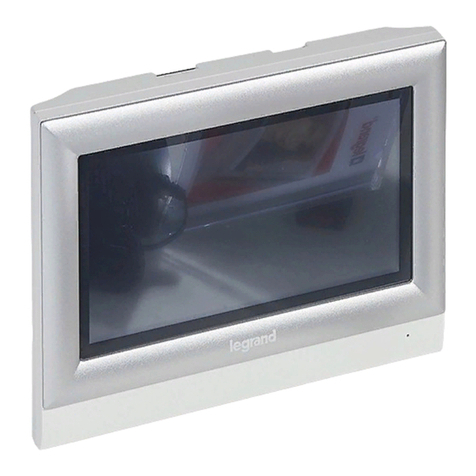
1. 7”(16:9) display
2. Door lock release pushbutton (L+/L- connector)
3. Answer key / Intercom key (available only with
additional internal unit)
4. Scrolling/entrance panel activation key
5. Gate lock release pushbutton (G+/G- connector)
6. Light pushbutton (+/- connector)
7. Bell exclusion notication LED
Red LED ashing: bell excluded
8. Wi-Fi signal notication LEDA
Red LED ashing: WI-FI on but not connected to
the network
LED o: WI-FI disabled or working correctly
Red LED steady: Easy Kit Connected is
exchanging data with the Door Entry Easy Kit
App (auto-switching ON)
9. Joystick for adjustments ans programming
1. Display 7”(16 : 9)
2. Türöffnertaste (Anschluss L+/L-)
3. Gesprächstaste / Intern Sprechen-Taste (nur mit
zusätzlicher Hausstation verfügbar)
4. Ein- und Umschalttaste Türstation / Kameras
5. Türöffnertaste (Anschluss G+/G-)
6. Lichttaste (Anschluss +/-)
7. LED- Meldung Läutsignal
Rote LED blinkt: Läutsignal stummgeschaltet
8. LED-Anzeige des WI- FI-Signals
Rote LED blinkend: WI- FI aktiv aber nicht mit
einem Netzwerk verbunden
LED aus: Wi-Fi deaktiviert oder korrekte Funktion
Rote LED fest leuchtend: Das Easy Kit Connected
tauscht gerade Daten mit der App Door Entry
Easy Kit (Automatische Einschaltung)
9. Joystick für Einstellungen und Konfiguration
•Note: when idle, the door opening, gate opening and light control
will act on the main Entrance Panel (MD). However, during an audio
video communication they will act on the communicating entrance
panel.
•Anmerkung:ImRuhezustandbeeinflussendieTüröffnung,dieToröffnung
und dieLichtsteuerungdieHaupttürstation(MD).Andernfallssteuernsie
während einerAudio-Video-Kommunikation,dieinVerbindungstehende
Türstation.
Easy Kit Connected
• Handset
•Hausstation
7
1
2 4 53
8
6
1. Microphone
2. Mini USB socket for device Firmware update
3. D1 - D2 removable connection clamps for
connection of the entrance panel or previous
internal unit
4. Micro switch for family 1 / family 2
5. Master / Slave micro switch
6. R1 - R2 removable connection clamps for
connection of the additional internal unit
7. Speaker
8. DC30V 30W power supply
1. Mikrofon
2. Mini-USB-Steckbuchse zur Aktualisierung der
Firmware
3. Abnehmbare Anschlussklemmen D1 - D2
Anschluss Türstation oder vorhergehende
Hausstation
4. Mikroschalter Familie 1 / Familie 2
5. Mikroschalter Master / Slave
6. Abnehmbare Anschlussklemmen R1 - R2
Anschluss einer zusätzlichen Hausstation
7. Lautsprecher
8. Versorgung DC30V 30W
•Technical data
•Technische Daten
•Wireless device in compliance with 802.11b/g/n standard, frequency 2.4 – 2.4835 GHz.
Transmission power < 20 dBm. WEP/WPA/WPA2 safety protocol.
•Funkprodukt, entspricht dem Standard 802.11/b/g/n, Frequenz 2,4 – 2.4835 GHz.
Übertragungsleistung <20 dBm. Sicherheitsprotokoll WEP/WPA/WPA2.
Easy Kit Connected
1
2
3
4
5
6
•
Entrance panel installation
•
Installation der Türstation
•
The camera must not be installed in front of large light sources, or in places where the subject viewed
remains in deep shadow. In poor lighting conditions colour cameras are less sensitive than black/white
cameras. An extra lighting source should be added in poorly lit rooms.
•
Die Kamera darf nicht vor starken Lichtquellen oder an Orten mit Gegenlicht installiert werden.
Farbkameras besitzen bei schlechter Beleuchtung eine geringere Empfindlichkeit als Schwarz/Weiß Kameras.
Wir empfehlen daher eine zusätzliche Beleuchtungsquelle vorzusehen.
7
8
9


• In case of a whistle (Larsen effect), first reduce the microphones power, adjusting the
corre-sponding potentiometers with a screw driver, until an acceptable level is reached. Should the
whistle persist, adjust the loudspeakers volume in order to eliminate the trouble. If the
volume is too low level then, increase first the potentiometer of the loudspeaker and secondly the
one for the mi-crophone, bearing in mind that a clear and noise free reception is preferable than
one just before whistling (Larsen).
•Beim etwaigen Auftreten eines Pfeiftones (Larsen-Effekt), zuerst die Lautstärke des Mikrofones bis
auf einen annehmbaren Wert herabsetzen, indem man das entsprechende Potentiometer mit einem
Schraubendreher einstellt. Sollte die Störung weiterhin bestehen, dann das Potentiometer des
Lautsprechers bis zur Beseitigung des Pfeiftones einstellen. Ist die Lautstärke nun zu niedrig, dann
zuerst die des Lautsprechers und erst danach evtl. auch die des Mikrofones erhöhen, wobei ein
deutlicher und störungsfreier Empfang einem an der Störungsgrenze liegendem (Larsen-Effekt)
vorzuziehen ist.
• Handset installation
•Installation der Hausstation
1
2
4
3
Easy Kit Connected
5
6
7
7
8
• Device adjustments and settings
•Einstellungen des Geräts
•Using the joystick it is possible to perform adjustments (Adjustments and/or Parameter Adjustment menu
during Audio/Video connection) and settings (Settings menu).
•Mit dem Joystick können Sie Regler- und/oder Konfigurationseinstellungen (während der Audio/Video-
Verbindung) und Menüeinstellungen vornehmen.
+
-
• Use of the joystick
You must use the joystick on the side of the device to navigate on the
menu and select the settings.
•Joystick benutzen
Um durch das Menü zu navigieren und die verschiedenen Einstellungen
auszuwählen, müssen Sie den Joystick an der Seite des Geräts verwenden.
- Symbol legend - Erläuterung der Symbole
• Press
•Drücken
•Confirm/access the Adjustments mode
• Bestätigen/Modus Einstellungen abrufen
> 5sec ; > 5Sek. • Press and hold down for more than 5 sec
•Länger als 5 Sekunde lang drücken
• Access the Settings mode
•Modus Einstellungen abrufen
•Move the joystick up (when released, it returns to central position)
•Bewegen Sie den Joystick nach oben (wenn Sie ihn loslassen, kehrt er wieder in die
Mittelstellung zurück).
• Previous page/increase level
•Vorhergehende Seite/Niveau erhöhen
• Move the joystick down (when released, it returns to central position)
•Bewegen Sie den Joystick nach unten (wenn Sie ihn loslassen, kehrt er wieder in die
Mittelstellung zurück).
• Next page/decrease level
•Nachfolgende Seite/Niveau verringern
Easy Kit Connected
•Move the joystick up/down to select the page among:
•Verwenden Sie den Joystick nach oben/unten,
um folgende Seiten zu wählen:
•Wi-Fi-Settings and Adjustments
•Wi‑Fi‑ und Menüeinstellungen
•From stand-by press the joystick to activate the display
•Im Standby, den Joystick drücken, um das Display zu aktivieren
Door Entry
Easy Kit
App
•Youcandownloadthe EasyKit ConnectedAppfromtheStores.
hepage disappearsafter thefirst associationwiththe App:
•Sie können die App Easy Kit Connected in den Online-
Stores herunterladen. Die Seite wird nach der ersten
Verknüpfung mit der App nicht mehr angezeigt:
Door Entry
CLASSE 100X
App
NETATMO
Wi-Fi Home
• Display the NETATMO cameras. Press the joystick to
display the associated NETATMO cameras.
•NETATMO-Kamerasanzeigen. Drücken Sie den Joystick, um
die verknüpften Netatmo-Kameras anzuzeigen.
• Adjust the ringtone volume
•Lautstärke der Ruftöne einstellen • Wi-Fi settings page, where it is possible to enable/disable/reset the Wi-Fi,
perform the first association to the app and reset the device
•Wi-Fi-Einstellungsseite, auf der Sie Wi-Fi aktivieren/deaktivieren/zurücksetzen,
die erste Verbindung mit der App herstellen und das Gerät zurücksetzen können
•Device info
•Informationen über die Hausstation
EXIT
• Exit the menu
•Menü beenden
Easy Kit Connected
• Ringtone volume adjustment
From stand-by press the joystick to activate the display and select the corresponding page
•Ruftonlautstärke einstellen
Im Standby, den Joystick drücken, um das Display zu aktivieren und die entsprechende Seite zu wählen
• Press the joystick to adjust the volume.
The ringtone is played at the set volume level
•Den Joystick drücken, um die Lautstärke zu regeln.
Das Läutwerk wird auf die gewünschte Lautstärke eingestellt
1
•Move the joystick up/down to select the volume level (1 – 8).
•Bewegen Sie den Joystick nach oben/unten, um das
Lautstärkenniveau einzustellen (1 - 8).
2
2
3• Press the joystick to confirm the setting or wait for the timeout
•Den Joystick drücken, um die Einstellung zu bestätigen oder das Timeout abwarten
• Move the joystick up/down to select another setting or the last page to exit
•Bewegen Sie den Joystick nach oben/unten, um eine andere Einstellung zu
wählen oder die letzte Seite abzurufen, um den Vorgang zu beenden
4
4
• The minimum level corresponds to the exclusion of the ringtone. The corresponding LED flashes red
•Die niedrigste Einstellung schaltet das Läutwerk stumm. Die entsprechende LED blinkt rot
Easy Kit Connected
• WI-FI settings
From stand-by press the joystick to activate the display and select the corresponding page
•WI-FI-Einstellungen
Im Standby, den Joystick drücken, um das Display zu aktivieren und die entsprechende Seite zu wählen
•Press the joystick to select the page of interest
•Den Joystick drücken, um die gewünschte Seite zu wählen
•Move the joystick up/down to select the page among:
•Bewegen Sie den Joystick nach oben/unten, um folgende Seiten zu wählen:
Home_Wi-Fi
• In this page you can display the Wi-Fi network to which the device is connected and if necessary disable the connection. Note: to connect the device to theWi-Fi network and
to the app, you must first associate the Easy Kit Connected to the Easy Kit Connected app.
•Auf dieser Seite können Sie das Wi-Fi-Netzwerk mit dem die Hausstation verbunden ist, anzeigen und die Verbindung ggf. deaktivieren. Anmerkung: Um das Gerät mit dem
Wi-Fi-Netzwerk und der App zu verbinden, ist zuerst die Verknüpfungsprozedur der Easy Kit Connected mit der App Easy Kit Connected durchzuführen.
RESET
• This page can be used to reset the Wi-Fi network.
•Auf dieser Seite können Sie das Wi-Fi-Netzwerk zurücksetzen (Reset).
• This page can be used to reset the device.
•Auf dieser Seite können Sie die Hausstation zurücksetzen (Reset).
RESET
• Exit the menu
•Menü beenden
EXIT
Easy Kit Connected
• Enable/disable the Wi-Fi Network
•Wi‑Fi‑Netzwerk aktivieren/deaktivieren
• A Wi-Fi network name to which the device is connected;
press the joystick to disable the Wi-Fi network
•A Name des Wi-Fi-Netzwerks, mit dem das Gerät verbunden ist;
drücken Sie den Joystick, um das Wi-Fi-Netzwerk zu deaktivieren
•
•
Now the Wi-Fi network is no longer active, but the device is still authenticated
to it. Note: to disconnect the Wi-Fi network from the device, the device must be
reset following the appropriate procedure
Jetzt ist das Wi-Fi-Netzwerk nicht mehr aktiv, aber das Gerät ist trotzdem
authentifiziert. Anmerkung: Um das Wi-Fi-Netzwerk von Ihrem Gerät zu trennen,
müssen Sie den Reset-Vorgang durchführen
WI-FI OFF
Home_Wi-Fi
A
• Reset the Wi-Fi network
•Wi-Fi-Netzwerk zurücksetzen •
•In this section it is possible to change the Wi-Fi network to which the device is connected, or the network password
•In diesem Abschnitt können Sie das Wi-Fi-Netzwerk, mit dem das Gerät verbunden ist, oder das Netzwerkkennwort ändern
RESET
• Press the joystick to confirm
•Den Joystick zur Bestätigung drücken
• Press the joystick to reset the Wi-Fi network
•Den Joystick drücken, um das Wi-Fi-Netzwerk zurückzusetzen
• Move the joystick down to select the confirmation icon
•Bewegen Sie den Joystick nach unten, um das Bestätigungssymbol zu wählen
•Now the device is no longer connected to the Wi-Fi network.To reconnect the device to the
same network or to a new one, you must complete the guided procedure from the Easy Kit
Connected app in the Settings/Set_Wi-Fi section. Note: if the procedure is not completed,
after a few seconds the connection is restored
•Nun ist das Gerät nicht mehr mit dem Wi-Fi-Netzwerk verbunden. Um das Gerät wieder mit
dem gleichen oder einem neuen Netzwerk zu verbinden, müssen Sie den,von
der App Easy Kit Connected, geführten Vorgang im Abschnitt Einstellungen / Set_Wi-Fi
beenden. Anmerkung: Wenn die Prozedur nicht beendet wird, wird die Verbindung nach
einigen Sekunden wieder hergestellt

Other manuals for Easy Kit Connected

1

This manual suits for next models

2

Other LEGRAND Intercom System manuals

LEGRAND IC5004 Series User manual

LEGRAND

LEGRAND IC5004 Series User manual

LEGRAND EASYKIT Connected User manual

LEGRAND

LEGRAND EASYKIT Connected User manual

LEGRAND 0 416 51 User manual

LEGRAND

LEGRAND 0 416 51 User manual

LEGRAND 41648 User manual

LEGRAND

LEGRAND 41648 User manual

LEGRAND 369339 User manual

LEGRAND

LEGRAND 369339 User manual

LEGRAND Bticino Terraneo 342911 User manual

LEGRAND

LEGRAND Bticino Terraneo 342911 User manual

LEGRAND F9018-BK User manual

LEGRAND

LEGRAND F9018-BK User manual

LEGRAND HPM D642/01 User manual

LEGRAND

LEGRAND HPM D642/01 User manual

LEGRAND Tynetec Advent XT2 User manual

LEGRAND

LEGRAND Tynetec Advent XT2 User manual

LEGRAND 369210 User manual

LEGRAND

LEGRAND 369210 User manual

LEGRAND CM2001 User manual

LEGRAND

LEGRAND CM2001 User manual

LEGRAND On-Q User manual

LEGRAND

LEGRAND On-Q User manual

LEGRAND AI6100M1 User manual

LEGRAND

LEGRAND AI6100M1 User manual

LEGRAND EASYKIT Essential User manual

LEGRAND

LEGRAND EASYKIT Essential User manual

LEGRAND IS-0387 User manual

LEGRAND

LEGRAND IS-0387 User manual

LEGRAND 369305 User manual

LEGRAND

LEGRAND 369305 User manual

LEGRAND LEGD365 061 User manual

LEGRAND

LEGRAND LEGD365 061 User manual

LEGRAND 369325 User manual

LEGRAND

LEGRAND 369325 User manual

LEGRAND EASYKIT Plus User manual

LEGRAND

LEGRAND EASYKIT Plus User manual

LEGRAND 369425 User manual

LEGRAND

LEGRAND 369425 User manual

LEGRAND Belanko 617 013 User manual

LEGRAND

LEGRAND Belanko 617 013 User manual

LEGRAND AI6100M1 User manual

LEGRAND

LEGRAND AI6100M1 User manual

LEGRAND Easy Kit Connected User manual

LEGRAND

LEGRAND Easy Kit Connected User manual

LEGRAND ON-Q IC5002-OB User guide

LEGRAND

LEGRAND ON-Q IC5002-OB User guide

Popular Intercom System manuals by other brands

Avidsen LUTA 2+ instructions

Avidsen

Avidsen LUTA 2+ instructions

Alphatech IPDPS-01C user manual

Alphatech

Alphatech IPDPS-01C user manual

Anchor PortaCom PC-100 owner's manual

Anchor

Anchor PortaCom PC-100 owner's manual

Panasonic KX-T7765 Specifications

Panasonic

Panasonic KX-T7765 Specifications

Sebury S Touch-s user manual

Sebury

Sebury S Touch-s user manual

Aiphone JKW-IP quick start guide

Aiphone

Aiphone JKW-IP quick start guide

GE 19200 installation instructions

GE

GE 19200 installation instructions

Nady Systems PMC-2X owner's manual

Nady Systems

Nady Systems PMC-2X owner's manual

Hollyland HOLLYVIEW LARK 150 User Note

Hollyland

Hollyland HOLLYVIEW LARK 150 User Note

Rocom Helpyair ALBU user guide

Rocom

Rocom Helpyair ALBU user guide

Ness uHoo manual

Ness

Ness uHoo manual

Telex 4030 User instructions

Telex

Telex 4030 User instructions

SVT innovations SVT-SMART 500 user manual

SVT innovations

SVT innovations SVT-SMART 500 user manual

Grandstream Networks GDS371 Series user manual

Grandstream Networks

Grandstream Networks GDS371 Series user manual

Aiphone RY-3DL Installation & operation manual

Aiphone

Aiphone RY-3DL Installation & operation manual

Linkcom link smile user manual

Linkcom

Linkcom link smile user manual

Vimar ELVOX Petrarca 6A40 instruction sheet

Vimar

Vimar ELVOX Petrarca 6A40 instruction sheet

CAME BPT PEC IP user manual

CAME BPT

CAME BPT PEC IP user manual

manuals.online logo
manuals.online logoBrands
  • About & Mission
  • Contact us
  • Privacy Policy
  • Terms and Conditions

Copyright 2025 Manuals.Online. All Rights Reserved.