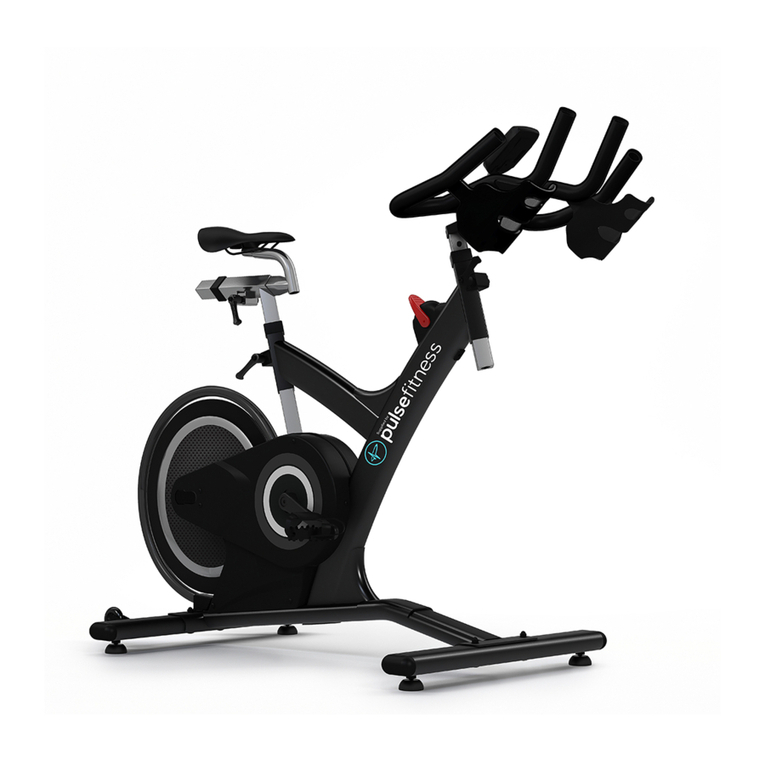
Pulse fitness 240G Guide

240G / 250G Assembly, Operation &
(Reference) Parts Manual
EU/US

Company Addresses
Assembly, Operation & Parts Manual G-Range CV Pg02
Global Corporate Headquarters
Address:
Pulse Fitness Ltd., Radnor Park, Greenfield Road, Congleton,
Cheshire, CW12 4TW, England, United Kingdom
Sales/Marketing:
Tel: +44 (0)1260 294600
Fax: +44 (0)1260 299282
Email: [email protected]
Service:
Tel: +44 (0)1260 294600
Email: [email protected]
Corporate Website:
www.pulsefitness.com
Regional (Distributor/Dealer) Address(es)
Current List of Distributors/Dealers:
https://www.thepulsegroup.co.uk/pulse-global
Americas
North America
Fitness Equipment Depot Worldwide
Address
45 Grand Blvd, Brentwood, NY, 11717
Sales/Marketing
Tel: +1-631-656-8826 ext 104
Toll Free - Tel: +1-866-965-4653
Fax: +1-631-656-8853
Service
Tel: +1-631-656-8826 ext 106
Distributor/Dealer Website:
www.fitnessplus.com

Assembly, Operation & Parts Manual G-Range CV Pg03
Overview
Before using these products, it is essential to read ALL of this manual and the documents it references prior to, choosing a
location, assembling or operating these pieces of equipment. This manual describes the equipment's setup its installation and
instructs how to use it correctly and safely. It is of the utmost importance that any User of the PULSE FITNESS U-Cycle
(Upright Cycle) and R-Cycle (Recumbent Cycle) is fully trained in its operation! Please ensure that the instructions given in
General Safety Precautions section are understood by ALL Users. Keep this manual for future reference.
WARNING: Health-related injuries may result from incorrect or excessive use of exercise equipment. PULSE FITNESS STRONGLY
recommends gaining professional medical advice before using fitness equipment, particularly if the user has a family history of high
blood pressure or heart disease, is over the age of 45, smokes, has high cholesterol, is obese, or has not exercised regularly in the
past year.
Always warm up by exercising gently before progressing to a full programme of strenuous exercise. Similarly, reduce the level of
activity gradually towards the end of the exercise programme.
Heart rate monitoring systems may be inaccurate.
Over exercise may result in serious injury or death. If you feel faint, light-headed, dizzy or suffer from any kind of pain or exhaustion,
STOP exercising immediately.
NOT suitable for Medical/Therapeutic purposes.
Ensure equipment is checked regularly for signs of damage and wear. Do not use equipment if faulty or damaged, repair using only
genuine PULSE FITNESS parts fitted by an authorised person.
SERIOUS INJURY MAY OCCUR IF THESE PROCEDURES ARE NOT FOLLOWED.

Assembly, Operation & Parts Manual G-Range CV Pg04
Statement of Purpose:
The U-Cycle replicates the sensation of riding a road bike. Its biomechanics and ergonomic design offer a variety of positions to
improve rider comfort and allows its users to achieve peak performance. Use it as a standard cycle, city cycle or racing cycle to tone
legs and gluteal muscles. The cycle is designed to reduce pressure on the knees and provide a comfortable ride, while also keeping
exercisers engaged.
The R-Cycle is quiet and stable, delivers a smooth workout whilst offering details such as custom-designed, multi-position handlebars
with integrated touch-heartrate, resistance controls and comfortable elbow supports. A single-handed seat adjustment with a
ergonomically designed contoured seat. Even details like pedals that self-level have been thought about! It’s the perfect solution for
active adults suffering from back pain, restricted movement or limited mobility who want moderate cardiovascular activity but need
additional comfort. It is particularly suitable for older adults and for those who have weight issues.
FCC Warning - Possible Radio / Television Interference.
NOTE: This equipment has been tested and found to comply with the limits for a Class A digital device, pursuant to part 15 of the FCC
rules. These limits are designed to provide reasonable protection against harmful interference when the equipment is operated in a
commercial environment. This equipment generates, uses and can radiate radio frequency energy, and if not installed and used in
accordance with the instruction manual, may cause harmful interference to radio communications. Operation of this equipment in a
residential area is likely to cause harmful interference, in which case the user will be required to correct the interference at his own
expense.
Class SC (Studio): Professional and / or commercial use.
CAUTION: Any changes or modifications to this equipment could void the product warranty.
Any service, other than cleaning or user maintenance, must be performed by an authorised service representative. There are no user
serviceable parts.
Overview (Continued)

4
2
3
8
9
240G Overview 07
Contents of the 240G Pack 08
Assembly of 240G 09
3.1 Connecting the Legs 09
3.2 Assembling the Pedals 10
3.3 Attaching the Pedals 10
3.4 Attaching the Column 11
3.5 Attaching the Handles 12
®
3.6 Fixing the iPod Dock/Storage Station 13
Installing the Console on 240G 14
4.1 Securing the Console 14
4.2 Assembling the Console 14
4.3 Wiring the Console 15
4.4 Assembling the Console 16
4.5 Securing the Book Holder 16
4.6 Using the Console 17
Alignment Checks on the 240G 18
5.1 Checking the alignment 18
Fully Assembled 240G U-Cycle 19
250G Overview 20
Contents of the 250G Pack 21
Assembly of 250G 22
9.1 Connecting the Rear Leg Assembly 22
9.2 Fixing the Scuff Guard 22
9.3 Assembling the Pedals 23
9.4 Attaching the Pedals 23
9.5 Attaching the Rear Handles 24
9.6 Securing the Seat 25
9.7 Attaching the Seat Storage Holder 26
9.8 Attaching the Seat Back Rest 27
9.9 Attaching the Seat Back Moulding 28
9.10 Insert Storage Containers 28
9.11 Attaching iPod Dock 29
®
9.12 Securing the Column 30
9.13 Attaching the Front Handlebars 31
Installing the Console on 250G 32
10.1 Securing the Console 32
10.2 Assembling the Console 32
10.3 Wiring the Console 33
10.4 Assembling the Console 34
10.5 Securing the Book Holder 34
10.6 Using the Console 35
Alignment Checks on the 250G 36
11.1 Checking the alignment 36
11
10
1
Assembly, Operation & Parts Manual G-Range CV Pg05
5
7
6
Table of Contents

Table of Contents (Continued)
Assembly, Operation & Parts Manual G-Range CV Pg06
16.2 Cleaning the Equipment 52
16.3 Compatible Cleaners 53
16.4 Preventive Maintenance Schedule 53
16.5 How to Obtain Product Service 54
16.6 Recycling the Battery 54
Specifications 55
17.1 Specifications - 240G 55
17.2 Physical Dimensions (L x H x W) 56
17.3 Weight (kg/lbs) 56
17.4 Console 56
17.5 Specifications - 250G 59
17.6 Physical Dimensions (L x H x W) 60
17.7 Weight (kg/lbs) 60
17.8 Console 60
Parts Lists & Exploded Diagrams 63
18.1 Parts Lists & Exploded Diagrams - 240G 63
18.2 Parts Lists & Exploded Diagrams - 250G 64
User Notes 65
Fully Assembled 250G R-Cycle 37
Important Safety Instructions 38
13.1 Introduction 38
13.2 Set-Up 40
13.3 Electrical Power Requirements 40
13.4 Battery Powered - Series 1 & 2 Only 41
13.5 Where to place the 240G 42
13.6 Where to place the 250G 43
13.7 How to Stabilise the 240G and 250G 44
13.8 Install External Power Supply - Series 3 Consoles 44
13.9 Install Coaxial & Ethernet Cables - Series 2 & Series 3 44
General Safety Precautions 45
14.1 Grounding Instructions 45
Installation 46
15.1 Location 46
15.2 Feet Adjustment 47
15.3 On/Off Switch 48
15.4 How to Adjust the Seat - 240G 49
15.5 How to Adjust the Seat - 250G 50
15.6 How to Adjust the Pedal Straps 51
Cleaning & Maintenance 52
16.1 Preventive Maintenance Tips 52
14
13
12
15
16
17
19
18

240G U-Cycle
Handpulse Sensor
Elbow Rest
Drinks Bottle
Seat
Pedal
Console (Series 1, 2 or 3)
Book Rest
Resistance Adjustor
Storage Bucket
® ®
iPod / iPhone Dock
Seat Height Adjustor
Transport Wheels
Levelling Foot
A
B
C
D
E
F
G
H
I
J
K
L
M
240G Overview
G
H
I
K
L
F
J
M
A
B
C
D
E
1
Assembly, Operation & Parts Manual G-Range CV Pg07

The 240G U-Cycle will have to be assembled
from the flat pack. The contents of the pack
are as follows:
Main Body
Console (Series 1, 2 or 3)
Book Holder
Column
® ®
iPhone / Pod Dock
Storage Buckets
Handlebars
Drinks Bottle
Front and Back Legs
Pedals & Foot Straps
Console Bolts
Handlebar Bolts
Feet Strut Bolts & Washers
Column Bolts
® ®
iPhone / Pod Dock Bolts
Console Neck Bolts
If any parts are missing then please contact
PULSE FITNESS' Global Service Team
+44(0)1260 294600.
A
B
C
D
E
F
G
H
I
J
K
L
M
N
O
P
L
2
Contents of the 240G Pack
EN
O
K
J
M
D
G
F
H
C
P
I
Assembly, Operation & Parts Manual G-Range CV Pg08

A
B
Assembly of 240G
3
Figure A
Connecting the Legs
Assembly, Operation & Parts Manual G-Range CV Pg09
3.1 Connecting the Legs
Place the Main Body onto the floor upside down.
Making sure that it is placed on a clean surface and
will not topple over.
Loosely fix all 4 bolts with washers into the Rear
Leg (hand tight). Then proceed to fully fasten ‘A’
followed by ‘B’. Follow this same procedure for the
Front Leg.
This is a two person procedure. [See Figure A].
Tools Required:
8mm Allen Key [M10 Cap Head 30mm Long]

Figure C Attaching the Pedals
Figure B Assembling the Pedals
3.2 Assembling the Pedals
Assemble the Foot Straps onto the edals.[See P
Figure B]
3.3 Attaching the Pedals
Attach the Pedals onto the Crank Arms (the Pedals
ar d therefore should be attached as e labelled an
indicated by the letter L or R on the underside of
the Pedal).[See Figure C]
Note: Ensure the Pedals are securely fastened
before using the U-Cycle.
Tools Required:
15mm Combination Spanner
Assembly, Operation & Parts Manual G-Range CV Pg10
Assembly of the 240G (Continued)

Figure D
Securing the Column
3.4 Securing the Column
Rest the Column onto something stable e.g. a box
or equivalent, and thread the Cable Loom up the
through it, whilst making sure that the loom does
not get trapped.
Next lift the assembled Column up and lean
against its Mounting Bracket and secure the bolts
into position by hand.
Once into position use an Allen Key to tighten up
the bolts ensuring that the Column is aligned
vertically and not twisted. [See Figure D].
Tools Required:
10mm Allen Key [M12 Cap Head]
*Refer to document 135-778-* for column wiring
installation.
Assembly of the 240G (Continued)
Assembly, Operation & Parts Manual G-Range CV Pg11

Figure E
Attaching the Handles
Assembly of the 240G (Continued)
Assembly, Operation & Parts Manual G-Range CV Pg12
3.5 Attaching the Handles
Attach the Handlebars to the Column using the
Handlebar Bolts, making sure that the Hand-Pulse
Sensor wire passes through the large hole as
shown and appears at the top of the Column’s
Console Mounting Plate. Check that the
Handlebars are aligned* before tightening bolts
securely. [See Figure E].
Tools Required:
8mm Allen Key
*Refer to document 135-767-* for alignment
instructions.

Figure F
Fixing the iPod Dock / Storage Station
®
Assembly of the 240G (Continued)
Assembly, Operation & Parts Manual G-Range CV Pg13
®
3.6 Fixing the iPod Dock/Storage Station
®
Place the iPod Dock Assembly onto the Bracket
that’s attached to the Column and use a Phillips
screwdriver to fasten 2x screws into the moulding,
ensuring that the Dock is positioned straight before
tightening screws*.
Insert the Storage Buckets into the metal loops and
press down firmly. [See Figure F].
Tools Required:
3mm Allen Key
*Refer to document 135-767-* for further alignment
instructions.

Securing the Console
Figure G
4
Installing Consoles on the 240G
Assembling the Console
Figure H
Assembly, Operation & Parts Manual G-Range CV Pg14
4.1 Securing the Console
Place the bottom half of the Console onto the
Column and secure with the Console Bolts. [See
Figure G].
NOTE: Fasten Bolts securely.
Tools Required:
4mm Allen Key
4.2 Assembling the Console
Place the top half of the Console onto the bottom
half and carefully connect all the wires into the
corresponding connectors from the front of the
Console to the back*. [See Figure H].
*Refer to document 135-771-* for further
instructions.

Figure I
Wiring the Console
Cables:
Red, White
Cable:
Red, Black
Cables:
Yellow, Blue,
Black, Red
Cable:
Yellow, Black,
Red, White
Cable:
Red, White, Yellow,
Green, Blue, Black
Cable:
Red, Black, Red
Cable:
Green, Black,
Pink, Red
Installing Consoles on the 240G (Continued)
4.3 Wiring the Console
Carefully pull the Electrical Connectors up from the
Column. Ensure that all the Electrical Connectors
attach to the Circuit Board as shown*. [See
Figure I].
*Refer to document 135-771-* for further
instructions.
Assembly, Operation & Parts Manual G-Range CV Pg15

Figure K
Securing the Book Holder
Figure J
Assembling
the Console
4.4 Assembling the Console
Carefully lower the top Console into place and
secure with the Console Screws*.[See Figure J].
NOTE: Fasten Screws securely.
Tools Required - 1 x Philips Head Screwdriver
4.5 Securing the Book Holder
For Series 1 & 2, carefully line up and firmly push
the Book Holder into the consoles allocated slots
until it is solidly fixed into position. [See Figure K].
NOTE: This may take some force. Be careful not to
damage the console in the process.
Assembly, Operation & Parts Manual G-Range CV Pg16
Installing Consoles on the 240G (Continued)

Assembly, Operation & Parts Manual G-Range CV Pg17
4.6 Using the Console
For details on how to use each of the Series 1, 2 &
3 Consoles, refer to documents:
135-1379-* Series 1 (Console 3.5 CV)
135-1299-* Series 2 (Console 5.0 CV)
135-1300-* Series 3 (Console 6.0 CV) Cirrus V1
135-1824-* Series 3 (Console 6.0 CV) Cirrus V2
NB: Image for illustration only
Figure L
Using the Console
Installing Consoles on the 240G (Continued)

5
Console Handlebars Storage
Alignment Checks on the 240G
5.1 Checking the alignment
As a final check make sure that the Console,
Handlebars, and Storage are correctly aligned and
are not twisted.
*Refer to document 135-767-* for further alignment
instructions.
Assembly, Operation & Parts Manual G-Range CV Pg18

6
Fully Assembled 240G U-Cycle
Your 240G U-Cycle is now ready to use, please
read the Technical and Console booklets to
become familiar with all operational and safety
features before use.
Caution: MAKE SURE ALL HARDWARE
IS TIGHT!
Assembly, Operation & Parts Manual G-Range CV Pg19

7
250G Overview
250G R-Cycle
Storage Bucket
Handlebars
Console (Series 1, 2 or 3)
Handpulse Sensors
® ®
iPod / iPhone Dock
Seat
Book Rest
Pedal
Drinks Bottle
Levelling Foot
Transport Wheels
Resistance Adjustor
A
B
C
D
E
F
G
H
I
J
K
L
K
L
Assembly, Operation & Parts Manual G-Range CV Pg20
This manual suits for next models
1
Table of contents
Other Pulse fitness Fitness Equipment manuals

Pulse fitness
Pulse fitness 870C-AAA User manual

Pulse fitness
Pulse fitness Strength User manual
Pulse fitness
Pulse fitness 224B-AAB User manual

Pulse fitness
Pulse fitness 3 6.0 CV Series User manual

Pulse fitness
Pulse fitness CLASSIC STRENGTH User manual
Pulse fitness
Pulse fitness EVOLVE Guide
Pulse fitness
Pulse fitness 206D-AAA User manual