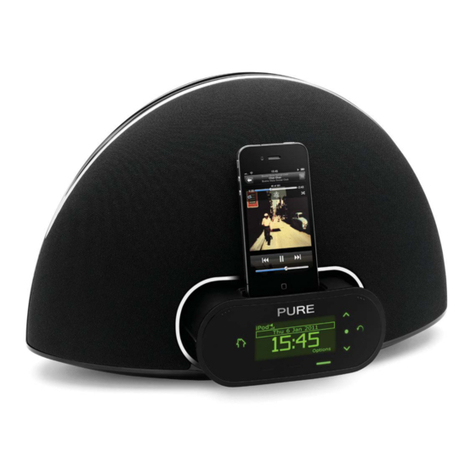
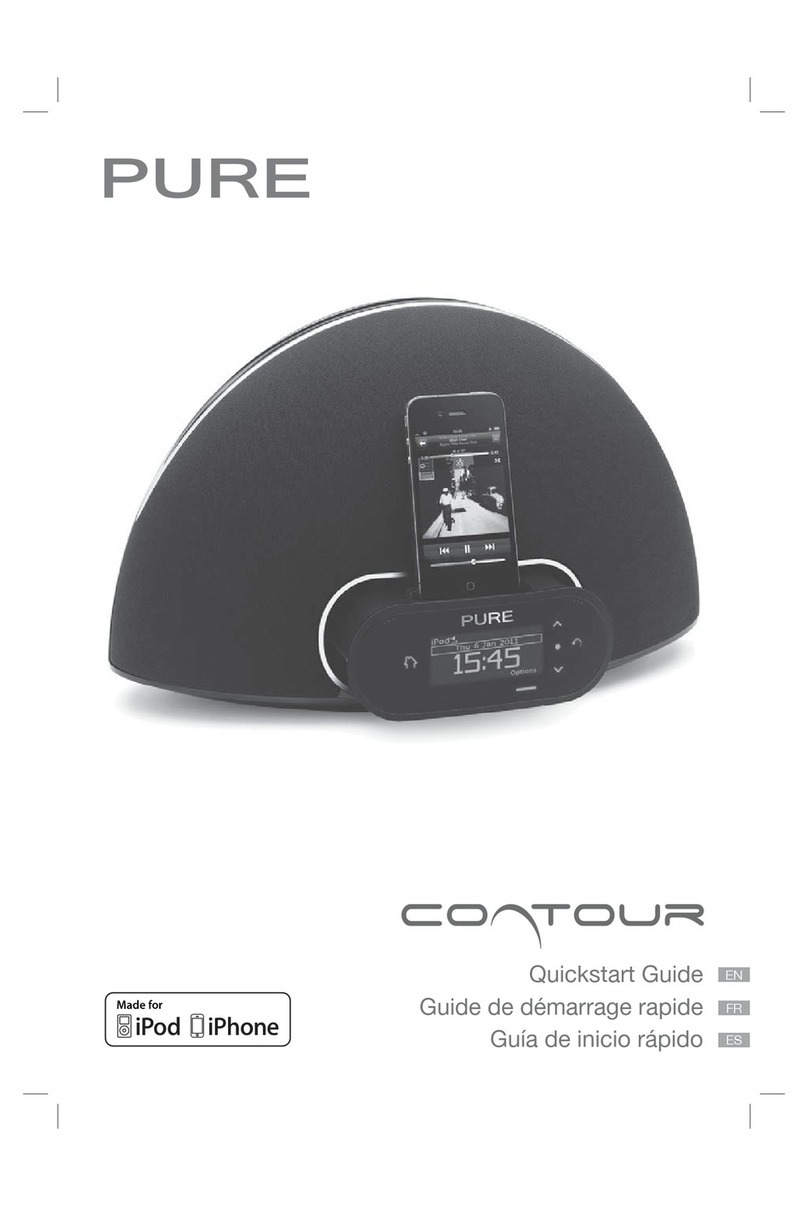
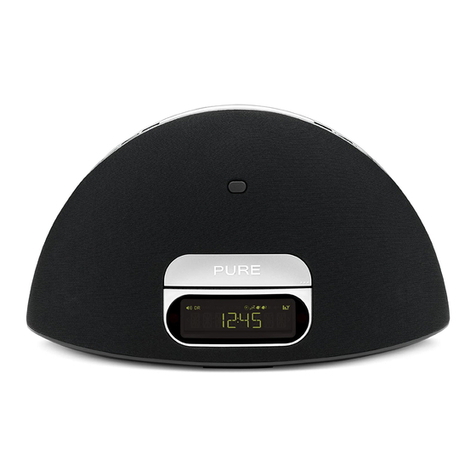
PURE Contour 100i User manual


FR
ES
ENGLISH
1
Thank you for choosing Contour 100i. This
manual will get you up and running in no time,
and explains how to make the most of your
Contour 100i. We’re constantly improving and
adding new features to our products. To
take advantage of any enhancements made
since your product was shipped, please visit
support. pure.com where you can download
the latest version of this user guide
in PDF format.
1

2
Important Safety Instructions
1. Read these instructions – All the safety and operating instructions should be read before
this product is operated.
2. Keep these instructions – The safety and operating instructions should be retained for
future reference.
3. Heed all warnings – All warnings on the apparatus and in the operating instructions should
be adhered to.
4. Follow all instructions – All operating and use instructions should be followed.
5. Do not use this apparatus near water – The appliance should not be used near water or
moisture – for example, near a swimming pool.
6. Clean only with dry cloth.
7. Do not block any ventilation openings. Install in accordance with the manufacturer’s
instructions.
8. Do not install near any heat sources such as radiators, heat registers, stoves, or other
apparatus (including amplifiers) that produce heat.
9. Do not defeat the safety purpose of the polarized or grounding plug. A polarized plug
has two blades with one wider than the other. A grounding plug has two blades and a
third grounding prong. The wide blade or the third prong is provided for your safety. If the
provided plug does not fit into your outlet, consult an electrician.
10. Protect the power cord from being walked on or pinched, particularly at the plugs,
convenience receptacles and at the point where they exit from the apparatus.
11. Unplug the apparatus during lightning storms or when unused for long periods of time.
12. Refer all servicing to qualified personnel. Servicing is required when the apparatus
has been damaged in any way, such as power supply cord or plug is damaged, liquid
has been spilled or objects have fallen into the apparatus has been exposed to rain or
moisture, does not operate normally, or has been dropped.
13. Do not install this equipment in a confined or built-in space such as a bookcase or similar
unit. The ventilation should not be impeded by covering the ventilation openings with items
such as newspaper, tablecloths, curtains etc.
14. WARNING: Only use attachments or accessories specified or provided by the
manufacturer.
15. WARNING: Please refer to the information on the base of the unit for electrical and safety
information before installing or operating the apparatus.
16. WARNING: To reduce the risk of fire or electric shock, do not expose this apparatus to
rain, moisture, dripping or splashing. Objects filled with liquids, such as vases, should not
be placed on apparatus.
17. WARNING: The power adapter is used to disconnect the apparatus from AC power. It
must remain readily accessible.
18. The remote battery should not be exposed to excessive heat or fire.
19. CAUTION: Danger of explosion if remote battery is incorrectly replaced. Replace only with
the same or equivalent type.
20. This equipment is a Class II or double insulated electrical appliance. It has been designed
in such a way that it does not require a safety connection to electrical earth.
EN
3
Contents
4 Getting started
4 Setting up
5 Controls and connectors
6 Remote control
6 Display
7 Listening to iPod/iPhone/iPad
8 Listening to radio
8 Selecting FM radio
8 Changing stations
8 Saving and selecting your favorite stations
8 Changing the information displayed on screen
9 Pure Connect app
10 Using the aux input
10 Using the sleep timer
11 Using the alarms
11 Setting an alarm
12 Cancelling a sounding alarm
12 Snoozing a sounding alarm
12 Changing the snooze duration
12 Cancelling a snoozing alarm
13 Options and settings
13 FM radio options
13 General options
14 Help and specifications
14 Help
14 Technical Specifcations

4
Pull the plastic tab from
the remote control battery
compartment and remove
the protective film from
remote buttons.
Press and on the remote to view the available
languages (English/French/Spanish) used for
displaying menus and options and press Select
to confirm your choice.
Fully extend the aerial.
Getting started
Setting up
LANGUAGE
Insert the connector of the
mains power adapter into the
socket on the rear of the radio.
Attach the appropriate adapter
pins for your region, if required
and plug in to the mains supply.
4
1 2
3
4

EN
5
Controls and connectors
Bass port
Remote control
holder
Storage recess
for remote
control.
Telescopic
Aerial
Power adapter socket
Connector for supplied
mains power adapter.
Headphone
socket
3.5mm stereo
headphone socket.
Aux In socket
Analogue stereo
input for iPod/
MP3 player.
USB socket
USB connector for
software updates
(mini-B type).
On/
Standby
Source
Press to change
between FM, iPod,
and Auxiliary input.
Favorites/Snooze
Press and repeat to browse
through your favorite stations.
Press to snooze a sounding
alarm.
Mute
Volume down
Volume up
iPod/iPhone/
iPad dock
Press the right
hand end of the
front panel to
release the iPod
dock.
LCD display

6
bUZZ FM
iPod
1
A X
2
1
FM
Remote control
Display
On/Standby Source
Press to change between
FM, iPod, and Auxiliary input.
Favorites
Press to view your favorite
stations list. Then press and hold
to save the current station.
Mute
Volume down
Volume up
Snooze
Press to view the current
Snooze time. Use and
Select to change. Press to
snooze a sounding alarm.
Sleep
Press and repeat to set a sleep
timer.
Alarm
Press and repeat to view alarm
status. Press Select to change
status or alarm settings.
Menu
Press to view options menu to
change settings.
In iPod source press to
navigate iPod menu. Press and
hold to view options menu.
and Select
Browse and select tracks and
menu options.
In FM step down and up the
frequency range in steps of 100
KHz. Press and hold to seek tune
to the next station.
Repeat
Toggle to repeat current track,
repeat all or no repeat.
Shuffle
Shuffle the track playback order.
and Skip to start
of current track or go to
previous/next track. Hold
to fast rewind or fast
forward. In FM seek tune
to the next station.
Play/Pause
Play/pause current track.
Volume
Source
indicators
Repeat one
Repeat all
Sleep
timer set
Alarm
snoozed
Alarm
1/2 set
Signal strength
Text area
Scroll
indicator
Scroll
indicator
Shuffle

EN
7
Listening to iPod/iPhone/iPad
Compatibility
Contour 100i is compatible with most iPod, iPhone and iPad models. For the latest
information, check the compatibility table on our website:
www.pure.com/products/ipod-compatibility.
Docking your device
1. Push the right hand end of the front panel as shown to release the dock.
2. Carefully dock your device onto the connector.
Your device will start charging as soon as it is docked and will continue charging
whether Contour 100i is switched on or in standby*.
Note The headphone socket is disabled when an iPhone/iPod/iPad is docked.
Selecting the iPod source
Press the Source button to select IPOD. On devices with apps you can also play audio from
other apps e.g. the Pure Connect internet radio app, if you pause the iPod playback.
Controlling your device
When the iPod source is selected your device will start playing the last iPod track you were
listening to. Use the remote or controls on your Apple device to navigate menus and control
playback.
To access the Contour 100i options menu while you have an iPod/iPhone docked, press
and hold the Menu button on the remote.
Changing the information displayed on screen
Press and hold the Menu button, press Select to choose the DISPLAY option.
Choose one of the following options:
TITLE/ARTIST Track title and artist name.
TIME Full screen clock.

8
Listening to radio
Selecting FM radio
Press the Source button to select FM. You’ll see the relevant icon.
Changing stations
Press or (or hold or ) to seek to the next station with a strong signal.
Press or to change the frequency in steps of 100 KHz.
Saving and selecting your favorite stations
You can save up to 40 stations in a list for easy access.
Saving
1. Tune to the station you want to save as a favorite.
2. Press on the remote to view the favorites list.
3. Press or on the remote to decide where you want to save the favorite (if you choose
an existing favorite it will be replaced).
4. Press and hold down or Select on the remote until you see ‘SAVED’ on the screen.
Selecting
Press on the unit or remote to view the favorites list.
Press again on the unit to cycle through the list or press or on the remote.
Wait for the station to change if using the main unit or press Select on the remote to change
immediately.
Changing the information displayed on screen
Press the Menu button, press and to browse and press Select to choose the DISPLAY
option.
Choose one of the following options:
STATION Station name or frequency.
TEXT Scrolling text broadcast by the station.
TIME Full screen clock updated by the radio broadcast.

EN
9
Pure Connect app
Make the most of Contour’s high quality audio by installing the free Pure Connect app on
your iPod touch or iPhone. The Pure Connect app gives you free access to thousands of
internet radio stations, on demand content (podcasts and listen again programs) and
ambient sounds.
iOS Pure Connect App

10
Using the aux input
Connecting an auxiliary device
Connect the line out or headphone socket of your auxiliary device to the Aux-In socket on
your Contour 100i using a suitable cable.
Selecting the auxiliary input
Press the Source button to select AUX.
Using the sleep timer
The sleep timer switches your radio into standby after a number of minutes has elapsed.
Setting the sleep timer
1. Press the Sleep button on the remote and repeat to increase the duration of the sleep
timer from 15 to 90 minutes.
2. Push Select, or wait to start the sleep timer.
The icon on the screen indicates when the sleep timer is set.
Tip Push the Sleep button again at any time to view the time remaining.
Cancelling the sleep timer
Press the Sleep button and set the timer duration to OFF.

EN
11
FM
FM
DAILY
FM
LAST
FM
FM
FM
ON
ON
FM
Using the alarms
Contour 100i has two alarms which you can set to sound a tone, tune to a radio station or
play a track from your iPod/iPhone.
Setting an alarm
Press the Alarm button on the remote to show the status of
Alarm 1, press or to show the status of Alarm 2.
Press the Select button to choose and adjust either alarm
and press or and Select to adjust the following settings:
Alarm on/off
Press or to choose between ‘ON’ (alarm sounds) or
‘OFF’ (alarm does not sound) and press Select.
Time
Set the alarm time. Press or to adjust the hours then
press Select. Repeat to set the minutes then press Select.
Days
Set the days that the alarm sounds. Press or to choose
between: DAILY (every day), ONCE (no repeat), WEEKENDS
or WEEKDAYS (Monday to Friday) then press Select.
Type
Press or to choose between: FM, IPOD or TONE
(buzzer).
Station
If you’ve set alarm mode as FM, press or to choose
between: LAST USED (Last station tuned to) or select a
favorite if you have any saved.
Note: NO PRESETS is displayed if you have not created
any favorites.
Volume
Press or to change the alarm volume then press Select.
You see the message ‘SAVED’ once you have completed all
the alarm settings.
The
1
and
2
icons on the screen indicate when an alarm
SAVED
1
FM
FM

12
is set.
Cancelling a sounding alarm
To cancel a tone alarm press the Alarm, Select or Standby button.
To cancel a radio alarm press any button except volume.
Note A sounding alarm will switch off after one hour unless you cancel it.
Snoozing a sounding alarm
To snooze a sounding alarm press the Favorites button on Contour or the Snooze
button on the remote. The alarm will be silenced for 10 minutes (the default snooze
time) then sound again.
The icon on the screen indicates when an alarm is snoozed.
Changing the snooze duration
The default snooze time for the alarms is 10 minutes. To change the snooze time:
Press the Snooze button on the remote and press or to choose a snooze
duration then press Select to confirm.
Cancelling a snoozing alarm
To cancel a snoozing alarm press the Alarm or Select button.

EN
13
Options and settings
Press the Menu button to access the options menu, press or to scroll through and
change the options and press Select to confirm. Current value of settings are indicated by
an asterisk ( ).
FM radio options
FM Stereo
Choose from Stereo or Mono (default). Mono may improve audio clarity where stereo signals
are weak.
General options
Clock
The clock is automatically set if you have a good FM (RBDS) signal and will automatically
update for daylight saving time. You can adjust the following settings:
SET TIME Manually set the time and date if required.
12/24HR Choose between 12 or 24 hour time display.
SNOOZE Set your preferred snooze duration for alarms.
Backlight
DURATION
Choose how long the backlight remains switched on:
TIMED The backlight turns on for 7 seconds when any button is pressed (default).
OFF The backlight does not switch on.
ON The backlight is always on when the radio is on.
LEVEL
Choose the brightness of the backlight:
AUTO Adjusts automatically depending on the light level in your
room (default).
1-5 Set a brightness level between 1 (dim) and 5 (bright).
Audio
Adjust the bass and treble:
BASS Adjust the bass between -3 (minimal bass), 0 (neutral) and 3
(maximum bass).
TREBLE Adjust the treble between -3 (minimal treble), 0 (neutral) and
3 (high treble).
Language
Choose from English, French or Spanish.
Reset
Reset removes all saved favorites and resets all options to their defaults.
Choose YES to confirm the reset or NO to cancel the reset.

14
Help and specifications
Help
Software updates
Software updates for your Contour 100i may be made available in the future. If you register
your product and include a valid e-mail address you will receive notification of software
updates (register at www.pure.com/register). Available software updates are also listed at:
http://support.pure.com/us.*
To upgrade:
1. From FM or Aux sources, press and hold the Menu button on the remote for three
seconds to access the maintenance menu.
2. Select UPGRADE and follow the instructions provided with the upgrade software*.
Technical Specifcations
Radio FM
iPod/iPhone/iPad Supports most iPod, iPhone and iPad models.
For the latest information, check the compatibility table on
our website: www.pure.com/products/ipod-compatibility.
Speakers 2 full-range 3” drive units.
Audio output 2 x 10W RMS. Rear bass port.
Input connectors 12V DC power adapter socket. iPod/iPhone/iPad connector.
3.5mm Aux-in for auxiliary devices. USB (mini-B type) for software
updates.
Output connectors 3.5mm stereo output for headphones.
LCD display Custom auto-dimming LCD display, large text and feature icons.
Remote control Infrared remote control. CR2025 button cell battery included.
Power supply adapter Input: 100-240V, 50/60Hz, 0.9A, Output: 12V DC, 2.4A
Main unit Input: 12V DC, 2.4A
Dimensions 12.1”(308mm) wide x 6.8” (174mm) high x 5.7” (145mm) deep.
Aerial Telescopic aerial.
Approvals CE marked. Compliant with the EMC and Low Voltage
Directives (2004/108/EC and 2006/95/EC). ETSI EN 300
401 compliant.
*Requires a PC (not Mac) with internet access running Windows XP/Vista/7 and a suitable USB cable (not included).

EN
15
Disposal of Waste Electrical & Electronic Equipment
This symbol on the product or on its packaging indicates that this product should
not be treated as household waste. Instead it should be handed over to a suitable
collection point for the recycling of electrical and electronic equipment. By ensuring
this product is disposed of correctly, you will help prevent potential negative
consequences for the environment and human health, which could otherwise be
caused by inappropriate waste handling of this product. The recycling of materials
will help to conserve natural resources. For more detailed information about
recycling of this product, please contact your local council office, your household
waste disposal service or the shop where you purchased the product.
Copyright
Copyright 2015 by Imagination Technologies Limited. All rights reserved. No part of this publication may be copied
or distributed, transmitted, transcribed, stored in a retrieval system, or translated into any human or computer
language, in any form or by any means, electronic, mechanical, magnetic, manual or otherwise, or disclosed to
third parties without the express written permission of Imagination Technologies Limited.
Trademarks
Contour, Pure, the Pure logo, Pure, the Pure logo, EcoPlus, the EcoPlus logo, Imagination Technologies, and
the Imagination Technologies logo are trademarks or registered trademarks of Imagination Technologies Limited.
iPad, iPod and iPhone are trademarks of Apple Inc., registered in the U.S. and other countries. “Made for iPod,”
and “Made for iPhone,” mean that an electronic accessory has been designed to connect specifically to iPod or
iPhone, respectively, and has been certified by the developer to meet Apple performance standards. Apple is not
responsible for the operation of this device or its compliance with safety and regulatory standards. Please note
that the use of this accessory with iPod or iPhone may affect wireless performance. All other product names are
trademarks of their respective companies. Version 5 November 2015.
Warranty Information
Imagination Technologies Limited warrants to the end user that this product will be free from defects in materials
and workmanship in the course of normal use for a period of two years from the date of purchase. This guarantee
covers breakdowns due to manufacturing or design faults; it does not apply in cases such as accidental damage,
however caused, wear and tear, negligence, adjustment, modification or repair not authorised by us. Please visit
www.pure.com/register to register your product with us. Should you have a problem with your unit please contact
your supplier or contact Pure Support at the address shown on the rear of this manual. If you need to return your
product please use the original packaging and include all parts and accessories. We reserve the right to refuse
incomplete or badly packaged returns.
Disclaimer
Imagination Technologies Limited makes no representation or warranties with respect to the content of this docu-
ment and specifically disclaims any implied warranties of merchantability or fitness for any particular purpose.
Further, Imagination Technologies Limited reserves the right to revise this publication and to make changes in it
from time to time without obligation of Imagination Technologies Limited to notify any person or organization of
such revisions or changes.

16
FCC NOTICE TO A USER IN THE UNITED STATES
This equipment has been tested and found to comply with the limits for a Class B digital device, pursuant to Part
15 of the FCC Rules. These limits are designed to provide reasonable protection against harmful interference in a
residential installation. This equipment generates, uses, and can radiate radio frequency energy and, if not installed
and used in accordance with the instructions, may cause harmful interference to radio communications. However,
there is no guarantee that interference will not occur in a particular installation. If this equipment does cause
harmful interference to radio or television reception, which can be determined by turning the equipment off and on,
the user is encouraged to try to correct the interference by one or more of the following measures:
• Reorient or relocate the receiving antenna.
• Increase the separation between the equipment and receiver.
• Connect the equipment into an outlet on a circuit different from that to which the receiver is connected.
• Consult the dealer or an experienced radio/TV technician for help.
Warning! Any modification or changes to this device, unless explicitly approved by Pure, will invalidate the
authorisation of the device. Operation of an unauthorized device is prohibited under Section 302 of the
Communications Act of 1934, as amended, and Subpart 1 of Part 2 of Chapter 47 of the Code of Federal
Regulations.
This device complies with part 15 of the FCC rules. Operation is subject to the following two conditions: (1) This
device may not cause harmful interference, and (2) this device must accept any interference received, including
interference that may cause undesired operation.
IC NOTICE TO A USER IN CANADA
Since digital circuitry may cause interference to other radio or television tuners nearby, switch this unit off when not
in use or move it away from the affected radio/television tuner.
NOTE: This digital apparatus does not exceed the Class B limits for radio noise emissions from digital apparatus
as set out in the Radio Interference Regulations of Industry Canada. These limits are designed to provide
reasonable protection against harmful interference in a residential installation. This equipment generates, uses and
can radiate radio frequency energy and, if not installed and used in accordance with the instructions, may cause
harmful interference to radio communications. However, there is no guarantee that interference will not occur in a
particular installation. If this equipment does cause harmful interference to radio or television operation (which can
be determined by turning the equipment off), the user is encouraged to try to correct the interference by one or
more of the following measures:
• Reorient or relocate the receiving antenna.
• Increase the separation between the equipment and receiver.
• Connect the equipment into an outlet on a circuit different from that to which the receiver is connected.
• Consult the dealer or an experienced radio / TV technician for help.
This Class B digital apparatus complies with Canadian ICES-003.

FRANÇAIS
ES
EN
1
Merci d’avoir choisi Contour 100i. L’objectif de ce
manuel est de vous permettre de mettre en service
votre appareil en un rien de temps et de tirer parti
de la plupart des fonctionnalités de Contour 100i.
Si le présent manuel ne couvre pas le sujet pour
lequel vous avez besoin d’aide, veuillez consulter la
section de notre site Web consacrée à l’assistance
technique, à l’adresse support.pure.com.

2
Instructions de sécurité importantes
1. Veuillez lire les présentes instructions – vous devez lire toutes les instructions de sécurité et
d’utilisation avant d’utiliser le présent produit.
2. Veuillez conserver les présentes instructions – vous devez conserver les instructions de
sécurité et d’utilisation en lieu sûr pour toute référence ultérieure.
3. Veuillez respecter tous les avertissements – vous devez respecter tous les aver tissements
figurant sur l’appareil ou dans le mode d’emploi.
4. Veuillez suivre toutes les instructions – vous devez suivre toutes les instructions d’utilisation.
5. N’utilisez pas cet appareil à proximité de l’eau ou d’une source d’humidité – par exemple,
dans un sous-sol humide, à proximité d’une piscine, etc.
6. Nettoyez l’appareil uniquement avec un chiffon sec.
7. Les orifices d’aération ne doivent pas être obstrués. Installez l’appareil conformément aux
instructions du fabricant.
8. N’installez pas l’appareil à proximité de sources de chaleur, telles que les radiateurs,
registres de chaleur, poêles, ou tout autre appareil (y compris des amplificateurs) produisant
de la chaleur.
9. Ne détruisez pas le dispositif de sécurité de la fiche polarisée ou de mise à la terre. Une
fiche polarisée est constituée de deux lames dont l’une est plus large que l’autre. Une prise
de mise à la terre est constituée de deux lames et d’une troisième broche de mise à la terre.
La lame large ou la troisième broche sont fournies pour votre sécurité. Si la fiche fournie
n’est pas adaptée à votre prise, veuillez consulter un électricien.
10. Protégez le câble d’alimentation afin que personne ne marche dessus ou qu’il ne soit pas
serré, particulièrement au niveau des fiches, des prises de courant et du point de sortie de
l’appareil.
11. Débranchez l’appareil en cas d’orages ou avant toute inutilisation prolongée.
12. Toutes les tâches de service après-vente doivent être réalisées par du personnel qualifié.
Il est nécessaire de procéder à un entretien quand l’appareil a subi des dommages, de
quelque manière que ce soit ; par exemple, si une prise ou un cordon électrique est
endommagé, si du liquide a éclaboussé l’appareil ou des corps étrangers y ont pénétré, si
l’appareil a été exposé à la pluie ou à l’humidité, s’il ne fonctionne pas correctement ou s’il
est tombé.
13. N’installez pas cet équipement dans un espace intérieur confiné, tel qu’une bibliothèque
ou tout autre espace similaire. Ne couvrez et n’obstruez pas les orifices de ventilation de
l’appareil avec des éléments tels que du journal, une nappe ou des rideaux.
14. AVERTISSEMENT : N’utilisez que des fixations ou accessoires spécifiés ou fabriqués par le
fabricant.
15. AVERTISSEMENT : Veuillez lire les informations indiquées sous l’appareil concernant les
branchements électriques et la sécurité avant d’installer ou de mettre l’appareil en marche.
16. AVERTISSEMENT : Afin de réduire le risque d’incendie ou de choc électrique, n’exposez
pas l’appareil à la pluie, à l’humidité, aux éclaboussures ou à tout autre source d’eau. Aucun
objet rempli d’eau (tel qu’un vase) ne doit être placé sur l’appareil.
17. AVERTISSEMENT : L’adaptateur secteur permet de débrancher l’appareil de la prise
d’alimentation. Il doit être facilement accessible.
18. Les piles de la télécommande ne doivent pas être exposées à une source de chaleur
excessive ou au feu.
19. ATTENTION : Risque d’explosion si vous remplacez les piles de la télécommande par un
modèle incompatible. Utilisez un modéle identique ou équivalent pour remplacer les piles.
20. Cet appareil est de classe 2 ou dispose d’un équipement à double isolation électrique. Il
a été conçu de sorte à ne requérir aucune connexion de sécurité pour la mise à la terre.
Table of contents
Languages:
Other PURE Docking Station manuals

PURE
PURE Contour D1 User manual

PURE
PURE I-10 User manual

PURE
PURE i-20 User manual

PURE
PURE Contour 100Di User manual

PURE
PURE Contour 100Di User manual

PURE
PURE Contour D1 User manual

PURE
PURE Contour User manual

PURE
PURE Contour User manual

PURE
PURE SIESTA iDock User manual

PURE
PURE CHRONOS iDOCK SERIES II User manual