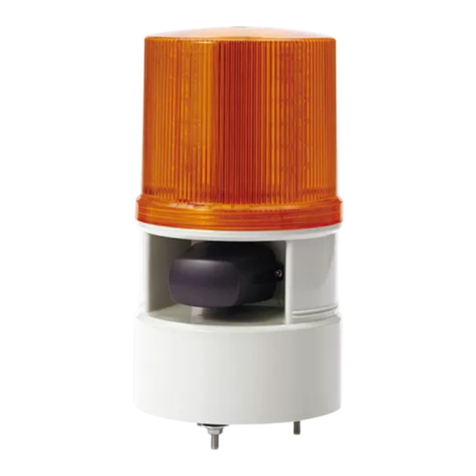
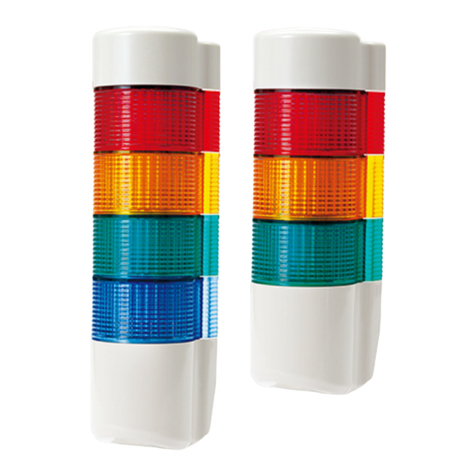
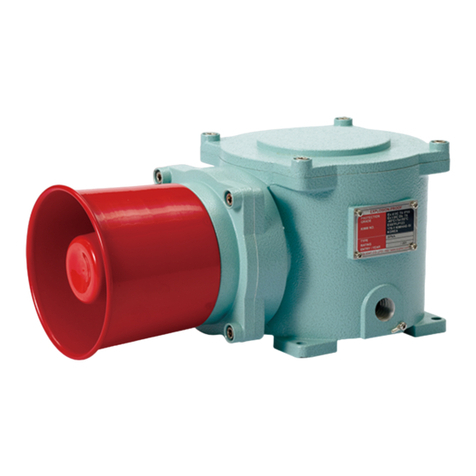
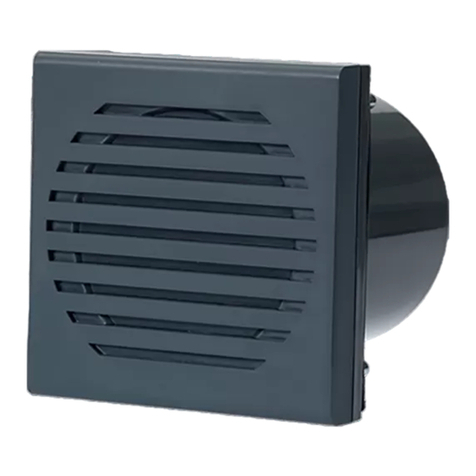
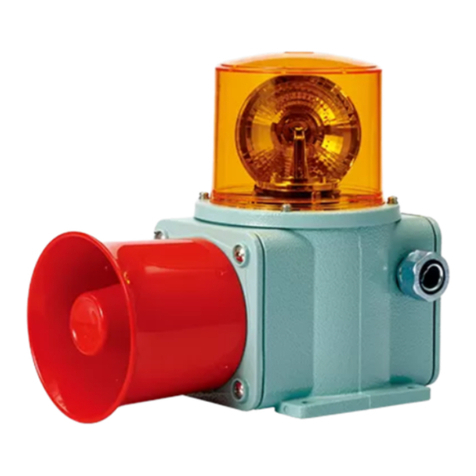
Qlightec SESA-TI User manual

1
Explosion Proof Warning Light/ Signal Light and
Electric Horn Combinations(Telephone Initiated)
SESA-TI/ SESAL-TI/ SESALR-TI/ SESAS-TI
HORN
66
6040
118dB
Ex
Please scan the QR code for more
detailed product information.
www.qlight.com
’XULQJZLULQJRUPDLQWHQDQFHSOHDVHFRPSOHWHO\WXUQRWKHSRZHURIWKHSURGXFW)DLOXUHWRIROORZWKLVPD\OHDGWRDQHOHFWULFVKRFN
2. Do not install the product in locations that subjects it to excessive dust or water other than the conditions designated by the IP protection
UDWLQJVLQGLFDWHGIRUHDFKSURGXFW)DLOXUHWRIROORZWKHVHLQVWUXFWLRQVPD\FDXVHD¿UHWRWKHSURGXFWHOHFWULFVKRFNSK\VLFDOLQMXU\
PDOIXQFWLRQRUGDPDJHWRWKHSURGXFW
3. Do not alter or repair this product. If maintenance or repair service is required, please contact your local Qlight contact point.
)DLOXUHWRIROORZWKHVHLQVWUXFWLRQVPD\OHDGWR¿UHHOHFWULFVKRFNRUSURGXFWGDPDJH
3OHDVHDSSO\WKHFRUUHFWYROWDJHWRWKHSURGXFW)DLOXUHWRIROORZWKHVHLQVWUXFWLRQVPD\OHDGWR¿UHHOHFWULFVKRFNRUSURGXFWGDPDJH
:KHQWKHSURGXFWLVDSSOLHGWRDFRQGLWLRQWKDWPD\LPSDFWOLYHVRUSURSHUW\SOHDVHPDNHVXUHWRKDYHDGRXEOHVDIHW\GHYLFH
)DLOXUHWRIROORZWKLVPD\FDXVHGDPDJHWRSURSHUW\¿UHHOHFWULFVKRFNDQGORVVRIOLIH
Precaution for Safety
)DLOXUHWRIROORZWKHLQVWUXFWLRQVEHORZPD\FDXVHDORVVRIOLIHRUVHULRXVSK\VLFDOLQMXU\
Safety Precautions for Explosion Proof Products
Please follow the instruction below to ensure safe and correct use of explosion proof products.
1. Explosion proof products should be managed according to explosion proof regulations. Do not disassemble, assemble, alter or repair
the product arbitrarily.
2. The temperature rating of the product is the temperature the product will experience at the applied rated voltage and ambient
temperature indicated.
3. Use cable glands that satisfy the product’s explosion proof grade and temperature grade.
8QXVHGFDEOHHQWULHVPXVWEH¿OOHGZLWKPDWHULDOWKDWPHHWVWKHH[SORVLRQSURRIJUDGHDQGWHPSHUDWXUHUDWLQJ
%HIRUHLQVWDOOLQJWKHSURGXFWSOHDVHPDNHVXUHDOOFDXWLRQVLQGLFDWHGRQWKHODEHOVSDFNDJLQJDQGRSHUDWLRQPDQXDORIWKHSURGXFW
are fully understood.
,QVWDOODWLRQPDLQWHQDQFHDQGUHSDLURIWKHSURGXFWPXVWEHSHUIRUPHGE\H[SHUWVLQWKHH[SORVLRQSURRI¿HOGRUSHUVRQVZKRKDYH
received relevant training.
)RUVDIHW\WKHSURGXFWVKRXOGEHLQVWDOOHGDQGRSHUDWHGLQHQYLURQPHQWVWKDWDYRLGKLJKWHPSHUDWXUHDQGKLJKSUHVVXUH
8. Please follow general safety precautions and avoid installing the product in locations that may generate excessive heat.
:KHQLQVWDOOLQJWKHSURGXFWLQSODFHVZKHUHFKHPLFDOVDUHORFDWHGSOHDVHPDNHVXUHWKDWWKHHQYLURQPHQWGRHVQRWKDYHWZRRUPRUH
LQFRPSDWLEOHFKHPLFDOVPL[HG)RUVDIHW\SOHDVHUHDGWKHLQVWUXFWLRQPDQXDOFDUHIXOO\DQGEHPLQGIXORIWKHFKHPLFDOFRPSRVLWLRQV
where the product is used.
10. This product requires grounding.
3OHDVHQRWHWKDWVSHFLDOFRQGLWLRQVVKDOOEHDSSOLHGLIWKHVLJQ‡;·LVSODFHGDIWHUWKHFHUWL¿FDWHQXPEHU
)RUVDIHXVHUHJXODURYHUSUHVVXUHWHVWPXVWEHFDUULHGRXWLQDFFRUGDQFHZLWK(1FODXVH
)RUVDIHXVHWHPSHUHGJODVVPXVWEHSURWHFWHGIURPVWURQJLPSDFW
:KHQXVLQJ137FDEOHJODQGVSOXJVLWLVUHFRPPHQGHGWRXVHWKHPDIWHUDSSO\LQJQRQKDUGHQLQJJUHDVHWRPDLQWDLQSURWHFWLYH
performance.
1. Please remove any objects that can interrupt ventilation around the product.
3OHDVHWXUQRWKHSRZHURIWKHSURGXFWLPPHGLDWHO\LILWIDLOVWRRSHUDWHSURSHUO\
&DUHIXOO\ZLUHWKHSURGXFWDFFRUGLQJWRHDFKSURGXFW¶VVSHFL¿FDWLRQ
4. Please be careful in preventing chemicals such as thinner, benzene, etc. in contact with the surface of the product.
5. Do not apply excessive force/impact to the product.
)DLOXUHWRIROORZDQ\RIWKHLQVWUXFWLRQVDERYHPD\FDXVHPDOIXQFWLRQRUGDPDJHWRWKHSURGXFW¿UHDQGHOHFWULFVKRFN
Precautions for Correct Use
)DLOXUHWRIROORZWKHSURSHULQVWUXFWLRQVPD\FDXVHGDPDJHWRSURSHUW\WKHSURGXFWRUPDOIXQFWLRQRIWKHSURGXFW
that would void the warranty.
7KDQN\RXIRUSXUFKDVLQJ4OLJKW¶VSURGXFWV3OHDVHUHDGWKLVXVHUPDQXDOFDUHIXOO\
prior to installation and operation to ensure safe and correct use.

2
Model number
6(6$7,
6(6$/7,
6(6$/57,
6(6$67,
Range of
operating voltage
DC 24V
AC 120V or 230V
([PDUN
,(&(;([GE,,&7*E
$7(; ,,*([GE,,&7*E
Ambient operating
temperature
–&7D&
Explosion proof
Zone
Zone1, Zone2
Protection rating IP66
Model
number Voltage Power
consumption Current
%XOEVSHFL¿FDWLRQV
Sound pattern and volume &HUWL¿FDWH
Weight Color
Volts/
Watts
&RQ¿JXUDWLRQ
Part#
6(6$7,
DC24V
46W
1.640A 24V15W *6 18
:6:DUQLQJVRXQGV
: Max.118dB
:36SHFLDOZDUQLQJVRXQGV
: Max.118dB
:00HORGLHV0D[G%
:$$ODUPV0D[G%
:9&XVWRPL]DEOHVRXQGV
G%
NJ
55HG
$$PEHU
**UHHQ
%%OXH
AC120V 0.320A 12V15W *6 17 NJ
AC230V 0.200A 12V15W *6 17 NJ
6(6$67,
DC24V
46W
1.300A 200V
9
EUB0641
$*
Utype 48
NJ
AC120V 0.320A NJ
AC230V 0.200A NJ
Model
number Voltage Power
consumption Current Sound pattern and volume &HUWL¿FDWH Weight Color
6(6$/7,
DC24V
39.1W
1.130A
:6:DUQLQJVRXQGV
: Max.118dB
:36SHFLDOZDUQLQJVRXQGV
: Max.118dB
:00HORGLHV0D[G%
:$$ODUPV0D[G%
:9&XVWRPL]DEOHVRXQGV
G%
NJ
55HG
$$PEHU
**UHHQ
%%OXH
AC120V 0.270A NJ
AC230V 0.170A NJ
6(6$/57,
DC24V
41.4W
1.190A NJ
AC120V 0.300A NJ
AC230V 0.180A NJ
SESAS
WS
230
R
TI
[Model number]
[Sound]
[Voltage]
[Color] [Telephone Initiated]
| | | | |
• SESA
• SESAL
• SESALR
• SESAS
:6:DUQLQJVRXQGV
:36SHFLDOZDUQLQJVRXQGV
:00HORGLHV
:$$ODUPV
:9&XVWRPL]DEOHVRXQGV
’&9
$&9
$&9
55HG
$$PEHU
**UHHQ
%%OXH
7, Telephone Initiated
Ordering Specications
■
General Product Specication
Product Specications
Zone
GH¿QLWLRQV*DV
Zone 1
+LJKULVNJDVYDSRXU
Zone 2
0HGLXPULVNJDVYDSRXU
*URXS
GH¿QLWLRQV*DV
*5283 II A
Acetone, Petrol, Methanol, Propane, Toluene
*5283 II B
Ethylene, City gas
*5283 II C
Hydrogen, Acetylene, Carbon sulphide
Maximum
surface
temperature
of electrical
equipment
T1
450
°C
T2
300°C
T3
200°C
T4
135
°C
T5
100
°C
T6
85
°C
Zone
GH¿QLWLRQV’XVW
Zone 21
+LJKULVNSRZGHUGXVW
Zone 22
0HGLXPULVNSRZGHUGXVW
*URXS
GH¿QLWLRQV’XVW
*5283 II A
,JQLWLEOH¿EHUV\LQJVP]RUHWKDQPP
*5283 II B
1RQFRQGXFWLYHGXVWV
*5283 II C
Conductive dusts
■
Explosion Proof Specications
■
Telephone lines rated power
• 5DWHGSRZHUZKHQWHOHSKRQHOLQHVDUHQRWLQXVH9’&9’&
• 5DWHGSRZHUZKHQWHOHSKRQHULQJV9’&9’&5LQJ5LQJVLJQDOVRXQG

3
6(6$7,6(6$/7,6(6$/57,6(6$67,
6(6$7,6(6$/7,6(6$/57,6(6$67,
Ø167
4-Ø8
FITTING HOLES 134
134
150
150
CABLE ENTRY 1/2'' NPT
333
13410 189
327
Ø134
*UD\
*UD\
White
%ODFN
7HOHSKRQHOLQHV7(/
Power
Fuse
([WHUQDOSRZHUOLQH8/$:*VT[&PP
External
telephone lines
8/$:*VTPP
Volume Adjustment
• The volume output of this product
is adjustable.
• 7XUQWKHYROXPHGLDOFORFNZLVH
to increase the volume, and turn
FRXQWHUFORFNZLVHWRGHFUHDVH
the volume.
• There will be no sound when the
GLDOLVSXWDW0,1
Volume Dial
92/
0,1MAX.
Dimensions
8QLWVPP
•
6WDQGDUGXQLWKDVEXLOWLQVRXQG
WRQHV6HOHFWGLHUHQWEXLOWLQ
sounds using the sound setting switch.
&K&K
Sound Setting - Select using the switch
inside of the unit.
Sound Setting - Select using External
contact(LC).
■ Sound Type by Group
Category Sound
pattern Channel Sound Tone Volume
0D[
WS
5 Warning
sounds
Ch1
)LUH$$1*
118dB
Ch2
(PHUJHQF\:$8
Ch3
$PEXODQFH3,32
Ch4
0DFKLQHU\)DXOW
Ch5
High Expansion
WP
5
Special
warning
sounds
Ch1
)LUH$$1*
118dB
Ch2
Abandon Alarm
Ch3
0DFKLQHU\)DXOW
Ch4
High Expansion
Ch5
7 Short PI. / 1 Long
WM
5 Melodies
Ch1 Sweet Home
118dB
Ch2 )RU(OLVH
Ch3 &XFNRRV:DOW]
Ch4 Piano Sonata
Ch5 7XUNLVK0DUFK
WA
5 Alarms
Ch1 Beep Intermittent
116dB
Ch2 Door Chime
Ch3 Phone Ring
Ch4 PI.PI.PI Short
Ch5 Tripping Beat
WV
5 Customizable
sounds
&K
Ch5
Available upon request
FXVWRPL]HGYRLFHW\SH
113dB
Volume Dial
7HUPLQDOEORFNLVORFDWHGLQVLGHRIWKHSURGXFW8QVFUHZWKHEROWVORFDWHGLQWKHXSSHU
body to get rid of the upper lighting element of the unit.
3OHDVHDSSO\IRUN8W\SHRUULQJ2W\SHORFNLQJVSDGHWHUPLQDODWQDNHGWLSRIWKHZLUHIRU
secure connection.
• Connect the power line to the terminal ①and ②.
• Connect the telephone signal cable to the terminal ③and ④.
)RU$&W\SHSURGXFWVZLUHUHJDUGOHVVRISRODULW\
)RU’&W\SHSURGXFWVZLUHWHUPLQDORIEODFNOLQHWRSRODULW\
Terminal Box Wiring Instructions
※$SSOLFDEOHFDEOHUDQJH$:*$:*
①
② ③ ④

4
①
• )LUVWPDFKLQHKROHVRQWKHPRXQWLQJVXUIDFH
①.
• The mounting hole of this product is 8mm in diameter.
• When machining taps, fasten the bolt through the mounting hole of
WKHEUDFNHW
• When machining holes, insert the bolt through the hole of the product,
and tighten the nut from the opposite side of the mounting surface.
■ Installation
Horn
676/
+RXVLQJ$,
Protection cage
676/
/HQV7HPSHUHGJODVV
Parts Denition/ Installation/ Light Function Selection
▶LF :
)ODVKLQJ
v Light Function Selection(SESAL only)
•• Please refer to the chart below to use light function
selection switch located inside the product.
• Default function is set at steady LED. Select the desired function
for your application during installation.
▶L :
Steady
■ Parts Denition
SESA/ SESAL/ SESALR/ SESAS
6XSSO\SRZHUWRWKHSURGXFWDQGFRQQHFWWKHWHOHSKRQHOLQH/,1(WRWKH3671WHOHSKRQHOLQHFRQQHFWHGLQSDUDOOHOZLWKWKHWHOHSKRQH
•
:KHQWKHSKRQHULQJVDWHOHSKRQHFRQWUROOHUUHFRJQL]HVDVLJQDOWKDWDFWLYDWHVDUHOD\2QFHWKHUHOD\LVDFWLYDWHGWKHVLJQDOOLJKWVRXQGHU
3&%LVSRZHUHGRQDQGEHDFRQVRXQGHUZLOOEHRSHUDWHG
%HDFRQVRXQGHUZLOOEHVWRSSHGZKHQDQRSHUDWRUUHFHLYHVDSKRQHFDOO
Wiring method
Telephone Line

5
Grounding Instructions
4-Ø9 HOLES
134
134
Mounting Hole Specications
•
Machine holes on the mounting surface referring to
the diagram below.
M4 ground contact part
•
3OHDVHXVHDQ0EROWDWWKHORFDWLRQPDUNHGLQWKHGLDJUDP
above to ground the product.
•
When connecting the grounding cable, please use a ring terminal.
• P
lease use a grounding cable with a diameter greater than 4mm.
■ Xenon Bulb Replacement Instructions(SESAS only)
Installation Environment and Protection Rating
Bulb/ Xenon Bulb Replacement Instructions
• This product is designed to be explosion proof.
3OHDVHPDNHVXUHWRXVHWKHSURGXFWLQDQHQYLURQPHQWWKDWPHHWVWKHVSHFL¿HGH[SORVLRQSURRIUDWLQJDQGUHJXODWLRQV
)RUIXUWKHULQIRUPDWLRQSOHDVHYLVLWRXUZHEVLWHZZZTOLJKWFRP
3OHDVHZDLWDWOHDVWPLQXWHVDIWHUWXUQLQJRWKHSRZHUEHIRUH
replacing the xenon bulb.
• Please pull out the entire xenon bulb structure
①
to disassemble
ZKLOHSXVKLQJWKHKRRNGRZQ
)RU[HQRQEXOEDVVHPEO\SOHDVHSXVKGRZQWKHFRQQHFWRU
portion of the xenon bulb structure to the connector pin
location
②
XQWLOLWPDNHV‡FODUN·VRXQG
①
②
• Please wait at least 1PLQXWHDIWHUWXUQLQJRWKHSRZHU
before replacing the bulb.
• In order to dissemble the bulb, please push down the bulb ①
OLJKWO\DQGVFUHZLWFRXQWHUFORFNZLVH
• In order to put the bulb in to the unit, please place the bulb ①
LQWKHVRFNHW
②DQGVFUHZLWFORFNZLVHZKLOHOLJKWO\SXVKLQJ
down the bulb.
Assemble bulb Assemble bulb
Disassemble bulb
Disassemble bulb
v
Bulb Replacement Instructions(SESA only)
①
②
Precautions for installation
• In case of outdoor applications, install the product in the upright
SRVLWLRQ’RQRWLQVWDOOWKHSURGXFWKRUL]RQWDORUXSVLGHGRZQ
positions where water can potentially penetrate into the product
and impact it’s operation.
Left direction Reverse direction Right direction
[Installation]

Product installation direction
■ Install the product in accordance with the manual. Otherwise rainwater or moisture may penetrate into the product.
ㆍ(/(&7521,&6281’(56,*1$/+251
6RXQGHUSDUWVKDOOQRWEHIDFLQJWKHVN\
ㆍ%($&216,*1$/,1*/,*+7
3RZHUFRUGLQOHWSDUWVKDOOQRWEHIDFLQJWKHVN\
ㆍ6,*1$/72:(5/,*+76
ㆍ+($9<’87<(;3/26,213522)6,*1$/,1*6
※)RUSURGXFWVZLWKDSURWHFWLRQUDWLQJRIOHVVWKDQ,3;SOHDVHLQVWDOOLWYHUWLFDOO\

MEMO

+HDG2FH_6XLWH67;97RZHU*DVDQGLJLWDOUR*HXPFKHRQJX6HRXO.RUHD
7HO7ROOIUHH)D[
)DFWRU\_0XNEDQJUR6DQJGRQJP\HRQ*LPKDHVL*\HRQJVDQJQDPGR.RUHD7HO7ROOIUHH
4OLJKW2YHU6($V6DOHV’HSW_
1DNGRQJGDHUR6DVDQJJX%XVDQ.RUHD(RPJXQJ’RQJ7HO
4OLJKW3XEOLF5HODWLRQV0DUNHWLQJ7HDP2FH_1DNGRQJGDHUR6DVDQJJX%XVDQ.RUHD(RPJXQJ’RQJ7HO
1RUWK)LUVW6WUHHW6XLWH6DQ-RVH&$86$7HO)D[
&KLQD)DFWRU\6KDQJKDL6DOHV2FH_1DQGD5RDG%DRVKDQ$UHD6KDQJKDL&KLQD7HO
21
6651
)D[
21
6315
3929
&KLQD)DFWRU\6LWH4LGRQJ_+DL\DQ5RDG4LGRQJ+LJKWHFK,QGXVWULDO’HYHORSPHQW=RQH4LGRQJ-LDQJVX3URYLQFH&KLQD
Tel +86
513
8384
)D[
513
8384
9910
3URGXFW2SHUDWLRQ,QTXLU\&XVWRPHU6XSSRUW
You can expect prompt service if you have exact information such as model name, symptom, telephone number and address.
※$//352’8&7352’8&763(&,),&$7,216$1’’$7$$5(68%-(&772&+$1*(:,7+287127,&(72,03529(
5(/,$%,/,7<)81&7,2125’(6,*12527+(5:,6(
+HDGRIILFH6XLWH67;97RZHU*DVDQGLJLWDOUR*HXPFKHRQJX6HRXO.RUHD Postal Code
)DFWRU\0XNEDQJ5R6DQJGRQJ0\HRQ*LPKDH6L*\HRQJVDQJQDP’R.RUHD Postal Code
For your safety
6SHFL¿FDWLRQDQGGLPHQVLRQVOLVWHGLQWKLVFDWDORJXHVXEMHFWWRFKDQJHZLWKRXWQRWLFHIRUSURGXFWTXDOLW\LPSURYHPHQW
7KHQHZHVWSURGXFWLQIRUPDWLRQLVDYDLODEOHRQRXUZHEVLWHZZZTOLJKWFRP
3OHDVHUHDGWKHLQVWUXFWLRQPDQXDODWWDFKHGWRWKHSURGXFWFDUHIXOO\EHIRUHLQVWDOODWLRQDQGXVH
www.qlight.com
(16(6$7,$
This manual suits for next models
3
Table of contents
Other Qlightec Security System manuals