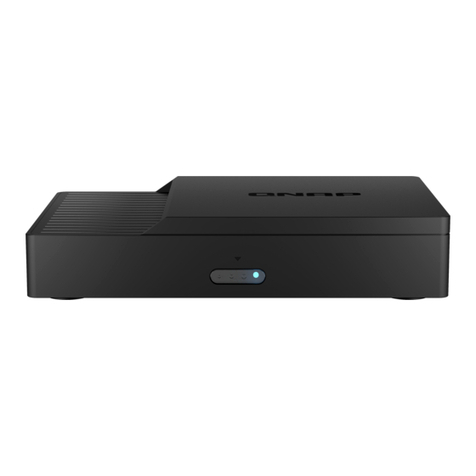
QNAP KoiBox-100W User manual

KoiBox-100W
Quick Start Guide
www.qnap.com

2
Table of contents
Call a Contact 3
Dial a KoiCode 4
Dial a SIP Number 5
Answer Incoming Calls 6
Project Wirelessly 7
Add Contacts 9
Import Contacts from File 11
Record Meetings (1) 12
Record Meetings (2) 13
Play Meeting Recordings 14
Download Meeting Recordings 15
Join Cloud Meetings in a Browser 17
Join Zoom Meetings 19
Join Skype Meetings 21
Host and Join Meetings using Microsoft Teams 23
Change Default Password 25
Change Device Name 27
Enable Automatic Call Answering 29
Disable PIN Code 31
Enable Automatic Call Recording 33

KoiBox
Quick Start Guide
3
Call a Contact
1. Press the return button to
go to the main menu.
2. In the main menu, select
Private Meeting using the
arrow keys and press OK.
3. Select Address Book using
the arrow keys and press
OK.
4. Choose a group using the
arrow keys and press OK.
5. Choose a target using the
arrow keys and press OK.
6. The calling screen appears.
To cancel the call press OK.

4
Dial a KoiCode
1. Press the return button to
go to the main menu.
2. In the main menu, select
Private Meeting using the
arrow keys and press OK.
3. Select Dial Pad using the
arrow keys and press OK.
4. Enter a KoiCode number
using the arrow keys and
press OK.
5. Select Call using the arrow
keys and press OK.
6. The calling screen appears.
To cancel the call press OK.
5

KoiBox
Quick Start Guide
5
1. Press the return button to
go to the main menu.
2. In the main menu, select
Private Meeting using the
arrow keys and press OK.
3. Select Dial Pad using the
arrow keys and press OK.
4. Enter an SIP IP using the
arrow keys and press OK.
5. Select Call using the arrow
keys and press OK.
6. The calling screen appears.
To cancel the call press OK.
Dial a SIP Number
5

6
1. KoiBox displays the call
answer screen when KoiBox
receives a call.
2. Choose to answer the call
using the arrow keys and
press OK.
Answer Incoming Calls
Your KoiBox KoiCode and SIP
(IP) are displayed on the main
menu.
Other parties can call you
using these KoiCode / SIP (IP)
numbers.
7

KoiBox
Quick Start Guide
7
1. Press the return button to
go to the main menu.
2. Take note of the Screen
Sharing IP displayed on
your screen.
3. Enter the Screen Sharing IP
in your web browser and
log in to KoiMeeter.
Project Wirelessly
Note: Only Chrome and Firefox
support wireless projection.
(Skip this step if you are not
using Chrome with macOS)
3.1. Enter "thisisunsafe" and
click Next.
(Skip this step if you are not
using Chrome with macOS)
3.2 Click Advanced and enter
"thisisunsafe" to log in to
KoiMeeter.
7

8
Project Wirelessly
4. Choose Wireless Projection.
5. Choose what to share and
click Share.
Note: You can choose to play
sound in the screen with Entire
Screen or Chrome Tab if you are
using Chrome with Windows.

KoiBox
Quick Start Guide
9
1. Press the return button to
go to the main menu.
2. Take note of the Screen
Sharing IP displayed on
your screen.
3. Enter the Screen Sharing IP
in your web browser and
log in to KoiMeeter.
Add Contacts
Note: Only Chrome and Firefox
support wireless projection.
(Skip this step if you are not
using Chrome with macOS)
3.1. Enter “thisisunsafe” and
click Next.
(Skip this step if you are not
using Chrome with macOS)
3.2 Click Advanced and enter
“thisisunsafe”to log in to
KoiMeeter.

10
Add Contacts
8. Enter the Device Name,
Category, Device IP or
KoiCode, and click Apply.
4. Click the top-right hamburger
icon and click Meeting &
Contact Settings.
5. Log in to your account.
6. Choose AddressBook.
7. Click +Add > Device.
Note: Select Category to add a group.
• Default username: “user”
• Default password: The device MAC
address
Note: Check the
KoiBox sticker for
the MAC address.

KoiBox
Quick Start Guide
11
Import Contacts from File
1. Select AddressBook.
2. Click Download address
book template to download
a template CSV le.
3. Open the template CSV le.
Enter your contacts' information
under the following columns:
4. Click Import.
5. Select the CSV le and click
Open to import the contacts
contained in the le.
• Category: The Group name
• Name: The Device name
• Protocol Settings: Enter“sip”or
“koicode”
• Address: The SIP or KoiCode.

12
1. Press the return button to
go to the main menu.
2. In the main menu, select
Record using the arrow
keys and press OK.
3. Read the warning message.
Click OK to start recording
or Cancel to abort.
Record Meetings (1)
4. Press the down arrow key
to display the menu and
select Stop Recording.
Press OK after ending the
meeting.

KoiBox
Quick Start Guide
13
1. Press the down arrow key
to display the menu. Select
Record and press OK.
2. Read the warning message.
Click OK to start recording
or Cancel to abort.
Record Meetings (2)
3. Press the down arrow key
to display the menu and
select Stop Recording.
4. Press OK to save the
meeting recording.

14
1. Press the return button to
go to the main menu.
2. In the main menu, select
Recordings using the
arrow keys and press OK.
Play Meeting Recordings
3. Select a video using arrow
keys and press OK to play
the video.
4. Press the down arrow key
to display the menu. Use
the media control symbols
to control playback and
play next/previous videos.

KoiBox
Quick Start Guide
15
1. Press the return button to
go to the main menu.
2. Take note of the Screen
Sharing IP displayed on
your screen.
3. Enter the Screen Sharing IP
in your web browser and
log in to KoiMeeter.
Download Meeting Recordings
Note: Only Chrome and Firefox
support wireless projection.
(Skip this step if you are not
using Chrome with macOS)
3.1. Enter “thisisunsafe” and
click Next.
(Skip this step if you are not
using Chrome with macOS)
3.2 Click Advanced and enter
“thisisunsafe”to log in to
KoiMeeter.

16
Download Meeting Recordings
4. Click the top-right hamburger
icon and click Meeting &
Contact Settings.
5. Log in to your account.
6. Click Meeting Minutes.
7. Click the hamburger icon under
Actions and click Download.
8. Click Apply to download the
meeting recording. You can
password protect the recording
if necessary.
• Default username: "user"
• Default password: The device MAC address
Note: Check the
KoiBox sticker for
the MAC address.

KoiBox
Quick Start Guide
17
1. Press the return button to
go to the main menu.
2. In the main menu, select
Cloud Meeting using the
arrow keys and press OK.
3. Enter the IP address in red
circle in PC browser.
Join Cloud Meetings in a Browser
Note: A mouse and keyboard is
required.
(Refer to steps 6-1 to 6-4 for
getting an invitation link).
4. Enter IP address from step
3 in the PC browser address
bar and press enter.
5. Paste the invitation link in
the blank column and click
OK.

18
Join Cloud Meetings in a Browser
Teams invitation link.
6.1.
Skype invitation link.
6.2.
Zoom invitation link.
6.3.
Google Meet invitation link.
6.4.
Note: KoiBox supports most
cloud meeting services such as
Teams, Skype, Zoom, Google
Meet, and Webex.

KoiBox
Quick Start Guide
19
1. Press the return button to
go to the main menu.
2. In the main menu, select
Cloud Meeting using the
arrow keys and press OK.
3. Select Zoom using the
arrow keys and press OK.
Join Zoom Meetings
Note: A mouse and keyboard is
required.
(e.g. https://zoom.us/97741552013)
4. Enter the last part of the
invitation link.
5. Copy the last part of the
Zoom invitation link.

20
Join Zoom Meetings
6. Paste the last part of the
invitation link and click OK.
7. Join the Zoom meeting.
Other manuals for KoiBox-100W
1
Table of contents
Other QNAP Conference System manuals
Popular Conference System manuals by other brands

Danish Interpretation Systems
Danish Interpretation Systems DCS 6000 user manual

Grandstream Networks
Grandstream Networks GVC3220 user guide

RADVision
RADVision Scopia XT5000 Series Quick setup guide

AT&T
AT&T MERLIN LEGEND Release 2.0 Analog Multiline... Installation section

Yealink
Yealink MVC860-C5-713 manual

Crestron
Crestron Mercury CCS-UC-1 Configuration guide