Assembly tips:
●Presort the various parts and place similar types in small paper picnic bo ls. Resistors in one, capacitors in another, and so on.
This ill not only speed assembly, but ill also help keep parts from getting lost. If you like, you can also cross check the parts
against the parts list as you do this to make sure you have them all.
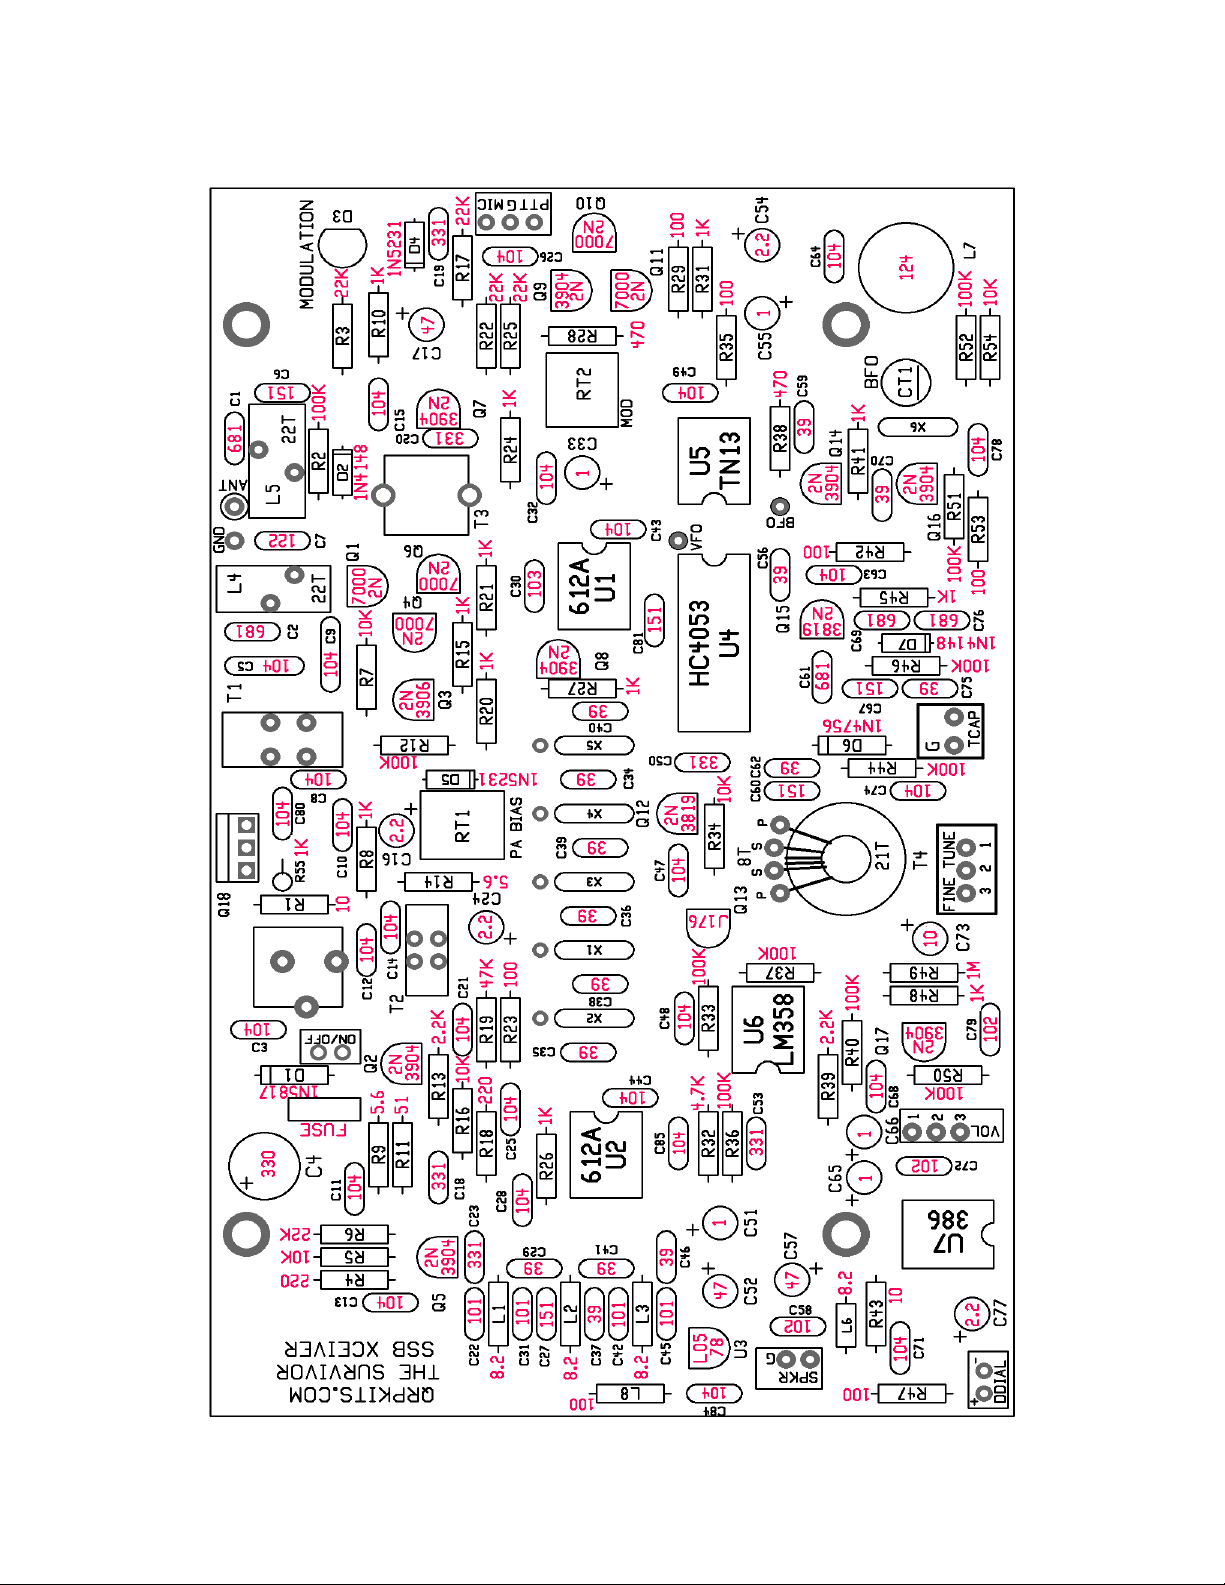
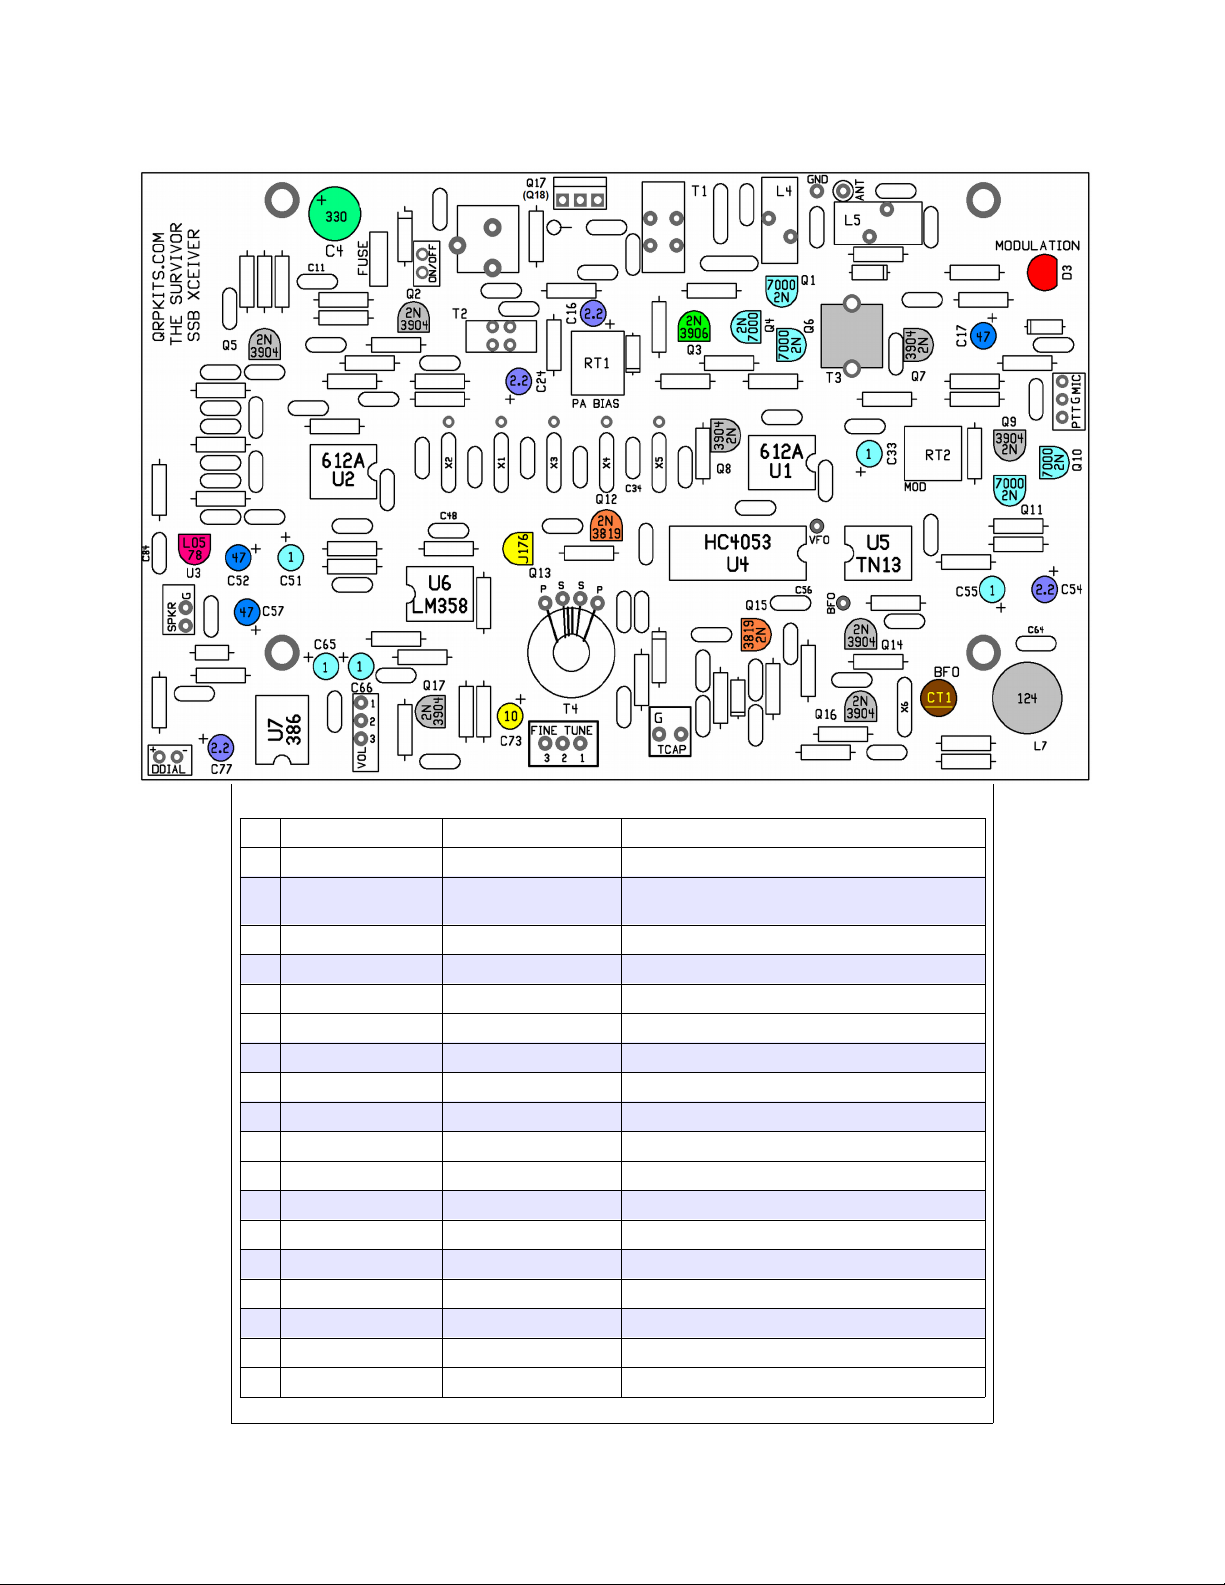
● Be sure to print out the black and hite parts placement diagram as this ill be easier to reference most of the time. You really
don't have to print out the hole manual if you have a laptop or equivalent on your orkbench to vie this.
●Hopefully you already kno ho to solder and don't need to be told to heat both the component lead and the solder pad ith the
tip of the soldering iron. Be stingy ith the solder. You don't need much, only enough to fill up the hole. Using 0.020” diameter
solder allo s better control then the more common 0.032”.
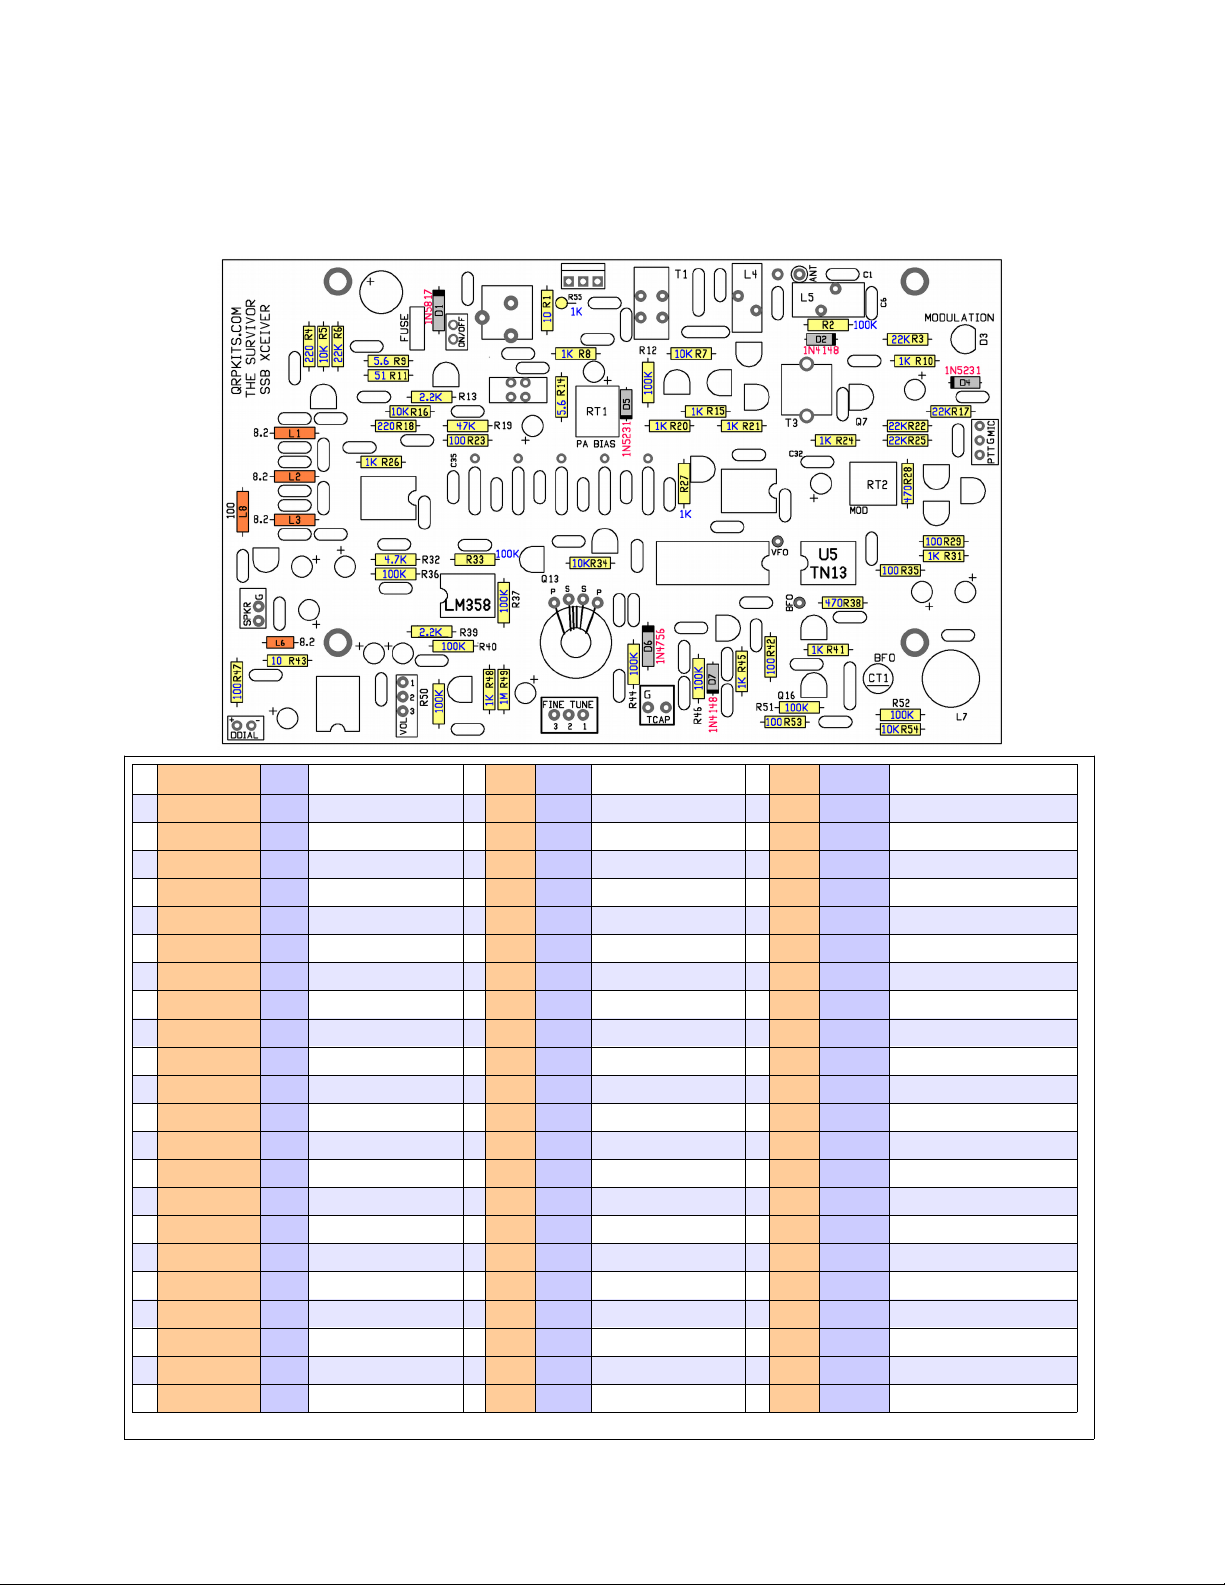
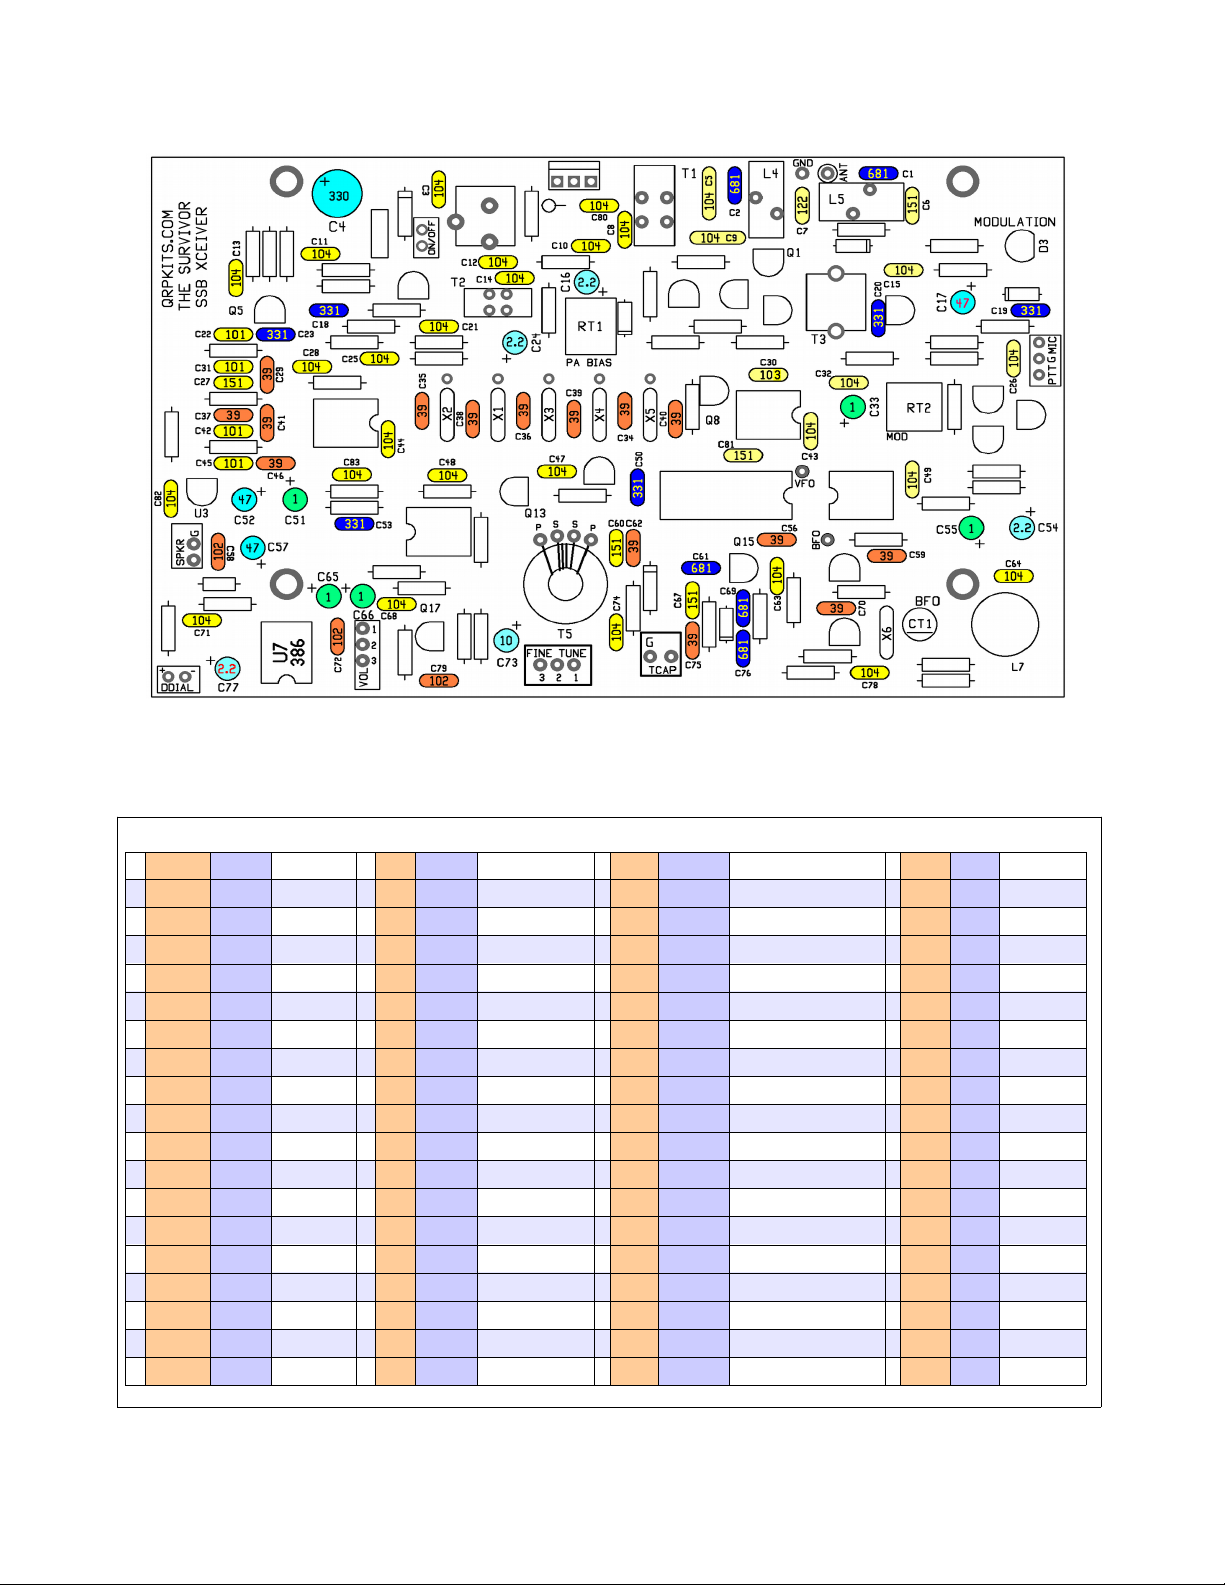
●The circuit board is assembled in the order of parts height. Lo profile parts starting ith resistors are installed first, the
progressively taller parts are added.
●Q16, the transmitter output transistor ill be the very last part mounted and only after the board has been ired into the case and
tested.
●If you bought the Digital Dial option, it ould be a good idea to built and calibrate this first. The Digital Dial can be used to adjust
the VFO coil to put the tuning into the proper range.
Cabinet prep:
●There is a “Modulation” indicator LED on the board, hich you might ant to bring out to the front panel. This ould require drilling
a small hole someplace on the front, hich ould best be done no .
●If desired, paint the cabinet.
●Tape the red film over the display cutout on the front panel. If you'll be using the optional Digital Dial, snip the corner of the film to
uncover the s itch hole.
●Attach the tilt bail to the bottom of the case and add the four rubber feet bumpers.
●Attach the decals as described belo .
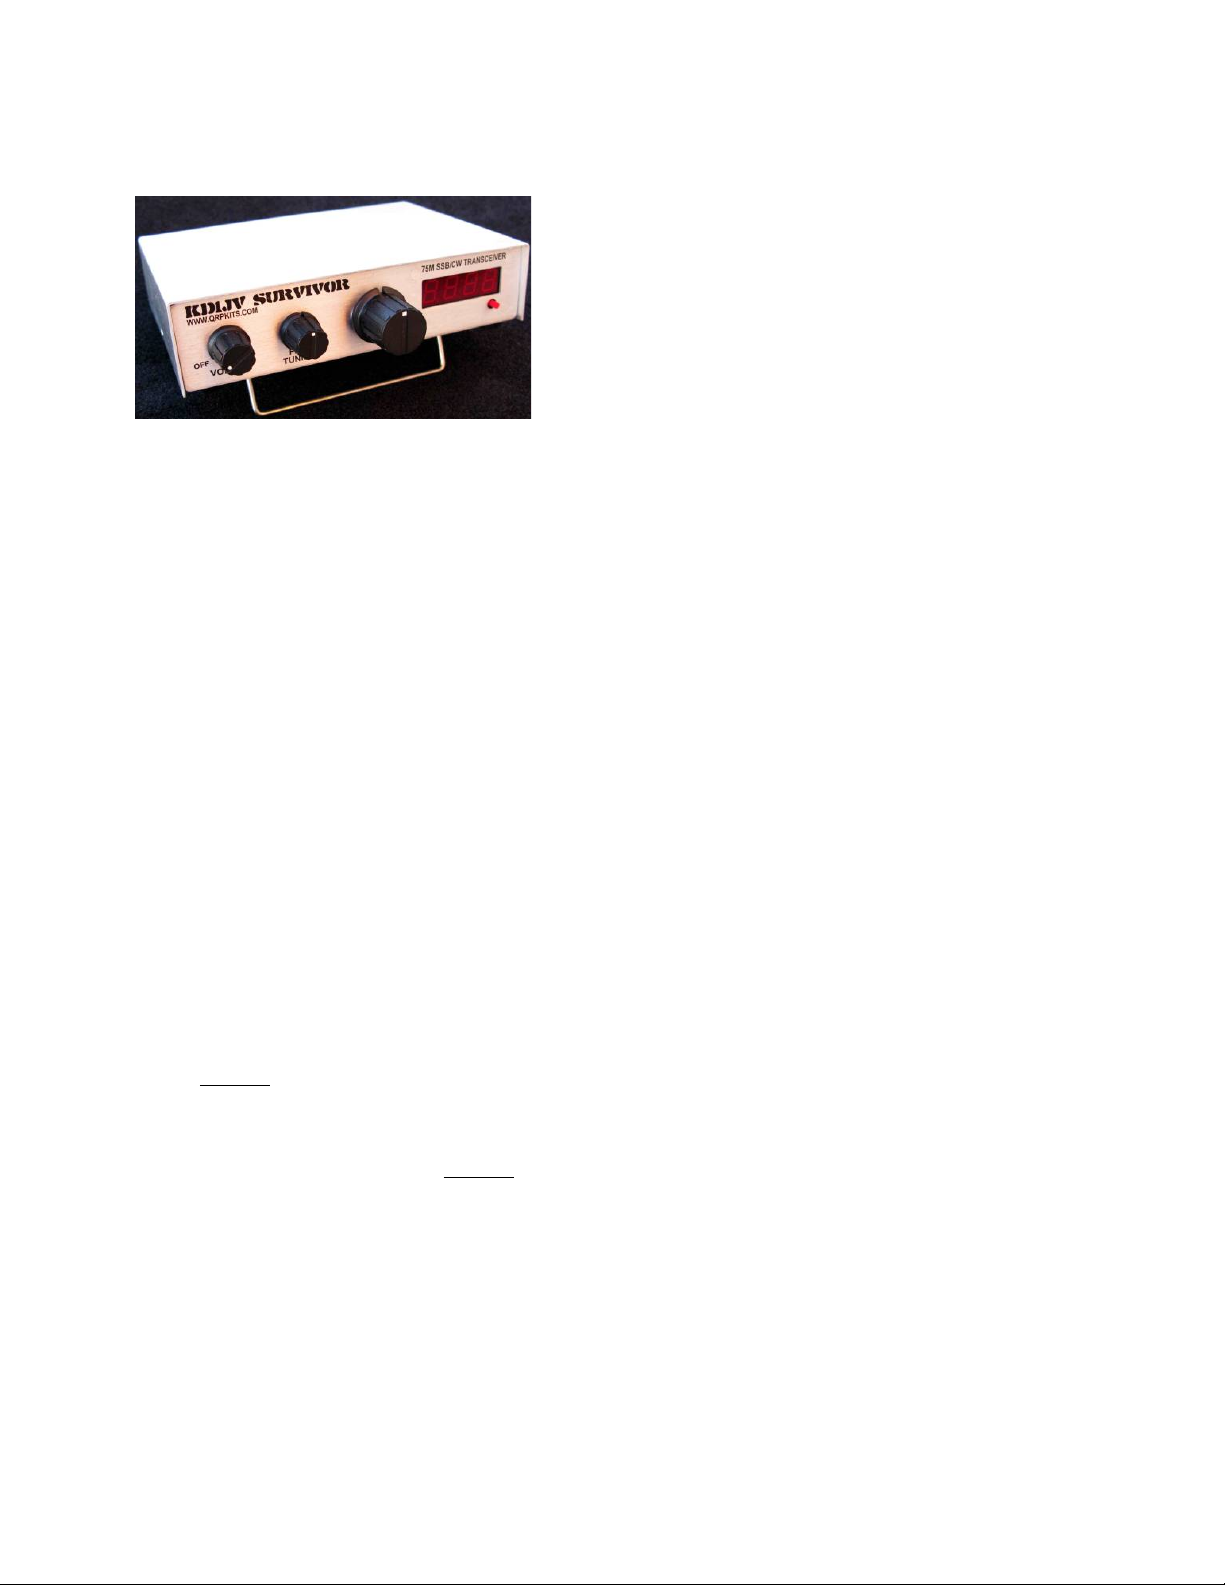
The decals are applied the same as model decals. Cut around each group of text or symbols you ish to apply. It doesn’t have to be perfect
as the background film is transparent. Apply the decals before you mount anything to the chassis. Use the above picture to get the correct
spacing around the holes and cutouts, as it is very easy to do a great decal installation and have a portion covered up ith a knob
Thoroughly clean the sur ace o the panel to remove any oils or contamination. We have ound that moving the decals into
position on bare aluminum chassis is di icult, due to the brushed sur ace, so we advise pre-coating the chassis with the Krylon
clear be ore applying the decals, and then, a ter as well.
Trim around the decal. After trimming, place the decal in a bo l of luke arm ater, ith a small drop of dish soap to reduce the surface
tension, for 10-15 seconds. Using t eezers, handle carefully to avoid tearing. Start to slide the decal off to the side of the backing paper, and
place the unsupported edge of the decal close to the final location. Hold the edge of the decal against the panel, ith your finger, and slide
the paper out from under the decal. You can slide the decal around to the right position, as it ill float slightly on the film of ater. Use a knife
point or something sharp to do this. When in position, hold the edge of the decal ith your finger and gently squeegee excess ater out from
under the decal ith a tissue or paper to el. Work from the center, to both sides. Remove any bubbles by blotting or iping gently to the
sides. Do this for each decal, and take your time. Allo to set overnight, or speed drying by placing near a fan for a fe of hours. When dry,
spray t o light coats of matte finish, Krylon, clear to seal and protect the decals, and allo to dry in bet een coats. All decals come ith t o
complete sets, in case you mess one up.
SurvivorB1_20171113 6