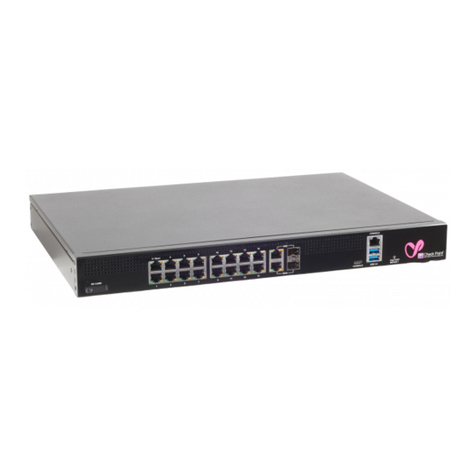
Quantum SMART-1 6000-L User manual

[Classification: Protected]
17 February 2022
QUANTUM SMART-1
6000-L/6000-XL
APPLIANCES
REPLACING SAN CARDS

Check Point Copyright Notice
© 2021 - 2022 Check Point Software Technologies Ltd.
All rights reserved. This product and related documentation are protected by copyright and distributed under
licensing restricting their use, copying, distribution, and decompilation. No part of this product or related
documentation may be reproduced in any form or by any means without prior written authorization of Check
Point. While every precaution has been taken in the preparation of this book, Check Point assumes no
responsibility for errors or omissions. This publication and features described herein are subject to change
without notice.
RESTRICTED RIGHTS LEGEND:
Use, duplication, or disclosure by the government is subject to restrictions as set forth in subparagraph (c)
(1)(ii) of the Rights in Technical Data and Computer Software clause at DFARS 252.227-7013 and FAR
52.227-19.
TRADEMARKS:
Refer to the Copyright page for a list of our trademarks.
Refer to the Third Party copyright notices for a list of relevant copyrights and third-party licenses.

Quantum Smart-1 6000-L/6000-XL Appliances Replacing SAN Cards
Quantum Smart-1 6000-L/6000-XL Appliances Replacing SAN Cards |3
Important Information
Latest Software
We recommend that you install the most recent software release to stay up-to-date with the
latest functional improvements, stability fixes, security enhancements and protection against
new and evolving attacks.
Certifications
For third party independent certification of Check Point products, see the Check Point
Certifications page.
Check Point Quantum Smart-1 6000-L/6000-XL Appliances Replacing SAN
Cards
For more about this release, see the home page.
Latest Version of this Document in English
Download the latest version of this document in PDF format.
Feedback
Check Point is engaged in a continuous effort to improve its documentation.
Please help us by sending your comments.
Revision History
Date Description
17 February 2022 Rebranding - New Check Point logo
28 February 2021 First release of this document

Table of Contents
Quantum Smart-1 6000-L/6000-XL Appliances Replacing SAN Cards |4
Table of Contents
Safety Instructions
5
Hardware Components
6
Procedure
7
Preparing the Appliance
7
Replacing the Bracket on a SAN Card
8
Removing the Riser
10
Installing an Expansion SAN Card into the Riser
11
Removing an Expansion SAN Card from the Riser
12
Installing the Riser
13
Reassembling the Appliance
13
Replacing a Transceiver
14
Attaching Cables
15
Viewing LEDs on the SAN Card
16

Safety Instructions
Quantum Smart-1 6000-L/6000-XL Appliances Replacing SAN Cards |5
Safety Instructions
nLift the appliance with assistance. To avoid injury, do not attempt to lift the appliance by yourself.
nOpening or removing the appliance cover, while the appliance is powered on may expose you to a
risk of electric shock.
nDo not operate the appliance without the cover for more than five minutes. Operating the appliance
without the cover can result in component damage.
nMany repairs may only be done by a certified service technician. Only perform troubleshooting and
simple repairs as authorized in your product documentation, or as directed by the technical support.
nWe recommend that you always use an antistatic mat and antistatic strap on your wrist, while working
on components inside the appliance.
nTo ensure proper operation and cooling, all bays in the appliance and cooling fans must be always
populated with a component or a blank.
For more information, see the
Enterprise Products Safety, Environmental, and Regulatory Information
booklet supplied in the original appliance shipping carton.
Best Practice - We recommend that only experienced personnel install or remove
hardware components. Installing or removing components incorrectly can permanently
damage the Security Appliance.
Important - Make sure that you are electromagnetically grounded when working with
hardware components of the appliance. ESD (electrostatic discharge) can damage the
appliance.

Hardware Components
Quantum Smart-1 6000-L/6000-XL Appliances Replacing SAN Cards |6
Hardware Components
Item Description
1 Front panel
2 Riser 1
3 Rear panel

Procedure
Quantum Smart-1 6000-L/6000-XL Appliances Replacing SAN Cards |7
Procedure
Use the relevant install or replace workflow for your appliance. For each step in the workflow, follow the
instructions as described in the subsequent sections of this guide.
To install a new expansion SAN card:
1. Prepare the appliance with a shut down, halt and disconnection of power.
2. If necessary, replace the short bracket on the new SAN card with the supplied larger bracket.
3. Install a new expansion SAN card into the riser.
Best Practice - We recommend that you populate the bottom-most slot first.
4. Reassemble the appliance.
5. Install a transceiver.
To replace an existing expansion SAN card:
1. Prepare the appliance with a shut down, halt and disconnection of power.
2. Remove the existing expansion SAN card from the riser.
3. If necessary, replace the short bracket on the new SAN card with the supplied larger bracket.
4. Install a new expansion SAN card into the riser.
5. Reassemble the appliance.
6. Install a transceiver.
Preparing the Appliance
To prepare the appliance:
1. Make sure to follow the
Safety Instructions
.
2. Shut down the appliance:
nIn Gaia Portal:
Go to Maintenance >Shut Down, and click Halt.
nIn Gaia Clish:
Run: halt
3. Open the retention strap that secures the power cables to the PSUs.
4. If AC PSUs are installed in the appliance:
Disconnect the power cables from the AC PSUs.
5. If DC PSUs are installed in the appliance:

Procedure
Quantum Smart-1 6000-L/6000-XL Appliances Replacing SAN Cards |8
Disconnect the safety ground wires from the DC PSUs.
Disconnect the DC power connectors from the DC PSUs.
6. Remove the hook-and-loop straps that hold and secure the system cables, if they interfere with the
PSU removal.
7. Remove any other attached cables, if necessary.
8. Remove the appliance from the rack. See the
Installing the Quantum Smart-1 6000-L/6000-XL
Telescopic Rails
booklet for illustrated installation procedures.
9. Put the Electrostatic Discharge (ESD) grounding strap on your wrist and attach the other end to a
grounding point.
10. Remove the appliance cover:
a. Use a flat or a Phillips head screwdriver to rotate the latch release lock counter-clockwise to the
unlocked position.
b. Lift the latch.
c. Slide the cover back.
The tabs on the cover should disengage from the guide slots on the appliance.
d. Hold the cover on both sides and lift the cover away from the appliance.
Replacing the Bracket on a SAN Card
The Emulex LPe31002 Dual, 16GFC Host Bus Adapter SFP+ is shipped with a short and long bracket.
nIf the long bracket is attached to the SAN card, no replacement is necessary and you can continue to
install the card in the riser.
nIf the short bracket is attached to the SAN card, follow the instructions below to replace it with the long
bracket supplied in the carton.
Note - The optical transceivers on the SAN card are delicate.
nRemove and install the transceivers carefully.
nUse ESD (Electrostatic Discharge) precautions such as an antistatic floor mat and an antistatic wrist
strap.

Procedure
Quantum Smart-1 6000-L/6000-XL Appliances Replacing SAN Cards |9
To remove the transceivers:
1. Pull the bail (handle) out and down to release the latch for a typical optical transceiver.
2. Pull the transceiver gently (without force).
3. The transceiver slides out easily after the latch releases.
4. Remove the second optical transceiver.
5. Store the transceivers in a safe place using ESD (Electrostatic Discharge) precautions such as
antistatic bags.
To remove the bracket:
1. Remove the mounting bracket screws from the top of the adapter.
2. Remove the bracket.

Procedure
Quantum Smart-1 6000-L/6000-XL Appliances Replacing SAN Cards |10
3. Align the new longer bracket tabs with the holes in the adapter.
Notes:
nBe careful not to push the bracket past the EMI (Electromagnetic Interference) compression
tabs of the SFP+ (Small Form-Factor Pluggable) transceiver cages.
nMake sure that the LEDs for the SAN card ports align properly with the holes in the bracket.
4. Reinstall the screws to attach the new bracket to the SAN card.
To reinstall the transceivers:
1. Slide the transceiver into the housing.
2. Gently engage the latch until it clicks.
3. Push the bail (handle) back into place.
Removing the Riser
Press the release latches, and lift the riser from the riser connector on the system board.

Procedure
Quantum Smart-1 6000-L/6000-XL Appliances Replacing SAN Cards |11
Installing an Expansion SAN Card into the Riser
1. Unpack the expansion SAN card and prepare it for installation.
2. If applicable, lift/pull the expansion SAN card latch and remove the filler bracket.
3. Hold the card by its edges, and align the card edge connector with the expansion SAN card connector
on the riser.
4. Insert the card edge connector firmly into the expansion SAN card connector until the card is fully
seated.
5. Close/push the expansion SAN card latch.
Installing an expansion SAN card into the expansion riser 1:
Best Practice - We recommend that you populate the bottom-most slot first.

Procedure
Quantum Smart-1 6000-L/6000-XL Appliances Replacing SAN Cards |12
Removing an Expansion SAN Card from the
Riser
1. If applicable, lift the expansion SAN card latch(es) out of the slot.
2. Hold the expansion SAN card by its edges, and pull the card until the card edge connector
disengages from the expansion SAN card connector on the riser.
Note - If you do not immediately install a replacement expansion SAN card when a SAN card fails,
leave the failed SAN card in place to ensure proper appliance cooling until the new SAN card is
installed.

Procedure
Quantum Smart-1 6000-L/6000-XL Appliances Replacing SAN Cards |13
Installing the Riser
Align the guide rails on the riser with the standoffs on the side of the system.
Lower the riser into the system until the riser connector engages with the connector on the system board.
Reassembling the Appliance
To reassemble the appliance:
1. Install the cover.
a. Make sure all internal cables are routed correctly and connected, and no tools or extra parts
are left inside the system.
b. Align the tabs on the cover with the guide slots on the appliance.
c. Push the latch down.
d. Slide the cover forward.
The tabs on the cover should engage with the guide slots on the appliance.
The latch should lock into place.
e. Use a flat or Phillips head screwdriver to rotate the latch release lock clockwise to the locked
position.
2. Install the appliance into the rack. See the
Installing the Quantum Smart-1 6000-L/6000-XL
Telescopic Rails
booklet for illustrated installation procedures:
3. If you have transceivers for your expansion SAN card, install them now.
See
"Replacing a Transceiver" on the next page
.
If not, install them later.
4. If AC PSUs are installed in the appliance:
Connect the power cables from the AC PSUs.

Procedure
Quantum Smart-1 6000-L/6000-XL Appliances Replacing SAN Cards |14
5. If DC PSUs are installed in the appliance:
Connect the safety ground wires from the DC PSUs.
Connect the DC power connectors from the DC PSUs.
6. If you opened the hook-and-loop straps, close them to secure the system cables.
7. Make a loop and secure the power cables to the PSUs using the retention strap.
8. Press the Power button on the front panel to turn on the Security Appliance.
Replacing a Transceiver
If your expansion SAN card contains removable transceivers, you can install and replace these
transceivers.
Note - The optical transceivers on the SAN card are delicate.
nRemove and install the transceivers carefully.
nUse ESD (Electrostatic Discharge) precautions such as an antistatic floor mat and an antistatic wrist
strap.
nStore transceivers in a safe place using ESD (Electrostatic Discharge) precautions such as antistatic
bags.
To install a transceiver:
1. Push the transceiver into an expansion SAN card port gently until it snaps into position.
2. Turn the transceiver latch lever up to lock into the expansion SAN card.
3. Connect the fiber optic cable to the transceiver.
To remove a transceiver:
1. Disconnect the fiber optic cables from the transceiver.
2. Pull the latch lever down to release the transceiver.
3. Gently, pull the transceiver out of the expansion SAN card.

Attaching Cables
Quantum Smart-1 6000-L/6000-XL Appliances Replacing SAN Cards |15
Attaching Cables
The Emulex Host Bus Adapter (16GFC) has two ports (Port 0 and Port 1) for fiber optic cables.
These tables show the supported cables with length limitations for 16GFC.
Multimode Fiber Optic Cables with Short-Wave Lasers
Fiber-Optic Cable Maximum
Length
Min
Length Connector
OM4: Multimode 50/125 micron fiber (4700 MHz*km
bandwidth cable)
4GFC: 0.5m to
400m
8GFC: 0.5m to
190m
16GFC: 0.5m to
125m
0.5m LC
OM3: Multimode 50/125 micron fiber (2000 MHz*km
bandwidth cable)
4GFC: 0.5m to
380m
8GFC: 0.5m to
150m
16GFC: 0.5m to
100m
0.5m LC
OM2: Multimode 50/125 micron fiber (500 MHz*km
bandwidth cable)
4GFC: 0.5m to
150m
8GFC: 0.5m to
50m
16GFC: 0.5m to
35m
0.5m LC
OM1: Multimode 62.5/125 micron fiber (200 MHz*km
bandwidth cable)
4GFC: 0.5m to
70m
8GFC: 0.5m to
21m
16GFC: 0.5m to
15m
0.5m LC

Viewing LEDs on the SAN Card
Quantum Smart-1 6000-L/6000-XL Appliances Replacing SAN Cards |16
Viewing LEDs on the SAN Card
After the cabling is complete, make sure to see the LEDs on each port.
Self-Test Conditions and Results for the Ports
Green LED Yellow LED State
Off Off No SFP modules installed or boot failure (dead board)
Off On POST failure (dead board)
Off Slow blink Boot failure after POST
Off Flashing POST processing in progress
On Off Failure in common code module
On On Failure in common code module
On 2 Fast blinks Normal (link up at 4GFC)
On 3 Fast blinks Normal (link up at 8GFC)
On 4 Fast blinks Normal (link up at 16GFC)
On 5 Fast blinks Normal (link up at 32GFC)
Slow blink Off Normal link down
Fast blink Fast blink Beaconing
This manual suits for next models
1
Table of contents
Other Quantum Network Hardware manuals
Quantum
Quantum B DLTSAGE SELLSHEET User manual

Quantum
Quantum TC2201E User manual

Quantum
Quantum DX Series User manual

Quantum
Quantum FC420 User manual

Quantum
Quantum VS2112-NVR User manual

Quantum
Quantum CHECK POINT 16000 User manual

Quantum
Quantum Scalar 50 Quick start guide

Quantum
Quantum LightSpeed Appliance QLS250 User manual

Quantum
Quantum Prism FC470 User manual
Quantum
Quantum DXi4800 User manual