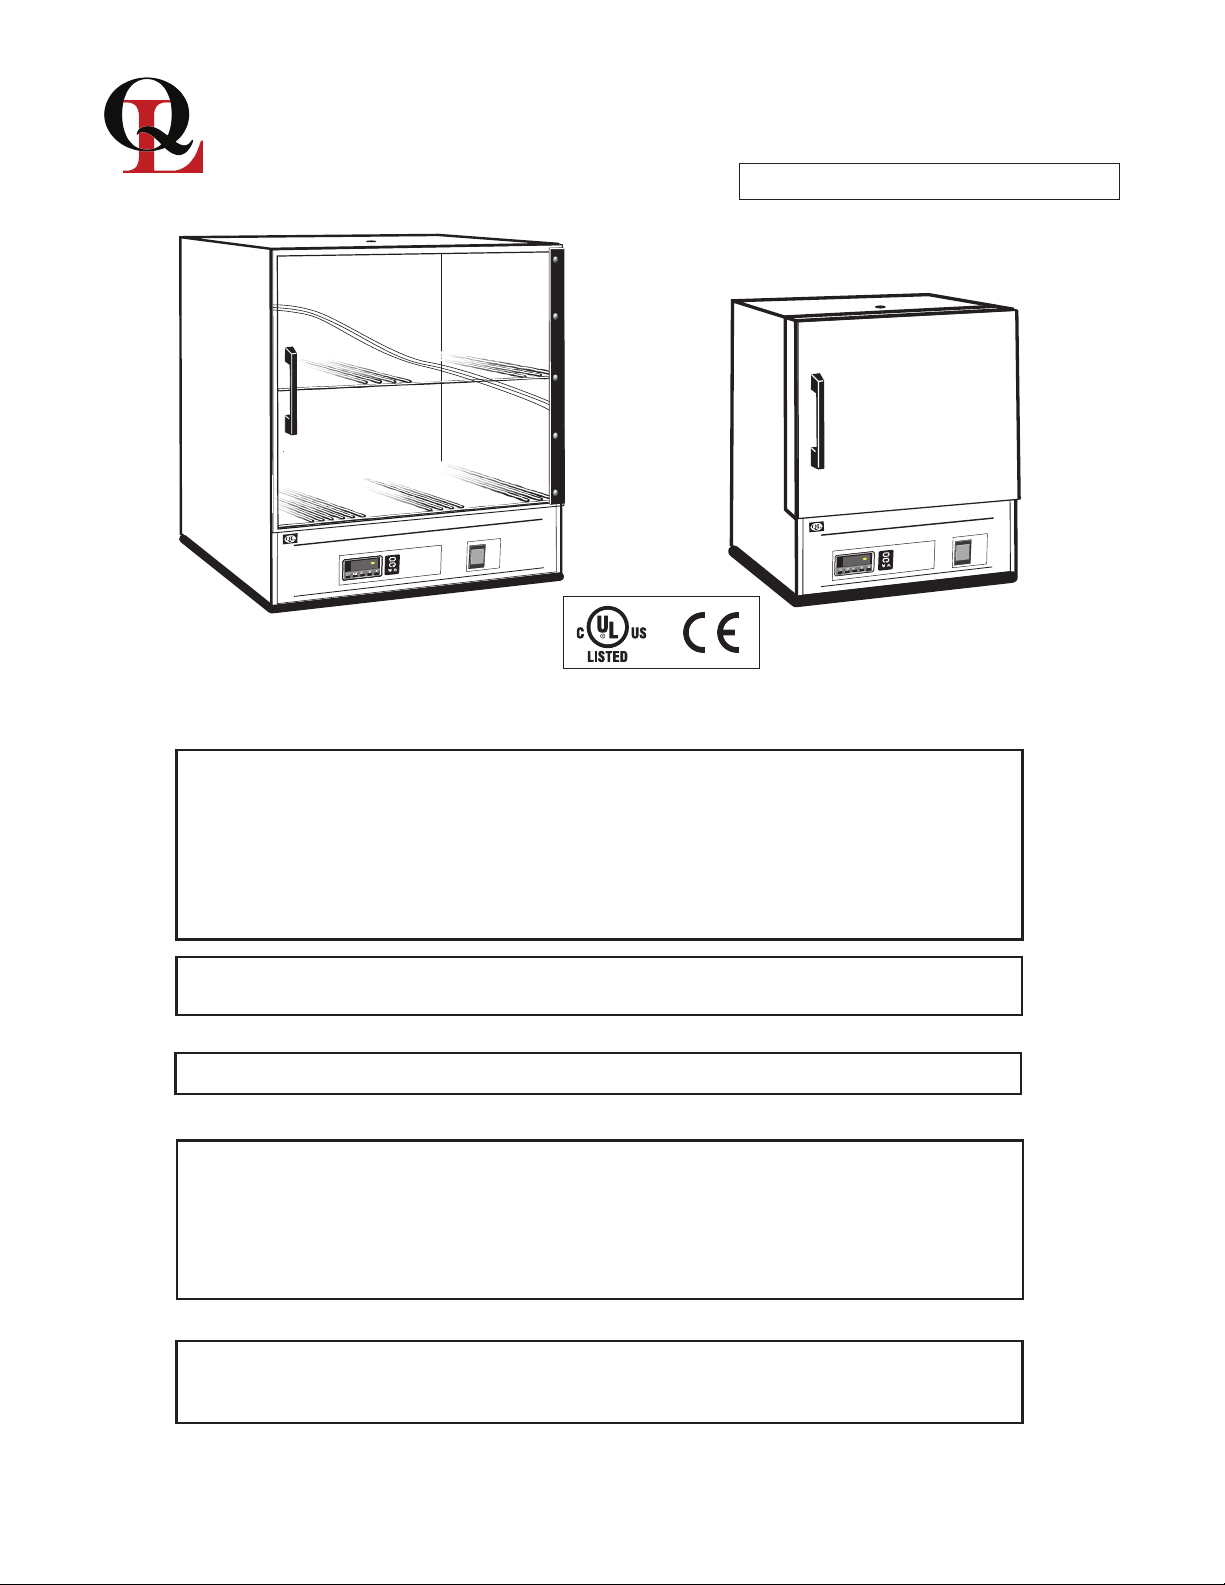
140E & 180E DIGITAL MODELS
Maintenance
To clean interior and exterior surfaces, use a damp cloth with or without an all-purpose cleaner. Avoid commercially available
oven cleaners. The acrylic door should only be cleaned using a lint-free cloth, with or without water. Paper towels can mar
the surface of the acrylic door. Use of any commercial cleansers on the acrylic door will cause crazing and cracking of the
.
PAGE 6
Unit not turning ON
when switch is in the
ON position
1. Check if the unit tripped a GFCI outlet or fuse. Try a different
power outlet connection before moving to number 2 on this list.
2. Check (red) fuse holder in the back of the unit for missing
fuse or broken fuse. Replace as needed.
3. Check all wire connections in the electrical area (bottom) and
make sure there are no loose or disconnected wires in the unit.
Incubator not heating
or over heating.
2.Turn unit OFF and ON to clear (SUB/OUT) Alarm, if the
problem persists contact Quincy Lab. for further assistance.
Common Replacement Components Common Additional Equipment
Digital P.I.D Controller 10 Series Wire Shelf
For a complete list of replacement components, part and additional
equipment, visit us on the web at www.quincylab.com
1. Tripped GFCI power outlet
2. Damaged or missing fuse
3. Disconnected / loose wires.
2. The unit overheated and alarmed
PART # 101-1230 PART # 101-1000
S.S Relay
PART # 401-1235
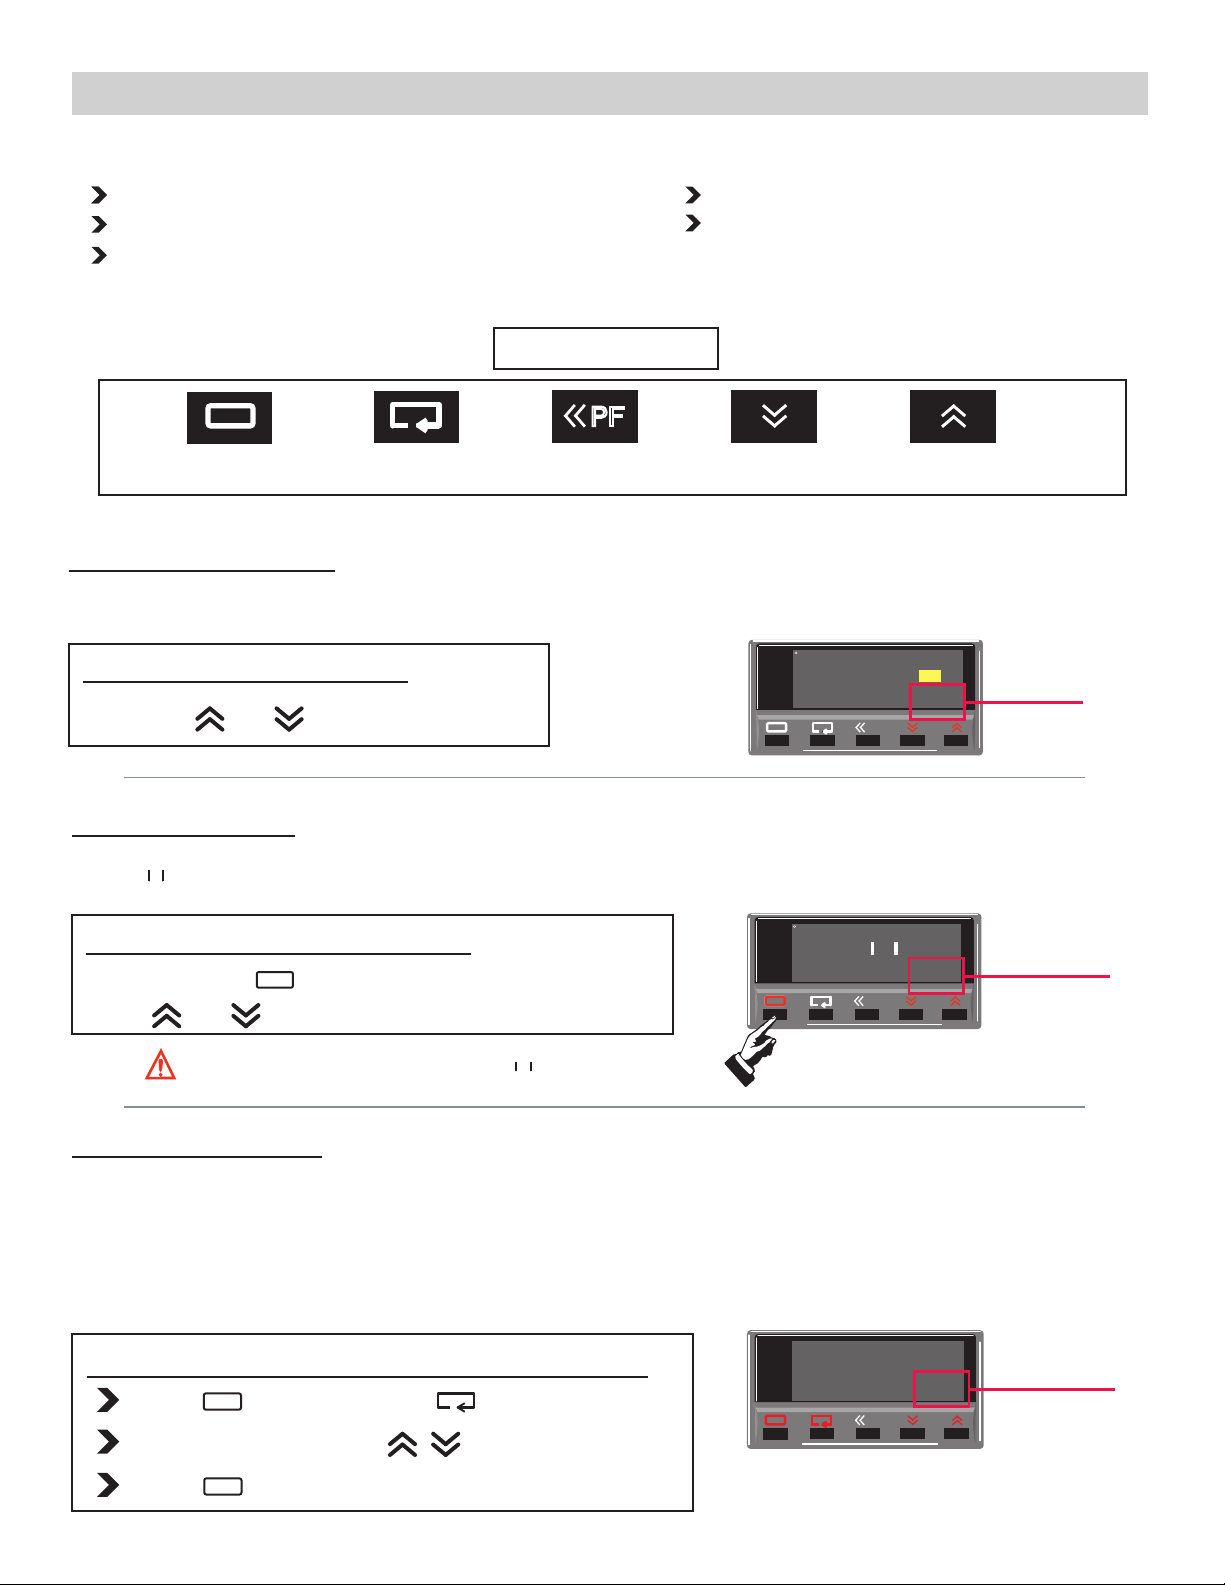
PROBLEM POSSIBLE CAUSE WHAT TO DO BEFORE CALLING TECH. SUPPORT
1.Make sure the setpoint temperature is set correctly on the
lower right corner and is above the stated 2°C (140 series) or 3°C
(180 series) above room temperature.
1. Set temperature not set correctly or
set too low.
Quincy Lab, Inc. warrants to the original purchaser that this product will be free from defects in mate-
rial and workmanship under normal use throughout the warranty period. The standard warranty period
for this instrument is twenty four (24) months from date of shipment. The instrument warranty is supple-
mented with a three year warranty on the heating element. Please refer to your invoice or shipping
documents to determine the active warranty period. This warranty covers parts & labor (labor at factory only)
and shipping cost for replacement parts.
Limited Warranty
Email:
Voice:
Fax:
800-482-4328
773-622-2282
Quincy Lab, Inc.
109 Shore Dr.,
Burr Ridge, Illinois 60527
on the web at
• If a liquid is spilled inside the unit, disconnect it from the power supply and have it checked by a
competent person.
spilled on or inside the unit.
3. Incorrect OFFSET (CNS)value 3.Verify that the Temperature Offset (pg.3) is between -10°F
to10°F. Any value higher than this may affect the heating
process. Bring value down to zero, and perform a temperature
calibration. Scan QR-code above for additional information.
10 Series Shelf Support
PART # 101-1001
12 Series Wire Shelf
PART # 101-3000
12 Series Shelf Support
PART # 101-3001
SPACE LEFT
INTENTIONALLY BLANK