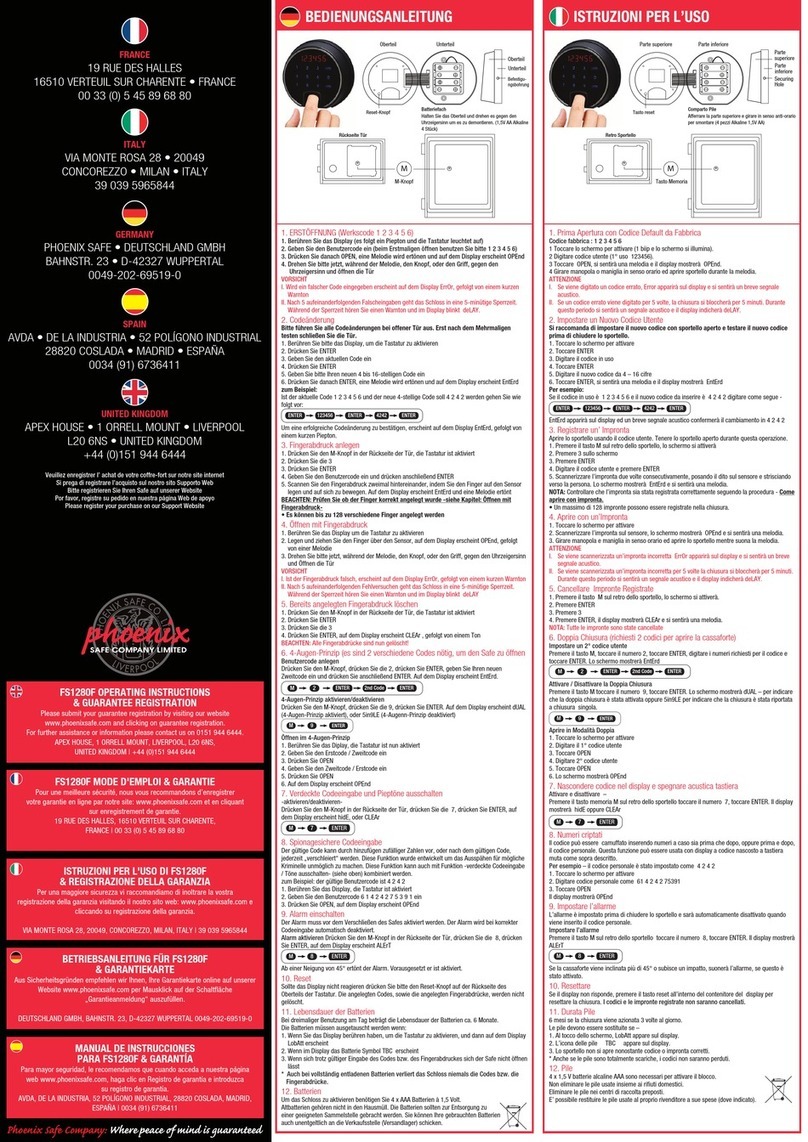
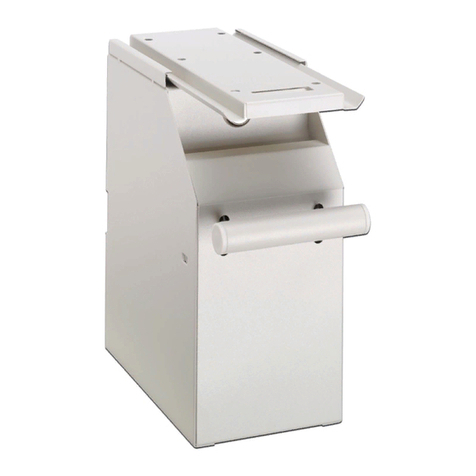
ratiotec RT 650 User manual

User manual RT | RT
Bedienungsanleitung RT | RT
Serial number: Master Code:

2
Bedienungsanleitung RT | RT ..........................................................
Instruction manual RT | RT ..............................................................
Istruzioni per l‘uso RT | RT ..............................................................
Rücksendeinformation.................................................................................
Return information ......................................................................................
[DE]
[EN]
[IT]
[DE]
[EN]
Inhalt | Content

3
Anleitung POS Safe RT
Die Sicherheit des Bargeldbestandes am POS ist für die Mitarbeiter von
zentraler Bedeutung, speziell wenn es sich um höhere Bargeldvolumen
handelt.
Ausstattung
Der POS Safe RT mit Schlüssel-System und Banknoteneinwurf
eignet sich ideal für die sichere Verwahrung höherer Banknotenvolumen
und bietet Ihnen somit zusätzliche Sicherheit am Kassenbereich. Der
RT verfügt über ein massives Stahlgehäuse. Der Banknoteneinwurf
an der Oberseite des Safes sowie der herausnehmbare Sto-Innenteil
mit Tragefunktion gewährleisten zusätzlich eine schnelle und sichere
Abschöpfung von Banknoten.
Befestigung und Bedienung
Der RT ist aufgrund seines einfachen Schlüssel-Systems leicht zu
bedienen und lässt sich leicht, für Ihre Kunden nicht sichtbar, unter
den Kassenplatz montieren. Zur Befestigung des Safes benutzen Sie bitte die im Lieferumfang enthaltenen
Befestigungsschrauben. Fixieren Sie diese in den dafür vorgesehenen Önungen an der Ober- oder Unterseite
des Safes. Befestigen Sie anschließend die Schrauben an der gewünschten Stelle im Kassenbereich.
Tipp: Positionieren Sie den RT für Kunden nicht sichtbar am POS.
[DE]
Befestigung des Safes
Zur Befestigung des RT benutzen Sie bitte die beiliegenden Be-
festigungsschrauben. Fixieren Sie diese in den dafür vorgesehenen
Önungen an der Ober- oder Unterseite des Safes. Befestigen Sie an-
schließend die Schrauben an der gewünschten Stelle im Kassenbereich.
Tipp: Positionieren Sie den RT für Kunden nicht sichtbar am
Kassenplatz.
Önen des Safes
Im Auslieferungszustand ist die Box entriegelt. Aktivieren Sie den
Safe indem Sie die Batterien einsetzen und den Splint am Batteriefach
entfernen. Um den Safe zu önen geben Sie den werksseitig einge-
stellten Operator oder Supervisor Code ein und bestätigen diesen mit
der #-Taste. Die Zeitverzögerung ist bei Minuten voreingestellt (Siehe
Önen mit Zeitverzögerung).

4
[DE]
Pin Code Einstellung
. Operator Code (-stellig)
Der werksseitig eingestellte Operator Code ist . Um den Operator
Code zu ändern, geben Sie bei geöneter Tür einen neuen -stelligen
Code ein und bestätigen Sie diesen mit der #-Taste (z.B. #). Sobald
die Tür geschlossen ist, wird der neue Code aktiviert.
. Supervisor Code (-stellig)
Der werksseitig eingestellte Supervisor Code ist . Zur Änderung des
Supervisor Codes drücken Sie bei geöneter Tür die #-Taste (rotes Licht
leuchtet) und geben den aktuellen Supervisor Code ein, bestätigen Sie
diesen mit der #-Taste. Geben Sie den gewünschten bis -stelligen Code
ein, bestätigen Sie diesen mit der #-Taste (z.B. ## --> #), das
rote Licht geht aus und es ertönt ein langes Bestätigungssignal.
. Master Code (-stellig)
Dieser Code sollte nur genutzt werden, falls Operator und Supervisor Code nicht bekannt sind, da sich bei
Eingabe des Master Codes der Operator und Supervisor Code auf Werkseinstellungen ( bzw. ) zu-
rücksetzen. Geben Sie den Master Code ein und bestätigen Sie mit der #-Taste. Master Code: Siehe Deckblatt.
Achtung: Wenn Sie drei Mal den falschen Code eingegeben haben ist der Safe für Minuten gesperrt.
Önen mit Zeitverzögerung
Der Safe lässt sich nicht sofort önen. Geben Sie den Code zum Önen ein und drücken Sie die #-Taste, um
den Countdown zu aktivieren. Während die eingestellte Zeitverzögerung läuft, leuchtet das grüne Lämpchen
alle - Sekunden. Nach Ablauf der Zeit ertönt erneut ein akustisches Signal und das Lämpchen leuchtet zwei
Mal rot auf. Geben Sie innerhalb von Sekunden den Code erneut ein und drücken Sie die #-Taste. Nach
Ablauf der Sekunden oder bei falscher Code-Eingabe ist der Safe wieder gesperrt und Sie müssen wieder
von neuem starten.
Achtung: Durch Eingabe des Master Codes und Bestätigung mit der #-Taste lässt sich der Safe auch ohne
vorherige Aktivierung des Countdowns sofort önen.

5
[DE]
System der Zeitverzögerung
Um die Zeitverzögerung einzustellen, müssen Sie zunächst die Tür önen. Anschließend betätigen Sie die
*-Taste und wählen eine Zahl zwischen - aus. Diese bestätigen Sie mit der #-Taste. Die Zeitverzögerung
lässt sich wie folgt einteilen:
keine Zeitverzögerung Minuten
Minute Minuten
Minuten Minuten
Minuten Minuten
Minuten Minuten
Zur Bestätigung ertönt ein Signalton.
Leeren des Safes
Zur Leerung des Safes önen Sie diesen wie beschrieben. Anschließend können Sie den Innenteil entnehmen.
Schließen des Safes
Schließen Sie die Tresortür und drücken Sie die #-Taste.
Austausch der Batterien
Falls sich der Tresor nicht önen lässt, sind ggf. die Batterien leer. Wenn das rote Licht durchgehend blinkt,
sind die Batterien in naher Zukunft leer. Der POS Safe benötigt sechs , Volt Batterien (Typ LR, x mm).
Önen Sie die schwarze Kunststoabdeckung an der Innenseite der Tür. Legen Sie die Batterien ein und stellen
Sie sicher, dass sich kein Kabel gelöst hat bzw. eingeklemmt ist. Falls sich der Safe trotz des Austausches der
Batterien nicht önen lässt, setzen Sie sich mit dem Hersteller/Händler in Verbindung.
Tipp: Optional lässt sich der Safe auch mit einer Volt Block Batterie önen, falls die , Volt Batterien kom-
plett leer sind

6
[EN]
Instruction POS Safe RT
The POS Safe RT oers additional security at the Point of Sale and
increases the sense of security among all employees, especially when it
comes to higher cash volume.
Equipment
The POS Safe RT with key system and banknote slot is ideal for the
safe custody of higher banknote volume and provides an additional
safety at the desired area. The RT has a solid steel casing. The
banknote slot at the top of the safe and the removable fabric inner part
with carrying handle ensure a fast and safe removal of the bills.
Fasten the safe and operation
The RT can be easily installed, under the sales counter or a bar, and
can still remain out of sight of the customers. Please use the enclosed
fastening screws for xing the safe. Fix them into the specic openings
found on top or bottom of the safe. Fix the screws at the desired area of
the POS.
Tip: Place the RT in the POS area but not visible to the customers.
Fasten the safe
To fasten the RT please use the enclosed fastening screws. Fix them
into the specic openings found on top and on the lower side of the safe.
Fix the screws to the desired area in the Point of Sale.
Tipp: Place the RT in the POS area but not visible to the customers.
Open the safe
When delivered the box is unlocked. Activate the box by inserting the
batteries and removing the cotter pin on the battery compartment. To
open the safe dial the initial operator or supervisor code and end with #.
The time delay is preset to minutes (see Open with a time interval).

7
[EN]
Pin Code adjustment
. Operator code (-digit)
The initial operator code is . To change the operator, type (when the
door is opened) a new -digit code and conrm it by pressing the #-key
(e.g. #). The new code will be activated after closing the door.
. Supervisor code (-digit)
The initial supervisor code is . To change the supervisor code,
press # (red light on) and dial valid supervisor code, end with #. Dial the
new code again and end with # (red light o and you hear a long beep).
. Master code (-digit)
This code should only be used in case the operator and supervisor codes
are unknown because after typing the master code, the operator and
supervisor code will reset to factory setting ( resp. ). Dial the master code (which is written by hand
on the rst page of the manual), end with #. There is no time delay when you dial the master code.
Please note: If you dial the wrong code times the safe will be locked for minutes.
Open with a time interval
The safe cannot be opened immediately. To open the safe dial the valid opening code and press the #-key to
activate the countdown. The time delay is preset to minutes, so during minutes delay period a green light
will flash (every - seconds) and then red light will flash twice and a longer signal tone will arise after the time
delay period is over.
Dial the valid opening code and # again within seconds. In case an incorrect code has been entered or you
do not dial the code within seconds the lock goes back to standby mode and you have to start again to open
it.
Please note: The safe can be directly opened, even without having activated the countdown, by typing the
master code and conrming it with the #-key.

8
[EN]
Time interval system
Open the door to activate the time interval. Subsequently, press the *-key and choose a number between
and . Conrm this with the #-key. The time interval can be graded considering the following:
no time interval minutes
minute minutes
minutes minutes
minutes minutes
minutes minutes
A signal tone arises to conrm the time interval.
Empty the safe
To empty the safe please open it as indicated above. Afterwards the internal part can be removed and opened
at the backside.
Close the safe
Close the door and press #.
Change of batteries
If the safe does not want to open the batteries could be dead. When the red light always flashes it means
that the batteries are running out. You need to replace with new ones. The lock is supplied with six pcs of AA
batteries, which you simply replace by opening the black plastic cover on the inside of the door. The POS safe
requires eight , Volt batteries (LR type, x mm).
Please note: An optional volt block battery can be used to power the box if the , volt batteries are comple-
tely drained.

9
[IT]
Manuale POS Safe RT
Manuale POS Safe RT
La certezza della sicurezza nel punto di vendita è importante per il
personale, specialmente nei punti cassa con un alto volume di contanti.
Speciche
La cassaforte POS Safe RT è prevista per proteggere l‘incasso,
riducendo il rischio di perdita dovuta a rapine o furto interno e così
aumentando la sicurezza. La POS Safe RT con serratura è costruita
interamente in acciaio, orendo anche un contenitore interno removibile
di stoa per la raccolta delle bancononte, specialmente per gli tagli alti.
La gettoniera sul lato superiore della cassaforte come anche il contenito-
re interno garantiscono un prelievo di banconote più veloce e sicuro.
Fissaggio ed istruzioni per l’uso
La POS Safe RT è un prodotto semplice da installare e usare. Per
ssare la cassaforte RT potete usate la bulloneria in dotazione.
La cassaforte è dotata di fori per il ssaggio, collocati sia sulla parte
superiore che inferiore.
Nota bene: La posizione ideale è vicino alla cassa, ma possibilmente fuori dalla vista.
Fissaggio della cassaforte
Per ssare la cassaforte RT potete usate la bulloneria in dotazione.
La cassaforte è dotata di fori per il ssaggio, collocati sia sulla parte
superiore che inferiore.
Nota bene: Il posizionamento ideale è vicino alla cassa, ma possibil-
mente fuori dalla vista.
Apertura della cassaforte
La cassaforte nuova e aperta e disattiva, per attivare la cassaforte biso-
gna prima rimuover la linguetta di plastica che interrompere l‘alimenta-
zione delle batterie alla cassaforte. Quando nuova la cassaforte ha già
attiva la temporizzazione attiva di minuti. Se si digita un codice errato,
verrà emesso un segnale acustico insieme al led rosso, si dovrà ripetere
la procedura usando il codice corretto.

10
[IT]
Pin Code impostazione
. Come modicare il codice operatore (no a numeri)
Aprire la cassaforte con il codice preinstallato digitando #. Ora, con
la porta aperta, digitare il vostro nuovo codice da a numeri confer-
mandolo con il tasto # (es.: #). Il codice sarà attivo appena verrà
chiusa la cassaforte.
. Come modicare il codice supervisore (no a numeri)
Il codice iniziale di fabbrica del supervisore è . Per modicarlo,
tenere la porta della cassaforte aperta e premere il tasto # (si accende il
led rosso). Digitare il codice supervisore attuale e confermare premendo
il tasto #. Poi digitare il nuovo codice supervisore da ( a cifre) e con-
fermarlo premendo il tasto # (es.: ## #). Il led rosso ora si
spegne dopo un segnale acustico di conferma.
. Codice d’emergenza ( numeri)
Questo codice deve essere usato solo nel caso in cui il codice operatore o supervisore sono stati smarriti, se
si usa questa funzione tutti i codici operatore e supervisore verranno cancellati e la cassaforte tornerà con i
codici iniziali di produzione ( e ).
Codice d’emergenza: Vedi copertina
Attenzione: Se si digita tre volte un codice errato, la cassaforte sarà bloccata per minuti.
Apertura con temporizzazione attiva
La cassaforte si apre solo allo scadere della temporizzazione. Digitare il codice operatore e confermare
premendo il tasto #. Ora si accende il led verde per conferma e si attiva il conto alla rovescia del tempo preim-
postato. Se la temporizzazione è attiva, il led verde lampeggia ogni - secondi. Quando la temporizzazione
è terminata, il led rosso si accende due volte e si sente un lungo suono acustico. Digitare ora entro secondi
nuovamente il codice impostato e confermare premendo il tasto #. (Se si digita il codice errato o si va oltre il
tempo di secondi bisogna ripetere l’operazione nuovamente.)
Nota bene: La cassaforte può essere aperta anche senza attendere lo scadere della temporizzazione digitando
il codice d’emergenza e confermandolo con il tasto #.

11
[IT]
Come modicare i minuti della temporizzazione
Per eettuare modiche alla temporizzazione bisogna avere la porta aperta. Premere il tasto * e si accende il
led rosso, digitare un tasto da a (vedi tabella sotto) a seconda del tempo scelto e confermare premendo il
tasto #:
apertura immediata minuti
minuto minuti
minuti minuti
minuti minuti
minuti minuti
Verrà emesso un segnale acustico di conferma.
Svuotamento della cassaforte
Aprire la porta come indicato e rimuovere il contenitore interno.
Chiusura della cassaforte
Digitare il tasto # ed il perno di chiusura si chiude da sé.
Cambio delle batterie
Se la cassaforte non si apre, è molto probabile che le batterie siano esaurite. Se il led rosso lampeggia conti-
nuamente vi indica che bisogna sostituire immediatamente le batterie con sei stilo AA (tipo LR, x mm). Il
vano batterie si trova nella parte interna della porta, dentro lo sportello nero in plastica. Inserendo le batterie,
assicuratevi che i cavi non vengono tranciati e messi nella loro posizione originale. Nel caso la cassaforte non
si apra anche avendo cambiato le batterie contattate il vostro fornitore.
Nota: Una batteria opzionale da volt può essere utilizzata per alimentare se le batterie da , volt sono
completamente scariche.

12
Ihre Zufriedenheit steht bei uns an erster Stelle. Sollten Sie ein technisches Problem mit Ihrem ratiotec Gerät
haben oder benötigt Ihr Gerät eine Wartung, beachten Sie bitte folgenden Ablauf für Ihre Rücksendung, damit
eine schnelle Bearbeitung erfolgen kann.
2.
1.
3.
4.
5.
6.
7.
www.ratio-tec.com/service-reparaturauftrag
Rücksendeschein anbringen und Paket
frankieren!
Rücksendeschein ausdrucken! Wir kümmern uns um Ihr Gerät!
Paket-
dienst
Serviceantrag ausfüllen auf:
Rücksendeinformation
[DE]

13
Your satisfaction is a priority for us. If you have a technical problem with your ratiotec device or your device
requires maintenance, please regard the following procedure for the return of your device to ensure a quick
processing.
2.
1.
3.
4.
5.
6.
7.
https://www.ratio-tec.com/en/repair-service-order
Affix the Service-Ticket and frank the
package!
Print the Service-Ticket! We will take care of your device!
Parcel
service
Fill in the service form on:
Return Information
[EN]

14
-DE- Dieses Gerät darf, lt. Elektro- und Elektronikgerätegesetz (ElektroG), nicht über den Haus-/Restmüll entsorgt werden. Wir
möchten Sie daher bitten, uns mit Ihrem aktiven Beitrag bei der Ressourcenschonung und beim Umweltschutz zu unterstützen
und dieses Gerät zur Entsorgung an uns zurückzusenden:
ratiotec GmbH & Co. KG, Max-Keith-Str. 66, 45136 Essen, Deutschland
-EN- This equipment is marked with the above recycling symbol. It means that at the end of the life of the equipment you must
dispose of it separately and not place it in the normal domestic unsorted waste stream. Please send it back to the distributor.
This will benet the environment for all.
-IT- Questo apparecchio è contrassegnato con il simbolo di riciclaggio. Questo vuol dire che l’apparecchio deve essere smaltito
presso un punto di smaltimento specico. In alternativa potete riconsegnarlo al distributore. Un ambiente pulito è a benecio
di tutti.
-ES- Este equipo está etiquetado con el símbolo de reciclado que puede verse arriba. Esto quiere decir que al nal de la vida del
equipo, éste debe ser llevado a un punto de recogida especíco para equipos electrónicos, o mandado detras al distribuidor.
Esto beneciará al medio ambiente para todos.
-FR- Cet équipement est marqué par le représenté ci dessus. Cela signie, qu´en n de vie, cet équipement ne doit pas être
mélangé á vos ordures ménagères, mais doit être déposé dans un point de collecte prévu pour les déchets des équipements
électriques et électroniques ou retournent cet équipement a votre marchand spécialisé. Votre geste préservera l`environne-
ment.
European Standard concerning the
waste from electrical and electronic
equipment (WEEE)
(European Union only)

15

ratiotec GmbH & Co. KG
Max-Keith-Str. 66 | 45136 Essen
T: +49 (0) 201/361 49 – 0
F: +49 (0) 201/361 49 – 26
E-Mail: info@ratio-tec.de
Internet: www.ratio-tec.de
ratiotec Italia S.r.L.
Località Bessiche 76|B
Zona Industriale
15070 Tagliolo Monferrato (AL)
Tel: +39 0143 150 901 6
Fax: +39 0143 150 901 9
www.ratio-tec-it
User manual RT | RT
Bedienungsanleitung RT | RT
This manual suits for next models
1
Table of contents
Languages:
Other ratiotec Safe manuals
Popular Safe manuals by other brands

Burtonsafes
Burtonsafes KEYGUARD ELECTRONIC SIZE 1 User instructions

Masterlock
Masterlock P008EML user manual

Security +
Security + Stack-On GCD-924-5 installation instructions

Masterlock
Masterlock Safespace 5900 Series instructions

Costway
Costway EL10004 user manual

Sequiam Biometrics
Sequiam Biometrics BioVault 2.0 installation instructions