Raz Lucia User manual

QUICK START
GUIDE
Welcome to the world of
www.luciaphone.com
Mobile phone for individuals who are
blind, visually impaired or hard of
hearing, and for seniors.
2
Additional Support
Please visit www.luciaphone.com/support for additional information,
including:
• A downloadable PDF version of the LUCIA Quick Start Guide
• A downloadable PDF version of the LUCIA User Guide
• Tutorial videos
• Frequently Asked Questions
Customer Support
If you have any questions, you may also contact Customer Support:
• Web chat: www.luciaphone.com/support
• Email: [email protected]
• Phone: +41 41 51 00 800
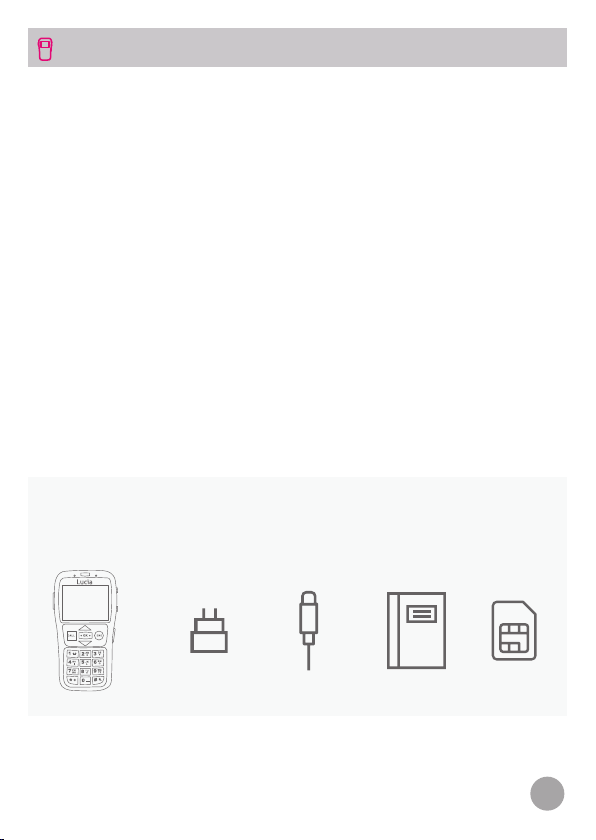
Included with your LUCIA phone:
LUCIA MOBILE PHONE
LUCIA
mobile phone
Battery USB Type-C
Cable
Wall
charger
Quick start
guide
3
BEFORE YOU START
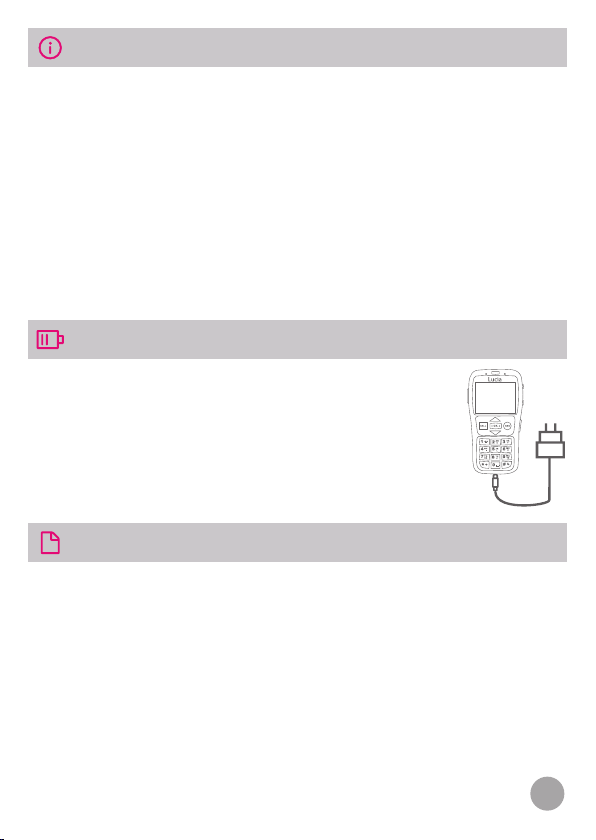
CHARGING LUCIA
Insert the battery and SIM card. Please follow instructions on page 8.
You must fully charge your device before using it for the rst time.
Plug your LUCIA phone into a wall outlet using the wall charger and
USB Type-C cable included with your phone.
You can use the phone while it charges.
Turn ON the phone.To turn the phone ON, slide the slider up and keep
in that position for at least 3 seconds. You will feel a vibration letting
you know that the phone is starting the activation process. After the
vibration you can release the slider. Few seconds after the vibration,
LUCIA will begin to speak.
Plug the cable into the phone to charge the battery.
The charger is supplied in two pieces: a wall charger
and a USB Type-C cable. Insert the larger of the two
ends into the USB port of the wall charger. You’re
now ready to plug in and charge your phone.
GENERAL DESCRIPTION
Let the LUCIA Mobile Phone read to you with its built-in voice guide.
On-screen information is spoken aloud. Scroll through your contact
list and hear the names read out or open a text message and LUCIA
will read it to you. Writing text messages is just as easy. As you type,
each letter and completed words are read aloud. The LUCIA mobile
phone has a simple menu and tactile, color-coded buttons. You’ll
also like the number keypad with the large and well-spaced tactile
buttons, ensuring you’ll hit the right button every time.

4
• Speaks the date, time, wireless provider, signal strength and
remaining battery charge
• Chooses from available languages and voices
• Announces the names stored in Contacts for incoming calls
• Adjusts the speech speed between 50 and 250% in increments
of 10%
• Allows to nd what you’re looking for quickly with its simple
menu system
• SOS button
• Sound Boost providing an additional 25 dB
• Compatible for use with hearing aids (HAC)
• Unlocked for compatible GSM networks
ORIENTATION - FRONT
This section will assume that you have the phone laid at on a table
with the buttons closest to you.
Earpiece
End/Cancel/Backbutton
OK button
Navigation arrow (up)
Call button
Navigation arrow (down)
Number keypad
Microphone

5
The front face of the phone has ve buttons underneath the screen.
On the left is the square CALL button (green) and on the right is
the round END/Cancel button (red). Between these buttons are the
up/down navigation buttons. Between the navigation arrows is the
smaller, rectangular OK button (blue).
Directly above the screen, in the center, is the earpiece. The number
keypad is in the lower part of the phone. It is laid out in the standard
four rows of three buttons with the rst row, from left to right,
containing one, two and three. The second row has four, ve and six.
The third row contains seven, eight and nine. The last row has the star,
zero and pound (the phone refers to the pound button as a “hash”).
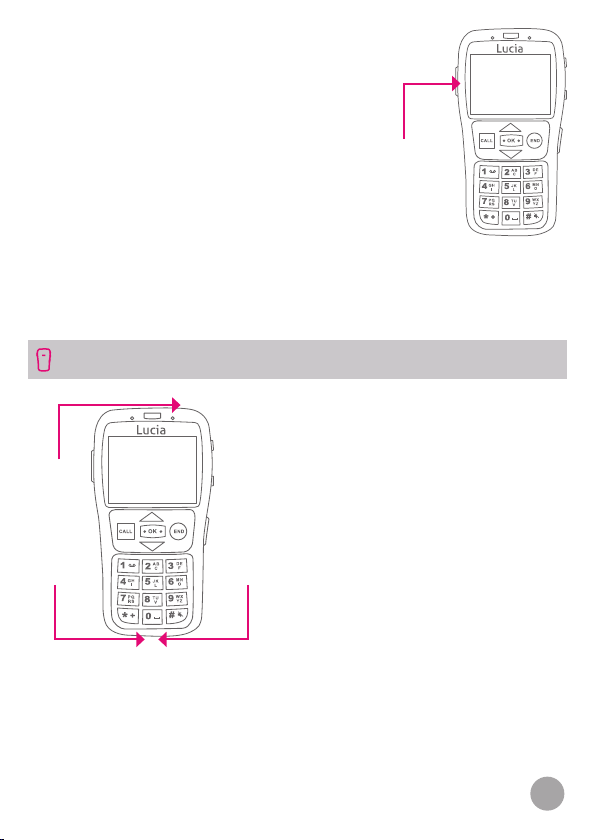
ORIENTATION - EDGES
Right Edge
There are three buttons on this
edge. From top to bottom they
are as follows: the repeat speech
button, Sound Boost button, and
Lock/Unlock & Power slider. The
repeat speech button also serves
as the phone status button and as
the Voice Guide ON/OFF button.
Repeat speech /
Status button
Sound boost button
Lock/Unlock &
Power slider
6
Volume rocker
button
+
-
This rocker button adjusts the volume
of the speech when not in a call and the
earpiece volume when in a call.
Please note: if you turn the speech
below its minimum volume the speech
features are essentially turned off and
LUCIA will no longer speak.
ORIENTATION - TOP, BOTTOM & BACK
Top Edge
On the top edge, near the right end of
the phone there is a small round hole
which is the earphone socket. It is a
standard socket for a 3.5 mm plug.
Bottom Edge
On the bottom edge, on the left
there is the USB Type-C port used
for charging. On the right are small
openings for the speaker.
Earphone
socket
USB Type-C
socket Speaker
Back
The back is a solid, one-piece cover with a recessed SOS button in the
top center. The back also serves as the battery cover and is attached
by clip on the inside. It can be opened by accessing a small recess on
the right side of the bottom edge.
Left Edge
On the left edge, near the top of the
phone is the volume rocker button.
Push the top of the button to increase
volume, and the bottom to lower it.
7
12:08
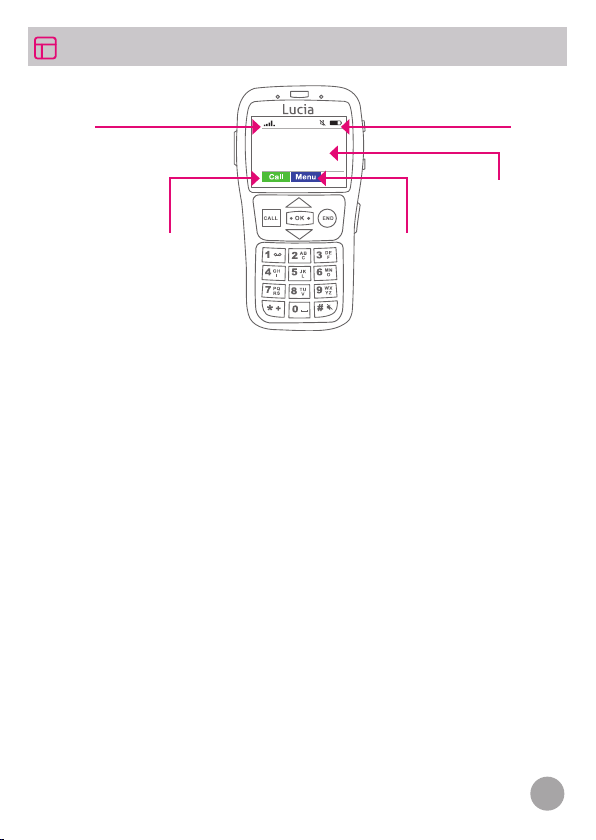
DISPLAY SCREEN
• The home screen has several icons arranged around the screen.
On the top left is the signal strength indicator. In the center is
the Voice Guide/text-to-speech indicator. If crossed out, the Voice
Guide is turned off and LUCIA will not speak. On the right is the
battery indicator. The icon shows a battery. When the battery is
full, the icon will also show as full. As the remaining charge in
the battery decreases, the battery icon will be displayed as only
partially full.
• In the default setting, the time is displayed in the center of the
screen.
• Assuming the keypad is unlocked (see Turning the Phone on
and off), along the bottom of the screen you will nd the words
“Menu” and “Call” in blue and green, respectively. To access the
“Menu”, press the blue OK button in the center. To use “Call”, press
the green CALL button to place a call after dialing a number or
selecting a phone number from Contacts.
• To hear the phone status, including date and time, battery level
and carrier, simply press the repeat speech button on the right
edge of the phone (when on the home screen).
Signalstrength Batteryindicator
Time & Date
MenuCall

8
Fitting the SIM Card and Battery
Below are instructions on how to remove the battery and insert or
remove a SIM card. Note that LUCIA is an unlocked GSM mobile
phone that works on any GSM networks.
Removing the Battery Cover
Turn off the phone before you remove the battery.
Turn it over so the screen faces down, with the
buttons closest to you. The LUCIA phone battery
cover is a one-piece cover across the back of the
phone. There is a recess in the bottom left corner.
Begin lifting the cover from this corner to safely
release the other clip.
Removing the Battery
To remove the battery, simply start lifting it from the
bottom.
Inserting/Removing the SIM Card
If you need to remove or install a SIM card, simply
follow these directions: the SIM tray is located in
the bottom left corner of the battery compartment
underneath the battery. The SIM card lies with the
metal contacts face down and the cut-off corner
at the top left. The SIM tray is covered by a metal
bridge. Remove the SIM card from its holder,
orientate the SIM so that the metal contacts are
facing down, and the cut-off corner is at the top left.
Slide the SIM card into the SIM tray under the bridge
as indicated. The LUCIA phone uses standard SIM
cards.
GETTING STARTED

9
To the right of the SIM card is a micro-SD card slot. In case a micro-
SD card is inserted in your phone, the micro-SD card will store
additional voices for the phone and must not be removed as this will
stop your phone from working properly.
Inserting/Replacing Batteries
The battery will only t into the compartment one
way. Please do not force it as this may damage your
phone. The battery has gold contacts on one of its
edges, line these up with the three contacts in the
top right of the battery compartment and insert the
battery rst onto the contacts then lay the battery
at into the compartment.
Additionally, there is a black triangle in the top right
corner of the battery compartment and a white
one on the battery, indicating the correct battery
position.
Fitting the Battery Cover
Place the battery cover on to the back of the phone
and press around the edges until the clip, positioned
around the edges of the phone, lock.
To turn the phone on, push up the
slider and hold it in that position
for at least 3 seconds. Your phone
will vibrate, letting you know that
the phone is starting the activation
process. After it vibrates, release the
slider. Within a few seconds, LUCIA
will begin to speak.
TURNING THE PHONE ON AND OFF
10
The rst time you turn on your phone, you will be prompted to
select the language and voice, and to set the date and time. Use
the arrows to select the desired language. LUCIA will repeat it
back to you. To conrm your selection, press OK. Use the arrows
to select the current year. LUCIA will repeat it back to you. Press
OK to move onto the month. Use the arrows to select the current
month and press OK, then select the day and press OK. LUCIA
will then read back the full date you have set before asking you to
enter the time. Follow the same process to set the time. You can
adjust the time and date at any time.
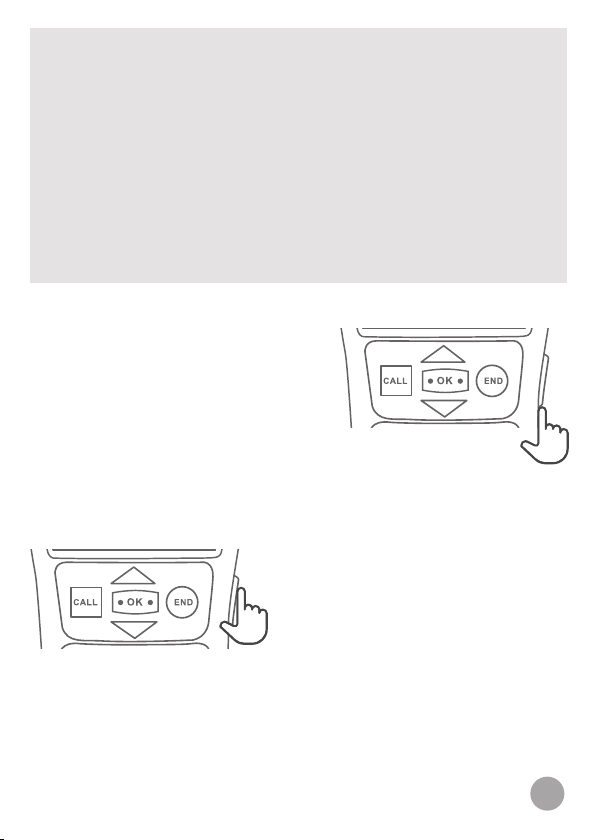
When the phone isn’t used for a
period of time, the keypad lock is
automatically activated. You can
unlock the keypad by sliding up the
lock/unlock slider located on the
right edge of the phone. You can also
lock the phone by sliding up the lock/
unlock slider.
To turn off the phone, ensure the
keypad lock is not active and that
you are on the home screen. Push
up the slider and hold it for at least
3 seconds until you hear a prompt
informing you that the phone is
turning off.
Table of contents
Other Raz Cell Phone manuals


