manuals.online logo
Brands
  1. Home
  2. •
  3. Brands
  4. •
  5. RCA
  6. •
  7. DVD Player
  8. •
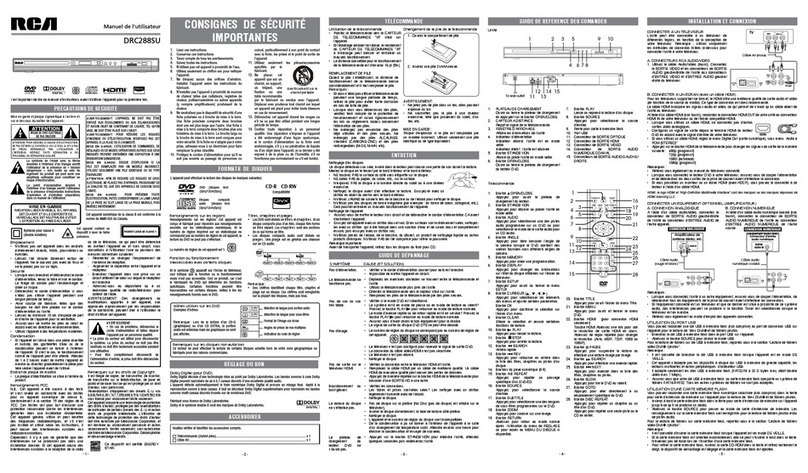
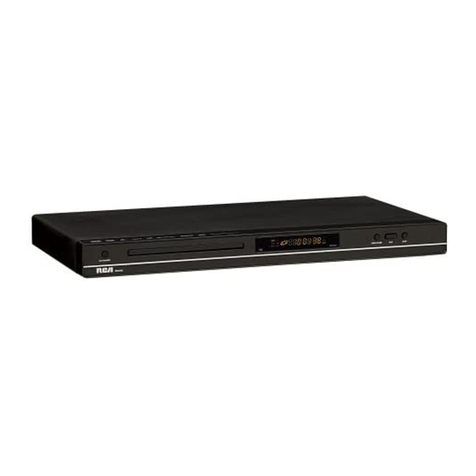
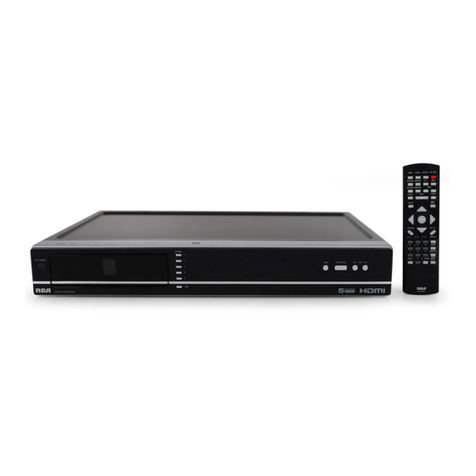
  9. RCA DRC279RE User manual

RCA DRC279RE User manual

This manual suits for next models

1

Other RCA DVD Player manuals

RCA DRC8335 - DVD Recorder & VCR Combo User manual

RCA

RCA DRC8335 - DVD Recorder & VCR Combo User manual

RCA DRC300iH User manual

RCA

RCA DRC300iH User manual

RCA DRC62708 Configuration guide

RCA

RCA DRC62708 Configuration guide

RCA DRC300i Instruction Manual

RCA

RCA DRC300i Instruction Manual

RCA DRC300iH User manual

RCA

RCA DRC300iH User manual

RCA DRC480N User manual

RCA

RCA DRC480N User manual

RCA RC5910P User manual

RCA

RCA RC5910P User manual

RCA RC5215P User manual

RCA

RCA RC5215P User manual

RCA HDV5000 User manual

RCA

RCA HDV5000 User manual

RCA DRC277 User manual

RCA

RCA DRC277 User manual

RCA DRC220N User manual

RCA

RCA DRC220N User manual

RCA RC5500P User manual

RCA

RCA RC5500P User manual

RCA DRC300iH Manual

RCA

RCA DRC300iH Manual

RCA DRC8335 - DVD Recorder & VCR Combo User manual

RCA

RCA DRC8335 - DVD Recorder & VCR Combo User manual

RCA RC6001P User manual

RCA

RCA RC6001P User manual

RCA DRC277A Instruction Manual

RCA

RCA DRC277A Instruction Manual

RCA DRC286 - 1080p HDMI DVD Player Instruction Manual

RCA

RCA DRC286 - 1080p HDMI DVD Player Instruction Manual

RCA SelectVision SJT 400 User manual

RCA

RCA SelectVision SJT 400 User manual

RCA DRC628 User manual

RCA

RCA DRC628 User manual

RCA DRC275 User manual

RCA

RCA DRC275 User manual

RCA DRC282 User manual

RCA

RCA DRC282 User manual

RCA DRC300i User manual

RCA

RCA DRC300i User manual

RCA DRC290 User manual

RCA

RCA DRC290 User manual

RCA DRC615N User manual

RCA

RCA DRC615N User manual

Popular DVD Player manuals by other brands

Yamaha DVD S540 - Progressive Scan DVD Player Service manual

Yamaha

Yamaha DVD S540 - Progressive Scan DVD Player Service manual

Yamakawa DVD-MP12i user manual

Yamakawa

Yamakawa DVD-MP12i user manual

Philips DVP3042/12 user manual

Philips

Philips DVP3042/12 user manual

Philips DVP5900/37B Quick use guide

Philips

Philips DVP5900/37B Quick use guide

Roadstar DVD-2020H Service manual

Roadstar

Roadstar DVD-2020H Service manual

Beko DVD 2006 user manual

Beko

Beko DVD 2006 user manual

Atak DVDA2015 instruction manual

Atak

Atak DVDA2015 instruction manual

LG DV257K owner's manual

LG

LG DV257K owner's manual

auna 10005069 manual

auna

auna 10005069 manual

Philips MCD700/61 user manual

Philips

Philips MCD700/61 user manual

Sony DVP-F11 Service manual

Sony

Sony DVP-F11 Service manual

Toshiba SD-2300U owner's manual

Toshiba

Toshiba SD-2300U owner's manual

LENCO DVP-740 X2 user manual

LENCO

LENCO DVP-740 X2 user manual

Tevion 44330 user guide

Tevion

Tevion 44330 user guide

Aiwa XD-DV370 operating instructions

Aiwa

Aiwa XD-DV370 operating instructions

Sony DVP S530D operating instructions

Sony

Sony DVP S530D operating instructions

Denon DVM-1805 - DVD Changer operating instructions

Denon

Denon DVM-1805 - DVD Changer operating instructions

Toshiba SD-3815 owner's manual

Toshiba

Toshiba SD-3815 owner's manual

manuals.online logo
manuals.online logoBrands
  • About & Mission
  • Contact us
  • Privacy Policy
  • Terms and Conditions

Copyright 2025 Manuals.Online. All Rights Reserved.

1. OPEN/CLOSE Button
 Presstoopenorclosethedisctray.
2. STANDBY/ON Button
Press to turn on the unit or put it in standby
mode
3. AUDIO Button
 Press to select one of the audio sound
tracksprogrammed onaDVDor to select
theaudiooutputmodeonanaudioCD.
4. ANGLE Button
 Press to switch the camera angle of the
video presentation when scenes with
multiplecamera anglesarerecorded ona
DVD.
5. MEMORY Button
 Presstocreateprograms.
6. DISPLAY Button
 Press to change disc status information
displayedontheTVscreen.
7. SETUP Button
 PresstoopenandclosetheSETUPmenu
screen
8. CURSOR ( , , , ) Button
 Press to highlight selections on a menu
screenandadjustcertainsettings.
OK Button
 Press to conrm selections on a menu
screen.
9. CLEAR Button
 Clear input selections and cancel certain
playbackfunctions.
10. PLAY Button
 Presstostartplayback.
11. STOP Button
 Presstostopplayback.
12. SEARCH Button
 Fastreverseplayback.
13. REV Button
 Press to move backwards through titles,
chaptersortracksonadisc.
14. Number (0-9) Buttons
15. A-B REPEAT Button
Press to perform point-to-point repeat
playbackonaDVDorCD.
16. GOTO Button
 Pressto skipdirectlytoaspeciclocation
on a DVD.
17. SUBTITLE Button
 Presstoselectoneofthesubtitlelanguages
programmedonaDVD.
18. ZOOM Button
 Zoominanimage.
19. RETURN Button
20. TITLE Button
 Presstoopenthetitlemenuscreen.
21. MENU Button
 PresstoopenandclosetheDVD’smenu.
22. HDMI Button
 Presstochangethevideooutputsignalsin
stop mode.
23. PAUSE Button
 Presstopauseplayback.
24. SEARCH Button
 Fastforwardplayback.
25. NEXT Button
 Press to move forward through titles,
chaptersortracksonadisc.
26. SLOW Button
 Presstoperformslowforwardplaybackof
DVDs.
27. STEP Button
 Presstoadvanceframebyframe.
28. DISC REPEAT Button
 Press to repeat chapter or title of a DVD.
PresstorepeatsingletrackorwholeCD.
1. Readtheseinstructions.
2. Keeptheseinstructions.
3. Heedallwarnings.
4. Followallinstructions.
5. Do not use this apparatus near water.
6. Cleanonlywithadrycloth.
7. Do not block any of the ventilation
openings. Install in accordance with the
manufacturer’sinstructions.
8. Donot installnearany heatsources such
as radiators, heat registers, stoves, or
other apparatus (including ampliers) that
produceheat.
9. Do not defeat the safety purpose of the
polarized or grounding - type plug. A
polarized plug has two blades with one
wider than the other. A grounding type
plughas twobladesandathirdgrounding
prong.Thewidebladeorthethirdprongis
providedforyoursafety.Whentheprovided
plugdoesnottintoyourACpoweroutlet,
consultanelectricianforreplacementofthe
obsolete outlet.
10. Protect the AC power cord from being
walkedonorpinchedparticularlyatplugs,
convenience receptacles, and the point
where they exit from the apparatus.
11. Only use attachments/accessories
speciedbythemanufacturer.
12. Useonlywithacart,stand,tripod,bracket,
or table specied by the manufacturer, or
sold with the apparatus. When a cart is
used, use caution when moving the cart/
apparatuscombinationtoavoidinjuryfrom
tip-over.
13. Unplug this apparatus during lightning
stormsorwhenunusedforlongperiodsof
time.
14. Refer all servicing to qualied service
personnel. Servicing is required when
the apparatus has been damaged in any
way,suchastheACpowercordorplugis
damaged,liquidhasspilledorobjectshave
fallen into the apparatus, the apparatus has
been exposed to rain or moisture, does not
operate normally, or has been dropped.
IMPORTANT SAFETY
INSTRUCTIONS
DISC FoRmATS
Region Management Information
This unit is designed and manufactured to
respondtotheRegionManagementInformation
thatisencoded on DVDs.Iftheregion number
printedonthe DVD doesnotcorrespondtothe
region number of this unit, it cannot play that
disc.
Theregionnumberofthisunitis1.
Disc Function or Operation that is Not
Available
When the appearsonthescreen,itindicates
that the function or operation attempted is not
availableat that time.This occurs because the
DVD manufacturer determines the specic
functions of DVDs. Certain functions may not
beavailableonsomeDVDs.Besuretoreadthe
documentationprovidedwiththeDVD.
Icons Used on DVDs
Samplelcons
Note:WhenplayingbackaCD-G(Graphics)or
CDEXTRAdisc,theaudioportionwillbeplayed,
butthegraphicimageswillnotbeshown.
Title, Chapter and Tracks
• DVDs are divided into “titles” and
“chapters”. If the disc has more than one
movieonit,eachmoviewouldbeaseparate
“title”. “Chapters”aresectionsoftitles.
• Audio CDs are divided into “tracks”. A
“track”isusuallyonesongonanAudioCD.
Note:
Numbersidentifyeachtitle,chapter,andtrackon
adisc.Mostdiscshavethesenumbersrecorded
on them, but some do not.
Theunitcanplayback:
Languageselectionsforaudio
Languageselectionsforsubtitles
Screenaspectratio
Multiplecameraangles
Regioncodeindicator
SoUND SYSTEm
Dolby Digital
DolbyDigitalisatechnologydevelopedbyDolbyLaboratories.SoundtracksencodedinDolbyDigital
canreproducefromoneto5.1discretechannelsofexcellentqualityaudio.
The unit automatically recognizes the Dolby Digital bitstream and provides a downmixsuitable for
two-channellistening.AnadditionalDolbyDigitaldecoderisrequiredforreproductionofthediscrete
multi-channelsoundtracksavailableonmanyDVDs.
ManufacturedunderlicensefromDolbyLaboratories.
‘Dolby’andthedouble-DsymbolaretrademarksofDolbyLaboratories.
ACCESSoRIES
Please check and identify the supplied accessories.
•Toorderaccessoriesvisitwebsitehttp://www.RCAav.com
RemoteControl.......................................................................................................... x 1
2xAAA batteries ..........................................................................................................x 1
AVcable......................................................................................................................x 1
CoNTRoL REFERENCE GUIDE
Remote Control
Using the Remote Control
• Point the remote control at the REMOTE
SENSORlocatedontheunit.
• Whenusing thisunitinverybrightlight,the
infraredREMOTECONTROLSENSORmay
notworkproperly.
• The recommended effective distance
for remote operation is about 16 feet (5
meters).
Battery Replacement
Whenthebatteriesbecomeweak,theoperating
distance of the remote control will be greatly
reduced and you will need to replace the
batteries.
Notes:
• Iftheremotecontrolis notgoing tobeused
for a long time, remove the batteries to
avoid damage caused by battery leakage
corrosion.
• When discarding batteries, environmental
problems must be considered and local
rulesorlawsgoverningthedisposalofthese
batteriesmustbestrictlyfollowed.
WARNING:
• Donotdisposeofthebatteryinreoritmay
explodeorleak.
• Batteries shall not be exposed to excessive
heatsuchassunshine,reorthelike.
CAUTION:
Danger of explosion if battery is incorrectly
replaced. Replace only with the same or
equivalenttype.
REmoTE CoNTRoL
DVDs
[8cm/12cmdisc]
AudioCDs
[8cm/12cmdisc] Compatible
Unit
1. STANDBY/ON Button
 Turntheunitonorputitinstandbymode.
2. Power Indicator
 IndicatorOn:Theunitisinstandbymode.
 IndicatorOff:Theunitisturnedon.
3. DISC TRAY
 Opens or closes the tray by pressing the
OPEN/CLOSEbutton.
4. REMOTE SENSOR
 Receivestheremotecontrolunitsignals.
5. DISPLAY LENS
Display units information.
6. OPEN/CLOSE Button
 Opensorclosesthetray.
7. PLAY Button
 Startsorresumesplaybackofadisc.
8. STOP Button
 Stopplayingadisc.
9. OPTICAL OUT jack
10. HDMI OUT jack
11. VIDEO OUT jack
12. DIGITAL COAXIAL OUT jack
13. LEFT/RIGHT AUDIO OUT jacks
SYMPTOM CAUSE (AND REMEDY)
• EnsuretheACpowercordisconnected.
• Theunitisnotturnedon.
• Removeanyobstaclesbetweentheremoteandtheunit
• Usetheremoteneartheunit.
• Pointtheremoteattheremotesensorontheunit.
• Replacethebatteriesintheremotewithnewone.
• MakesurethatyouselectONmode.
• The system is in pause mode. Press the PLAY button to return to
normal play mode.
• Theunitisinfast-forwardorfast-reversemode.Pressthe PLAY button
to return to normal play mode.
• MakesuretheAUDIOoutputiscorrect.
• Makesuretheaudiocableisconnectedsecurely.
• Theregionnumberof thediscdoesn’tmatch the regionnumberof this
unit.
• TheTVisnotsettoreceiveDVDsignaloutput.
• Thevideo/HDMIcableisnotconnectedsecurely.
• TheTVisnotturnedon.
• Cleanthedisc.
• CheckconnectionbetweenHDMITVandtheunit.
• ReplacetheHDMIcable with abetterone.BadHDMIcable cancause
data lost.
• PressHDMIkeyonremotehandsetseveraltimestotoggleamongdifferent
HDOUTPUT.
• Checktheconnections.
• Theplugsandjacksaredirty.Wipethemwith aclothslightlymoistened
withalcohol.
• Cleanthedisc.
• Thereisnodiscinside.(“NoDisc”appearsonthescreen).
• Insertthedisccorrectlywiththeplaybacksidefacingdown.
• Cleanthedisc.
• Theunitanddiscregionnumberareincompatible.
• Condensationmayhaveformedinsidetheunitduetoasuddenchangein
temperature.Waitaboutanhourforittoclearandtryagain.
• Resettheunit,presstheSTANDBY/ONbuttontoturnofftheunit,waitfor
afewseconds,thenrestarttheunit.
No power.
The remote control
doesnotfunction.
No sound or only a
verylow-levelsound
is heard.
No picture or
abnormalcolor.
No output on your
HDMITV.
Severehumornoise
is heard.
The disc does not
play.
The DVD door
cannotopen.
TRoUbLESHooTING GUIDE
SAFETY PRECAUTIoNS
The lightning ash with an arrowhead
symbol, within the equilateral triangle, is
intendedtoalerttheusertothepresenceof
uninsulated “dangerous voltage” within the
product’senclosurethatmaybeofsufcient
magnitudetocauseanelectricshock.
Theexclamation pointwithin theequilateral
triangle is intended to alert the user to
the presence of important operating and
maintenance (servicing) instructions in this
user manual.
CAUTION
INVISIBLE LASER RADIATION WHEN
OPEN AND INTERLOCKS DEFEATED.
AVOID EXPOSURE TO BEAM.
THIS CLASS B DIGITAL APPARATUS
COMPLIES WITH CANADIAN ICES-003.
On Placement
• Do not use the unit in places that are
extremelyhot,cold,dusty,orhumid.
• The ventilation should not be impeded by
covering the ventilation openings with items
such as newspaper, table-cloths, curtains,
etc.
On Safety
• When connecting or disconnecting the AC
power cord, grip the plug and not the cord
itself. Pulling the cord may damage it and
createahazard.
• Whenyouare notgoingtousetheunitfora
longperiodoftime,disconnecttheACpower
cord.
• No naked ame sources such as lighted
candles should be placed on the AC power
cordandtheunit.
• Leave a minimum of 10 cm around the
apparatusforventilation.
• Attentionshouldbedrawntotheenvironmental
aspectsofbatterydisposal.
• Useofapparatusinmoderateclimates.
On Condensation
• Whenleftinaheatedroomwhereitiswarm
and damp, water droplets or condensation
may form inside the unit. When there is
condensation inside the unit, the unit may
not function normally. Let the unit stand for
1to 2hoursbeforeturningthepoweron,or
graduallyheatthe room andletthe unit dry
before use.
Rating Plate Location
• Theratingplateislocatedonthebackofunit.
FCC Statements
NOTE: This equipment has been tested and
found to comply with the limits for a Class
B digital device, pursuant to Part 15 of the
FCC Rules. These limits are designed to
provide reasonable protection against harmful
interference in a residential installation. This
equipmentgenerates,usesandcanradiateradio
frequencyenergy and,ifnotinstalledandused
inaccordancewith the instructions,maycause
harmful interference to radio communications.
However,thereisnoguaranteethatinterference
will not occur in a particular installation. If this
equipment does cause harmful interference
to radio or television reception, which can be
determined by turning the equipment off and
on,theuser isencouraged totryto correctthe
interference by one or more of the following
measures:
– Reorientorrelocatethereceivingantenna.
– Increase the separation between the
equipmentandreceiver.
– Connect the equipment into an outlet on a
circuitdifferentfromthattowhichthereceiver
isconnected.
– Consult the dealer or an experienced radio/
TVtechnicianforhelp.
Shielded cables must be used with this unit to
ensurecompliancewiththeClassFCClimits.
Warning: Changesormodicationstothisunit
notexpresslyapprovedbythepartyresponsible
forcompliancecouldvoidtheuser’sauthorityto
operatetheequipment.
• Shouldanytroubleoccur,disconnectthe ACpowercordandreferservicingtoa
qualiedtechnician.
• Mainplugisusedas thedisconnect device,itshallremain readilyoperable and
shouldnotbeobstructedduringintendeduse.Tobecompletelydisconnectedthe
apparatusfromsupplymains,themainplugoftheapparatusshallbedisconnected
fromthemainssocketoutletcompletely.
WARNING
Notes on Copyright
Itisforbidden bylaw tocopy, broadcast, show,
broadcast on cable, play in public, or rent
copyrightedmaterialwithoutpermission.
ApparatusClaimsofU.S.PatentNos.6,836,549;
6,381,747;7,050,698;6,516,132;and5,583,936
licensedforlimitedviewingusesonly.
This product incorporates copyright protection
technology that is protected by U.S. patents
and other intellectual property rights. Use of
this copyright protection technology must be
authorized by Macrovision, and is intended for
homeandotherlimitedviewingusesonlyunless
otherwise authorized by Macrovision. Reverse
engineeringordisassemblyisprohibited.
Thisproduct
containsalowpower
laserdevice.
User manual
DRC279RE
Notes on Unauthorized Discs
You may not be able to play some DVDs on
thisunit,particularlyiftheywerepurchased
fromoutsideyour geographicarea ormade
for business purposes.
mAINTENANCE
Cleaning the Disc
A defective or soiled disc inserted into the unit can cause sound to drop out
duringplayback.Handlethediscbyholdingitsinnerandouteredges.
• DoNOTtouchthesurfaceoftheunlabeledsideofthedisc.
• DoNOTstickpaperortapeonthesurface.
• DoNOTexposethedisctodirectsunlightorexcessiveheat.
• Cleanthediscbeforeplayback.Wipethediscfromthecenteroutwardwitha
cleaningcloth.
• NEVERusesolventssuchasbenzineoralcoholtocleanthedisc.
• Do NOT use irregular shaped discs (example: heart shaped, octagonal, etc.). Theymay cause
malfunctions.
Cleaning the Unit
• BesuretoturntheunitoffanddisconnecttheACpowercordbeforemaintainingtheunit.
• Wipetheunitwithadrysoftcloth.Ifthesurfacesareextremelydirty,wipecleanwithacloththat
hasbeendippedinaweaksoap-and-watersolutionandwrungoutthoroughly,thenwipewithadry
cloth.
• Neverusealcohol,benzine,thinner,cleaninguidorotherchemicals.DoNOTusecompressedair
toremovedust.
Important Note
Beforetransportingtheunit,removethediscfromthedisccompartment.
CAUTION
RISK OF ELECTRIC SHOCK
DO NOT OPEN
CAUTION:TOREDUCETHERISKOFELECTRICSHOCK,DO
NOTREMOVECOVER (ORBACK).NO USER-SERVICEABLE
PARTS INSIDE. REFERSERVICINGTOQUALIFIED SERVICE
PERSONNEL.
WARNING: THE APPARATUS SHALL NOT BE
EXPOSED TO DRIPPING OR SPLASHING AND
THATNOOBJECTSFILLEDWITHLIQUIDS,SUCH
ASVASES,SHALLBEPLACEDONAPPARATUS.
WARNING: TO REDUCE THE RISK OF FIRE
OR ELECTRIC SHOCK, DO NOT EXPOSE THE
APPLIANCETORAINORMOISTURE.
CAUTION:USEOFCONTROLSORADJUSTMENTS
OR PERFORMANCE OF PROCEDURES OTHER
THAN THOSE SPECIFIED MAY RESULT IN
HAZARDOUSRADIATIONEXPOSURE.
CAUTION: DANGEROFEXPLOSIONIFBATTERY
IS INCORRECTLY REPLACED. REPLACE ONLY
WITHTHESAMEOREQUIVALENTTYPE.
CAUTION: TO REDUCE THE RISK OF FIRE,
DO NOT PLACE ANY HEATING OR COOKING
APPARATUSBENEATHTHISUNIT.
CAUTION: TO PREVENT ELECTRIC SHOCK,
MATCHWIDEBLADEOFPLUGTOWIDESLOTOF
POWEROUTLET,THENFULLYINSERT.
ThesymbolforClass
II(DoubleInsulation)
Caution Marking and rating plate was located at
rear enclosure of the apparatus.
Portable Cart Warning
2. InserttwoAAAsizebatteries.
1. Open the battery door.
To Change Remote Batteries
1
16
17
19
21
22
23
25
24
20
18
26
27
28
2
4
6
7
9
11
13 12
10
8
5
3
14
15
13245678
To wall outlet 9
10 12 13
11
SETUP AND CoNNECTIoNS
CONNECTING TO A TV
TheunitcanbeconnectedtoyourTVinseveraldifferent
ways,dependingonthedesignofyourTV.
Note: Use only one of the below listed connection
methodforconnectingtoyourTV.
A. RCA AUDIO/VIDEO JACKS
Use the Audio/Video cable (supplied). Connect the
VIDEOOUTandleft/rightAUDIOOUTjacksontheunit
totheVIDEOIN andleft/rightAUDIOINjacksonyour
T V.
TV
red
white
yellow
AV cable
DRC279RE
Itisimportanttoreadthisinstructionpriortousingyournewproductforthersttime.
Need more help?
Please visit online help at www.RCAav.com
Specicationsandexternalappearancearesubjecttochangewithoutnotice.
PrintedinChina 811-727991W011
- 1- - 2- - 3- - 4-
DRC279REENGIB.indd2 4/9/200910:30:52
Slow-motion Play
1. Press the SLOW button on the remote in play
mode.
• Eachtimethe SLOW button is pressed, the
speed of slow-motion playback changes in
thefollowingsequence:
2. Press the PLAY button to return to normal
playbackspeed.
Audio Selection
On some DVDs, the sound is recorded in two
or more formats. Follow the directions below
to select the preferred language and sound
system.
1. While a disc is playing, press the AUDIO
button to show the current audio format
number.e.g.
2. Press the AUDIObuttonrepeatedlytoselect
the desired audio format.
Notes:
• If only one audio format is recorded on the
DVD,thenumberdoesnotchange.
• Some DVDs allow you to change audio
selectionsonlyviathediscmenu.Ifthisisthe
case,presstheMENUbuttonandchoosethe
appropriatelanguageonthediscmenu.
• You can select different audio channels
(Stereo, Left or Right) on an Audio CD by
pressingtheAUDIO button repeatedly.
Subtitle Selection
1. While a DVD is playing, press the
SUBTITLE button to display the
current language setting, as shown in
the example.
2. Press the SUBTITLE button repeatedly to
selectthedesiredsubtitlelanguage.Youcan
turn subtitles off by pressing the SUBTITLE
button repeatedly until the is
displayed.
Notes:
• Some DVDs are set to display subtitles
automatically, and you cannot turn them off
evenifyousetthesubtitlefunctiontooff.
• During some scenes, the subtitles may not
appear immediately after you select your
desiredscene.
• The number of subtitle languages recorded
differs depending on the disc. If only one
languageisrecorded,thelanguagedoesnot
change.
• This function can only be used for discs
on which subtitles have been recorded in
multiplelanguages.
• Some DVDs allow you to change subtitles
only via the disc menu. If this is the case,
press the MENU button and choose the
appropriatesubtitleonthediscmenu.
Angle Selection
Some DVDs contain scenes which have been
shotfromanumberofdifferentangles.Forthese
discs,thesamescenecanbeviewedfromeach
ofthesedifferentangles.
1. While you are playing a DVD with different
anglesrecorded,presstheANGLE button to
viewthenumberofcurrentanglesavailable.
2. Press the ANGLE button repeatedly to
changethescenetothenextrecordedangle.
e.g.
• After approx. two seconds, playback will
continuefromthenewangleyouselected.
• If no button is pressed within 10 seconds,
playback continues without changing the
currentangle.
Notes:
• This function can only be used for discs on
whichscenesshotfrommultipleangleshave
beenrecorded.
• If only one angle is recorded, is
displayed.
Display Function
While the disc is playing, press the DISPLAY
button on the remote control repeatedly to
display information on operation status.
Elapsed Time:Elapsedtimefromthebeginning
ofthechapter/titlewhichiscurrentlyplaying.
Remaining Time: Remaining time of the
chapter/titlewhichiscurrentlyplaying.
Playing a Disc
1. Press the STANDBY / ON button to turn on
the unit.
 See CUSTOMIZING THE FUNCTION
SETTINGSbeforeproceedingtostep2.
2. Press the OPEN/CLOSE button to open
thedisctray.
3. Placeadisc ontothedisctraywiththelabel
side up.
4. Press the OPEN/CLOSE button to close
thedisctray.Ittakesashortwhileforyourunit
toloadthedisc.Afterloading,formostDVDs,
theunitwillautomaticallytakeyoumainmenu
orstartplaying.
5. Iftheunitdoesnotautomaticallystartplaying
the DVD, press the PLAY button.
Pausing Playback (Still Mode)
Press the PAUSE button on the remote. To
resume normal playback, press the PLAY
button.
Each time you press the PAUSE button, the
pictureadvancesoneframe.
Stopping Playback
• Press the STOP button at the location
where you want to interrupt playback. To
resume playback at the position where
the disc was stopped, press the PLAY
button.
• If you press the STOP button twice, the
unit’s memory will be cleared and pressing
the PLAYbuttonwillresetthedisc tothe
beginning.
Zooming into an image
Whilea discisplaying,pressthe ZOOM button
toenlargetheimageinseverallevels.
• Whilean imageiszoomed,you canuse the
, , or CURSORbuttonto shiftthe
viewanddisplaythepartyouwant.
• To return to normal view, press
the ZOOM button until the
123Off
 shows. The
screenwillreturntonormal.
• Whenyoureach theedgeof theimage,the
displaywillnotshiftanymoreinthatdirection.
Skipping (Forward / Reverse)
• Press the PREV button to go back to
currentorpreviouschapters/tracks.
• Press the NEXT button to advance
chapters/tracks.
• For audio CDs, use the number buttons on
theremotecontroltojumpimmediatelytothe
desiredtracknumber.
Fast Forward / Fast Reverse
1. Press the SEARCH or SEARCH
buttonwhenadiscisplaying.Eachtimeyou
press the SEARCH or SEARCH
button, the playback speed changes in the
followingsequence:
2. Press the PLAY button when you reach
thedesiredpointtoresumenormalplayback.
Notes:
• The unit mutes sound and subtitles during
reverseandforwardscanofDVDs.
• Thefastplaybackspeedmaydifferdepending
onthedisc.
PlayingTitles/ChaptersinaFavoriteOrder
Youcancombineyourfavoritetitles/chaptersandplaythemintheorderyoudetermine.
1. WhenaDVDisstopped,presstheMEMORYbuttonandthefollowingdisplayappears.
2. Selecttheitemsintheorderyouwantby pressingthe numberbuttons.Eachtimeyoupress the
Cursorbuttons( , , , ),the spaceishighlighted.Highlightwhere youwantto enter,then
pressthecorrespondingnumberbuttons.
3. PresstheCursorbuttons( , , , ) tomovethehighlighted
barto“Play”,then presstheOK button.TheDVDplayerstarts
memoryplayback.
4. Toresumenormalplaybackfrommemoryplayback
a) PresstheMEMORYbuttoninstopmode.
b) PresstheCursorbuttons( , , , )tomovethehighlighted
barto“ClearAll”,thenpresstheOKbutton.Alltheinputprograms
willbecleared.
c) Pressthe PLAYbuttontoresumenormalplayback.
Note:
• Ifthetitle orchapternumbersyouentered isnotpermitted bythe DVD,afteryou presstheOK
button,itwillrestoreto---.Youshouldre-entercorrectnumbers.
• Somediscsmaynotpermitmemoryplaybackoperation.
• If you select repeat during memory playback, the DVD player repeats the current memory
playback.
• If you press the MEMORY button while the display appears on the TV screen, the display
disappears.
• The programmed selections will be cleared when you open the disc tray or turn off the DVD
player.
Locating a specific chapter / track / title / time
If you know the chapter / track / title / time number you want to
play,youcanlocateaspecicchapter/track/title/timebydirectly
selectingachapter/track/title/timenumber.
1. Press the GOTObuttontosearchyourdesiredchapter/ track/
title/time.
2. Press or buttontohighlightachapter/track/title/timeand
pressthecorrespondingnumberbutton(s)forthechapter/track/
title/timeyouwant.
3. Press the OKbuttontoconrm.Theunitwillstartplaybackabout
3secondslater.
Notes:
• Somediscsmaynotrespondtothisprocess.
• Somescenesmaynotbelocatedaspreciselyasyouspecied.
• Thismethodfor accessing speciclocationsis availableonlywithin the current titleofthe DVD
disc.
Youcanplayaspecictitleorchapterrepeatedly.
(Titlerepeat,chapterrepeat,A-Brepeat)
Repeating a chapter
Youcanplaythesamechapterrepeatedly.
1. While the disc is playing, press the REPEAT
DISC button until the
indicator displays on the screen. The current
chapterisplayedrepeatedly.
Repeating a title
Youcanplaythesametitlerepeatedly.
2. While the disc is playing, press
the REPEAT DISC button until the
indicatordisplaysonthescreen.
Thecurrenttitleisplayedrepeatedly.
Toresumenormalplayback
3. While the disc is playing, press
the REPEAT DISC button until the
indicatordisplaysonthescreen.
You can play a single track and whole disc
repeatedly.
Repeating a single track
Youcanplaythesametrackrepeatedly.
1. While the disc is playing, press
the REPEAT DISC button until the
 indicator displays on the
screen.Thecurrenttrackisplayedrepeatedly.
Repeating a whole disc
2. While the disc is playing, press
the REPEAT DISC button until the
indicatordisplaysonthescreen.
Thewholediscisplayedrepeatedly.
Toresumenormalplayback
3. Press the REPEAT DISC button until the
indicatordisplaysonthescreen.
Youcanplayaspecicsectionrepeatedly.
Repeating a specific section
1. While the disc is playing, press the REPEAT
A-B button at the beginning of the section (
 is displayed) you want to play
repeatedly.
2. Press the REPEAT A-B button again at the
endofthesection( isdisplayed).
3. Theunitwillimmediatelybeginreplayingyour
selection.
Toresumenormalplayback
4. While the disc is playing, press the REPEAT
A-B button until the indicator
displaysonthescreen.
Notes:
• Some discs may not permit A-B repeat
operation.
• A-Brepeatcan onlybe usedwithinthe same
title.If the star t and end of the section to be
repeated are in different titles, A-B repeat is
cancelled.
• You can specify a segment only within the
currenttitleortrack.
• The A-B repeat function does not operate in
scenes where different camera angles are
recorded.
PLAYING A DISC
Thisusermanualexplainsthebasicinstructions
foroperatingthisunit.SomeDVDsareproduced
in a manner that allows specic or limited
operationduringplayback.Therefore,thisunit
may not respond to all operating commands.
THISISNOTADEFECT.Pleasereferto the
instructionsaccompanyingthespecicDVDin
questionformoreinformationabouttheoptions
availableonthatDVD.
mayappearonthescreenduringoperation.
It means that the desired operation is not
permittedbytheunitordisc.
PLAYING PICTURE FILE DISC
PRoGRAmmAbLE mEmoRY
REPEAT PLAYbACK
ThisunitcanplaypicturelesrecordedonCD-RandCD-RWdiscs.
Playing a Picture File Disc
1. Openthediscdoor.
2. Placeapicturelediscontothetraywithlabelsideup.
3.Closethediscdoor.
4.The unit will load the disc and automatically display the
contentsofthedisconthescreen,whileplayingthebeginning
oftherstpicturele.Theseleswillthenbeplayedbackone
byone.Iftheunitdoesnotautomaticallystartplaying,press
the PLAY button.
5. Press or buttontoselectapictureletoview.
6. Press the , , or CURSORbuttontoviewandselect
thelesthatyouwanttoview,thenpresstheOKbuttontoconrmtheselectedle.
NOTE:
• Youcanpressthe PAUSEbuttontointerruptplayback,andpressthe PLAY button to resume
playback.
• Duringplayback,pressthe / buttonrepeatedlytorotatethepicture.Press torotatepicture
anti-clockwiseby90°.Press torotatepictureclockwiseby90°.
LoCATING A DESIRED SECTIoN
CUSTomIZING THE FUNCTIoN SETTINGS
B. CONNECTING TO A DISPLAY (Using a
HDMI cable)
ForTVs that suppor t it, HDMI can provide the
bestqualityaudio andvideooutput (depending
on media source), and so is the preferred
connection type.The HDMI cable incorporates
both audio and video signals, so you will have
justonecablerunningfrom theunittoyourTV.
Using the HDMI cable (not included), connect
theHDMIOUTjackonyourunittotheHDMIIN
jackonyourTVorHDMI-compatibledisplay.
• WhenusingtheHDMIcable,donotconnect
tootheranalogvideooutputs.
• Setan outputsignalfromtheHDMIterminal
of the DVD player in accordance with your
TV’sinputsignal
• WhenusingHDMIcable,settheHDMIAudio
toPCM.
• PresstheHDMIbuttonontheremotecontrol
tochangeoutputsignalsasbelow:
 480p(progressive)
 720p(progressive)
 1080I(interlace)
 1080p(progressive)
Notes:
• Refertoyourowner’smanualtotheconnected
TVaswell.
• WhenyouconnecttheDVDplayertoyourTV,
besuretoturnoffthepowerandunplugboth
unitsfromthe walloutletbeforemakingany
connections.
• If you have a HDMI (with HDCP) equipped
monitoror display,youcanconnectittothis
playerusingaHDMIcable.
HDMI, the HDMI logo and High-Definition Multimedia
Interface are trademarks or registered trademarks of
HDMI licensing LLC.
CONNECTING TO OPTIONAL EQUIPMENT (AMPLIFIER)
DRC279RE
Amplifier of
stereo system, etc.
AUDIO IN
ANALOGUE CONNECTION
red
white
Audio cable
(red and white)
DRC279RE
Audio equipment with
digital audio input jack
DIGITAL
AUDIO IN
DIGITAL CONNECTION
Coaxial Digital
Audio cable
A.ANALOGUECONNECTION
Usinganaudio/videocable,connecttheleft/right
AUDIOOUT jackon yourunit totheAUDIOIN
jackonyourothersource.
B.DIGITALCONNECTION
Usingacoaxialdigitalaudiocable(notincluded),
connect the DIGITAL COAXIAL OUT jack on
yourunittotheDIGITALAUDIOINjackonyour
othersource.
Notes:
• Whenyouconnecttheunittootherequipment,besuretoturnoffthepowerandunplugallofthe
equipmentfromthewalloutletbeforemakinganyconnections.
• Iftheexternalequipmentistelevisionandthisaudiosystemisclosetoit,youmayexperiencethe
interferenceifthetunerfunctionisselectedwhilethetelevisionisworking.
• Refertotheinstructionmanualoftheconnectedequipmentaswell.
Use Default Settings
1. PresstheSETUPbutton.
2. Press the / buttontoselectMisc.
3. Press the  button,then select “Use Default
Settings”dialogueboxandpressOKbutton.
4. Press the / buttonto select“Yes”.Press
the OK button and the original setting will be
restored.The unit will exit the default setting
menuautomaticallyandre-loadthediscinthe
disctray.
Note:  It will take3-5 seconds to reset the DVD
playertothefactorydefault.
1/2 1/4 1/6 1/8
Filter
Repeat : Off
Mode : Normal
Search
Title
Chapter
Time
1
- - -
00. 00. 00
Search
Track
Time
Disc Time
2
00. 00. 00
-- : -- : --
Elapsed time
Remaining time
e.g.
Title number
Chapter
number
PLAY moDES FoR CD oR JPG DISC
WhenplayingCD/JPGdiscs,youcanmodifythePlayModesthroughtheToolkitwhichappearson
thepicture onthescreen.Pressthe /  buttonto navigatebetweenthewindowsandthe  /
buttontoselectles/tracksorplaymodeitems.ThenpresstheENTERbutton.
1. PresstheCursorbuttons( , , , )toselect“Editmode”thenpresstheENTERbutton.
2. Use the Cursor buttons ( , , , ) to select tracks/les shown on the left hand side of the
window.PresstheENTERbuttontoconrmtheselectedtracks/les.“ “ will appear in front of the
selectedtracks/les.
3. Select“Addtoprogram”,then presstheENTER button.“ “will disappearfromthe screen.It
meansthatthetracks/lesyouhaveselectedareaddedintothe“Programview”.
4. Select“Programview” toviewprogrammed les.To add morelesby“Browserview”follow the
steps.
5. Press the PLAYbuttontostarttheprogramplayback.
TheToolkithasthefollowingplaymodeitems:
• Repeat(Off/Track/All):
 Off:Resumesnormalplayback.
 Track:Repeatsthecurrenttrack/le.
 All:Repeatsalllesonthecurrentfolderoralltracksonthedisc.
• Mode(Normal/Shufe/Musicintro):
 Normal:Resumesnormalplayback.
 Shufe:Playsbacktracks/lesinrandomorder.
 Music intro (for Audio CD only): Only plays back the rst 10
secondsofallthetracksonthecurrentfolder/disc.
• Editmode:Programoperationworksonlywhen“Editmode”isselected.
• Programview:Toviewtracks/lesinthe“Programview”list.Itisdisabledwhenthe“Programview”
list is empty.
• Addto program:Addles/tracks tothe“Programview”list.It isdisabledifthe“Editmode”is not
selected.
• Browserview:Toviewles/tracksintheoriginalviewlist.
• Clearprogram:Deletetheles/tracksinthe“Programview”list.
 Selectale/trackormoreyouwanttodeleteincompletestopmode(pressthe STOPbuttontwice).
Usethe Cursorbuttons( , , , ) toselect tracks/lesyouwanttodelete,a“ ” will appear
besidethedeletedle/track.Select“Clearprogram”andthenpresstheENTERbutton.Itisdisabled
ifthe“Editmode”isnotselected.
Note:Theprogramwillbedeletedifthediscdoorisopened,orselectedlesaredeletedbyselecting
“Clearprogram”.
Language
1. PresstheSETUPbutton.
2. Press the buttontoselectLanguage.
3. Press the OK button, then the / button to
shiftandchangetheLanguage.
4. Press the OK button.
5. PresstheSETUPbuttontoexitthemenu.
Subtitle
1. PresstheSETUPbutton.
2. Press the button, then the / button to
selectSubtitle.
3. Press the OK button, then the / button to
shiftandchangetheLanguage.
4. Press the OK button.
5. PresstheSETUPbuttontoexitthemenu.
Note:
•SomeDVDs maybe setto displaysubtitles in
a different language other than the ones you
selected. A prior subtitle language may be
programmedonthedisc.
• Some DVDs allow you to change subtitle
selectionsusingthedisc menu only.Ifthis is
thecase,presstheMENUbuttonandchoose
the appropriate subtitle language from the
selectiononthediscmenu.
Audio
1. PresstheSETUPbutton.
2. Press the button, then the / button to
selectAudio.
3. Press the OK button, then the  / button
until your preferred Audio is displayed.
4. Press the OK button.
5. PresstheSETUPbuttontoexitthemenu.
Note:
• Some DVDs may not be played in the
languageyou selected.Apriorlanguagemay
beprogrammedonthedisc.
DVD Menu
1. PresstheSETUPbutton.
2. Press the button, then the / button to
selectDVDMenu.
3. Press the OK button, then the  / button
until your preferred DVD Menu language is
displayed.
4. Press the OK button.
5. PresstheSETUPbuttontoexitthemenu.
Note:
• SomeDVDsmaynotincludeyourpre-selected
language. In this case, the DVD player
automatically displays disc menus consistent
withthedisc’sinitiallanguagesetting.
Aspect Ratio
1. PresstheSETUPbutton.
2. Press the / buttontoselectVideo.
3. Press the button, then the / button to
selectAspectRatio.
4. Press the OK button, then the / button to
shiftandchangetheaspectratio.
5. Press the OK button.
6. PresstheSETUPbuttontoexitthemenu.
Note:
• The displayable picture size is preset on the
DVD.Therefore,theplaybackpictureofsome
DVDsmaynotconformtothepicturesizeyou
select.
• When you play DVDs recorded in the 4:3
picture size only, the playback picture always
appears in the 4:3 picture size regardless of
theAspectRatiosetting.
• Select16:9to conformtothe LCDscreenon
theunit.AlwaysbesurethatyourAspectRatio
conformstotheactualTVinuseifyouconnect
theunittoaTV.
View Mode
1. PresstheSETUPbutton.
2. Press the / buttontoselectVideo.
3. Press the button, then the / button to
selectViewMode.
4. Press the OK button, then the / button to
shiftandchangetheViewMode.
5. Press the OK button.
6. PresstheSETUPbuttontoexitthemenu.
Fill: Fillthescreenwithdecodedimage.
Original: Display image as it original size.
“Original” is preferred for Jpeg
viewing.
HeightFit: Fit the screen height with image
height.
WidthFit: Fitthescreenwidthwithimagewidth.
AutoFit: Automatically t the decoded image
onscreenwithoutdistortion.
PanScan: Automaticallydisplaydecodedimage
onfullscreenwithoutdistortion.
Note:DependingontheDVD,youmaynotbeable
toviewthemodeasselected.
HDMI Resolution
1. PresstheSETUPbutton.
2. Press the / buttontoselectVideo.
3. Press the button, then the / button to
selectHDMIResolution.
4. Press the OK button, then the / button to
selectthe options(Auto,480p,720p,1080ior
1080p).
5. Press the OK button.
6. PresstheSETUPbuttontoexitthemenu.
Note:
Select the HDMI resolution according to the
performanceoftheconnectedTV.
JPEG Interval
1. PresstheSETUPbutton.
2. Press the / buttontoselectVideo.
3. Press the button, then the / button to
selectJPEGInterval.
4. Press the OK button, then the / button to
shiftandchangeJPEGinterval.
5. Press the OK button.
6. PresstheSETUPbuttontoexitthemenu.
Off: Playsbackoneleatatime.
5seconds Playsback imagesinthe formofa
slideshowat5secondsinterval.
10seconds Playsback imagesinthe formofa
slideshowat10secondsinterval.
15seconds Playsback imagesinthe formofa
slideshowat15secondsinterval.
Digital Output
1. PresstheSETUPbutton.
2. Press the / buttontoselectAudio.
3. Press the button, then press the  /
buttontoselectDigitalOutput.
4. Press the OK button, then press the  /
buttontoselect theoutputsound format(Off,
PCMorRaw).
5. Press the OK button.
6. PresstheSETUPbuttontoexitthemenu.
PCM: SelectwhenconnectedtoaMulti-channel
digitalstereoamplier.
Raw: Discaudiorawdatawillbeoutput.
Off: TodisableDigitalOutput.
Note:IfyouconnectedtoaTVusingHDMI,make
suretoselect“PCM”.
Night Mode
1. PresstheSETUPbutton.
2. Press the / buttontoselectAudio.
3. Press the button, then press the  /
buttontoselectNightMode.
4. Press the OK button, then press the  /
buttontochangetheOn/Offmode.
5. Press the OK button.
6. PresstheSETUPbuttontoexitthemenu.
Note: Night mode is Dynamic Range Control
(DRC)optionforanalogaudiooutput.
Language
Video
Audio
Misc
- 5- - 6- - 7- - 8-
DRC279REENGIB.indd1 4/9/200910:30:47