Electrical hazards Be careful the details below when you use.
Do not pull the cord when
taking out the power cord, and
keep wet hands away from
connecting plug.
Do not use a damaged power
cord or loose outlet.
▶ Risk of electric shock or fire.
▶ Risk of electric shock or fire.
Do not insert multiple
connecting plugs in an outlet.
▶ Risk of fire or electrical
overload.
Never pull the plug out of the
outlet during the incubation
period.
▶Incubation will be interrupted.
Do not twist or crush electric
cord.
▶ Risk of electric shock or fire.
Setting Cautions Be careful the details below when you use.
Cleaning Cautions Be sure to disconnect the electric cord from the outlet
before cleaning.
Clean the incubator by a soft
cloth with a neutral detergent.
Do not spray cleanser directly
on the incubator surface.
Do not use chemicals like wax,
benzene, alcohol, thinner,
aromatic, or lubricant, etc.
Brush away dust on the plug
with a dry cloth.
For special cleaning of inner
part per year, contact to the
service center.
▶ If you don't clean the inside of
incubator for a long time, dust
can cause some trouble or a fire.
Do not install under the direct
sunlight.
Do not install in dusty or dirty
environment.
▶ Risk of fire or interference
with the incubation process.
▶ Risk of damage or fire within
the incubator.
Do not install in excessively
cold or hot conditions,
cigarette smoke, etc.
Do not install in moist or
humid environment.
▶ Risk of interference with
the incubation process.
▶ Risk of fire or electric shock.
Do not use any other
non-standard parts except
those provided.
▶ Risk of damage or hatching
failure.
Please ensure that no small
objects get into
the holes on the incubator.
▶ Risk of electric shock or fire.
Do not disassemble or modify
the incubator in any way.
▶ Risk if electric shock or fire.
If the incubator sounds
strange or emits smoke
contact your service center.
▶ Risk of electric shock or fire.
If the incubator requires repair
disconnect from the power
supply and please contact to
your service center.
Clean the incubator thoroughly
before storing.
Install away from heat
sources.
▶ Risk of damage to the
incubator case and
interference with the
incubation process.
Do not turn the incubator
upside down.
▶ Water will pour out of the
incubator, and view window
can be dropped or damaged.
Ensure that the incubator is
installed on a stable surface
away from edges.
▶ Risk of damage to incubator
and eggs and user from
accidental knocks or drops.
Do not cover the ventilating
opening.
▶ Inner temperature can rise,
interrupting incubation.
Children should be supervised
to ensure that they do not play
with the appliance.
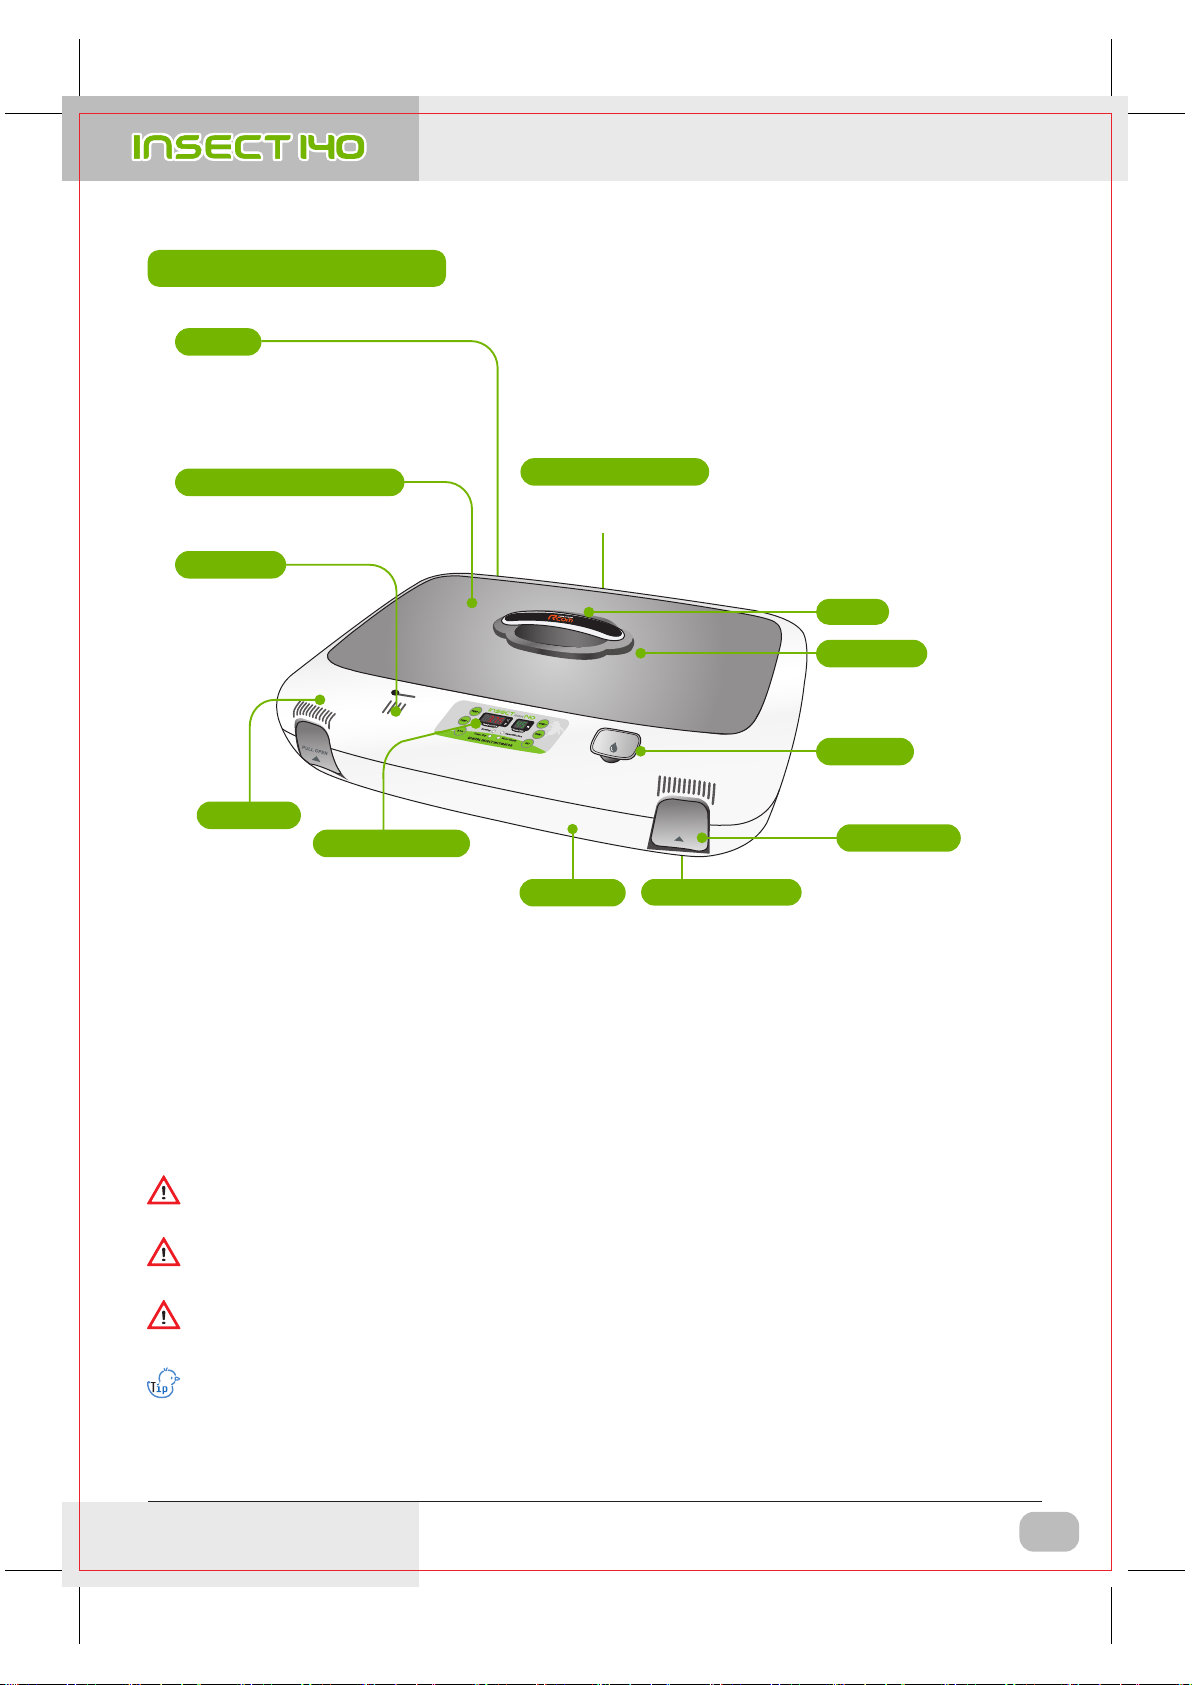
DIGITAL INCUBATOR
4
1. Introduction (1) Safety Precautions
USA & Canada Official Sales & Service https://www.R-Com-Hatcher.com
Insect Incubator Rcom Max 140 User Manual