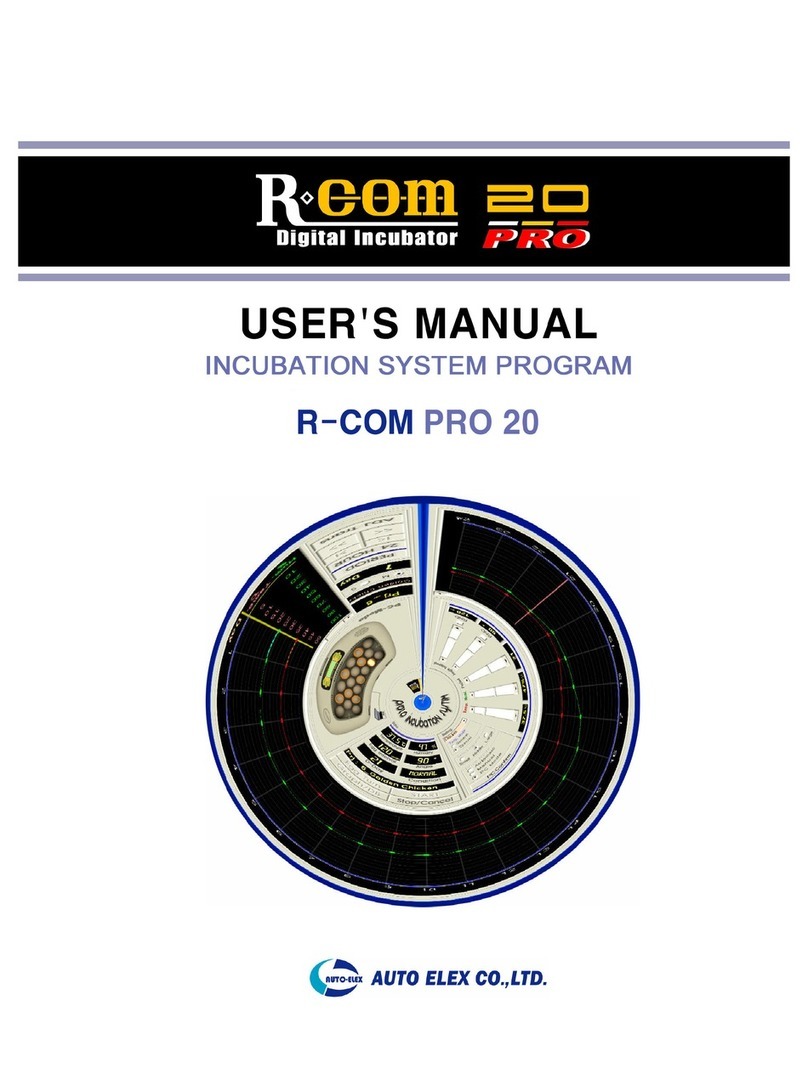
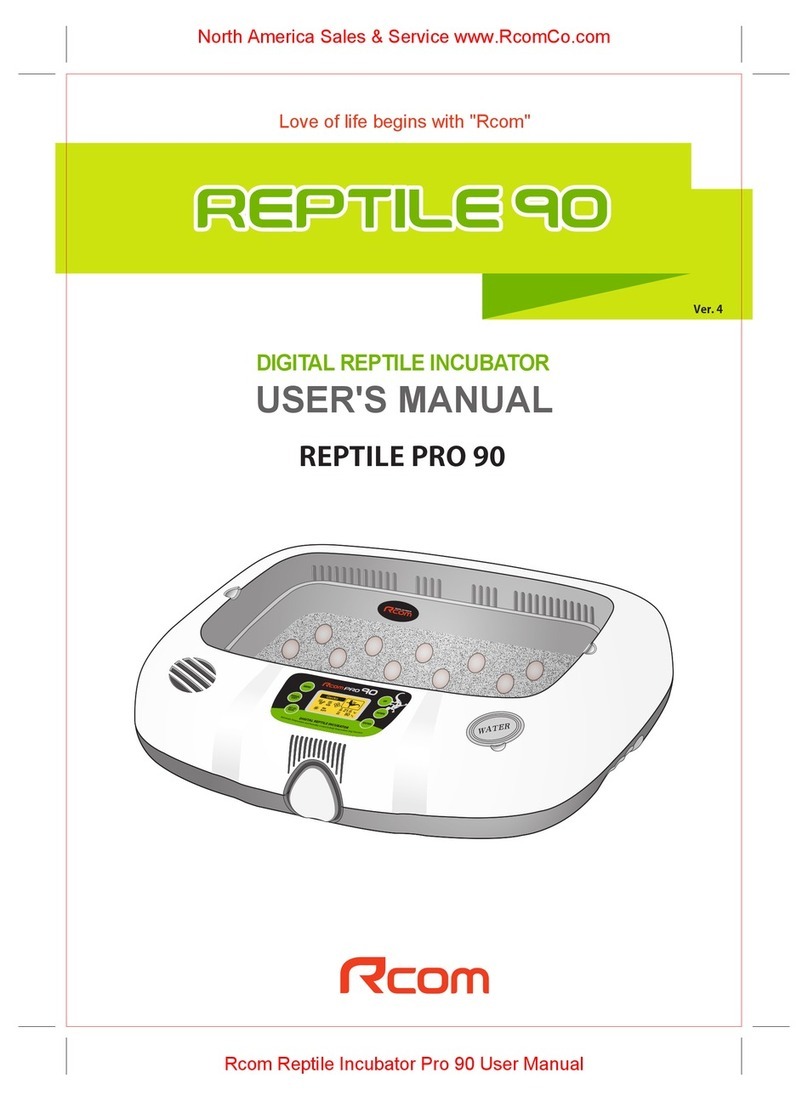
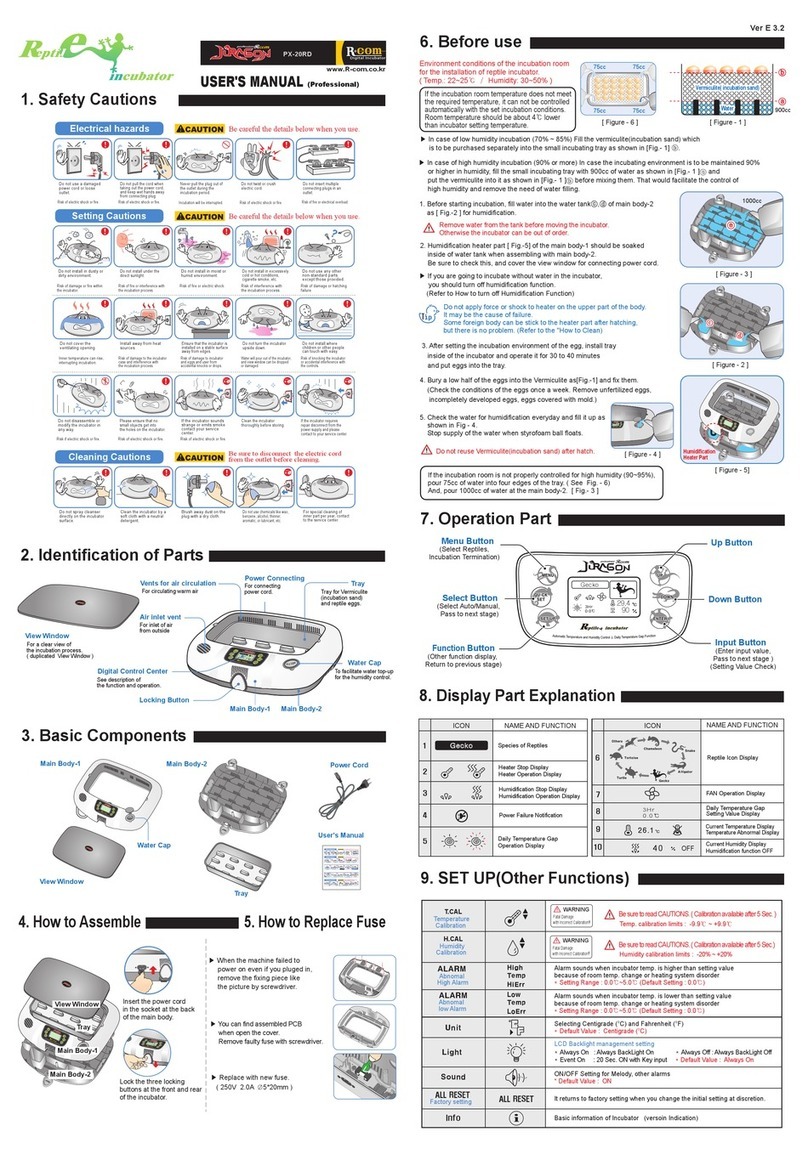
Rcom INSECT MAX 70 User manual

Ver. 1.0
DIGITAL INSECT INCUBATOR
INSECT MAX 70
POWER INLET
PUMP POWER
USER'S MANUAL
USA & Canada Official Sales & Service https://www.R-Com-Hatcher.com
Insect Incubator Rcom Max 70 User Manual
DIGITAL INCUBATOR
Contents
1. Introduction
(1) Rcom Insect 70 Introduction
3 ~ 7
(2) Safety Precautions
(4) Name & Function of Operation Parts
(3) Identification of Parts and Composition
5. Management
(1) How to Disassemble and Clean the Incubator
20 ~ 21
2. Before use
(1) What's an Incubation Room?
8 ~ 13
(2) How to Assemble Main Body
(3) APS Assembly / Speed Control / Tube Replacement/ Storage and Cleaning
(4) Humidity & Air Maintenance During Incubation / Dew Condensation
6. Product Information
(1) How to Replace the Fuse
22 ~ 24
(2) Troubleshooting
(3) Specification
3. Incubation
14 ~ 16
(1) Incubator Installation
(2) Incubation start / Incubation Termination
4. Function Settings
16 ~ 19
(1) Incubator Initialization / Return to Factory Setting
(2)
Temperature & Humidity Setting / How to Set Abnormal High & Low Temp. Alarm
(3) How to change Centigrade & Fahrenheit / Work Automatic Pumping System by Force
Introduction
Incubation
Product Information
Function Settings
Management
Before use
How to Use Rcom Insect MAX 70
Successful hatching depends on many numbers of factors. Neither Autoelex (Rcom) nor its global
distributors and vendors can be held responsible for loss of life or property damage caused by user
neglect, alteration, modification or painting, change of use or power failure. To avoid errors, mishaps
and danger, carefully check this User Manual before initial use. Also please check the manual regularly
to ensure your operation of the machine is correct.
Caution : Caution mark against a fault that can cause damage, trouble, or failure of incubation.
Tip : References or useful suggestions in using Rcom product
Mark Explanation
Warning of actions which may be dangerous or cause damage to the incubator.
Prohibited.
Do not disassemble.
Do not touch.
It is necessary to keep.
Remove the power cord from outlet.
Ground Connection for preventing electric shock.
2
USA & Canada Official Sales & Service https://www.R-Com-Hatcher.com
Insect Incubator Rcom Max 70 User Manual
Rcom Insect 70
DIGITAL INCUBATOR
(1) Rcom Insect 70 Introduction
1. Introduction
First of all, we would like to express our deep appreciation for all the customers who purchased Rcom Insect
Incubator. Rcom Insect Incubator was designed to be used easily and conveniently by the newest digital control
method for controlling optimal incubation environment automatically, however, in order to get the best incubation
result, at first, it is very important for users to have some incubation knowledge and right machine operation method.
Therefore, before suing incubator, be sure to read instruction manual. Rcom Insect Incubator provides the best
incubation environment, however, it is necessary for users to observe and adjust each environment necessary for
incubation including egg kind, temperature and humidity management by incubation date, surrounding conditions
of incubator, and this product was made it possible to make the best setting for all the environments necessary for
incubation.
[Main Features]
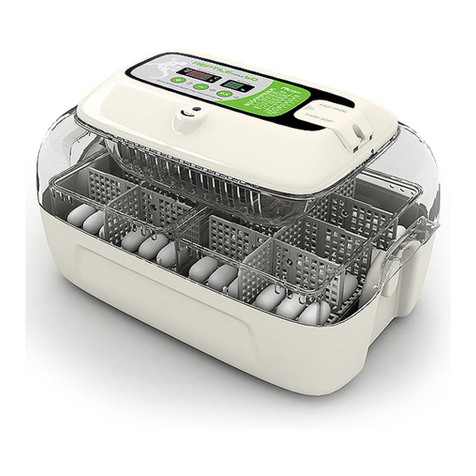
* Luxury design with streamlined egg shaped concept
* Automatic Temperature&Humidity setting and control
*Artificial intelligence electronic control device to automatically adjust the cycle of incubator according to the ambient
conditions
* Convenient humidifier with Automatic Pumping System (A.P.S)
* Clear and transparent large view-window
*Minimizing the parasitic bacteria by not using any interior material and using revolutionary hygienicduplicated
insulation structure (bottom tray)
* Variable air control lever to control air amount inside the incubator
* Applying Rcom's optimum air flow technology to avoid the fan's air from directly touching egg
* Enhanced reliability by applicating Swiss's Sensirion's 3rd generation temperature & humidity sensor
[Easy Features]
* Degree C / degree F interchangeable
*Alarm and indicator function for abnormal high or low temperature by drastic and unusual outer temperature change
* Incubation data memory function and power outage notification function in case of power outage
* Closed structure to avoid waterdrops (condensation) on the view window from leaking out of incubator
* Rotating heater support which conveniently controls the tension of the heater
* Application of Water Nipple to supply water easily for humidification
* Automatic humidification function for minimum 2 minutes (Press + button for 10 sec.)
* Automatic Humidification Pumping System, and precise Speed Regulator VR to control the amount of pumping
* Air Vent Holes for inflow of fresh air from outside to inside by affecting the heat insulation to the minimum
*Not required to have a balance weight with the optimized incubator design considering the centroid of incubator's
top and bottom when eggs are placed
*The Automatic Pumping System (APS) for accurate humidification, as a pump of silicone tube, is structured to
make tube changed with easy and durable by installing mini roller on the four areas with friction
Features of Rcom Insect 70
3
USA & Canada Official Sales & Service https://www.R-Com-Hatcher.com
Insect Incubator Rcom Max 70 User Manual
1. Introduction (2) Safety Precautions
DIGITAL INCUBATOR
Do not pull the cord when
taking out the power cord, and
keep wet hands away from
connecting plug.
Do not use a damaged power
cord or loose outlet.
▶ Risk of electric shock or fire.
Do not insert multiple
connecting plugs in an outlet.
▶ Risk of fire or electrical
overload.
Never pull the plug out of the
outlet during the incubation
period.
▶Incubation will be interrupted.
Do not twist or crush electric
cord.
▶ Risk of electric shock or fire.
Electrical hazards Be careful the details below when you use.
Setting Cautions Be careful the details below when you use.
Do not install under the direct
sunlight.
Do not install in dusty or dirty
environment.
▶ Risk of fire or interference
with the incubation process.
▶ Risk of damage or fire within
the incubator.
Do not install in excessively
cold or hot conditions,
cigarette smoke, etc.
Do not install in moist or
humid environment.
▶ Risk of interference with
the incubation process.
▶ Risk of fire or electric shock.
Do not use any other
non-standard parts except
those provided.
▶ Risk of damage or hatching
failure.
Install away from heat
sources.
▶ Risk of damage to the
incubator case and
interference with the
incubation process.
Ensure that the incubator is
installed on a stable surface
away from edges.
▶ Risk of damage to incubator
and eggs and user from
accidental knocks or drops.
Do not cover the ventilating
opening.
▶ Inner temperature can rise,
interrupting incubation. ▶ Risk of knocking the incubator
or accidental interference with
the controls.
▶ Water wil pour out of the
incubator, and view window
can be dropped or damaged.
Children should be supervised
to ensure that they do not play
with the appliance.
Do not turn the incubator
upside down.
Please ensure that no small
objects get into
the holes on the incubator.
▶Risk of electric shock or fire.
Do not disassemble or modify
the incubator in any way.
▶ Risk if electric shock or fire.
If the incubator sounds
strange or emits smoke
contact your service center.
▶Risk of electric shock or fire.
Clean the incubator
thoroughly before storing.
If the incubator requires repair
disconnect from the power
supply and please contact to
your service center.
Cleaning Cautions Be sure to disconnect the electric cord from the outlet
before cleaning.
Do not spray cleanser directly
on the incubator surface.
Brush away dust on the plug
with a dry cloth.
Clean the incubator by a soft
cloth with a neutral detergent.
Do not use chemicals like wax,
benzene, alcohol, thinner,
aromatic, or lubricant, etc.
For special cleaning of inner
part per year, contact to the
service center.
▶ If you don't clean the inside of
incubator for a long time, dust
can cause some trouble or a fire.
4
USA & Canada Official Sales & Service https://www.R-Com-Hatcher.com
Insect Incubator Rcom Max 70 User Manual
1. Introduction
DIGITAL INCUBATOR
OUT
IN
Insect House
(3) Identification of Parts
and Composition
Identification of Parts
Power cover
Humidification Nipple
Ventilation Control Lever
Main Controller
View Window
Tray
Automatic pumping
system(APS)
Bottom body
ABS Divider
<PET bottle>
(sold separately)
5
USA & Canada Official Sales & Service https://www.R-Com-Hatcher.com
Insect Incubator Rcom Max 70 User Manual
1. Introduction
DIGITAL INCUBATOR
(3) Identification of Parts
and Composition
6
Power Cord
Basic Components
View window Egg Tray
Power Cap
Main Controller
Rated voltage and product serial No. are marked inside of power cover.
Be sure to check this before connecting power.
Your Serial no. located on left-side of the main controller. Please be sure not to get dirty or break.
(ex:RCM0000000)
Nipple (1pcs.)
(Silicon Tube)
12.5cm (diameter : Ø2.6 *3.5)
Power Cover fixing bolt
Main Controller Assembly Bolts
(1pcs.)
(2pcs.)
Humidity Pad
Expendables
ABS Divider Manual
APS Components
Silicon Tube
Pump Case
Bolt (2pcs.)
Pump Main Body
Silicon Tube and Nipple (2pcs.)
Humi Pad Clip (2pcs.)
1.5m (diameter : Ø2.6 * 3.5)
(Humidity Pad Fixing Use)
3.5cm (diameter : Ø2.6 * 3.5)
Roller
Pumping Motor
Gear
Pump Frame
Insect House (54pcs.)
Bottom body
Hatching Pad
USA & Canada Official Sales & Service https://www.R-Com-Hatcher.com
Insect Incubator Rcom Max 70 User Manual
조작부의 명칭과 기능
1. Introduction
DIGITAL INCUBATOR
① ④
⑤
⑥⑦ ⑧
② ③
Setting Mode: Press two buttons at the same time to go to Setting Mode.
Select Menu / Quick Movement / Cancellation / Setting value check during incubation
Value + / APS is forced to operate if press 5sec. / APS is forced to operate for 2min. if press 10sec.
Value - / Factory Initialization
● Function Key
Function
Dispaly
Default Setting
Temp.
35.0℃
tEP
Humidity
60%
rH HI
2℃
Abnormal high
temp. alarm
LO
-3℃
Abnormal low
temp. alarm
℃
℃/ ℉
Centigrade / Fahrenheit
Name & Function of Operation Parts
(4) Name & Function of
Operation Parts
Heater Operation Lamp
: Light on when working
①
Temp. Display
: Current Temperature Display
②
Humidity Display
: Current Humidity Display
③
Pumping System Operation Lamp
: Light on when working
④
Power Failure Alarm Function (FND light)
: Light on when power failure (Cancel Button : OK)
⑤
Up Button
: Setting Temp. & Humidity UP
⑥
Down Button
: Setting Temp. & Humidity DOWN
⑦
Menu Selecting Button
: Setting Value check
⑧
●Names and components of each part
Insect MAX 70 is available to automatic humidity raise only, if you want to control low humidity level,
please adjust "Air Controlling Lever" by manual [refer to page 13]
Press buttons at the same time to go to setting mode.
7
USA & Canada Official Sales & Service https://www.R-Com-Hatcher.com
Insect Incubator Rcom Max 70 User Manual
POWER INLET
PUMP POWER
2. Before use
DIGITAL INCUBATOR
OUT
IN
(1) What is an incubation Room?
(2) How to Assemble
Incubation room? It means the place where the incubator is installed and operated, and as it has much effect on
incubation rate according to the environment of incubation room, it is good to install incubator at the place where
there is little noise and vibration in the vicinity and the temperature range isn’t severe in the temperature of 22~25℃
(71.6~77℉). In particular, as there are many cases that the temperature falls rapidly in the nighttime differently
from the daytime, it is necessary to check certainly, and during daytime, incubator must not be exposed directly to
the sunlight.
What is an Incubation Room?
When the temperature of incubation room is lower than, recomended setting temperature there could be
water-droplets in side of incubation room or water leak on the floor. because of dew condensation.
How to Assemble
Pump PowerPump Power
Power CordPower Cord
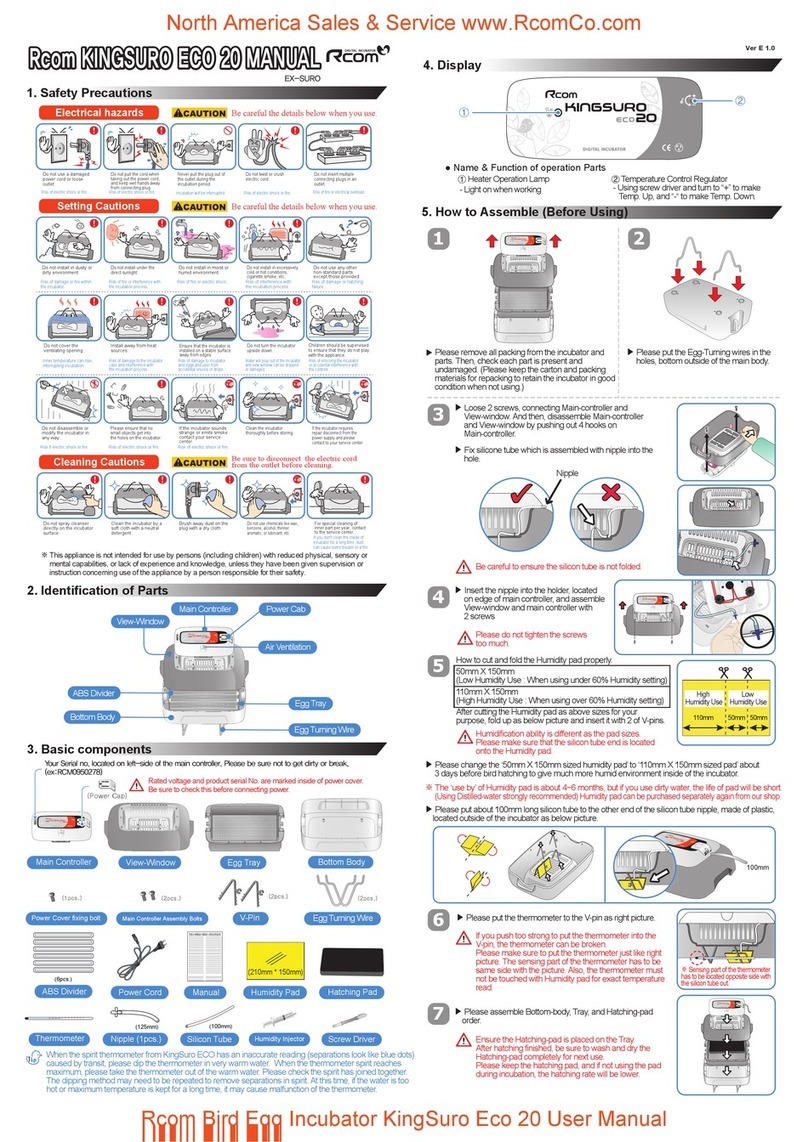
▶Please remove all packing from the incubator and parts.
Then, check each part is present and undamaged.
(Please keep the carton and packing materials for repac
king to retain the incubator in good condition when not
using.)
▶(EX:RCM0000000) If you register your information with
your machine’s serial number on our web-site(www.
Rcom.co.kr), you can get 2 year warranty service.
[Refer to the page 24]
[ How to Assemble Main Body ]
8
USA & Canada Official Sales & Service https://www.R-Com-Hatcher.com
Insect Incubator Rcom Max 70 User Manual
3. 부화
(2) How to Assemble Main Body
2. Before use
DIGITAL INCUBATOR
▶Loose two bolts connecting main controller and view
window. After that, disassemble main controller from
view window by pulling 4 hooks on main controller.
Be careful to ensure the silicone tube is not folded.
▶Fix silicone tube which is assembled with nipple into the
hole.
Nipple
Do not tighten the bolts too much.
▶Insert the nipple which is connected with view window to
the hole of main controller, and assemble view window
and main controller with two bolts.
9
USA & Canada Official Sales & Service https://www.R-Com-Hatcher.com
Insect Incubator Rcom Max 70 User Manual

2. Before use (2) How to Assemble Main Body
DIGITAL INCUBATOR
10
▶Place Insect house by adjusting tray divider.
▶Prepare the Insect House egg contained.
▶Please close the view window.
※Humidity pad can be purchased separately.
▶Assemble bottom body, Tray, and Tray hatching pad.
Evaporating ability is different from pad size.
▶Cut Humidity pad to proper size, and then fix on the view
window with 2 pins included.
※You can use Humidity pad for about 4 ~ 6 months, but it
can be different depending on water quality.
(DISTILLED WATER is recommended to use.)
Over 60% humidity (Cut to 70mm~75mm)Over 60% humidity (Cut to 70mm~75mm)
Under 50% humidity (Cut to 50mm~55mm)
In case that the sight glass isn’t closed completely,
temperature doesn’t go up. Be careful.
Test the incubator to be sure that the incubator works
without any problem before placing eggs in the incubator.
Please ensure you remember how to use the machine
and maybe re-read instructions.
USA & Canada Official Sales & Service https://www.R-Com-Hatcher.com
Insect Incubator Rcom Max 70 User Manual
DIGITAL INCUBATOR
2. Before use
11
(3) APS Assembly / Speed Control /
Tube Replacement/ Storage and Cleaning
How to Assemble APS (Automatic Pumping System)
①Cut the silicone tube exactly to 35mm, and insert to nipple as picture 1-2.
(When you purchase, product is originally assembled as ⓐ-1.)
②Cut the silicone tube of 1.5m to half, and insert to assembled nipple ⓐ.
③It is normal if you assembled as pic.1-3. If you do not insert silicon tube to the nipple completely as pic.1-4,
pumping will not work well.
④Loose two bolts of APS case as picture 1-0, and insert the assembled silicone tube and nipple as pic.1-3 to the
side of pic. 1-5 ⓑ.
⑤Grip the part ⓒon Pic.1-5, and pull the silicone tube so that fit to ⓓ.
(If silicon tube should be assembled tightly.)
⑥Spread IN and OUT of tube so that the silicone tube is not tangled. Insert tube on the groove, and cover the case.
Here, be sure to check the silicone tube or wire is not jammed. Refer to the Pic.1-6.
[Pic.1-1]
[Pic.1-3] [Pic.1-4]
* Is not required with first use
[Pic.1-6]
[Pic.1-0]
[Pic.1-2]
[Pic.1-5]
Turning
Direction Turning
Direction
USA & Canada Official Sales & Service https://www.R-Com-Hatcher.com
Insect Incubator Rcom Max 70 User Manual
DIGITAL INCUBATOR
2. Before use
12
(3) APS Assembly / Speed Control /
Tube Replacement/ Storage and Cleaning
OUTOUT
1 drop per 3 sec.
How to Control Water Flow Speed in APS
How to Replace the Tube
Humidity will raise up very slowly as artificial intelligence function check and memorize ambient conditions
to keep incubator inside with optimum conditions.
If water does not flow out even if pumping motor is working, check if silicon tube is blocked or folded.
Be sure to use the silicon tube supplied from Autoelex(Rcom). (Ø2.6 × 3.5)
▶The amount of water for humidification can be easily
controlled with APS.
▶With cross type screw driver, turn "Speed" clockwise
to increase water flow and vice versa to decrease.
Storage and Cleaning
▶Do not wash APS with water but wipe with soft cloth.
▶When assembling again, stretch the tube to open the hole in case the tube is blocked.
▶In case of long time storage, detach the silicon tube from the APS and remove the water from the tube.
Keep the tube unkinked. It stops the tube hole from blocking.
▶To prevent water over flowing and dropping down in to
the chamber, it is recommended to use the APS with
lowest water flow speed. (1 drop of water in 3 sec.)
▶If the silicone tube wear out and it does not pump water effectively, you should replace silicone tube.
[Refer to the page 13]
※If it failed in pumping water, check direction of IN and OUT again, and also check if motor is turning with anti-
clockwise. Also, length of silicon tube should be 35mm and inserted correctly. [Refer to the page 13]
USA & Canada Official Sales & Service https://www.R-Com-Hatcher.com
Insect Incubator Rcom Max 70 User Manual
DIGITAL INCUBATOR
2. Before use
※Evaporating pad is expendables.
13
(4) Humidity & Air Maintenance
During Incubation / Dew Condensation
Humidity & Air Maintenance During Incubation
▶When hatching, it's recommended not to open the lid
often. If you open the lid often humidity will be rapidly
decreased and it will take a long time to regain the proper
humidity.
※Air Controlling Lever : Outer fresh air can be flowed into
incubator inside without affecting insulation. When eggs
start hatching, open air controlling lever either fully or
half-open.
Check water level every three days during incubation, and refill when needed. You'd better to use tap water
than purified water or underground water for avoiding evaporating pad damage.
(Evaporating pad is available from Autoelex Co.,Ltd. or Rcom distributors.)
▶This is a naturally occurring phenomenon when there is
a significant difference in temperature between inside
and outside of the incubator during incubation period.
If this occurs, water may form in inside bottom of the
incubator(bottom part).
Do not place any goods near the incubator.
Dew Condensation
USA & Canada Official Sales & Service https://www.R-Com-Hatcher.com
Insect Incubator Rcom Max 70 User Manual
DIGITAL INCUBATOR
3. Incubation (1) Incubator Installation
Test the incubator to be sure that the incubator works without any problem before placing eggs in the incubator.
Please ensure you remember how to use the machine and maybe re-read instructions.
power cord
pump -
power cord
ⓐ
14
Incubator Installation
▶Open the power cap, and insert the incubator power cord
and pump power cord.
Be careful to ensure the cords do not get jammed
when you tighten screw bolt.
If you open power cap, there is a sticker which is
showing rated current in the position of pic.ⓐ.
▶Connect silicon tube end of APS (Automatic
Pumping System) into the nipple of incubator,
and the other end into PET bottle.
▶Be sure to check rated current Pic.ⓐbefore
connecting power cord to outlet.
▶Press button for about 10 sec.
for pump operation, and it automatically
stop after 2min. If you want to stop pump
operation, press any key.
If you do not insert silicon tube exactly,
it will not work properly.
[Refer to the page 11. How to replace
silicon tube.]
POWERINLET
PUMPPOWER
OUT
IN
Pump Power
Power Cord
Pump Power
Power Cord
USA & Canada Official Sales & Service https://www.R-Com-Hatcher.com
Insect Incubator Rcom Max 70 User Manual
DIGITAL INCUBATOR
3. Incubation (2) Incubation Start /
Incubation Termination
15
POWERINLET
PUMPPOWER
OUT
IN
Pump Power
Power Cord
Pump Power
Power Cord
How to Start Incubation
▶If you connect power cord, incubator starts
incubation with factory set conditions.
[Factory setting : Temperature 35.0℃(95℉),
Humidity RH 60%]
※Start incubation with required temperature
& humidity for your species of birds.
There can be some odor the first time
you use incubator, which is normal.
▶The first time you connect power, FND light will blink and
pump will work for about 2sec. Then, incubator version
will be indicated on FND for about 1 sec.
▶After version indication, buzzer sounds for about 15sec.
At the same time, present temp. & humidity displayed and
power failure alarm indication ⓐis blinking.
▶Press button to remove buzzer and alarm indication.
(Buzzer will be removed automatically after 15sec.)
※Notice of Power Failure : If power is turned off and then
on again because of power failure or by mistake, first dot
will blink.
▶Incubator display current temperature and humidity, and it goes to setting conditions within an hour.
Quick Start : If you just connect power, it automatically
starts incubation with factory setting. [Factory setting :
Temperature 35.0℃(95℉), Humidity RH 60%]
※The artificial intelligence system memorizes and classifies ambient conditions for keeping optimum temperature,
and temperature can move up slowly at the first stage.
USA & Canada Official Sales & Service https://www.R-Com-Hatcher.com
Insect Incubator Rcom Max 70 User Manual
DIGITAL INCUBATOR
POWERINLET
PUMPPOWER
OUT
IN
Pump Power
Power Cord
POWERINLET
PUMPPOWER
HOLD
OUT
SPEED
3. Incubation
4. Function Settings
16
(2) Incubation Start / Incubation Termination
(1) Incubator Initialization / Return to Factory Setting
Incubation Termination
▶There is no specified ON or OFF button on the incubator.
Just turn off the power cord after hatching.
▶It is not necessary to do Incubator Initialization with
Insect MAX 70 incubator after hatching. Just connect
power again when you want to start incubation.
Pump Power
Power Cord
Calibrated setting value will not be initialized with this function.
[If you need to initialize calibrated setting, refer to FACTORY SETTING next page.]
▶This function can be used when user input wrong setting,
or incubation termination.
▶Press and button at the same time for about
5sec. then display will show "rSt" and incubator returns
to default setting.
Incubator Initialization
Initialization Display
▶Unplug power cord. Replug during button is press
ed. Then, "rSt AL" will indicated in display, and incubator
return to factory setting. [Default setting]
▶This function is for return incubator to factory setting.
Return to Factory Setting
Calibrated temperature and humidity will also return
to factory setting.
Factory Setting Display
USA & Canada Official Sales & Service https://www.R-Com-Hatcher.com
Insect Incubator Rcom Max 70 User Manual
DIGITAL INCUBATOR
4. Function Settings
Function Key
Function
Dispaly
Default Setting
Temp.
35.0℃
tEP
Humidity
60%
rH HI
2℃
Abnormal high
temp. alarm
LO
-3℃
Abnormal low
temp. alarm
℃
℃/ ℉
Centigrade / Fahrenheit
17
(2) Temperature Setting&Humidity Setting /
How to Set Abnormal High Temp. Alarm
Temperature Setting
Step 2
Step 1
※Just press button if you do not need to change setting.
▶Press and button at the same time then “ tEP ”
will be indicated for about 0.5sec. and then temp display
will blink.
▶Then, you can adjust temperature with
and button. [Default setting: 35℃(95℉)]
▶After setting required temperature, press button
once then setting will be stored.
Next, “rH” will indicated in humidity display for about 0.5
sec. and then humidity display will blink.
Step 3
Step 4
Humidity Setting
▶When humidity display is blinking, adjust humidity setting
with or button. [Default setting : RH 45%]
▶After setting required humidity, press button once
then setting will be stored. Next, “HI”will be indicated for
about 0.5sec.
※Just press button if you do not need to change
setting.
The temperature and humidity level is optimized according to the international standard at the time of ship
ping. It could be recalibrated by the user if the user wishes to do so, but this is not recommended.
When in need of adjustment, please refer to our homepage (www.Rcom.co.kr → Information → User Manual
Category) or contact the place of purchase. Commercially available thermometer and hygrometers may have
drastic measurement deviations, so it is recommended to use thermometer and hygrometer designated for
this purpose. [Designated Thermometer and hygrometer – Refer to Rcom Homepage]
Insect MAX 70 is available to automatic humidity raise only, if you want to control low humidity level,
please adjust "Air Controlling Lever" by manual [refer to page 13]
▶From the temperature setting, press
button once and
“rH” (Humidity) will be displayed for 0.5 second and humidity
display will blink.
USA & Canada Official Sales & Service https://www.R-Com-Hatcher.com
Insect Incubator Rcom Max 70 User Manual
DIGITAL INCUBATOR
4. Function Settings
18
(2) Temperature Setting&Humidity Setting /
How to Set Abnormal High Temp. Alarm
▶After setting required value, press button to save.
Then, it will go to the next stage, abnormal low temp.
setting with display "LO" for about 0.5 sec.
▶Adjust abnormal high temperature value with
or button. [Default setting : 2℃(2℉)]
How to Set Abnormal High Temperature Alarm
Abnormal High temperature:
This function gives notice when incubator temperature is higher than setting temperature because of abnor
mal ambient temperature increase.
When room temperature is higher than incubator tem
perature, this function works with buzzer. Here, "HI"
and temp. gap are displayed alternatively. Press OK
button to remove buzzer.
Step 7
Step 8
※It shows that the set temperature value is approximately 3℃(3℉)
higher than the Maru incubator’s incubation chamber(the Cabinet).
ex :
※Just press button if you do not need to change setting.
* Max. abnormal temp. alarm limit (0.0 ~ 5.0℃Default Setting:2.0℃)
▶From the humidity setting, press the button once
and “HI” (abnormal HIgh temperature alarm) will be
displayed for 0.5 second and temperature display will
blink.
▶From the Abnormal HIgh Temperature Alarm setting, press
the button once and “LO” (abnormal LOw temp.
alarm) will be displayed for 0.5 second and the temperature
display will blink.
▶After setting required value, press button to save.
Then, it will go to the next stage,℃& ℉change.
Abnormal Low Temperature: " LO" will indicated on LCD.
(The others, same with abnormal high temp. alarm function.)
▶Adjust abnormal low temp. setting with or
button. [Default Value: -3℃ (-3℉)]
ex : ※It shows that the set temperature is 2℃(2℉) lower than the
actual cabinet temperature of the machine.
※Just press button if you do not need to change setting.
How to Set Abnormal Low Temperature Alarm
▶This function gives notice when incubator temperature
is lower than setting temperature because of abnormal
ambient temperature decrease.
Step 9
Step 10
* Min. abnormal temp. alarm limit (0.0 ~ -5.0℃Default Setting:-3.0℃)
USA & Canada Official Sales & Service https://www.R-Com-Hatcher.com
Insect Incubator Rcom Max 70 User Manual
DIGITAL INCUBATOR
4. Function Settings
19
(3) How to change Centigrade & Fahrenheit /
Work Automatic Pumping System by Force
▶From the abnormal LOw temperature alarm setting,
press button once and “C.F” (Celsius/Fahrenheit)
will be displayed for 0.5 second and LED for “C” will blink.
▶After selecting °C or °F , press button to save.
[Default setting : ℃]
How to change Centigrade & Fahrenheit
▶Select °C or °F with or button.
℃= 5/9 (℉- 32)
Step 11
Step 12
※Just press button if you do not need to change setting.
How to Work Automatic Pumping System(APS) by Force
APS by Force
If you press button for about 10sec. pump will operate for about 2min.
Press any key to remove.
▶Press button for about 10sec. then pump motor
works for 2min. by force. It still works for 2min. even if
you remove your finger from the button.
▶Press button for about 5sec. during incubation
process. Then, PUMP will operate by force with LED
light on.
USA & Canada Official Sales & Service https://www.R-Com-Hatcher.com
Insect Incubator Rcom Max 70 User Manual

DIGITAL INCUBATOR
5. Management
20
(1) How to Disassemble
and Clean the Incubator
POWERINLET
PUMPPOWER
OUT
IN
Pump Power
Power Cord
Pump Power
Power Cord
▶After incubation terminated, never leave the incubator
covered with view window.
Moisture inside of the incubator vaporizes and it can stick
to electric parts causing operation failure.
Be sure to dry the incubator perfectly.
How to Disassemble and Clean the Incubator
Be sure to take off power cord before cleaning the
incubator.
▶Remove main controller from view window.
[Refer to the page 9]
▶Wipe the main controller smoothly with soft brush.
Be careful not to give impact to sensor part or heating
part.
▶Temp. & Humidity sensor is assembled with connector
for easy replacement in case of trouble.
USA & Canada Official Sales & Service https://www.R-Com-Hatcher.com
Insect Incubator Rcom Max 70 User Manual
Table of contents
Other Rcom Accessories manuals

Rcom
Rcom PRO PLUS 10 User manual

Rcom
Rcom KingSuro ECO 20 User manual

Rcom
Rcom MINI User manual

Rcom
Rcom KINGSURO MAX 20 User manual

Rcom
Rcom PX-20RD User manual

Rcom
Rcom REPTILE PRO 90 User manual

Rcom
Rcom 20 User manual

Rcom
Rcom MARU DELUXE Hatcher & Brooder MX-100HBD User manual

Rcom
Rcom REPTILE 90 Series User manual

Rcom
Rcom USB 50 User manual

Rcom
Rcom Juragon PX-20R User manual

Rcom
Rcom USB 20 User manual

Rcom
Rcom Reptile MAX 60 User manual

Rcom
Rcom R-Com 20 User manual

Rcom
Rcom KINGSURO MAX 20 User manual

Rcom
Rcom INSECT MAX 90 User manual

Rcom
Rcom INSECT MAX 140 User manual

Rcom
Rcom MARU DELUXE PRO Series User manual

Rcom
Rcom PRO 20 User manual