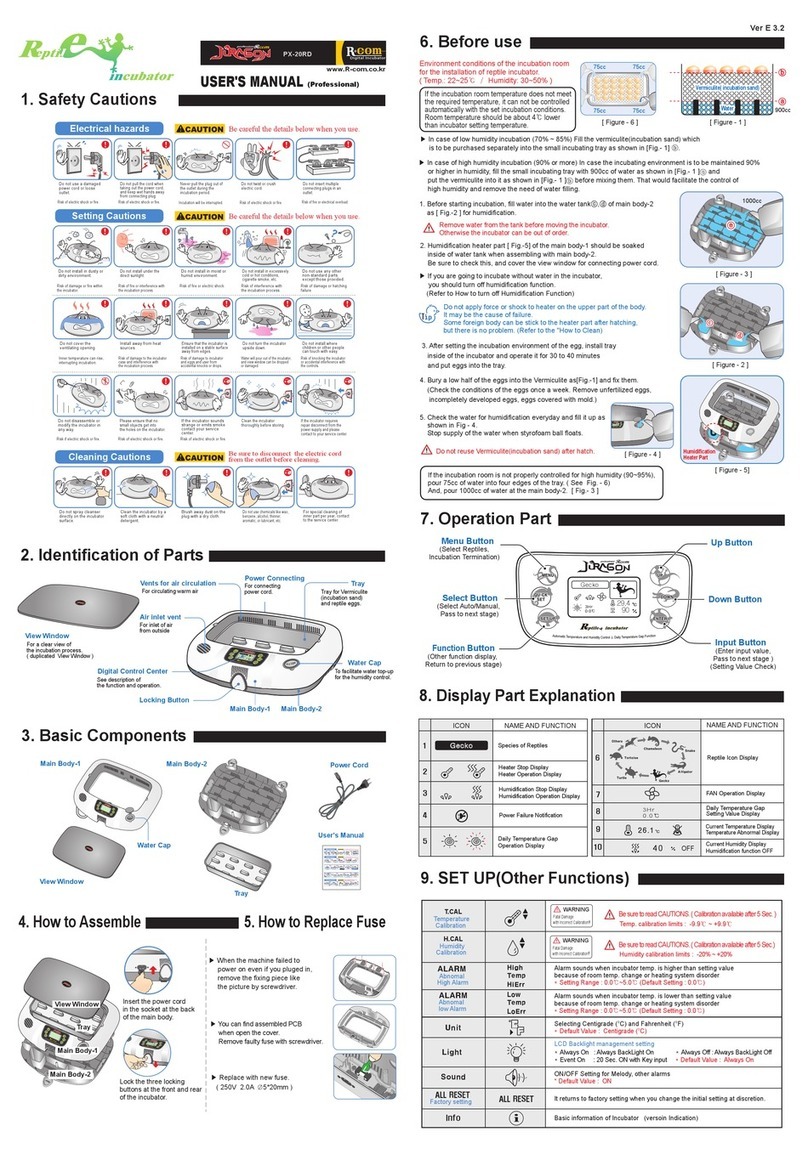
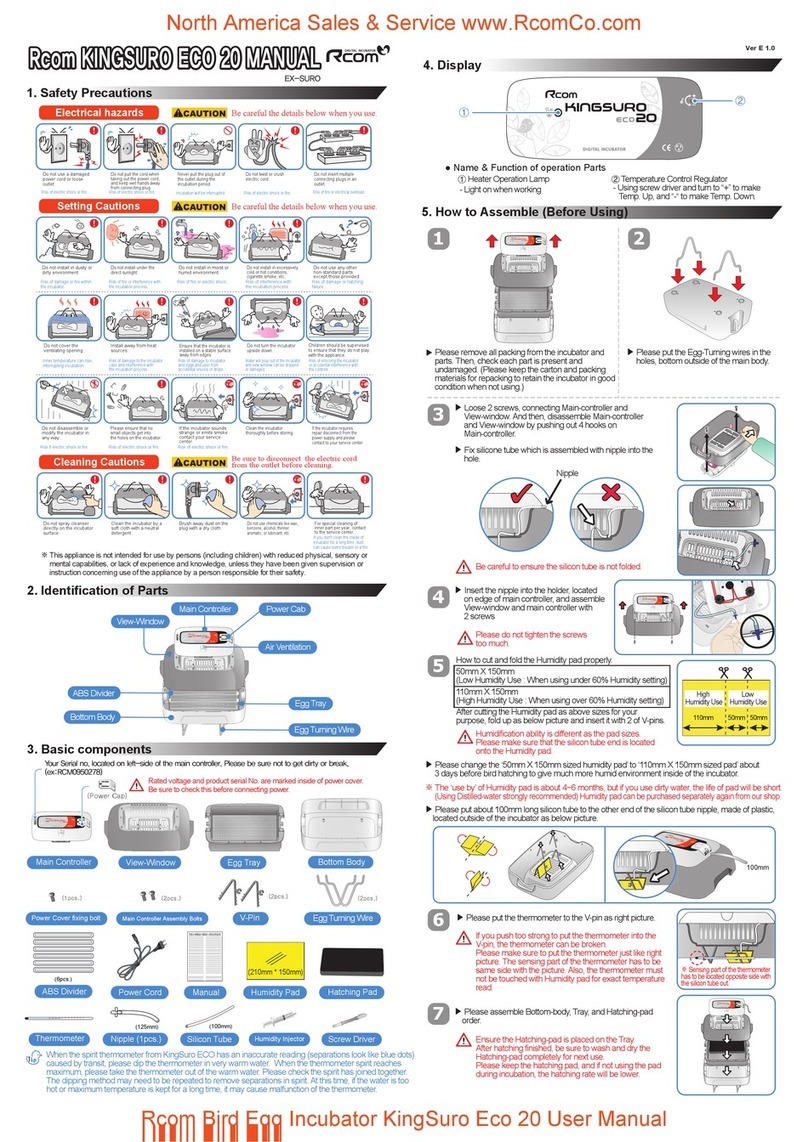
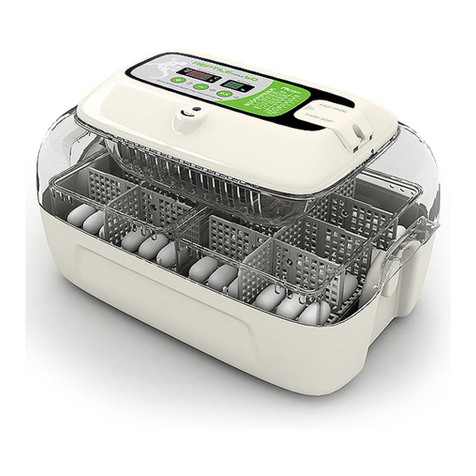
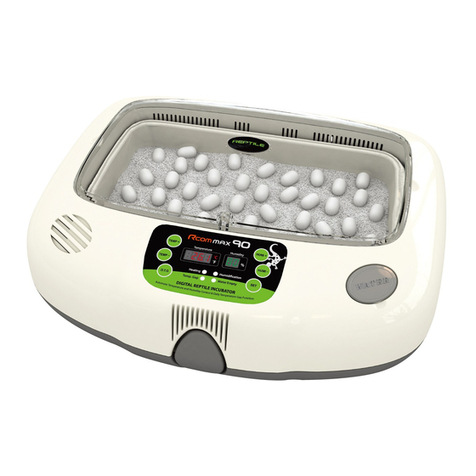
Rcom MARU DELUXE PRO Series User manual

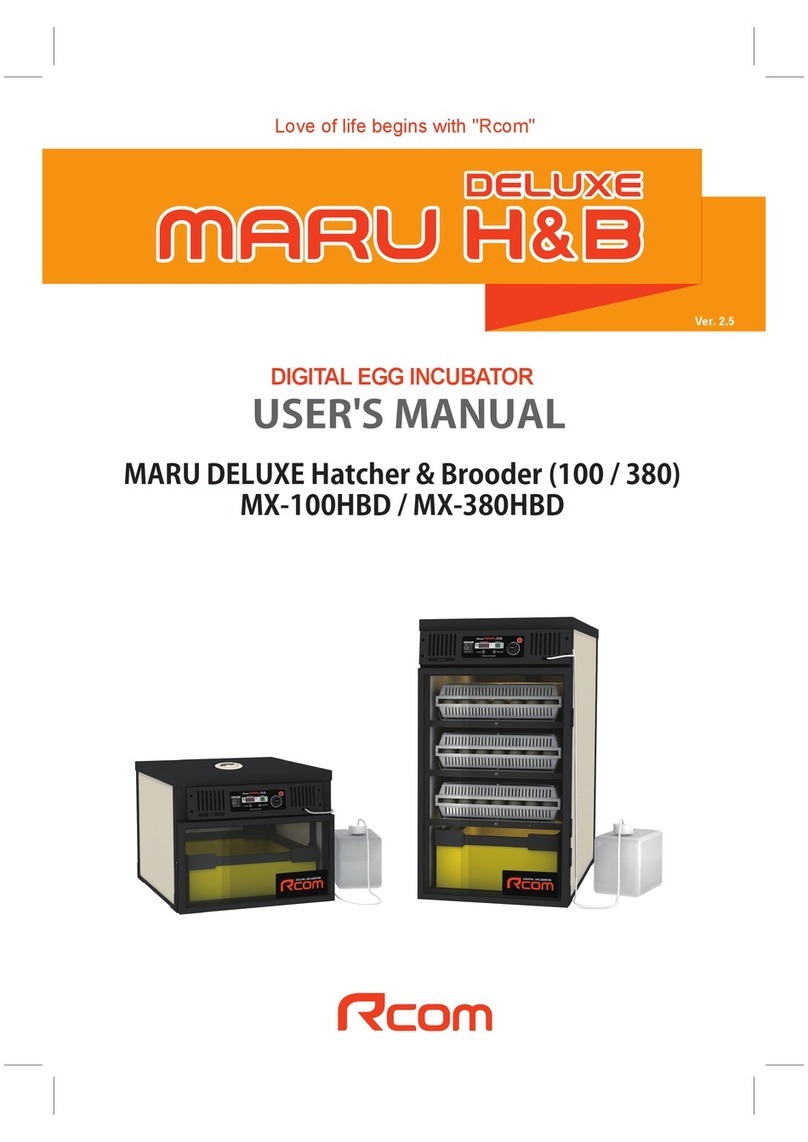
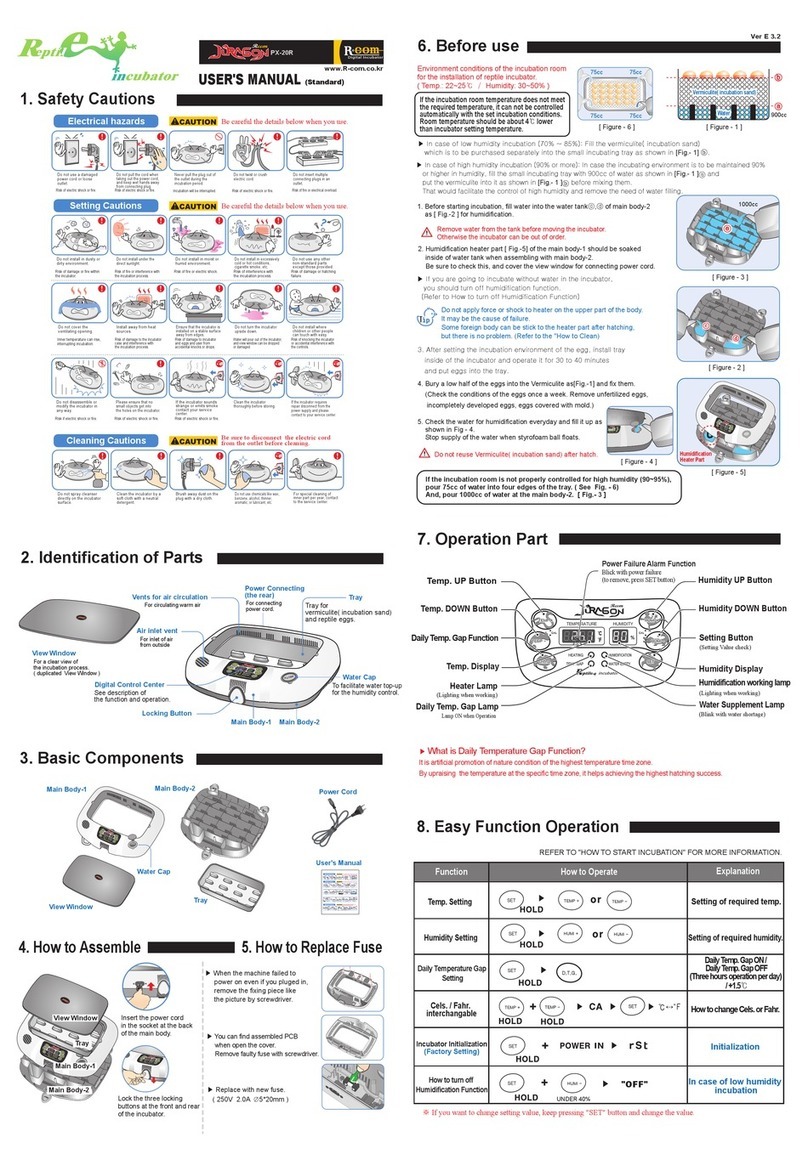
MARU DELUXE PRO 100 / 200 (Slide Type)
Love of life begins with "Rcom"
Ver. 4.0
DIGITAL EGG INCUBATOR
USER'S MANUAL
USA & Canada Official Sales & Service https://www.R-Com-Hatcher.com
Egg Incubator Hatcher Maru Pro User Manual
DIGITAL INCUBATOR
5. Incubation
(1)
Humidity and Condensation principles, Air Flow considerations, and Post-Hatch maintenance
20
1. Introduction
(1) Rcom MARU Introduction
3 ~ 7
(2) Safety precautions
(4) Name & Function of Operation Parts
(3) Identification of Parts and Composition
(5) Description of optional functions
6. How to Clean your MARU
(1) Instructions for Disassembling and Cleaning
21 ~ 22
7. Product Information
(1) How to Service your Maru Replacing the Fuse, General maintenance
23 ~ 26
4. Optional Functions
(1) The Abnormal High and Low Alarm Settings
18 ~ 19
(2) How to change between Centigrade and Fahrenheit Temperature units
(3) Hot to turn the backlight ON/OFF or to set the turning frequency
(5) Return to Factory Settings
(4) Sound ON /OFF
(2) Troubleshooting(FAQ)
(3) Specification
(2) Dew Condensation
2. Before use
(1) What is an Incubation Room?
8 ~ 10
(2) How to install this Incubator / Preparing for Incubation
3. MARU Function Settings
11~ 18
(1) Incubation Modes / Incubation start with Automatic Mode
(2) Incubation start with Manual Mode
(3) Incubation start for Other Birds
(4) Egg Turning, Humidification
(5) How to Terminate Incubation / Reset of Incubation circum start during incubating
(6)
Room Light ON/OFF Setting
(7) Humidifier Device OFF method
(8)
Water Shortage Detecting Function / Power Failure Alarm Function / Alerting function when the door is open
Introduction
Function Settings
How to Clean
Product Information
Optional Functions
Incubation
Before use
How to use Rcom MARU DELUXE PRO 100 / 200
Contents * Read the manual completely before use.
Caution : Caution mark against a fault that can cause damage, trouble, or failure of incubation.
Tip : References or useful suggestions in using Rcom product
Mark Explanation
Warning of actions which may be dangerous or cause damage to the incubator.
Prohibited.
Do not disassemble.
Do not touch.
It is necessary to keep.
Remove the power cord from outlet.
Ground Connection for preventing electric shock.
Successful hatching depends on many numbers of factors. Neither Autoelex (Rcom) nor its global
distributors and vendors can be held responsible for loss of life or property damage caused by user
neglect, alteration, modification or painting, change of use or power failure. To avoid errors, mishaps
and danger, carefully check this User Manual before initial use. Also please check the manual regularly
to ensure your operation of the machine is correct.
2
USA & Canada Official Sales & Service https://www.R-Com-Hatcher.com
Egg Incubator Hatcher Maru Pro User Manual
[Main Function]
* Convenient jog dial operation for optimized user interface
* LCD display with incubation information, and animation graphic design
* Micro chip with optimum incubation conditions according to the species of birds, for incubation beginners
* Manual setting Mode for incubation specialists
* Superior design with convenient operation
* Integrated simple control panel (superior maintenance)
* Automatic temperature & humidity control and set function
* Automatic egg turning & turning interval set function (1h, 2h, 3h)
* LCD display for easy recognition of incubation state
* Artificial intelligence electronic control system by Rcom technology
* Precise temperature and humidity sensor produced by Sensirion, Swiss (ver. 3rd Generation of Sensirion, Swiss)
* Transparent double insulated viewing window
* Sliding vent to in the chamber
* Dependable temperature by Rcom optimum air flow technology
* Innovative PTC Heating Type humidifier eliminates bacteria from humidity reservoir
* Built-in water level sensing switch automatically detect the water level inside the humidifier and alarm water refill is required
* Increased temperature stability and energy efficiency due to high-density insulated body developed by Rcom
* Built-in ‘open door’ micro-switch detection
* Option to select ON/OFF function each of eggs on the universal tray
[Useful Function]
* Degree C / degree F interchangeable
* Self-examination function for sensing abnormal conditions
* Separate humidifier not required due to built-in humidifier unit within the device
* Warning & display function of abnormal temperature caused by ambient temperature fluctuation
* Incubation data memory and alarm function in case of blackout
* Equipped with water nipple in front for efficient water supply
* Equipped with removable upper cover for convenience of cleaning or maintenance after incubation
* Built in LED dome-light for ease of viewing when door is open
* Universal tray sliding device for uniform egg incubation
* Automatic egg rotation at any angle carried out by tray carrier filler
* Adjustable universal tray and aluminum dividers suitable for most egg sizes
DIGITAL INCUBATOR
(1) Rcom MARU Introduction
1. Introduction
Firstly, we sincerely thank you for purchasing Rcom MARU incubators.
It has been designed to analyze airflow using built in digital technology to maintain an optimal environment within the
incubator cabinet. The incubation parameters are controlled using purpose built control systems coupled with high end
sensors, all in order to permit optimum results. However, best results occur when the user, couples personal knowledge
of the machine and of incubation and hatching along with observation skills with the Maru Incubators sensing, automation
and control systems. The machine needs your help, good breeding flock, healthy flock diet, fertile eggs , reasonable
incubation room environment and a ‘clean’ power supply in order to provide excellent results. User’s knowledge of the
machine and manage the incubator are very important. Certainly, the Maru provides an optimal incubation environment
but parameters need to be managed, i.e. temperature and humidity depends on egg species, environment, and capacity.
Moreover, the Rcom MARU has been carefully designed to provide an optimal setting and or hatching environment,
therefore, before using the incubator, we strongly recommend that you read the manual carefully.
Rcom MARU
Features of Rcom MARU
3
USA & Canada Official Sales & Service https://www.R-Com-Hatcher.com
Egg Incubator Hatcher Maru Pro User Manual
DIGITAL INCUBATOR
4
1. Introduction (2) Safety Precautions
Electrical hazards Be careful the details below when you use.
Setting Cautions Be careful the details below when you use.
Cleaning Cautions Be sure to disconnect the electric cord from the outlet
before cleaning.
Do not pull the cord when
taking out the power cord, and
keep wet hands away from
connecting plug.
Do not use a damaged power
cord or loose outlet.
▶ Risk of electric shock or fire.
Do not insert multiple
connecting plugs in an outlet.
▶ Risk of fire or electrical
overload.
Never pull the plug out of the
outlet during the incubation
period.
▶Incubation will be interrupted.
Do not twist or crush electric
cord.
▶ Risk of electric shock or fire.
Do not install under the direct
sunlight.
Do not install in dusty or dirty
environment.
▶ Risk of fire or interference
with the incubation process.
▶ Risk of damage or fire within
the incubator.
Do not install in excessively
cold or hot conditions,
cigarette smoke, etc.
Do not install in moist or
humid environment.
▶ Risk of interference with
the incubation process.
▶ Risk of fire or electric shock.
Do not use any other
non-standard parts except
those provided.
▶ Risk of damage or hatching
failure.
Clean the incubator by a soft
cloth with a neutral detergent.
Do not use chemicals like wax,
benzene, alcohol, thinner,
aromatic, or lubricant, etc.
Brush away dust on the plug
with a dry cloth.
For special cleaning of inner
part per year, contact to the
service center.
▶ If you don't clean the inside of
incubator for a long time, dust
can cause some trouble or a fire.
Install away from heat
sources.
▶ Risk of damage to the
incubator case and
interference with the
incubation process.
Ensure that the incubator is
installed on a stable surface
away from edges.
▶ Risk of damage to incubator
and eggs and user from
accidental knocks or drops.
Do not cover the ventilating
opening.
▶ Inner temperature can rise,
interrupting incubation. ▶ Risk of knocking the incubator
or accidental interference with
the controls.
Children should be supervised
to ensure that they do not play
with the appliance.
If the incubator requires repair
disconnect from the power
supply and please contact to
your service center.
Please ensure that no small
objects get into
the holes on the incubator.
▶Risk of electric shock or fire.
Do not disassemble or modify
the incubator in any way.
▶ Risk if electric shock or fire.
If the incubator sounds
strange or emits smoke
contact your service center.
▶Risk of electric shock or fire.
Clean the incubator
thoroughly before storing.
Do not place water container
on the incubator
USA & Canada Official Sales & Service https://www.R-Com-Hatcher.com
Egg Incubator Hatcher Maru Pro User Manual
Rcom MARU DELUXE PRO 100 / 200
(*Below is the image of MAX 200 model.)
Rcom MARU DELUXE PRO 100 / 200
DIGITAL INCUBATOR 5
1. Introduction (3) Identification of Parts
and Composition
Serial NO is located on the upper front cover. (ex. RCM0000000)
is a product specific number.
Identification of Parts
100 : 2Floors / 200 : 4Floors
Universal Tray (Slide Type)
(Sold Separately)
Air inlet vent
LED Room Light
Air Vent (Front)
Door
Dual structured
insulated window
Insulation Board
Nipple for water hose
Jog Dial
Air Vent (Front)
For connecting power cord.
Power Connecting (the rear)
Temp, Humi. sensor/
Door detecting micro switch
refer to control panel
function description
Control Panel/
Display Window
Rubber foot, Door Guide
Basic Components
Driver
Spinning Wheel, Bracket
MARU 100 4EA
MARU 200 4EA
Pieces : 18EA
(2EA)(4EA) (2EA)
Lubricant
Aluminum Divider
MARU 100 14EA
MARU 200 28EA
※Extra aluminum divider
can be purchased separately
Universal Tray
MARU 100 2EA
MARU 200 4EA
Manual Power Cord Silicon Tube : 1.5M (Diameter: Ø4*6)
Sold Separately
USA & Canada Official Sales & Service https://www.R-Com-Hatcher.com
Egg Incubator Hatcher Maru Pro User Manual
Rcom MARU DELUXE PRO 100 / 200
1. Introduction (4) Name & Function of
Operation Parts
DIGITAL INCUBATOR
①Function Table :Function can be selected in order by using the jog dial
②Jog Dial :Press and turn around to left and right
- Function setting mode will appear when pressed for 3 seconds
- Temp. and humidity can be checked when pressed for 1 second
③Room Light Button (1 second) /
Forced egg turning button (3 seconds) - The incubator turns eggs 1 time for artificial incubation.
④On screen : Incubation conditions are displayed.
●Names and components of each part
Species of Birds FAN Operation Display
Heater Stop Display /
Heater Operation Display
Humidification Stop Display /
Humidification Operation
Display
Water Supplement /
Humidity Abnormal
Current Temperature Display /
Temperature Abnormal Display
Current Humidity Display /
Humidification function OFF
Alerting function when
the door is open Power Failure Notification
Egg Turning Interval Indication(minute) /
Egg Turning Angle Indication
ICON NAME AND FUNCTION ICON
NAME AND FUNCTION
Bird Icon Display
**Choose a bird**
* Chicken ①
* Duck ②
* Quail ③
* Pheasant ④
* Peacock ⑤
* Goose ⑥
* wildgoose ⑦
* G-Pheasant ⑧
* Turkey ⑨
* Other Birds ⑩
Egg Turning Indication
Manual Egg Turning
Stop Indication
Automatic Egg Turning
Stop Indication
Incubation Termination
6
Name & Function of Operation Parts
① ③②
④
USA & Canada Official Sales & Service https://www.R-Com-Hatcher.com
Egg Incubator Hatcher Maru Pro User Manual
2. Before use (5) Description of optional functions
DIGITAL INCUBATOR
Description of optional functions
Info Basic information of Incubator (versoin Indication)
ALL RESET
(Factory setting) It returns to factory setting when you change the initial setting at discretion.
Alarm sounds when incubator temp. is higher than setting value because of room
temp. change or heating system disorder
* Setting Range : 0.0℃~ 5.0℃(Default Setting : 2.0℃)
Alarm sounds when incubator temp. is lower than setting value
because of room temp. change or heating system disorder
* Setting Range : 0.0℃~ -5.0℃(Default Setting : -3.0℃)
T.CAL
(Temperature
Calibration)
Unit
ALARM
(Abnomal
High Alarm)
ALARM
(Abnomal
low Alarm)
High
Temp
Low
Temp
Selecting Centigrade (℃) and Fahrenheit (℉)
* Default Value : Centigrade (℃)
Sound ON/OFF Setting for Melody, other alarms
* Default Value : ON
Light
H.CAL
(Humidity
Calibration)
Be sure to read CAUTIONS. We do no recommend
customers to recalibrate by their own. If you need to
recalibrate, please ask purchase place.
WARNING
Fatal Damage
with Incorrect Calibration
!
WARNING
Fatal Damage
with Incorrect Calibration
!
Be sure to read CAUTIONS. We do no recommend
customers to recalibrate by their own. If you need to
recalibrate, please ask purchase place.
* Always On : Always BackLight On
* Event On : 20 Sec. ON with Key input
* Always Off : Always BackLight Off
* Default Value : Always On
LCD Backlight management setting
7
USA & Canada Official Sales & Service https://www.R-Com-Hatcher.com
Egg Incubator Hatcher Maru Pro User Manual
2. Before use
(1) What is an Incubation Room?
(2) How to install this Incubator /
Preparing for Incubation
DIGITAL INCUBATOR
8
Do not place water container on top
of the incubator. It may flood the
humidity unit.
How to Install this Incubator
▶Please set the incubator horizontally on a stable, tallish
table (50[cm] or above)
▶Ensure the incubator is completely level, so the door can
close completely.
▶Connect silicon tubing onto the nipple of incubator, and
the other end of silicon tubing into a water container.
50cm
WATER IN
The device can be broken or injured due to weight when setting up or laying down the machine, so remove
the egg basket or trays inside the device before assembling.
▶ⓐ: the front - brake-type wheel x 2
ⓑ: the rear - brake free-type wheel x 2
▶Cautiously, lay the machine down :
bracket-wheel-screw in sequence
ⓐfor the front 2wheels, assemble brake-type wheel
ⓑfor the rear 2wheels, assemble brake free-type wheel
Once the assembly done, put up the assembled incubator
with care.
Pieces : 18EA
(2EA) (Bracket 4EA)(2EA)
[ Rotary wheel assembly method ] - Rotary wheels are sold separately
What is an Incubation Room?
The Incubation Room is a confined space for setting and operating an incubator efficiently.
An Incubation Room environment has a considerable effect on hatch rate. Controlling the incubator
environment is recommended; there should be little noise or vibration and constant temperature ranging
upwards from 28℃(82.4℉) with small variation in temperature. For optimum performance, pay attention
that your incubator isn’t exposed to temperature drops compared with daytime. Do not directly exposed the
incubator to sunlight during daytime. also, please incubator where direct wind from air-conditioner not to reach.
If you set a high temperature, condensation will occur and may causes water to leak from the incubator and
it which is not a technical problem. You need to keep temperature between 28℃(82.4℉).
Using tap water or underground water
instead of distilled water in this unit's
humidification device will cause serious
debris (scale) to develop. In this case,
the inconvenience of frequent cleaning
will occur and when left alone, may
become the cause of malfunction or
breakage. If you have any questions
regarding such problems, please contact
the place of purchase and failure of the device
due to the consumer negligence (due to non-cleaning), even if it occurred with in the free A/S period,
repair charges might occur when repairing , so use of distilled water is highly recommended.
Sold Separately
USA & Canada Official Sales & Service https://www.R-Com-Hatcher.com
Egg Incubator Hatcher Maru Pro User Manual
3. 부화
2. Before use (2) How to install this Incubator /
Preparing for Incubation
DIGITAL INCUBATOR 9
Preparing for Incubation
Please turn on the device and make
sure that all functions are properly
operating before putting in the eggs.
▶2 frame fillers are installed on one carrier frame.
▶The Carrier filler shown in figure below is factory assembled so no assembly is required.
① ② ③ ④
ⓐ: Carrier Frame ⓑ: Moving Screw
[ Egg Rotating Device] ]
▶Remove the cable ties fixed to both sides of the egg tray of each shelf(shown in figure ⓒbelow).
▶Before supplying power, make sure that the filler bar(shown in figure ④below) located in the universal tray
slide plate is inserted in the middle of the carrier frame(shown in figure ③below).
[ Egg tray assembling method ]
If cable ties are not removed, egg-rotation problems or malfunctions may occur.
Carrier Filler
Carrier Frame
▶▶▶
Aluminum
Divider
If the door isn't completely closed, the temperature and humidity might not be controlled, so be careful.
If water is on the machines floor, it will not reach operating temperature.
(Do not place the humidifier water tank on top of the machine.)
▶A slight gap (about 2mm) is required, between
egg and aluminum divider (as shown in the
figure), this allows smooth egg turning.
More eggs could be inserted if sorted by similar
size.
The eggs intended for incubation must
be fertilized eggs.
about 2mm
Slide Plate
USA & Canada Official Sales & Service https://www.R-Com-Hatcher.com
Egg Incubator Hatcher Maru Pro User Manual
▶When the power cord is plugged in and turned on the digits on the temperature and humidity FND appears,
then Temperature and Relative Humidity will increase a little. (Their default value is respectively : 37.5℃(99.5℉)
and RH 45%) A initial smell may be noticed this is to be expected.
▶Please check and refill distilled water every 2 days during incubation. Or as needed
(If the water tank is small, please check every day.)
※To turn off the Humidification Function : Set humidity under RH 30%.
Do not connect power supply before the incubator is assembled completely.
Risk of electric shock.
If you use the incubator without adding humidification water or intend to incubate eggs at low humidity under
RH 30%, you must stop the humidification function. Please turn off the humidity function if there is no water
available otherwise the humidity unit will fail, making the machine unuseable.
(When using this function, the alarm for sensing wter drop will go out.)
[Refer to the page 17]
Using tap water or underground water instead of distilled water in this unit's humidification device
will cause serious debris (scale) to develop. In this case, the inconvenience of frequent cleaning
will occur and when left alone, may become the cause of malfunction or breakage. If you have any
questions regarding such problems, please contact the place of purchase and failure of the device
due to the consumer negligence (due to non-cleaning), even if it occurred with in the free A/S period,
repair charges might occur when repairing , so use of distilled water is highly recommended.
2. Before use (2) How to install this Incubator /
Preparing for Incubation
DIGITAL INCUBATOR
You can buy the ‘Distilled water’ in your local market, and if you have any question, please contact the shop,
where you purchased your machine.
10
USA & Canada Official Sales & Service https://www.R-Com-Hatcher.com
Egg Incubator Hatcher Maru Pro User Manual
DIGITAL INCUBATOR
3. MARU Function Settings
(1) Incubation Modes /
Incubation start with Automatic Mode
Incubation Modes
Incubation start with Automatic Mode
In auto incubation, user only needs to select type of
birds as incubation environments such as optimum temperature, humidity, egg turning, etc.
are automatically controlled. User can change incubation environments if needed.
▶turn the jog dial to the left and right at the initial setting
and select “Auto Incubation”, and then press jog dial.
This way, you can set auto incubation conditions.
▶If you turn the jog dial to the left and right to select the
type of birds and press the dial for a moment, the message
“Start system Are you sure?” comes up. Select “YES” by
turning the jog dial to start auto incubation, or select “NO”
to go back to the previous page. Or, select “Home” to go
back to the main page.
When choosing the type of birds, press the jog dial for
2 seconds to skip “YES/NO” and start auto incubation.
The optimum incubation environment of the birds on the
menu screen is memorized in the micro chip.
User can incubate easily using by this function.
▶If you press the jog dial for 3 seconds while on operation, “Finish Incubation / Change Settings / Option” appear on the screen.
Auto
Incubation
Turn jog dial to the left/right (Selection of birds)
Press jog dial (Auto incubation starts after two seconds)
Manual
Incubation
Selection
of birds
Egg turning
angle setting
Temperature
setting
Incubation starts
Egg turning
interval setting
Humidity
setting
Option
Rcom
MARU
DELUXE
PRO
100 / 200
①
Setting of egg turning angle of early and middle stages of incubation
③
Setting of date of egg turning angle change in the final stage of incubation
①
Setting of egg turning interval of early and middle stages of incubation
②Setting of incubation date
②Setting of temperature of final stage of incubation.
①Setting of temperature of early and middle stages of incubation
③
Setting of date of temperature change in the final stage of incubation
②Setting of humidity of final stage of incubation
①Setting of humidity of early and middle stages of incubation
③Setting of date of humidity change in the final stage of incubation
Screen showing
incubation is in progress
37.5
45
37.5
45
Chicken
60
90˚
Screen showing incubation
of other birds is in progress
Other Birds
60
90˚
Screen showing
Automatic mode
37.5
45
Chicken
HOME screen
Auto Manual Option
Screen showing
completion of incubation
Finish system
Are you sure?
YES
Auto Manual Option
Others Birds
Quail
Turkey
WildGoose
Goose
Duck Peafowl
Gold
Pheasant
Chick
Pheasant
Start
Incubation
Auto Incubation
37.5
45
Chicken
11
USA & Canada Official Sales & Service https://www.R-Com-Hatcher.com
Egg Incubator Hatcher Maru Pro User Manual
(2) Incubation start with
Manual Mode
3. MARU Function Settings
DIGITAL INCUBATOR
Auto Manual
Option
Manual Incbtn
▶Following the steps below, set temperature, humidity,
angle and Turning Interval you want by turning the jog
dial to the left and right. Then, press the dial to save the
settings and move on to the next step.
Incubation start with Manual Mode
If there is no proper option, please select option other
bird, Refer to the Page14.
▶At the initial setting, turn the jog dial to the left and right
to select “Manual Incbtn” and then press the dial.
This way, you enter the manual incubation setting mode.
▶If you press the job dial once again on the manual incbtn
setting mode, a list of bird types comes up. Select the
type you want by turning the jog dial to the left and right
and then press it. In the case you want to go back to the
previous page, select “BACK”.
This mode helps users to set temp. humidity, and egg turn
ing etc. according to their needs. This mode is ideal for those
persons who are experienced in incubation.
▶Optimum incubation temperature of general birds at early
and middle stages ①is 37.5℃, and the temperature of
final stage ②is better to set at 37℃three days before the
expected date of hatching (D-Day) ③. User can optionally
change the temperature of early, middle, and final stages
of incubation.
[Default settings: ①37.5℃, ②37.0℃, ③3days]
Temperature setting
At the final stages of hatching (from 3 days before hat
ching), temperature inside eggs stay relatively high.
At this stage, keep the hatching temperature approximately 0.5 ℃lower than usual.
Humidity setting
[Temperature Setting]
It is recommended to raise the humidity setting to
over 65% from 1~3days before hatching.
▶The optimum humidity depends on type of birds.
However the humidity of final stage ⑤(3 days before
incubation) is generally higher than that of early and
middle stages ④of incubation.
[Default settings: ④45%, ⑤60%, ⑥3days]
[Humidity Setting]
Humi. Set
21 Days
45
65
30
21
.
.
.
.
.
.
⑥
Return to home
: Go back to
the main page
One step back
: Go back to the
previous step
Save & Start
: Save the settings
and start
incubation
※ P
ress “PUSH” for 3 seconds while setting ~ to choose among “Home / One step back / Save & Start”.
Return to home
Home Back Save
1Step
Home Back
Save
1Step
Save & Start
Home Back
Save
1Step
Temp. Set
21 Days
37.5
0
21 3
37.0
③
②
37.5
45
Chicken
** Choose a bird **
* Chicken
* Duck
* Quail
* Pheasant
* Peacock
* Goose
* Wildgoose
One step back
12
①Setting of temperature of
early and middle stages of incubation.
②Setting of temperature of
final stage of incubation.
③Setting of date of temperature change
in the final stage of incubation.
④Setting of humidity of
early and middle stages of incubation.
⑤Setting of humidity of
final stage of incubation
⑥Setting of date of humidity change
in the final stage of incubation.
USA & Canada Official Sales & Service https://www.R-Com-Hatcher.com
Egg Incubator Hatcher Maru Pro User Manual
DIGITAL INCUBATOR
(2) Incubation start with
Manual Mode
3. MARU Function Settings
Egg-turning angle setting
The temperature and humidity level is optimized according to the international standard at the time of ship
ping. It could be recalibrated by the user if the user wishes to do so, but this is not recommended.
When in need of adjustment, please refer to our homepage (www.Rcom.co.kr → Information → User Manual
Category) or contact the place of purchase. Commercially available thermometer and hygrometers may have
drastic measurement deviations, so it is recommended to use thermometer and hygrometer designated for
this purpose. [Designated Thermometer and hygrometer – Refer to Rcom Homepage]
[ Setting Finish and Incubation Start ]
▶The egg turning angle showing on LCD screen may be
different from the setting angle depending on egg tray
(based on standard egg tray) and size of eggs. In general,
the egg turning angle of early and middle stages is 90°
for chicken, golden pheasant, pheasant. It is better to set
higher angle (110 ~180°) for bigger eggs and wild birds.
It is a general practice not to turn eggs (turn angle is 0°) at
final stage of incubation (3 days before expected hatching date).
※Incubation date setting cannot be changed during incubation.
When "rnd" (Random) is set, the egg turning angle is between
75~180˚at random. (Egg turning angle setting range : 0˚, 15˚, 30˚, 45˚ㆍㆍㆍㆍ, 150˚, 165˚, 180˚, rnd)
Egg turning interval setting
▶It is a function to set the interval (time) of egg-turning ⑨.
It turns the eggs with the setting angle of early and middle
stages ⑦ every 60min. User can optionally set the egg-
turning interval ⑨ of eggs. [Initial Setting: ⑨ 60min.]
▶ Setting of incubation date: The incubation date of birds on menu screen is a general incubation date.
User can input the correct incubation date. [Initial settings: depending on type of birds]
▶At the final step, if you press the job dial after setting the D-day for hatching, the message “Start system Are
you sure?” comes up. Select “YES” by turning the jog dial to start the auto incubation, or select “NO” to go back
to the previous page. Or, select “Home” to go back to the main page.
"rnd"(Random) setting is for operating at random within
the limits from 10min. to 360min.
(Egg turning interval setting range: rnd, 10, 20, 30, 40
ㆍㆍㆍ340, 350, 360min.)
If having difference for the egg turning angle between display and actual operating,
Please find and select the proper angle.
[Incubation Start Notification] [During Incubation]
[Egg Turning Angle Setting]
Turning Angle
21 Days
0
30
21
90
⑦
⑧
[Egg Turning Interval, Incubation Date Setting]
Turning Interval
⑩
60
0
30
21
⑨
Turning Interval
60
0
30
21
Start
Incubation
37.5
45
Chicken
60
90˚
13
⑦Setting of egg turning angle of
early and middle stages of incubation.
⑧Setting of date of egg turning angle change
in the final stage of incubation.
⑩Setting of incubation date.⑨Setting of egg turning interval of
early and middle stages of incubation.
USA & Canada Official Sales & Service https://www.R-Com-Hatcher.com
Egg Incubator Hatcher Maru Pro User Manual
(3) Incubation start
for Other Birds
3. MARU Function Settings
DIGITAL INCUBATOR
Humi. Set
Incubation start for Other Birds
This function is used when user wishes to incubate other
birds which are not memorized in the incubator menu setting.
User can change incubation conditions according to needs.
▶After setting the D-Day for hatching, set temperature,
humidity, angle and turning interval you want by turning
the jog dial to the left and right then press the jog dial to
save the settings. Refer to the Page12, 13.
▶At the initial setting, turn the jog dial to the left and right
to select “Manual Incbtn” and then press the dial.
This way, you enter the manual incubation setting mode.
▶press the jog dial once again on manual incbtn setting
mode to see a list of the types of bird. select “Other Brids”
by turning the jog dial to the left and right then, press it
enter into “Incubate setting”
WHAT is repetitive incubation?
It is a function that allows you to operate the egg incu
bator repetitively with the same incubation conditions
you already set, regardless of the days hatching takes.
▶How to set repetitive incubation: when setting the D-day,
if you turn the jog dial to the left and right up to D-50Days
and turn the dial once again, “?” mark comes up. Then,
press the jog dial for 2 seconds to set repetitive incubation.
Auto Manual
Option
Manual Incbtn
60
0
3021
⑨
25 Days
[Egg Turning Angle Setting /
Egg Turning Interval, Incubation Date Setting]
25 Days
025
[D-day Setting]
[Temperature / Humidity Setting]
25 Days
37.5
37.0
021
①
②
③3
45
21
④
⑥
65
30
.
.
.
.
.
.
⑤
25 Days
[Incubation Start Notification / During Incubation]
0
3021
90
⑦
⑧
25 Days
Start
Incubation
37.5
45
Other Birds
60
90˚
37.5
45
Chicken ** Choose a Bird **
* G-Pheasant
* Turkey
* OtherBirds
D-Day
Temp. Set
Turning Angle Turning Interval
14
Return to home
: Go back to
the main page
One step back
: Go back to the
previous step
Save & Start
: Save the settings
and start
incubation
※ Press “PUSH” for 3 seconds while setting Incubation conditions to choose among “Home / One step back / Save & Start”.
Return to home
Home Back Save
1Step
Home Back
Save
1Step
Save & Start
Home Back
Save
1Step
One step back
⑩
USA & Canada Official Sales & Service https://www.R-Com-Hatcher.com
Egg Incubator Hatcher Maru Pro User Manual
DIGITAL INCUBATOR
3. MARU Function Settings
(4) Egg Turning,
Humidification
15
It is recommended to hatch in special hatching room. Hatching chickens in a Incubator are exposed to the
risk of falling from egg trays or being caught in mechanisms which may cause their death occasionally.
Please don’t forget to turn off the turning function during hatch. [Hatching separately in a specialist hatching
machine is recommended, i.e the Rcom Hatcher & Brooder – Rcom Maru H&B 380, in this may your incubator
is easier to maintain, hatching chicks are separated from incubating eggs (good health)]
Egg Turning
▶Make sure you stop egg turning and remove the dividers 3 days prior to hatching.
In the case of auto incubation, the egg turning stops automatically 3 days before hatching.
▶Forced egg tray turning method : By pressing forced turn button ( ) for 3 seconds,
turning will occur once.
▶The Rcom Maru sliding type model allows each layers
egg turning to be separately turned off.
It is recommended that turning should be stopped 3 days
before hatching day.
[Good example for stopping turning of each layer] o : turning, x : Stop turning
o
o
o
o
o
x
x
o
o
o
x
o
[Bad example for stopping turning of each layer] o : turning, x : Stop turning
x
x
x
o
x
x
o
o
o
x
x
x
▶Try to balance weights egg numbers and weight in egg
trays to avoid straining the machine.
Push tray inward (disengage turning) to turn
ON the egg turning for the each layer
Pull tray outward (disengage turning) to turn
OFF the egg turning for the each layer
▶By slightly pulling the handle of the each layer forward,
as shown in the figure, egg turing function in the
corresponding layer can be set to OFF.
USA & Canada Official Sales & Service https://www.R-Com-Hatcher.com
Egg Incubator Hatcher Maru Pro User Manual
▶All kinds of bird need over RH 65% humidity during the period prior to hatching.
In case of water shortage, it works. When the inside of the incubator is filled with water, the pump motor works
for 0.5 second. (Check motor working sound)
▶Pumping Motor Test Method: During the operation of the machine, pressing the jog dial 3 times shortly will operate
the pump motor.
Please turn off the humidity unit if the unit is empty water otherwise, humidity unit will be broke or you may
not no longer use the unit. So please turn off the humidity unit. [Refer to the page 17]
Using tap water or underground water instead of distilled water in this unit's humidification device
will cause serious debris (scale) to develop. In this case, the inconvenience of frequent cleaning
will occur and when left alone, may become the cause of malfunction or breakage. If you have any
questions regarding such problems, please contact the place of purchase and failure of the device
due to the consumer negligence (due to non-cleaning), even if it occurred with in the free A/S period,
repair charges might occur when repairing , so use of distilled water is highly recommended.
DIGITAL INCUBATOR
(4) Egg Turning, Humidification
(5) How to Terminate Incubation /
Reset of Incubation circum start during incubating
3. MARU Function Settings
Quit Save & Quit
▶If you select “Finish Incubation” by turning the jog dial
and press it, the message “Finish system Are you sure?”
comes up.
▶Select “YES” by rotating the jog dial to the left and right,
and press it to finish incubation, going back to the main
page. Select “NO” and press the jog dial if you want to
go back to the previous page.
YES
[Incubation Termination]
▶Press the jog dial for 3 seconds while on incubation to
choose among “Finish Incubaiton / Change settings /
Option / Back”.
▶turn the jog dial to select “Change Settings” and press
the jog dial. Then, the temperature setting page blinks.
If you want to adjust temperature, turn the jog dial to the
left and right of reset the temperature. Then, if you press
the jog dial, the settings are saved with alerting message
/sounds and you move on to the next step.
(Adjust settings in the following order: temperature→
humidity→angle→turning interval) [Setting Save Message]
Reset of Incubation circum start during incubating
Quit
: Do Not Save Settings and
Move On To The Incubation
Page.
Save & Quit
: Save Settings and Move On
To The Incubation Page
※If you press “PUSH” while setting incubation conditions, you can choose between “Quit/Save & Quit”.
Quit
Save
Quit
Save
Finish Change Option
Finish Incubation
Finish Change Option
Change settings
Finish system
Are you sure?
Finish
Incubation
Parameter saved
16
Humidification
How to Terminate Incubation
▶Press the jog dial for 3 seconds while on incubation to
choose among “Finish Incubaiton / Change settings /
Option / Back”.
USA & Canada Official Sales & Service https://www.R-Com-Hatcher.com
Egg Incubator Hatcher Maru Pro User Manual
DIGITAL INCUBATOR
3. MARU Function Settings
Chicken
37.5
45
60
90 ˚
Water Shortage Detecting Function
▶When water is running low, the water drop shaped “HU
MIDITY” mark on the main page turns from
and an alerting message pops up with alerting sounds
every 3 minutes.
▶
Lasting water shortage makes that humidity display is
changed to the abnormal state and the
alarm is ringing. (Check humidity unit and refill water)
It takes several minutes to get back to normal state
once water is supplied.
Chicken
37.5
45
60
90 ˚
Chicken
37.5
45
60
90 ˚
Chicken
37.5
45
60
90 ˚
Power Failure Alarm Function
▶ When you first switch on the power, or in case of power
failure during incubation, display shows this icon
and incubator and incubator alarm sounds for about 10sec.
Press ENTER to remove.
37.5
45
Chicken
60
90˚
17
(6) Room Light ON/OFF Setting
(7) Humidifier Device OFF method
(8) Water Shortage Detecting Function / Power Failure Alarm
Function / Alerting function when the door is open
Room Light ON/OFF Setting
Leaving the lamp on for a long period of time is not
good for incubation.
▶When you press the cabinet light button, you can ON/OFF
the room light. [Default Value : OFF]
▶When the door is open, the cabinet light turns on, when
the door is closed, the light is OFF.
▶turn the jog dial to select “Change Settings” and press
the jog dial. Then, the temperature setting page blinks.
If you press the jog dial when the temperature setting
page is blinking, the humidity setting page blinks. Then,
lower humidity until “OFF” sign is shown by turning the
jog dial to the left and right and press the jog dial for 3
seconds to turn humidification function off, moving on to
the incubation page. On the other hand, if you adjust
humidity to over RH 30%, the humidification function is
turned on. (Default Setting: ON)
▶If you use the incubator without adding humidification water
or intend to incubate eggs at low humidity under RH 30%,
you must stop the humidification function.
[Humidification ON / Humidification OFF]
OFF OFF
3021
.
.
.
.
.
.
21 Days
Chicken
37.5
45
60
90 ˚
Chicken
37.5
45
60
90 ˚
Finish Change Option
Change settings
Parameter saved
Humi. Set
Humidity Settings and Humidifier Device OFF method
▶Press the jog dial for 3 seconds while on incubation to
choose among “Finish Incubaiton / Change settings /
Option / Back”.
USA & Canada Official Sales & Service https://www.R-Com-Hatcher.com
Egg Incubator Hatcher Maru Pro User Manual
DIGITAL INCUBATOR
3. MARU Function Settings /
4. Optional Functions
(8) Water Shortage Detecting Function /
Power Failure Alarm Function / Alerting function
when the door is open (1) The Abnormal Low Alarm Settings
The Abnormal Low Alarm Settings (Option function)
The alerting sounds set off for 1 minute and automati
cally stops. The alerting sign stays on until the jog dial
is pressed.
▶
When incubator temperature is different from setting
value, icon is changed , and display indicates
current temp. and temp. difference alternatively.
Chicken
39.5
45
60
90 ˚
Chicken
+ 2.0
45
60
90 ˚
When temp. difference is 2℃, it indicates 39.5℃and +2.0
alternatively ( setting 37.5℃)
When temp. difference is -3℃, it indicates 34.5℃and -3.0
alternatively ( setting 37.5℃)
▶WHAT is an abnormal temperature alerting function?
It is a function that alerts the user to an abnormally high
or low temperature inside the incubator.
[ How to Set Abnormal High Temp. Setting ]
: When incubator temp. is higher than setting temp.
▶
Setting Range: 0.0℃~ 5.0℃, Default Setting : 2.0℃
▶Press the jog dial for 3 seconds to see the menu and turn
the dial to the left and right to select “Option”. Then, press
it again to enter the option mode.
▶On the option mode, turn the jog dial to the left and right
to select “High Temp. Set”, and press the jog dial to enter
the “High Temp. Set” mode. Then, adjust the setting by
turning the jog dial to the left and right. Now, press the
jog dial to save the settings.
[ How to Set Abnormal Low Temp. Setting ]
: When incubator temp. is lower than setting temp.
▶Setting Range: 0.0℃~ - 5.0℃, Default Setting : - 3.0℃
▶Press the jog dial for 3 seconds to see the menu and turn
the dial to the left and right to select “Option”. Then, press
it again to enter the option mode.
▶On the option mode, turn the jog dial to the left and right
to select “Low Temp. Set”, and press the jog dial to enter
the “Low Temp. Set” mode. Then, adjust the setting by
turning the jog dial to the left and right. Now, press the
dial to save the settings.
Low Temp. Error
over -4.0˚C
High
Temp
HiErr Unit
Low
Temp
LoErr
Parameter saved
Auto Manual
Option
Option Low Temp. Set
Low Error
H.CAL
High
Temp
HiErr
Low
Temp
LoErr
High Temp. Error
over 3.0˚C
Parameter saved
Auto Manual
Option
Option High Temp. Set
High Error
Close door
Alerting function when the door is open
▶If the door is open for over 30 seconds during operation,
the “Door Opened” icon pops up with alerting sounds.
The icon disappears immediately if the door is closed.
37.5
45
Chicken
60
90˚
18
USA & Canada Official Sales & Service https://www.R-Com-Hatcher.com
Egg Incubator Hatcher Maru Pro User Manual
4. Optional Functions
DIGITAL INCUBATOR
▶On the option mode, turn the jog dial to the left and right
to select “Temp. Unit”, and press the jog dial to enter the
“Change Temp. Unit” mode. Then, enter “Temp. Unit”
mode by pressing the jog dial.
▶On the “Temp. Unit” mode, turn the jog dial to the left and
right to select Celsius or Fahrenheit. Now, press the jog
dial to save the settings. [Default Setting: Celsius : ℃]
How to change between Centigrade and Fahrenheit Temperature units
(Option function)
▶Press the jog dial for 3 seconds to see the menu and turn
the dial to the left and right to select “Option”. Then, press
it again to enter the option mode.
Hot to turn the backlight ON/OFF or to set the turning frequency
(Option function)
▶Press the jog dial for 3 seconds to see the menu and turn the dial to the left and right to select “Option”. Then,
press it again to enter the option mode.
▶On the option mode, turn the jog dial to the left and right to select “Backlight”, adjust the setting and press the
jog dial to save the settings *choose among “Always ON/ Always OFF/ Event On for 20 seconds [Default Setting : Always ON]
▶On the option mode, select “Sound” by turning the jog dial to the left and right, adjust the setting and press the
jog dial to save the settings [Default Setting : ON]
Sound ON /OFF
(Option function)
▶Press the jog dial for 3 seconds to see the menu and turn the dial to the left and right to select “Option”. Then,
press it again to enter the option mode.
Sound InfoReset
▶Press the jog dial for 3 seconds to see the menu and turn
the dial to the left and right to select “Option”. Then, press
it again to enter the option mode.
▶On the option mode, select “Reset All” by turning the jog
dial to the left and right, press the jog dial to enter the
factory default mode.
▶When entering the factory default mode, the message
“Return to Factory Setting?” comes up.
Return to Factory Settings
(Option function)
▶When users have changed the incubator settings, but
want to return to factory setting.
** WARNING **
Return to
Factory setting?
▶Select YES by turning the jog dial to the left and right and press the jog dial to turn off the LCD screen along
with messages and alerting sounds, going back to default in 15 seconds. Select NO and press the jog dial to
go back to the previous page.
Parameter saved
Auto Other
Option
Option Reset All
Reset All
YES
(2) How to change between Centigrade and
Fahrenheit Temperature units
(3) Hot to turn the backlight ON/OFF or to set the turning frequency
(4) Sound ON /OFF (5) Return to Factory Settings
Temperature unit
Fahrenheit(˚F)
Unit Light
Low
Temp
LoErr
Parameter saved
Auto Manual
Option
Option Temp.Unit
Temp Unit
19
USA & Canada Official Sales & Service https://www.R-Com-Hatcher.com
Egg Incubator Hatcher Maru Pro User Manual

DIGITAL INCUBATOR
5. Incubation
20
▶When hatching, humidity should be relatively high to prevent the thin membrane from drying out or hardening
before hatching.
▶When hatching, it's recommended not to open the door often.This is because if you open the door often humidity
will be rapidly decreased and it will take a long time to regain the proper humidity.
Post-Hatch maintenance
Dew condensation is natural phenomenon which can be occurred
when incubator inner temperature is big different from outer temperature.
So, water can leak from the incubator during humidification, which is normal.
Appropriate Incubator internal temperature is between 28
℃
(82.4
℉
).
Dew Condensation
▶It's very important to maintain humidity higher 1~2 days before hatching than the early and middle incubation
periods. Humidity requirements during incubation are RH 45~55% for waterfowl, RH 40~45% for poultry and
RH 35~45% for parrot, in general. One day before hatching, all kinds of birds need about RH 65% humidity
and sometimes need higher than that. However, in areas of high ambient humidity, lower levels of humidity may
be needed during incubation.
▶Air Controlling Lever : Outer fresh air can be flowed into incubator inside without affecting insulation. When eggs
start hatching, open air controlling lever either fully or half-open.
▶If the temperature where incubator installed is high, it will effects to incubator’ setting temperature. In this case,
you are able to adjust temperature by Air ventilation on the top of machine.
1/4 open 1/2 open close wide open
Incubator internal temperature is 37.5℃(99.5℉) or more, and hatching room temperature is below 28℃,
in that case, RH 70% humidity is may not be able. The difference of ±5% humidity value may occur
from the humidity sensors difference, and there are no problems at hatching.
If you set high temperature, condensation will occur the near Air Vent and may causes licking water from the
incubator and it is not a technical problem.
▶As there is some difference in chick feed for each kind of bird, so it's desirable to obtain useful information about
the chicks before hatching.
Generating Room : Space for hatching (breaking of the egg) and used 1~3 days before hatching
(Rcom maru H&B)
Development (Brooding) Room : A device designed for newly hatched chicks to adjust to the environment
by maintaining proper temperature and humidity for certain amount of days.
(Rcom maru H&B / Rcom bird brooder &ICU)
Do not developing chicks inside the incubator. It becomes the source of malfunction of the device and repair
charges will rise even if it is within the free A/S period.
You can adjust
Air Ventilation
▶Newborn birds are vulnerable to cold so it is essential to have a separate development room (brooding device)
In case of developing (brooding) inside the incubator, the incubator can easily become contaminated with various
bacteria which can become a major cause of reduction of hatching rate and various feather, dust, bark, manure
and other pollutants can become the cause of incubator failure. In case of failure due to inappropriate usage
can cause repair costs to occur even if it is within the free A/S period so purchasing of a separate development
(brooding) is recommended. Instructions to build a simple development (brooding) room can be found on our
homepage. (www.Rcom.co.kr → Rcom Study → Making a birdcage)
Humidity and Condensation principles, Air Flow considerations
(1) Humidity and Condensation principles,
Air Flow considerations, and Post-Hatch maintenance
(2) Dew Condensation
USA & Canada Official Sales & Service https://www.R-Com-Hatcher.com
Egg Incubator Hatcher Maru Pro User Manual
This manual suits for next models
2
Table of contents
Other Rcom Accessories manuals

Rcom
Rcom 20 User manual

Rcom
Rcom PRO 20 User manual

Rcom
Rcom KingSuro ECO 20 User manual

Rcom
Rcom KINGSURO MAX 20 User manual

Rcom
Rcom KINGSURO MAX 20 User manual

Rcom
Rcom PX-20RD User manual

Rcom
Rcom INSECT MAX 70 User manual

Rcom
Rcom REPTILE 90 Series User manual

Rcom
Rcom INSECT MAX 140 User manual

Rcom
Rcom REPTILE PRO 90 User manual

Rcom
Rcom INSECT MAX 90 User manual

Rcom
Rcom USB 50 User manual

Rcom
Rcom MARU DELUXE Hatcher & Brooder MX-100HBD User manual

Rcom
Rcom MINI User manual

Rcom
Rcom PRO PLUS 10 User manual

Rcom
Rcom Juragon PX-20R User manual

Rcom
Rcom R-Com 20 User manual

Rcom
Rcom Reptile MAX 60 User manual

Rcom
Rcom USB 20 User manual