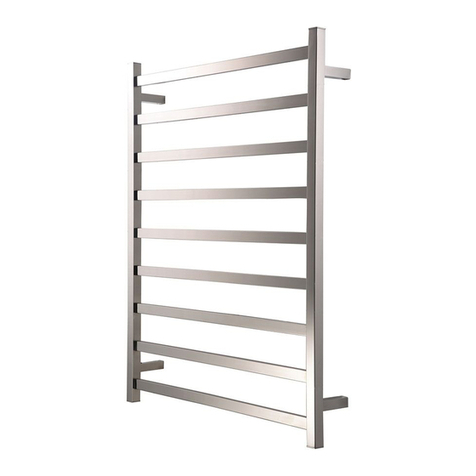
Reece Kado Lussi MKII Installation guide

Kado Lussi MKII Heated Towel Rail
Operations and Maintenance
WARNING
This product must be installed by a qualified electrician in accordance with AS/NZS 3000 wiring rules. Switch off the electrical
supply at the mains before installation and maintenance. A means of disconnection must be incorporated in the fixed wiring
in accordance with the wiring rules. For complete temperature control a wall mounted dimmer switch (with “off” position) is
recommended. Suitable for bathroom and non-bathroom/dry areas. Not suitable for above baths, nor for installation in saunas,
steam rooms or shower cubicles. Please consult with a qualified electrician to confirm appropriate compliant installation
location.
Rated IP55 and suitable for indoor use only. Do not fix to damp or conductive surfaces. Site well away from curtains and fabrics.
Switch off after use.
This appliance is not to be used by persons (including children) with reduced physical, sensory or mental capabilities, or lack
of experience and knowledge, unless they have been given supervision or instruction concerning use of the appliance by a
person responsible for their safety.
Children should be supervised to ensure that they do not play with the appliance.
WARNING: In order to avoid a hazard for very young children, this appliance should be installed so that the lowest heated rail
is at least 600mm above the floor.
If the supply cord is damaged, it must be replaced by the manufacturer, its service agent or similarly qualified person in order
to avoid a hazard.
For safety, please DO NOT use for any purpose other than as a towel rail and a towel warmer. To avoid damage DO NOT sit,
stand, lean or hang on product.
OPERATION AND MAINTENANCE
• After installation, connect the electric power and turn on the wall switch. The towel warmer will start to work
• Turn off the power wall switch when towel warmer is not in use.
• Clean the towel warmer with a soft dry towel.
• This unit has been designed to run continuously
The surface temperature is high when towel warmer operates. PLEASE BE CAREFUL!
ELECTRICAL INSTALLATION
Please ensure this towel warmer is installed by a registered electrician and ensure the electrical supply, plug
& switch location and product location will comply with your local regulations.
This appliance must be fitted with an air gap phase isolation switch. For complete temperature
control, a wall mounted dimmer switch (with “off” position) is recommended. Please consult with a
qualified electrician for selection of an appropriate device.

Kado Lussi MKII Heated Towel Rail
INSTALLING BRACKETS
INSTALLATION
• Slide all 4 Wall Brackets (1) over towel rail bracket arms (2).
Hold unit in position,with a pencil outline
brackets and remove from wall.
• Using pencil and Wall Bracket (1) mark the centre of
each screw hole and cross for accuracy.
• Drill a hole for the Screws(3)and insert nylon plug into tiled wall
(if applicable). Installer may choose to use alternative screws
to suit the application. Installer MUST use a DIAMOND HEAD
drill bit.
A QUALIFIED ELECTRICIAN MUST THEN CONNECT TOWEL
RAIL ELEMENT TO EXISTING WALL CABLE PROTRUDING FROM
• Position Wall Bracket(1) so that the Grub Screw hole faces
directly down towards the oor. Mount Wall Brackets (1)
by inserting screws (3), be sure not to overtighten.
• Slip Cover Plates (6) onto Towel Rail Bracket Arms (2),
slide towel rail (4) into position on wall.
• Insert 4 x Grub Screws (5), into Wall Brackets (1).
With the Allen Key provided, tighten the Grub Screws (5)
to ensure that towel rail stays in position.
1 Wall Bracket x 4
2
3
Bracket Arm
4
Wall Screw** x 12
5
Hydrotherm Towel Rail
6Cover Plate x 4
Allen Key & Grub Screw x 4
**INSTALLER MAY CHOOSE NOT TO USE SCREW IF NOT
SUITABLE FOR APPLICATION
We will not accept
responsibility for incorrectly
installed brackets. Please read
instructions carefully.
WARNING:
This appliance is not intended for use by young children or in rm persons
without supervision.
CAUTION:
The cord extension set must be positioned so that it is not subject to splashing or
ingress of moisture. The supply shall have means for disconnection with an air gap in all active
conductors incorporated in the xed wiring according to the Wiring Rules in AS/NZS 3000:2000.
CAUTION
WARNING
• Push down on cover plate (6)and secure in place.
BOTTOM WALL MOUNT (1).
40mm
50mm
Bottom Bracket With Cable
WALL
Screw
1
4
2
5
Screw
Element Cord
2
40mm
WALL
Screw
1
4
2
Screw
2
5
3
3
3
3
6
6
4
4
WARNING
TOWEL RAILS MUST ALWAYS BE INSTALLED WITH THE
ELEMENT PLACED AT THE BOTTOM FOR CORRECT HEAT
TRANSFER.
Please ensure that the measurements are taken
accurately and that the screw is in a stud or noggin to
provide support. Do not overtighten screws.
Please ensure a DIAMOND HEAD drill bit is used to drill
screw and cord holes into tiled wall.
We take pride in the fact that all rails are individually
hand made. Due to this fact some measurements
may not be exact. PLEASE READ INSTRUCTIONS
CAREFULLY and do not force towel rail bracket if
postion of Wall Mount is not accurate.
WARNING
TOWEL RAILS MUST ALWAYS BE INSTALLED WITH THE
ELEMENT PLACED AT THE BOTTOM FOR CORRECT HEAT
TRANSFER.
WARNING
Top Wall Bracket
Page 3 of 7
Installation Instructions

Kado Lussi MKII Heated Towel Rail
Please consult with a qualified electrician to confirm appropriate compliant installation location.
Installation Instructions
Page 4 of 7
Kado Lussi Heated Towel Rail Wall Mount
PLUG IN VERSION
DOUBLE HARD-WIRED VERSION
HARD-WIRED VERSION
(FIG.1)
(FIG.3)
PLUG IN OPTION - REQUEST ONLY
(See Fig. 3)
Plug is supplied with element cable (approx. 1200mm long).
Cable may be cut and plug attached to required length.
(See Fig. 3)
This option is only available upon request.
HARD WIRED - STANDARD OPTION
(See Fig.1 & Fig. 2)
The heating elment cable is fed back through either the left, or right
hand BOTTOM (ONLY) bracket, wherby a qualifed electrician will then
hardwire the cable in behind the wall.
All hard-wired elements achieve an IP Rating of IP55.
(IPX5) for use in wet areas. Hydrotherm
recommend all electric towel rails be connected
to a timer for convenience, as well as to prolong the life
of the replaceable electric element.
All Elements carry the following approvals.
Elements have a built in thermostat and internal cut out ensuring
safety and energy efficiency.
All Hydrotherm electric elements are supplied as 240v.
All electric elements are replaceable and can be easily
changed over.
®IP55
(FIG.2)
WIRING OPTIONS
Kado Lussi Wall Mount Series Electric Towel Rails fitted
(standard on the left unless otherwise specified)
40mm
50mm
Bottom Bracket With Cable
WALL
Screw
1
4
2
Screw
Element Cord
2
5
3
3
6
4

Kado Lussi MKII Heated Towel Rail
Installation Instructions
Electrician, please ensure a copy of the installation
instructions is left with the end user for future reference
Page 5 of 7
Kado Lussi Heated Towel Rail Wall Mount
HARD WIRING
We recommend that all hard-wired heated towel rails
be connected to a light switch or digital timer. Connecting hard-
wired heated towel rails to a light switch or a timer will prolong the
life
of the electric element and reduce energy consumption.
CHANGING ELEMENTS
Replacing a heating element, or exchaging it from one side to the
other is a realtively simple process.
There are Five Basic Steps:
1. Remove towel rail from brackets (if already installed).
3. Pull element cable back through vertical rail so that it protrudes
from bottom. With a 19mm tap spanner, loosen
the hex nut of the electric element. When the element is
, unscrew it by hand. If you are changing the element
from left to right (or vice versa) the internal plug on the
opposite side must also be removed and swapped over with the element.
loose
4. Swap the element and screw in place.
5. Turn the towel rail the right way up and position back into
brackets, re t grub screws to secure.
Element
on left side
Turn rail
upside down
Swap
element over
Element
on right side
2. 3. 4.
- 19mm Tap Spanner
Required
unscrew internal cap
unscrew element
screw in element
screw in internal cap
2. Turn towel rail upside down and remove both push on caps
from bottom of vertical tube.
1.
Please note:
We advise that the unit be removed from the wall and turned
upside down to avoid water spilling. Please ensure
the heating element always remains at the bottoom of the towel rail.
Remove push on caps
Ret push on caps
Table of contents
Other Reece Heater manuals