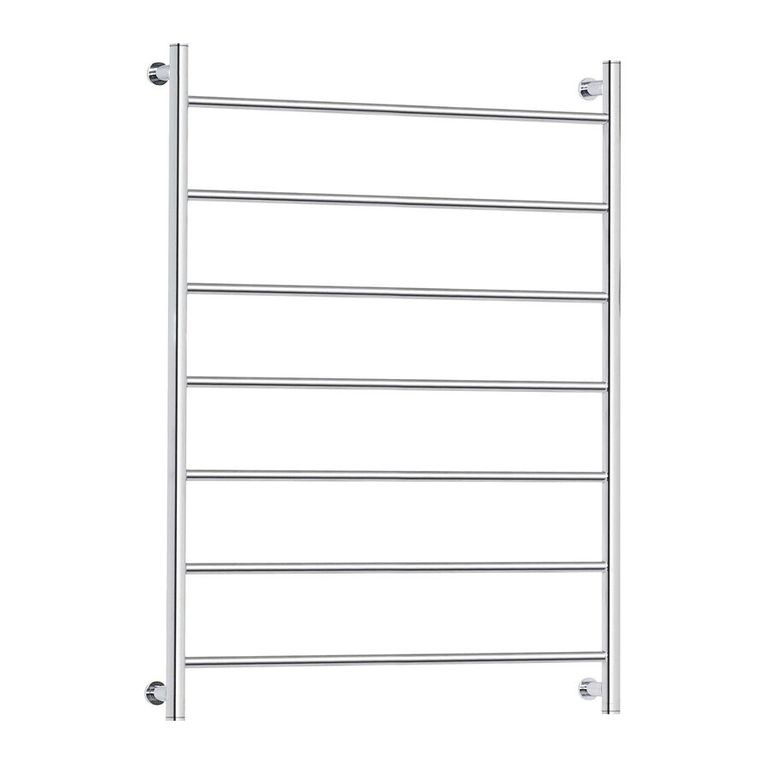
Reece Milli CUBE HEATED TOWEL RAIL 1025 X 850 Quick start guide

To see the complete Milli range go to
www.reece.com.au/bathrooms
MILLI
CUBE HEATED TOWEL RAIL
1025 X 850
SPECIFICATIONS
Recommended Use Residential and Commercial
Colour 304 Stainless Steel
Materials Stainless Steel
Finish Polished Stainless Steel
Technology Dry Element
Element Electrical Element
Options Hardwired Only
Power Entry Bottom Right
Wattage 140W
Standards AS/NZ 60335
Safety Rating IP 45
CLEANING RECOMMENDATIONS
We recommend the use of soapy water or approved cleaners.
This product should not be cleaned with abrasive materials.
Damage caused by any improper treatment is not covered by the product
warranty. Refer to Warranty Conditions on the last page.
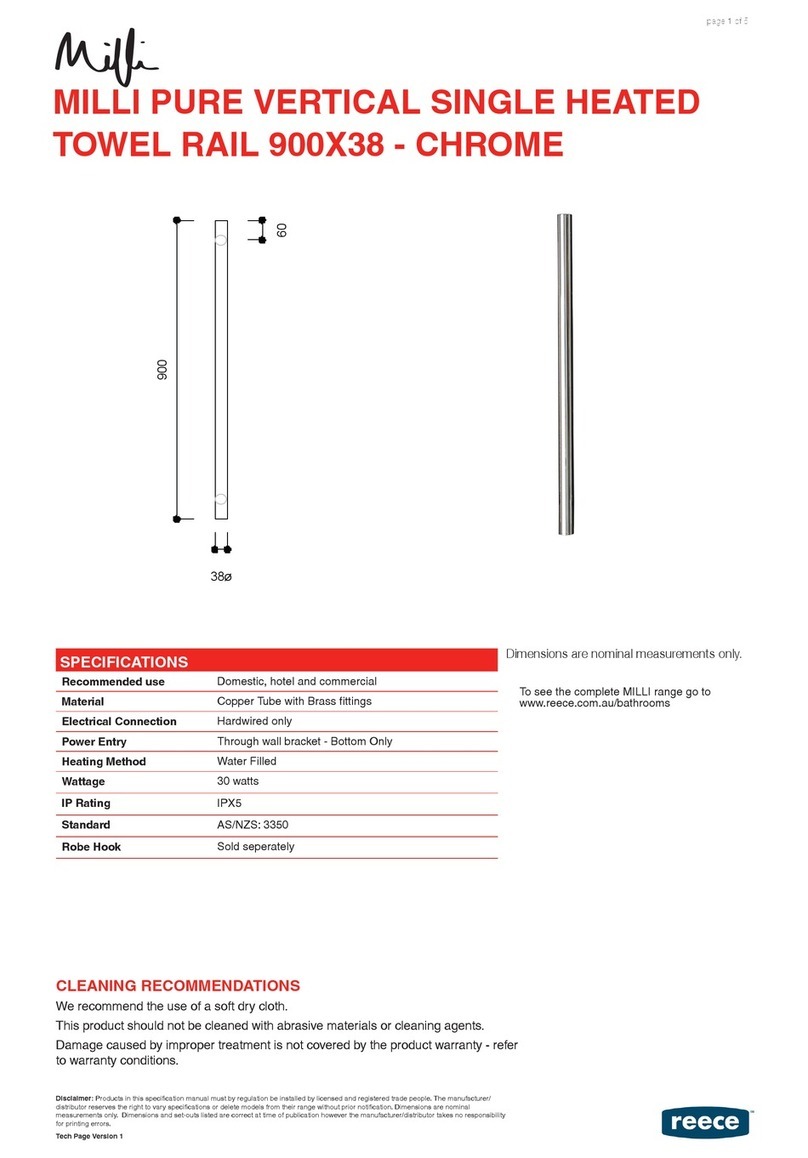
1025 825
820
850
120
Disclaimer: Products in this specification manual must by regulation be installed by licensed and registered trade
people. The manufacturer/distributor reserves the right to vary specifications or delete models from their range
without prior notification. Dimensions are nominal measurements only. Dimensions and set-outs listed are correct at
time of publication however the manufacturer/distributor takes no responsibility for printing errors.
Tech Page Version 1

MILLI
CUBE HEATED TOWEL RAIL
1025 X 850
MILLI A
ust
v
1.
1
MILLI
LADDER TOWEL WARMER
SPECIFICATIONS:
Recommended use
Domestic, hotel and
commercial
Colour Availability
Polished Stainless Steel
IP Rating
IP45
Warranty (see below)
3 years
Standards
AS/NZS 60335
WARANTY & CARE DETAILS:
Dear Customer,
This is t
he warranty by Reece Pty Ltd.
r
elating to this product. Please keep it together with your
purchase receipt. In the unlikely event of a query please contact your nearest Reece Plumbing
Centre.
Care and Cleaning
The polished
stainless steel
finish of your
t
owel
w
armer is hard wearing and easily maintained.
Clean with a soft cloth and non
-
abrasive cleaning agent.
Guarantee
This product is guaranteed against defects due to fault
y workmanship or materials for 3
years
from date of purchase. In the event of a de
fect in the product, it should be returned with the sales
receipt to the retailer from whom it was purchased. Under the guarantee the defective article will
be repaired or replaced at
the manufacturers
option
–
free of charge. Costs of disconnection,
recon
nection, and freight are the responsibility of the owner, as is any damage arising in transit to
and from servicing.
This guarantee does not cover:
a.
Any damage to the product caused by misuse, neglect, accident, or in violation of the
manufacturer’s instru
ctions, or
b.
Any damage, loss or injury arising as a consequence of the use of the product.
Operation
Your
MILLI
Towel Warmer uses only minimal electrical power
-
about the same as an average
light bulb. It will take approximately 20
-
30 minutes to reach max
imum operating temperature.
MILLI
Towel warmers are designed for continuous operation. NOTE: The temperature of your
towel warmer will vary with the ambient temperature of your room. A towel warmer is designed to
warm and assist the drying of towels and w
ill normally operate at a temperature that is too hot for
the warmer to b
e
grasped for an extended time
.
Locating Instructions
The
MILLI
Ladder Towel Warmer should
be fixed through the wall cladding directly to studs or
other suitable anchor material.
T
he
towel warmer should be located in compliance wit
h the
AS/NZS
60335
Standard
and should not in any
circumstances be located in the direct path of a
water source (tap or shower etc)
.
MILLI
towel warmers have an IP
4
5 rating offering you the
greatest flexibil
ity to safely locate the towel warmer in bathrooms o
r
shower rooms
.
Electrical Installation
Please ensure your towel warmer is installed by a registered electrician
and ensure the electrical
supply, plug & switch location, and product location will comply
with your local regulations.
This appliance must be fitted with an air gap phase isolation switch. For complete temperature
control a wall mounted dimmer switch (with “off” position) is recommended.
Concealed Wiring Kit
A concealed wiring adapter is
in
cluded with
this product. If you have access to the wall cavity the
kit allows you to conceal the electrical flex for a more
s
treamline
d
and
v
isually appealing
installation.
Concealed wiring fittings must be installed before the wall cladding is
installed.

MILLI
CUBE HEATED TOWEL RAIL
1025 X 850
MILLI A
ust
v
1.
1
INSTALLATION OF
MILLI
LADDER TOWEL WARMER
This Package Contains:
1 Ladder Towel Warmer and flex
4 Mounting Feet with Mounting Barrel & Grub Screw
(
with
2
pin plug
Australian models only)
4
Mounting Screws to fix Brass mounting Barrel to
wall
1 Brass Concealed adaptor (optional)
3 Fixing screws to attach feet to towel warmer
CAUTION
:
Prior to installation please ensure the product is to your satisfaction.
This product is not intended for
use
by young
children or infirmed persons witho
ut
supervision. Young
children should be supervised to ensure they
do not
play with the product.
To
minimize a hazard for young children, this appliance should be installed so that the bottom rail is 600mm above the floor
.
The
supply cord cannot be replace
d. If the cord is damaged the appliance should be scrapped or contact the
supplier
.
Installation:
This towel warmer should be installed by a registered electrician and in accordance with local and national electrical codes.
We
recommend that the towel war
mer be installed vertically on a flat and uniform wall, and where possible into studs or other suitable
anchor material. If fixing to hollow cavity walls,
Toggle Anchors
or similar devices must be used.
Position the
towel
warmer so that the plug and mains
power receptacle are easily accessible, with the cable entry to the
towel
warmer
NEAREST THE FLOOR
. Avoid the supply cable coming into contact with the heated parts of the towel warmer.
DO NOT PLUG THE UNIT INTO THE POWER SUPPLY
OR SWITCH THE TOWEL WARM
ER ON
BEFORE INSTALLATION IS
COMPLETE.
1
If the warmer is being installed without using the concealed adaptor proceed to no2. If the towel warmer is being
installed with a concealed wiring adaptor, proceed to that section.
2
Remove the 4 mounting barrels fro
m the 4 stainless steel feet then attach the 4 stainless steel mounting legs to the
towel warmer
3
Hold the towel warmer in position and m
ark
around one of the top legs. Remove the towel warmer and fix the mounting
barrel to the wall.
4
Place the leg onto the
mounting barrel and, making sure that the towel warmer is level, mark the location of the
remaining top leg. Fix the mounting barrel to the wall
5
Place the towel warmer onto the two mounting barrel’s and mark the location of the two bottom legs.
6
Remove the
towel warmer and fix the remaining two mounting barrels to the wall
7
Place the towel warmer in position and secure it to the mounting barrels using the 4 grub screws.

MILLI
CUBE HEATED TOWEL RAIL
1025 X 850
MILLI A
ust
v
1.
1
Concealed Wiring Option
:
It is recommended that the concealed wiring adaptor be in
stalled
before
the wall cladding is in position.
1.
Cut plug from end of electrical flex (if applicable)
2.
Carefully remove the stainless steel leg from the flex
3.
Thread the flex through the centre of the stainless steel foot
4.
Connection to electrical supply sh
ould be carried out by a qualified electrician in accordance with local electrical
requirements and regulations and to
ensure the electrical supply, plug & switch location, and product location will
comply with your local regulations
.
5.
Installation of
the adaptor first requires mounting the bottom feet of the towel warmer followed by the top feet. Do
not turn on the power to the towel warmer until installation is complete.
6.
Ensure that the flush box that the towel warmer will be wired to is within this d
istance of the mounting position of the
foot of the towel warmer that has the flex. Allow for loss of flex length due to connections.
7.
Drill a
13
mm hole into the face of the stud where the towel warmer foot with the flex is to be positioned. Drill the
hole
approximately 25mm deep.
8.
Identify the side of the stud facing the flush box that the towel warmer will be wired to. On that side of the stud, drill
a 25mm deep hole at right angles to this first hole so that the hole will break into the base of the first h
ole. Refer to
Fig1.
9.
Place a pull through line from the flush box to the
13
mm hole that can be picked up later once the wall cladding is in
place
10.
Once the wall cladding is positioned, remove some of the cladding to expose the
9
mm hole. Locate the p
ull through and
thread the adaptor
-
fixing barrel onto the pull through.
11.
Screw the adaptor
-
fixing barrel into the stud. On masonry walls drill a 1
0
mm hole and epoxy resin the adaptor
-
fixing
barrel into position. The shoulder of the barrel should leave a
gap equal to the wall cladding thickness so that when the
wall cladding is fixed the shoulder of the barrel is flush with the wall cladding. (refer Fig
2
)
12.
Measure the towel warmers horizontal distance between the mounting barrel centers.
Mark a point ho
rizontally from the
centre of the adaptor at th
is
measurement for your model (
but check the actual measurements to your warmer as
manufacturing tolerances apply)
for the other bottom fixing barrel. It is important that the line between these two points is
level
.
13.
Screw the other fixing barrel (provided with the towel warmer) into place with the screw provided with the towel warmer.
14.
Attach the pull through to the flex and pull the flex through the stud holes to the flush box.
15.
Position t
he towel warmer on the bottom two fixing barrels and mark the two top feet. (Use easy to remove pencil)
16.
Mark the centre distance for the top fixing barrels (per above) & screw the fixing barrels to the wall.
17.
Remount the towel warmer on the four fixing b
arrels. Secure the foot containing the
flex with the screw provided t
hen
secure the three remaining feet with the screws provided
.

To see the complete Milli range go to
www.reece.com.au/bathrooms
REECE PRODUCT QUALITY GUARANTEE
You have purchased a quality product from Reece Pty Ltd
ABN 84 004 097 090 (“Reece”). This product is covered by a
7 year replacement product warranty and a 12 month warranty
over spare parts and labour.
7 YEAR WARRANTY – DOMESTIC USE
This warranty covers faults in the product construction, material
and assembly. Products which are within 7 years from the
date of purchase, found upon inspection by an authorised
Reece representative, to be defective in construction,
material or assembly, will be repaired or exchanged with an
equivalent product free of charge. Replaced items become
Reece’s property.
All replacement products will be available for collection without
charge to the customer at the nearest Reece branch to the
customer’s location, or elsewhere as agreed between the
customer and Reece.
Labour and Spare Parts
The labour for the replacement of products and spare parts
to which this warranty applies will be supplied by Reece or
relevant supplier using licensed plumbers engaged by Reece or
relevant supplier within 1 year from the date of purchase.
Spare parts which are within 1 year from the date of purchase
found upon inspection by an authorised Reece representative
to be defective in construction, material or assembly, will be
replaced free of charge.
Manufacturer’s Provisions
The following spare parts are covered by a 3 year warranty:
• Heating Elements
Warranty Conditions
This warranty will apply only under all of the
following conditions:
• The item has been installed by a qualified tradesman
• The item has been installed for and subjected to domestic
residential use only
• Failure is due to a fault in the manufacture of the product
• Proof of purchase (including the date of purchase)
is provided
• The installation of the product is in accordance with the
instructions provided
This warranty does not cover products purchased as an
ex-display without being fully checked and tested for sale by
the manufacturer.
This warranty does not include faults caused by:
• Unsuitable or improper use
• Incorrect installation or installation not in accordance with
the instructions provided
• Installation or part installation by the purchaser or any person
other than a qualified tradesman
• Normal wear and tear
• Inadequate or complete lack of maintenance
• Chemical, electrochemical or electrical influences
• Harsh detergents or abrasive cleaners used on
product finishes
1 YEAR WARRANTY – COMMERCIAL USE
‘Commercial’ use is all use other than for normal domestic
residential purposes, including use in non-business places as in
public buildings, schools, sports centres and in establishments
that contain private bathrooms with high frequency of use by
many individuals, such as hotels, motels, retirement villages
and hospitals.
The Commercial warranty covers this product against
manufacturing faults in the construction, material and assembly
of both the finished products and any spare parts for a period
of 1 year from the date of purchase. Products and spare
parts which are found upon inspection by an authorised
Reece representative to be defective in construction, material
or assembly will be repaired or exchanged free of charge.
Replaced items become Reece’s property. The labour for the
replacement of products and spare parts to which this warranty
applies will be supplied by Reece or relevant supplier using
licensed plumbers engaged by Reece or relevant supplier. The
Warranty Conditions and exclusions which apply to the non-
commercial warranty also apply to this commercial warranty.
EXCLUSIONS
To the fullest extent permitted by law, Reece excludes all liability
for damage or injury to any person, damage to any property,
and any indirect consequential or other loss or damage.
CLAIM PROCEDURE
For all warranty queries customers are to contact the branch
where the product was purchased. These details can be found
on your purchase invoice.
Our goods come with guarantees that cannot be excluded
under the Australian Consumer Law. You are entitled
to a replacement or refund for a major failure and for
compensation for any other reasonably foreseeable loss or
damage. You are also entitled to have the goods repaired or
replaced if the goods fail to be of acceptable quality and the
failure does not amount to a major failure.
HTR.MILLI.KADO.MILAN.7YR
Don’t risk it, use a licensed plumber.™
7
YEAR
Q
U
A
L
I
T
Y
G
U
A
R
A
N
T
E
E
MILLI
CUBE HEATED TOWEL RAIL
1025 X 850
page 5 of 5
Table of contents
Other Reece Heater manuals
Popular Heater manuals by other brands

TESY
TESY 1506 Instructions for use and maintenance

Termozeta
Termozeta TZR08 instruction manual

Spitwater
Spitwater JETFIRE J20A Operating and maintenance manual

Vasner
Vasner Citara T Series Installation guide and user's manual

jablotron
jablotron Futura user manual

Cumberland
Cumberland Super-Saver XL SS-200-XL owner's manual