Reed Instruments R7800 User manual

Coating
Thickness
Gauge
Instruction
Manual
R7800
REED Instruments

2
Table of Contents
Introduction ................................................................................................... 3
Product Quality.............................................................................................. 3
Safety ............................................................................................................ 4
Features......................................................................................................... 4
Included......................................................................................................... 4
Specications................................................................................................ 5
Instrument Description.................................................................................. 6
Display Description ....................................................................................... 6
Operating Instructions................................................................................... 7
Power ON/OFF......................................................................................... 7
Measuring Procedure............................................................................... 7
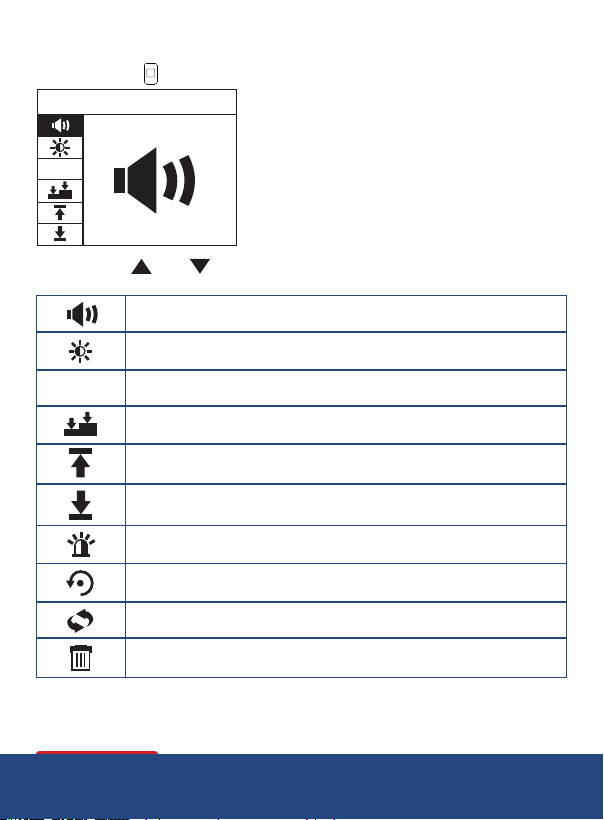
Setup Mode..............................................................................................8-12
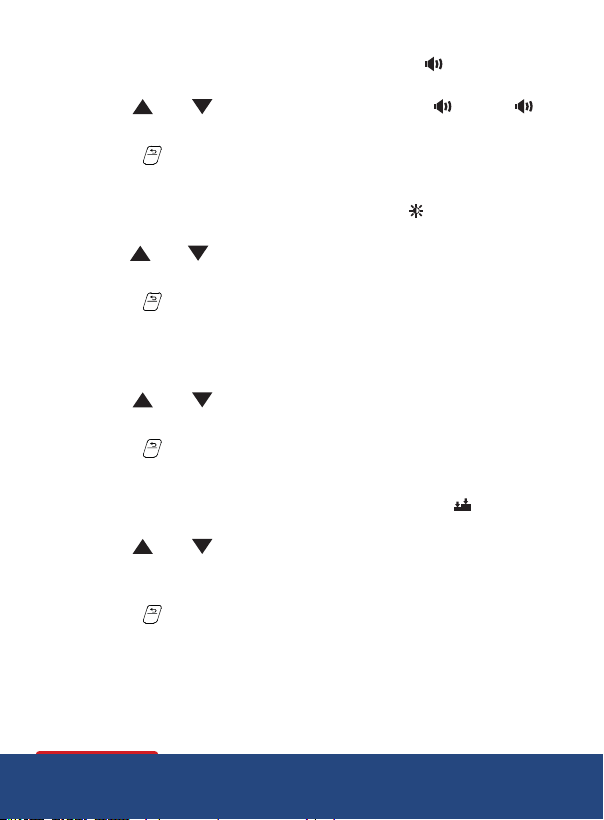
Enabling/Disabling Audible Beep............................................................. 9
Setting the LCD Brightness...................................................................... 9
Selecting the Thickness Unit of Measure ................................................. 9
Selecting Calibration Mode...................................................................... 9
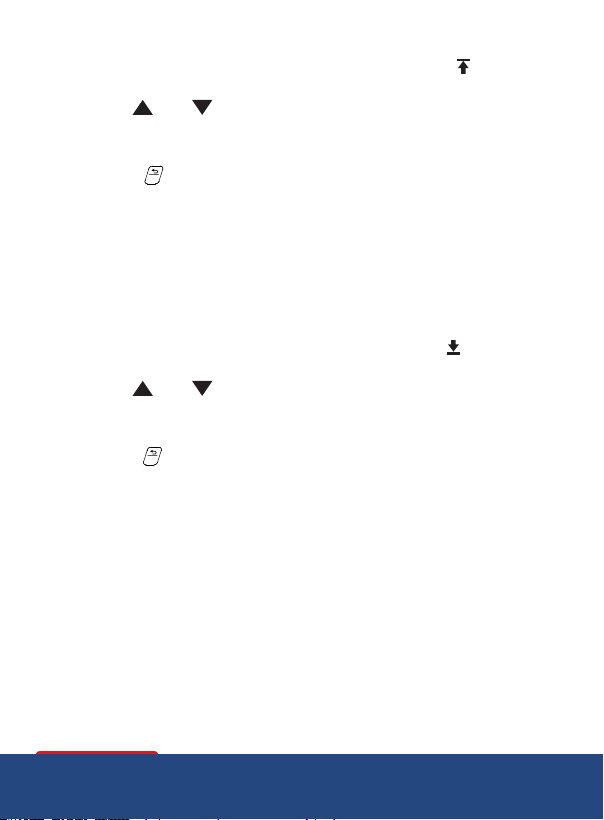
Setting Higher Limit Value ...................................................................... 10
Setting Lower Limit Value....................................................................... 10
Enabling/Disabling LED Indicators ......................................................... 11
Factory Reset ......................................................................................... 11
Selecting Continuous Measurement Mode............................................ 11
Delete Recorded Data............................................................................ 12
Minimum, Maximum, and Average Values .................................................. 12
Quick Decision Mode .............................................................................12-13
Single-Point Decision Configuration ...................................................... 13
Multi-Point Decision Configuration ........................................................ 13
continued...
REED Instruments

3
Zero Calibration......................................................................................14-16
Zero Calibration...................................................................................... 14
Two-Point Calibration ............................................................................. 15
Calibration Verification............................................................................ 16
Locking Screen Auto-Rotation.................................................................... 16
Data Upload ................................................................................................ 16
Software Installation.................................................................................... 16
Battery Replacement................................................................................... 17
Applications................................................................................................. 17
Accessories and Replacement Parts .......................................................... 17
Product Care ............................................................................................... 17
Product Warranty ........................................................................................ 18
Product Disposal and Recycling ................................................................. 18
Product Support.......................................................................................... 18
Introduction
Thank you for purchasing your REED R7800 Coating Thickness Gauge.
Please read the following instructions carefully before using your instrument.
By following the steps outlined in this manual your meter will provide years
of reliable service. This coating thickness gauge is designed for non-invasive
coating thickness measurements. The R7800 features zero or two point
calibration, user adjustable high/low alarms and a USB interface to further
analyze results in the software.
Product Quality
This product has been manufactured in an ISO 9001 facility and has
been calibrated during the manufacturing process to meet stated product
specications. If a certicate of calibration is required please contact the
nearest authorized REED distributor or authorized Service Center. Please
note an additional fee for this service will apply.
REED Instruments

4
Safety
Never attempt to repair or modify your instrument. Dismantling your
product, other than for the purpose of replacing batteries, may cause
damage that will not be covered under the manufacturer's warranty.
Servicing should only be provided by an authorized service center.
Features
• Automaticallydetectsferrousandnon-ferroussubstrates
• Easy-to-readcolorLCDdisplay
• 360°screenrotationallowsuserstoviewmeasuredreadingsfrom
any angle
• Durablegaugeandprobeconstruction
• Zeroandtwo-pointcalibrationensuresmeasurementaccuracy
• Singleormulti-pointmodeallowsausertosettolerancesandquickly
identify whether a coating passes or fails
• Tri-colorLEDsquicklyindicatewhenmeasurementsarebelow(red),
above(yellow)orwithinsetparameters(green)
• Internalmemorystoresupto500groupsofdata
•
View stored data, charts or real-time measurement with software
• Lowbatteryindicationandautoshutoff
Included
• FerrousSubstrate
• Non-FerrousSubstrate
• 5ReferenceFilms
• USBCable
• WristStrap
• SensorCover
• Batteries
• HardCarryingCase
REED Instruments

5
Specifications
Measuring Range: 0 to 1250µm
0.1 to 49.2mils
Accuracy: 0 to 1250µm: ±3% +1µm
0 to 49.21mils: ±3% +0.04mils
Resolution: 0 to 99.9µm: 0.1µm
100 to 1250µm: 1µm
0 to 4.99mils: 0.01mils
5.0 to 49.2mils: 0.1mils
Measurement Modes: Single and Continuous
Display: 4-digit color LCD display
Resolution: 320 x 240 pixels
BacklitDisplay: Yes(5levels)
Min/Max/Average Readings: Yes
MinimumCurvatureRadius: 5mm(196.85mils)
MinimumAreaDiameter: 20mm(787.40mils)
MinimumSubstrateThickness: 0.5mm(19.69mils)
AutoShut-Off: Yes(After5minutes)
Low Battery Indicator: Yes
Power Supply: 2 x AA Batteries
InternalMemory: Yes(Upto500groups)
PC Connectivity: USB Cable
Software: Yes
Product Certications: CE
RefreshRate: 0.5seconds(continuousmode)
OperatingTemperature: 32to104°F(0to40°C)
StorageTemperature: -4to140°F(-20to60°C)
OperatingHumidityRange: ≤80%RH
Dimensions: 5.9x2.6x1.38"(152x65x35mm)
Weight: 6.35oz(180g)
REED Instruments

6
Instrument Description
1. Wrist Strap Anchoring Point
2. LED Status Indicator
3. LCD Display
4. Power Button
5. Menu/Conrm/Calibration
Button
6. Increase Value/Up/Lock
Screen Button
7. USB Port
8. Cancel/Zero/Return Button
9. Decrease Value/Down/Quick
Decision Mode Button
10.BatteryCompartment(Back)
11. Sensor
Display Description
1. Low Limit Indicator
2. Measured Value
3. Minimum Value Indicator
4. Stored Measurements
Indicator
5. Average Measurement Value
6. Maximum Value Indicator
7. Battery Level Indicator
8. Locked Screen Indicator
9. Substrate Type
10. Unit of Measure
11. Calibration Mode Indicator
12.HighLimitIndicator
OK
MENU
CLEAR
R7800
Coating Thickness Gauge
2
1
5
3
48
7
9
11
6
10
100
Num:
Lo: 90.0
99.4 100
99.84
101Hi:
um/mil
NFe/Fe
Avg:
Max:Min:
1
4
2
75 6
3
8
9
11
12
10
REED Instruments

7
Operating Instructions
Power ON/OFF
To turn the meter ON or OFF press and hold the power button for 2 seconds.
Note: If the buzzer is enabled, there will be an audible beep when the
instrument is powered ON or OFF.
Measuring Procedure
Before each test session perform a Zero Calibration. See the Zero Calibration
section for details.
1. During start-up the meter begins an initialization process and enters
normal operation upon completion.
2. Select the closest reference lm to the estimated coating thickness
of the test area and perform a 2-point calibration on the appropriate
substrate plate.
3. Proceed with the 2-point calibration. See the Two-Point Calibration
section for details.
4.
Once the 2-point calibration has been completed, proceed with testing.
5. Select 3-5 measuring points on the test surface.
6. For each measuring point, it is recommended to take 5 measurements
and record the average value as indicated on the LCD display.
7. After each measuring point has been tested, the overall average value
should be noted as the coating thickness value of the test piece.
Note: Lightly press the sensor against the substrate being measured.
Keep the sensor in close contact with the surface of the substrate without
the use of excessive force as it can cause measurement errors. If the
measured value is greater than 1250μm and less than 1500μm, the LCD
displays "OL" indicating it is over the measurement range. If the measured
value is greater than 1500μm, the gauge will not respond.
REED Instruments

8
Setup Mode
1. Press the
OK
MENU
CLEAR
button to enter Setup Mode.
OK
MENU
ZERO
R7800
Coating Thickness Gauge
2/2
OK
MENU
ZERO
R7800
Coating Thickness Gauge
1/2
OK
MENU
ZERO
R7800
Coating Thickness Gauge
1/2
um
Fe
509
1/2
um
Fe
500
um
Fe
Calibration completed!
0.0
2/2
um
Fe
Calibration completed!
0.0
MENU
um/mil
2. Use the
OK
MENU
CLEAR
and
OK
MENU
CLEAR
arrows to scroll through the following parameters.
OK
MENU
CLEAR
Enabling/Disabling Audible Beep
OK
MENU
CLEAR
Setting the Brightness
um/mil Selecting the thickness Unit of Measure
OK
MENU
CLEAR
Selecting Calibration Mode
OK
MENU
CLEAR
SettingHigherLimitValue
OK
MENU
CLEAR
Setting Lower Limit Value
OK
MENU
CLEAR
Turning LED Indicators ON/OFF
OK
MENU
CLEAR
Factory Reset
OK
MENU
CLEAR
Selecting Continuous Measurement Mode
OK
MENU
CLEAR
Delete Recorded Data
3.
Follow the instructions below to adjust each setting
.
continued...
REED Instruments

9
Enabling/Disabling Audible Beep
1. Press the OK button when the audible beep icon
OK
MENU
CLEAR
is selected in
Setup Mode.
2. Use the
OK
MENU
CLEAR
and
OK
MENU
CLEAR
arrows to select between ON
OK
MENU
CLEAR
or OFF
OK
MENU
CLEAR
X.
3. Press the OK button to conrm selection.
4. Press the
OK
MENU
CLEAR
button to exit Setup Mode and resume normal operation.
Setting the LCD Brightness
1. Press the OK button when the brightness icon
OK
MENU
CLEAR
is selected in
Setup Mode.
2.
Use the
OK
MENU
CLEAR
and
OK
MENU
CLEAR
arrows to increase or decrease the brightness level.
3. Press the OK button to conrm selection.
4. Press the
OK
MENU
CLEAR
button to exit Setup Mode and resume normal operation.
Selecting the Thickness Unit of Measure
1. Press the OK button when the unit of measure icon um/mil is selected
in Setup Mode.
2. Use the
OK
MENU
CLEAR
and
OK
MENU
CLEAR
arrows to select between μm and mil.
3. Press the OK button to conrm selection.
4. Press the
OK
MENU
CLEAR
button to exit Setup Mode and resume normal operation.
Selecting Calibration Mode
1. Press the OK button when the calibration mode icon
OK
MENU
CLEAR
is selected
in Setup Mode.
2. Use the
OK
MENU
CLEAR
and
OK
MENU
CLEAR
arrows to select between zero and
2-point calibration.
3. Press the OK button to conrm selection.
4. Press the
OK
MENU
CLEAR
button to exit Setup mode and resume normal operation.
continued...
REED Instruments

10
Setting Higher Limit Value
1. Press the OK button when the higher limit value icon
OK
MENU
CLEAR
is selected
in Setup Mode.
2. Use the
OK
MENU
CLEAR
and
OK
MENU
CLEAR
arrows to increase or decrease the higher
limit value.
3. Press the OK button to conrm selection.
4. Press the
OK
MENU
CLEAR
button to exit Setup Mode and resume normal
operation.
Note: If the higher limit value is exceeded while in normal measuring
modeandLEDindicatorsareenabled(SeeEnabling/Disabling LED
Indicatorsfordetails),theLEDwarninglightwillashyellow.When
measurements are within set parameters, the LED warning light
ashesgreen.
Setting Lower Limit Value
1. Press the OK button when the lower limit value icon
OK
MENU
CLEAR
is selected in
Setup Mode.
2. Use the
OK
MENU
CLEAR
and
OK
MENU
CLEAR
arrows to increase or decrease the lower
limit value.
3. Press the OK button to conrm selection.
4.
Press the
OK
MENU
CLEAR
button to exit Setup Mode and resume normal operation.
Note: If the lower limit value is exceeded while in normal measuring mode
andLEDindicatorsareenabled(SeeEnabling/Disabling LED Indicators for
details),theLEDwillashred.Whenmeasurementsarewithinset
parameters,theLEDwarninglightashesgreen.
continued...
REED Instruments

11
Enabling/Disabling LED Indicators
1. Press the OK button when the LED alarm icon
OK
MENU
CLEAR
is selected in
Setup Mode.
2. Use the
OK
MENU
CLEAR
and
OK
MENU
CLEAR
arrows to turn the LED alarm ON or OFF.
3. Press the OK button to conrm selection.
4.
Press the
OK
MENU
CLEAR
button to exit Setup Mode and resume normal operation.
Factory Reset
1. Press the OK button when the factory reset icon
OK
MENU
CLEAR
is selected in
Setup Mode.
2. Use the
OK
MENU
CLEAR
and
OK
MENU
CLEAR
arrows to turn the factory reset ON or OFF.
3. Press the OK button to conrm selection.
4.
Press the
OK
MENU
CLEAR
button to exit Setup Mode and resume normal operation
.
Selecting Continuous Measurement Mode
1. Press the OK button when the continuous measurement mode icon
OK
MENU
CLEAR
is selected in Setup Mode.
2. Use the
OK
MENU
CLEAR
and
OK
MENU
CLEAR
arrows to turn the continuous measurement
mode ON or OFF.
3. Press the OK button to conrm selection.
4.
Press the
OK
MENU
CLEAR
button to exit Setup Mode and resume normal operation.
Note: When Continuous Measurement is turned on, the gauge will
continuously measure until it is powered off.
continued...
REED Instruments

12
Delete Recorded Data
1. Press the OK button when the delete recorded data icon
OK
MENU
CLEAR
is
selected in Setup Mode.
2. Use the
OK
MENU
CLEAR
and
OK
MENU
CLEAR
arrows to turn the delete recorded data mode
ON or OFF.
3. Press the OK button to conrm selection.
4. Press the
OK
MENU
CLEAR
button to exit Setup Mode and resume normal operation.
Maximum, Minimum, and Average Values
Minimum, maximum and average values are displayed during the
measuring process. To clear and reset values to zero, press and hold the
OK
MENU
CLEAR
button for 2 seconds.
Quick Decision Mode
The Quick Decision Mode is intended for quick measurement taking and
analyzing. While in normal operation, press and hold the
OK
MENU
CLEAR
arrow to
enter Quick Decision Mode. Use the
OK
MENU
CLEAR
and
OK
MENU
CLEAR
arrows to select between
single-point/multi point setup. Press the
OK
MENU
CLEAR
button to enter the selected
mode and follow the steps below to congure.
continued...
REED Instruments

13
Single-Point Decision Configuration
1. Press the
OK
MENU
CLEAR
and
OK
MENU
CLEAR
arrows to set the target thickness value, and
press the
OK
MENU
CLEAR
button to conrm selection.
2. Press the
OK
MENU
CLEAR
and
OK
MENU
CLEAR
arrows to set the tolerance value, and press
the
OK
MENU
CLEAR
button to conrm.
3.
Use the gauge to measure the coating thickness of the measured object.
4. The screen displays the measured value and whether or not the
thicknesspassesorfails("PASS"or"FAIL").
5. Press the
OK
MENU
CLEAR
button to return to the single-point analyzing setup
screen or hold the
OK
MENU
CLEAR
button to exit and resume normal operation.
Multi-Point Decision Configuration
1. Press the
OK
MENU
CLEAR
and
OK
MENU
CLEAR
arrows to set the target thickness value, and
press the
OK
MENU
CLEAR
button to conrm selection.
2. Press the
OK
MENU
CLEAR
and
OK
MENU
CLEAR
arrows to set the tolerance value, and press
the
OK
MENU
CLEAR
button to conrm.
3. Use the gauge to measure the coating thickness of the measured
object. After measuring the same position 3 times, the gauge will
automatically display the average value of all 3 measurements under
point A.
4. Change measurement position. After measuring the same position
3 times, the gauge will automatically display the average value of all
3 measurements under point B.
5. Proceed by measuring positions C, D, and E the same way as
positions A & B.
6. After the measurements are complete, the screen displays the
average value of all 5 points and whether or not the thickness passes
orfails("PASS"or"FAIL").
7. Press the
OK
MENU
CLEAR
button to return to the multi-point-point analyzing setup
screen or press and hold the
OK
MENU
CLEAR
button to exit and resume
normal operation.
REED Instruments

14
Zero Calibration
While in normal operation press and hold the
OK
MENU
CLEAR
button to enter the
selected calibration mode from the Setup Mode. See Setting Calibration
Mode for details.
Calibration Mode Icon Description
Zero Calibration
OK
MENU
CLEAR
Simply place the sensor on an uncoated
metal substrate for zero calibration.
Two-Point
Calibration
OK
MENU
CLEAR
Place a standard coating thickness lm
with a known thickness on an uncoated
substrate for calibration to obtain a more
accurate measurement result for testing.
Zero Calibration
1. When Figure 1 appears on screen, place the instrument vertically on
the uncoated substrate.
2. Liftupafterapproximately2seconds.Zerowillbedisplayed(as
showninFigure2).
3. When completed, the gauge will automatically exit the zero
calibration mode and resume normal operation.
Note: At any time, you can press the
OK
MENU
CLEAR
button to cancel the calibration
and resume normal operation.
continued...
Figure 1 Figure 2
OK
MENU
ZERO
R7800
Coating Thickness Gauge
2/2
OK
MENU
ZERO
R7800
CoatingThickness Gauge
1/2
OK
MENU
ZERO
R7800
CoatingThickness Gauge
1/2
um
Fe
509
1/2
um
Fe
500
um
Fe
Calibration completed!
0.0
2/2
um
Fe
Calibration completed!
0.0
MENU
um/mil
OK
MENU
ZERO
R7800
Coating Thickness Gauge
2/2
OK
MENU
ZERO
R7800
CoatingThickness Gauge
1/2
OK
MENU
ZERO
R7800
CoatingThickness Gauge
1/2
um
Fe
509
1/2
um
Fe
500
um
Fe
Calibration completed!
0.0
2/2
um
Fe
Calibration completed!
0.0
MENU
um/mil
REED Instruments

15
Two-Point Calibration
1. When Figure 3 appears on the screen, place a standard coating
thicknesslmwithknownthickness(e.g.:500μm)ontopofan
uncoated substrate.
2. Place the gauge vertically on both the thickness lm and
uncoated substrate.
3. Lift the instrument after approximately 2 seconds and the measured
valuewillbedisplayed(asshowninFigure4).
4. Press the
OK
MENU
CLEAR
and
OK
MENU
CLEAR
arrows to adjust the value to the actual thickness
ofthestandardcoatingthicknesslm(asshowninFigure5).
5. Press the
OK
MENU
CLEAR
button to conrm adjustment.
6. Figure 6 will now appear on the screen, prompting users to place the
instrument vertically on the uncoated substrate again.
7. Lifttheinstrumentafter2seconds.Zerowillbedisplayed(asshown
inFigure7).
8. When completed, the gauge will automatically exit the two-point
calibration mode and resume normal operation.
Note: At any time, you can press the
OK
MENU
CLEAR
button to cancel the calibration
and resume normal operation.
Figure 3
Figure 6 Figure 7
Figure 4 Figure 5
OK
MENU
ZERO
R7800
CoatingThickness Gauge
2/2
OK
MENU
ZERO
R7800
CoatingThickness Gauge
1/2
OK
MENU
ZERO
R7800
CoatingThickness Gauge
1/2
um
Fe
509
1/2
um
Fe
500
um
Fe
Calibration completed!
0.0
2/2
um
Fe
Calibration completed!
0.0
MENU
um/mil
OK
MENU
ZERO
R7800
CoatingThickness Gauge
2/2
OK
MENU
ZERO
R7800
CoatingThickness Gauge
1/2
OK
MENU
ZERO
R7800
CoatingThickness Gauge
1/2
um
Fe
509
1/2
um
Fe
500
um
Fe
Calibration completed!
0.0
2/2
um
Fe
Calibration completed!
0.0
MENU
um/mil
OK
MENU
ZERO
R7800
CoatingThickness Gauge
2/2
OK
MENU
ZERO
R7800
CoatingThickness Gauge
1/2
OK
MENU
ZERO
R7800
CoatingThickness Gauge
1/2
um
Fe
509
1/2
um
Fe
500
um
Fe
Calibration completed!
0.0
2/2
um
Fe
Calibration completed!
0.0
MENU
um/mil
OK
MENU
ZERO
R7800
CoatingThickness Gauge
2/2
OK
MENU
ZERO
R7800
CoatingThickness Gauge
1/2
OK
MENU
ZERO
R7800
CoatingThickness Gauge
1/2
um
Fe
509
1/2
um
Fe
500
um
Fe
Calibration completed!
0.0
2/2
um
Fe
Calibration completed!
0.0
MENU
um/mil
OK
MENU
ZERO
R7800
CoatingThickness Gauge
2/2
OK
MENU
ZERO
R7800
CoatingThickness Gauge
1/2
OK
MENU
ZERO
R7800
CoatingThickness Gauge
1/2
um
Fe
509
1/2
um
Fe
500
um
Fe
Calibration completed!
0.0
2/2
um
Fe
Calibration completed!
0.0
MENU
um/mil
continued...
REED Instruments

16
Calibration Verification
While in normal operation, measure the standard coating thickness lm.
The measured value of the instrument should be within the indicated
accuracy on the coating thickness lm. If it is out of tolerance,
recalibration is required.
Note: If the calibration result is inaccurate try restoring the factory settings
and recalibrating.
Locking Screen Auto-Rotation
The instrument has a built-in gravity sensor, which automatically rotates
the display during testing. This feature allows users to read the measure-
ment values in any direction. To lock the screen auto-rotation, hold the
OK
MENU
CLEAR
arrow while in normal operation to turn auto-rotation function ON/OFF.
When disabled, the lock screen symbol
OK
MENU
CLEAR
appears on the screen.
Data Upload
Connect the R7800 via the included cable to a USB port on your PC, to
download the recorded data and generate reports or view the data in
real-time.
Note: The USB interface cannot power the gauge or charge the batteries.
Software Installation
Visit www.reedinstruments.com/software to
download the R7800 software.
Full specications and Operating System compatibility can be found on
the product page at www.reedinstruments.com.
If you have specic questions related to your application and/or questions
related to software setup and functionality please contact the nearest
or 1-877-849-2127.
REED Instruments

17
Battery Replacement
When the " " icon appears on the LCD, the batteries should be replaced.
1.
Remove the screw with a Philips screwdriver and open the battery cover.
2. Replace the 2 x "AA" batteries.
3. Secure the battery cover back and tighten the screw.
Applications
• Vericationofpaintthickness
• Automotiveindustry
• Platingthickness
• Industrialmanufacturing
• Metalprocessing
• Aerospace
• Scienticresearch
Accessories and Replacement Parts
• CA-52A Soft Carrying Case
• R8888DeluxeHardCarryingCase
• R9050 Coating Thickness Calibration Kit
Don't see your part listed here? For a complete list of all accessories and
replacement parts visit your product page on www.reedinstruments.com.
Product Care
To keep your instrument in good working order we recommend the following:
• Storeyourproductinaclean,dryplace.
• Changethebatteryasneeded.
• Ifyourinstrumentisn'tbeingusedforaperiodofonemonthorlonger
please remove the battery.
• Cleanyourproductandaccessorieswithbiodegradablecleaner.Donot
spray the cleaner directly on the instrument. Use on external parts only.
REED Instruments

18
Product Warranty
REED Instruments guarantees this instrument to be free of defects in
materialorworkmanshipforaperiodofone(1)yearfromdateofshipment.
During the warranty period, REED Instruments will repair or replace, at no
charge, products or parts of a product that proves to be defective because
of improper material or workmanship, under normal use and maintenance.
REED Instruments total liability is limited to repair or replacement of the
product. REED Instruments shall not be liable for damages to goods,
property, or persons due to improper use or through attempts to utilize the
instrument under conditions which exceed the designed capabilities. In
order to begin the warranty service process, please contact us by phone at
claim and determine the appropriate steps to process the warranty.
Product Disposal and Recycling
Please follow local laws and regulations when disposing or recycling your
instrument. Your product contains electronic components and must be
disposed of separately from standard waste products.
Product Support
If you have any questions on your product, please contact your authorized
REED distributor or REED Instruments Customer Service by phone at
Please visit www.REEDINSTRUMENTS.com for the most
up-to-date manuals, datasheets, product guides and software.
Product specifications subject to change without notice.
All rights reserved. Any unauthorized copying or reproduction of
this manual is strictly prohibited without prior written permission
from REED Instruments.
REED Instruments

TEST & MEASURE
WITH CONFIDENCE
CHECK OUT OUR LATEST PRODUCTS!
REED Instruments
Table of contents
Other Reed Instruments Test Equipment manuals

Reed Instruments
Reed Instruments BX-500 User manual

Reed Instruments
Reed Instruments R5700 User manual

Reed Instruments
Reed Instruments R9030 User manual

Reed Instruments
Reed Instruments TM-8811 User manual

Reed Instruments
Reed Instruments R5800 User manual

Reed Instruments
Reed Instruments R5600 User manual

Reed Instruments
Reed Instruments R5820 User manual

Reed Instruments
Reed Instruments R7200 User manual

Reed Instruments
Reed Instruments R2810 User manual

Reed Instruments
Reed Instruments R5710 User manual