manuals.online logo
Brands
  1. Home
  2. •
  3. Brands
  4. •
  5. Reliance Foundry
  6. •
  7. Outdoor Light
  8. •
  9. Reliance Foundry R-7593 User manual

Reliance Foundry R-7593 User manual

Decorave Bollard Cover Installaon Threaded Rod
in New Concrete
1-877-789-3245 | info@reliance-foundry.com | www.reliance-foundry.com
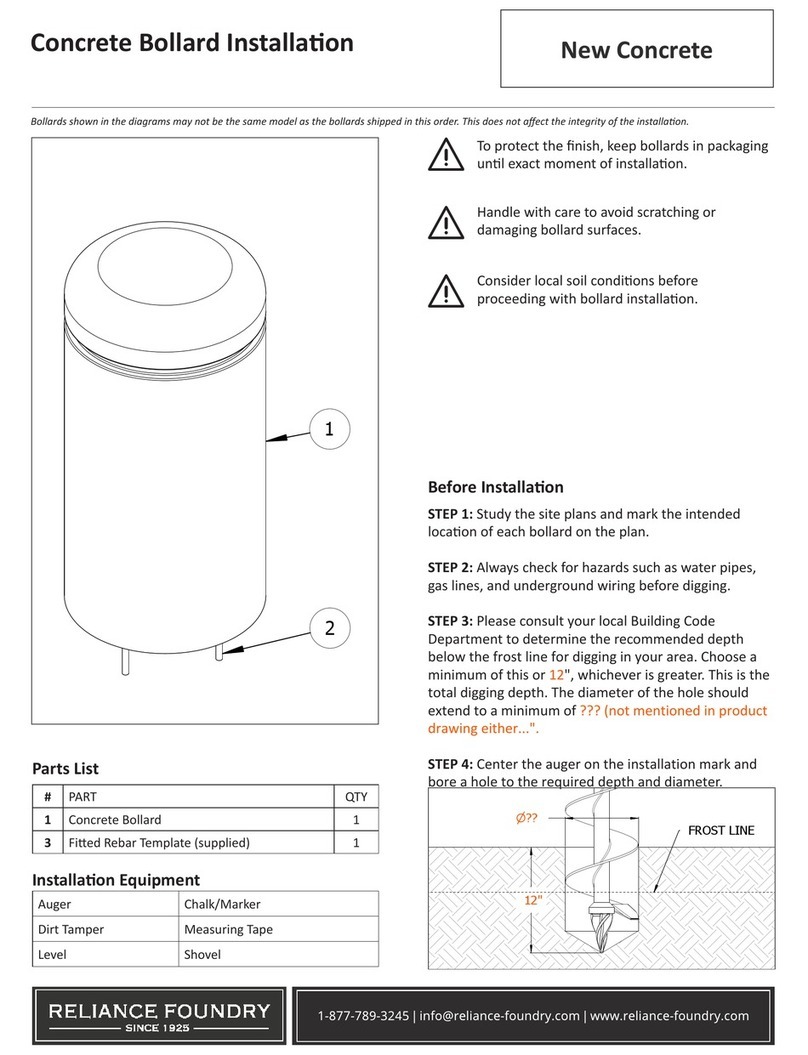
Bollards shown in the diagrams may not be the same model as the bollards shipped in this order. This does not aect the integrity of the installaon.
To protect the nish, keep bollard covers in
packaging unl exact moment of installaon.
Handle with care to avoid scratching or
damaging bollard cover surfaces as abrasions
will lead to rust.
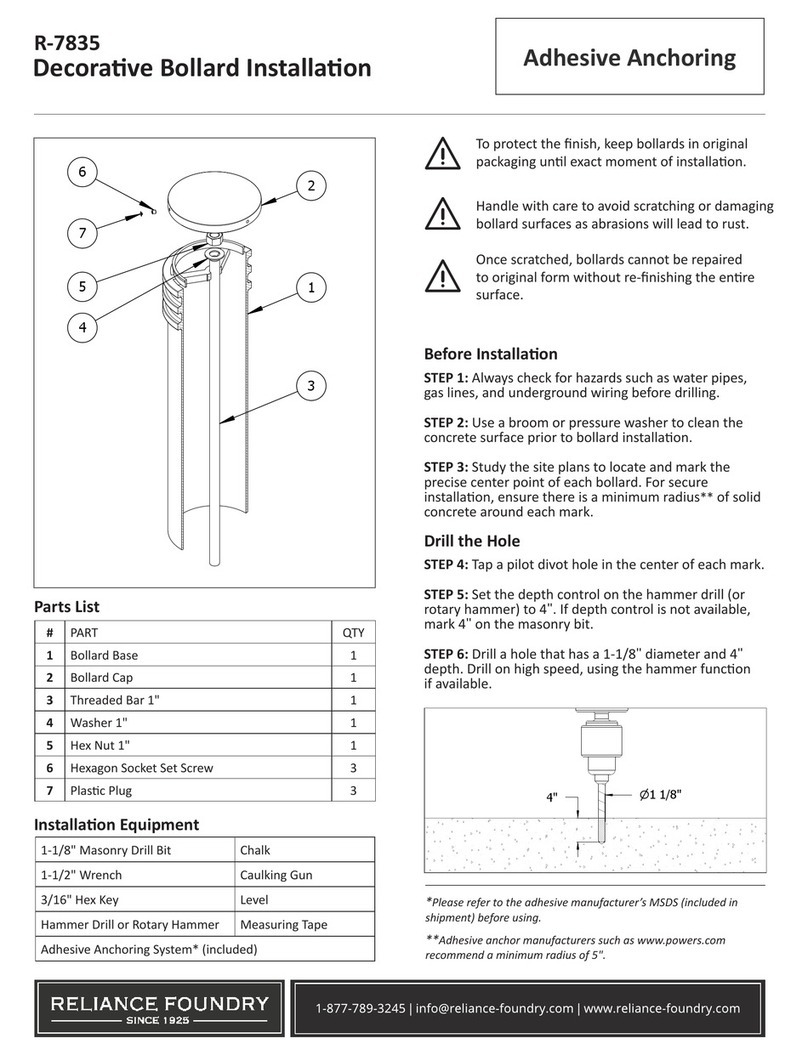
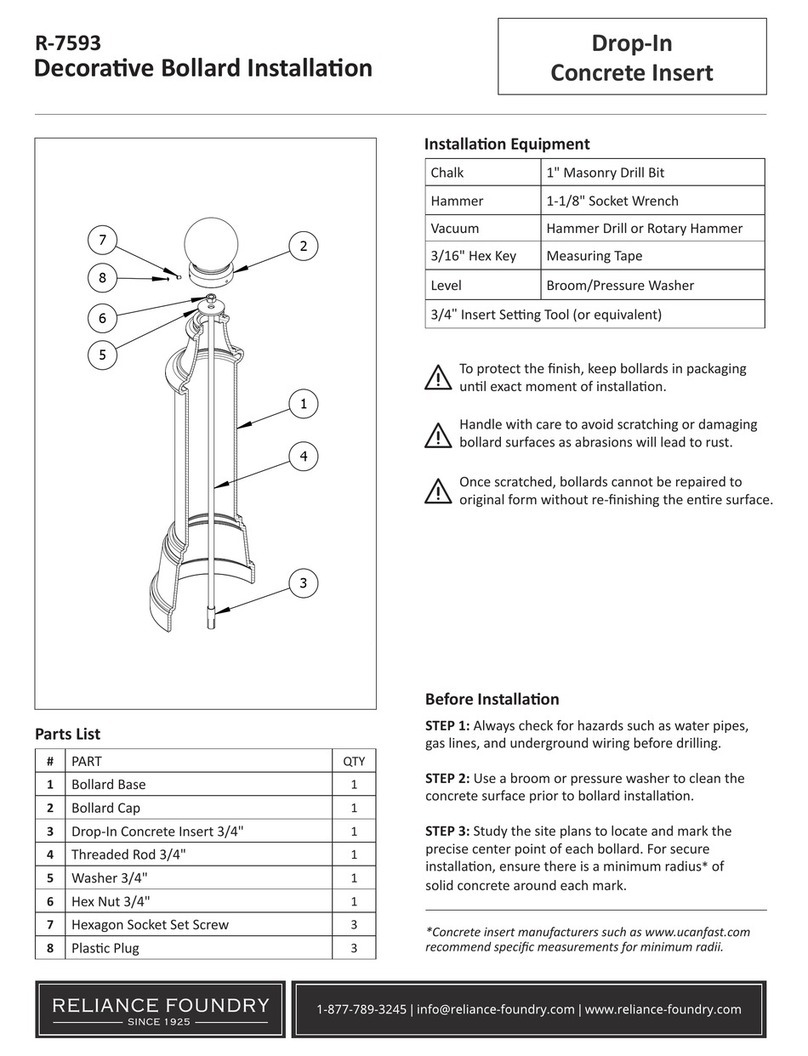
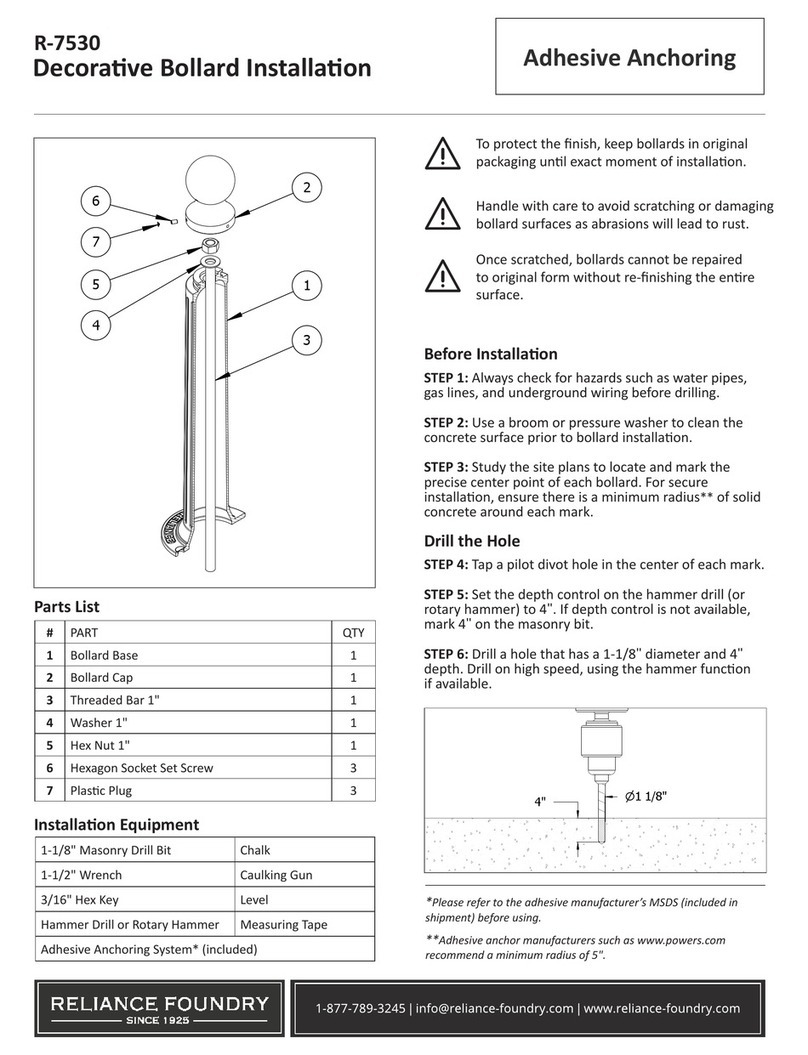
Parts List

#PART QTY
1Decorave Bollard Cover 1
2Decorave Bollard Cap 1
3Threaded Bar 1" 1
4Washer 1" 1
5Hex Nut 1" 2
6Hexagon Socket Set Screw 3
7Plasc Plug 3
3/16" Hex Key Shovel
1-1/2" Wrench Measuring Tape

Examine the pre-installed pipe bollard for signs
of damage. Any rust should be removed, and abrasions
should be covered. If the damage is beyond repair, a
new pipe bollard may need to be installed. Ensure the
pipe bollard does not have any pre-exisng concrete ll.
Hold a level vercally against the side of the
pipe bollard and ensure that it is plumb. Note: Any
damage or lng of the pipe bollard can aect the
performance of the bollard cover.

Mix the concrete. Ensure that the proper rao
of water and concrete mix is used.
Using a shovel, ll the pipe bollard with concrete
leaving approximately 1" of the top clear. Create a at
surface at the top.
1
2
3
5
4
5
6
7
1"
1-877-789-3245 | info@reliance-foundry.com | www.reliance-foundry.com
Decorave Bollard Cover Installaon Threaded Rod
in New Concrete




 Clean the surface of the pipe bollard. Debris can
oset measurements and the placement of the bollard
cover.
Keep the bollard cover in its protecve packaging
and place near the installaon site. When ready to install,
remove its protecve packaging.

There are two opons for installing the bollard cover and
inserng the threaded rod.


Li the bollard cover and carefully lower over
the pipe bollard so that the pipe bollard is centered in the
bollard cover’s sha. Note: Metal bollard covers can be
heavy—ensure the proper resources are available to li
them.
Fix the 1" nut to the boom poron of the
threaded rod.
 Push the threaded rod into the concrete down
the center of the pipe bollard. Leave an allowance at the
top for the washer and 1" nut.


 Fix the 1" nut to the boom poron of the
threaded rod.
Push the threaded rod into the concrete down
the center of the pipe bollard. Leave an allowance at the
top for the washer and 1" nut. Check that the threaded rod
is centered and ensure it is plumb.
Li the bollard cover and carefully lower it over
the pipe bollard and threaded rod. Ensure the pipe bollard
is centered in the bollard cover’s sha and the bollard
cover is plumb. Note: Metal bollard covers can be heavy—
ensure the proper resources are available to li them.
1-877-789-3245 | info@reliance-foundry.com | www.reliance-foundry.com
Decorave Bollard Cover Installaon Threaded Rod
in New Concrete
. Abrasions should be
covered as soon as possible. For damage repair
or other servicing needs, please contact Reliance
Foundry’s sales department.

Measure the total distance from the surface grade
to the top of the threaded rod. Ensure that this does not
exceed the maximum measurement shown in the product
drawings.
Place the washer over the threaded rod so that it
rests on top of the sha of the bollard cover. Apply the 1"
nut to the threaded rod and hand ghten.
Allow a minimum of 2–3 days for the concrete
to cure. Note: Moisture in the environment and cool
temperatures can signicantly slow the process.
 Use a wrench to further ghten the 1" nut unl
the bollard cover is secure.
 Remove the bollard cover cap from its packaging.
Place the cap on the top of the sha of the bollard cover.
Secure and align the cap to the base with the three set
screws. Tighten in equal amounts to ensure that the cap
remains centered.
Place the plasc plugs over the set screws.
MAX BAR
HEIGHT




Other Reliance Foundry Outdoor Light manuals
Reliance Foundry R-8464 User manual

Reliance Foundry

Reliance Foundry R-8464 User manual

Reliance Foundry R-7539 User manual

Reliance Foundry

Reliance Foundry R-7539 User manual

Reliance Foundry R-8471 User manual

Reliance Foundry

Reliance Foundry R-8471 User manual

Reliance Foundry R-7593 User manual

Reliance Foundry

Reliance Foundry R-7593 User manual

Reliance Foundry R-7530 User manual

Reliance Foundry

Reliance Foundry R-7530 User manual

Reliance Foundry R-7535 User manual

Reliance Foundry

Reliance Foundry R-7535 User manual
Reliance Foundry R-7835 User manual

Reliance Foundry

Reliance Foundry R-7835 User manual
Reliance Foundry Concrete Bollard User manual

Reliance Foundry

Reliance Foundry Concrete Bollard User manual

Reliance Foundry R-7593 User manual

Reliance Foundry

Reliance Foundry R-7593 User manual

Popular Outdoor Light manuals by other brands

Bailey 145110 manual

Bailey

Bailey 145110 manual

Lunux HELLUX BLOCKFORM DB 171-8 instruction manual

Lunux

Lunux HELLUX BLOCKFORM DB 171-8 instruction manual

LUDECO PL3003 manual

LUDECO

LUDECO PL3003 manual

Targetti MRS. BO manual

Targetti

Targetti MRS. BO manual

urban ambiance UQL1171 installation instructions

urban ambiance

urban ambiance UQL1171 installation instructions

World Market RYAN 582926 Assembly instructions

World Market

World Market RYAN 582926 Assembly instructions

Larson Electronics VPLHL-7WLED-PC-GR50 instruction manual

Larson Electronics

Larson Electronics VPLHL-7WLED-PC-GR50 instruction manual

B-K lighting MB2 installation instructions

B-K lighting

B-K lighting MB2 installation instructions

Hubbell LNC4 installation instructions

Hubbell

Hubbell LNC4 installation instructions

marset Francesc Rife Lab 35 A Assembly instructions

marset

marset Francesc Rife Lab 35 A Assembly instructions

LIGMAN PALETTA 5 installation manual

LIGMAN

LIGMAN PALETTA 5 installation manual

LIGMAN VANCOUVER 37 installation manual

LIGMAN

LIGMAN VANCOUVER 37 installation manual

Green Furniture Concept Leaf Lamp Series maintenance

Green Furniture Concept

Green Furniture Concept Leaf Lamp Series maintenance

Timberlab Manual Peri 100 quick start guide

Timberlab

Timberlab Manual Peri 100 quick start guide

urban ambiance UHP4054 installation instructions

urban ambiance

urban ambiance UHP4054 installation instructions

LIGMAN MATRIX 9 installation manual

LIGMAN

LIGMAN MATRIX 9 installation manual

Maximus Smart Security Light SPL06-07A1W4-ORB instruction manual

Maximus

Maximus Smart Security Light SPL06-07A1W4-ORB instruction manual

Home Decorators Collection JL0905-L Use and care guide

Home Decorators Collection

Home Decorators Collection JL0905-L Use and care guide

manuals.online logo
manuals.online logoBrands
  • About & Mission
  • Contact us
  • Privacy Policy
  • Terms and Conditions

Copyright 2025 Manuals.Online. All Rights Reserved.