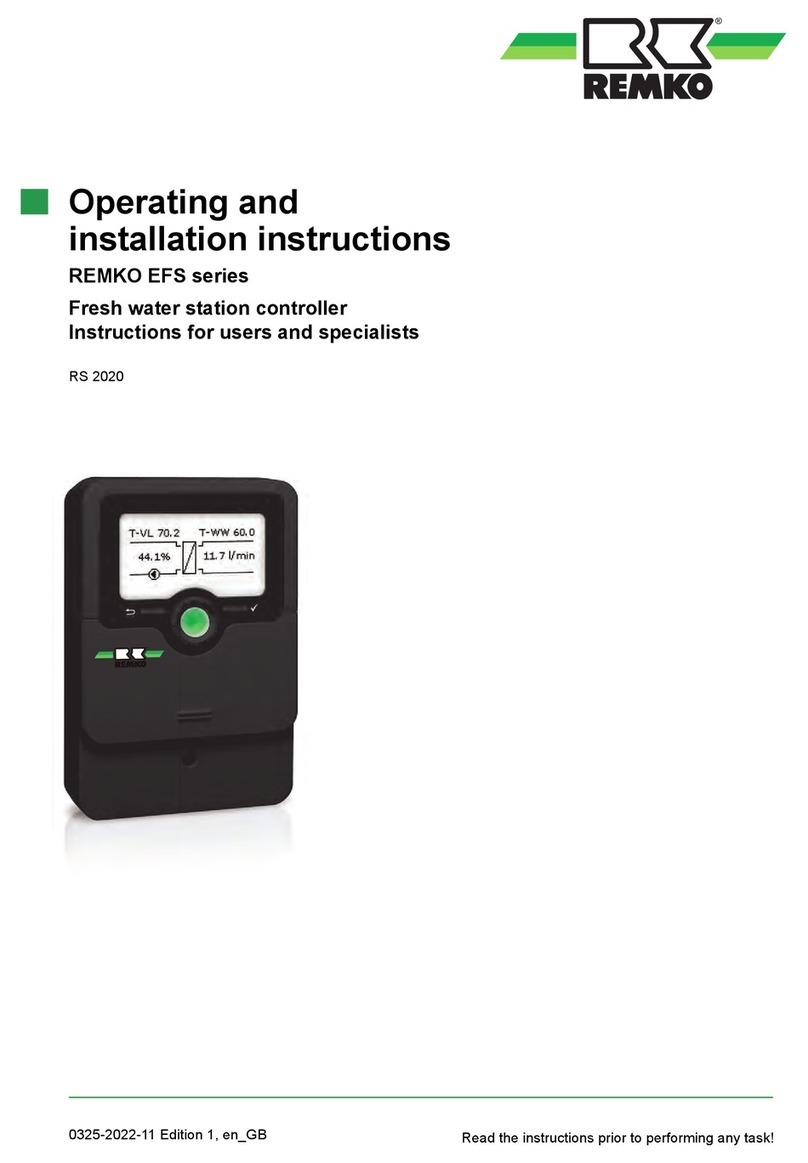
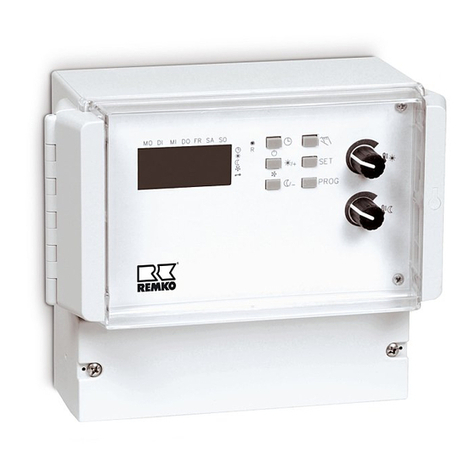
REMKO EFS Series User manual

Assembly and operating instructions
Read the instructions prior to performing any task!
REMKO fresh water station Controller EFS
Instructions for user and specialist
0066-2013-10 Edition 1, en_GB

Made by REMKO
Installation and operating instructions (translation of the orig-
inal)
Read these operating instructions carefully before commis-
sioning / using this device!
These instructions are an integral part of the system and must
always be kept near or on the device.
Subject to modifications; No liability accepted for errors or mis-
prints!

Table of contents
1 Safety and usage instructions............................................................................................................. 4
1.1 General safety notes....................................................................................................................... 4
1.2 Identification of notes...................................................................................................................... 4
1.3 Personnel qualifications.................................................................................................................. 4
1.4 Dangers of failure to observe the safety notes................................................................................ 4
1.5 Safety-conscious working............................................................................................................... 4
1.6 Safety instructions for the operator................................................................................................. 5
1.7 Safety notes for installation and inspection tasks........................................................................... 5
1.8 Unauthorised modification and changes......................................................................................... 5
1.9 Intended use................................................................................................................................... 6
1.10 Safety-conscious working............................................................................................................. 6
1.11 Warranty........................................................................................................................................ 6
1.12 Transportation and packaging....................................................................................................... 6
1.13 Environmental protection and recycling........................................................................................ 6
2 Technical data....................................................................................................................................... 7
2.1 Unit data.......................................................................................................................................... 7
2.2 Cable specification.......................................................................................................................... 8
3 Unit construction.................................................................................................................................. 9
3.1 Housing........................................................................................................................................... 9
3.2 Display............................................................................................................................................ 9
4 Operation............................................................................................................................................. 12
4.1 Buttons and Display...................................................................................................................... 12
4.2 Operating modes........................................................................................................................... 12
4.3 Setting menu................................................................................................................................. 15
4.4 Functions....................................................................................................................................... 16
4.5 Information messages................................................................................................................... 23
5 Assembly and dismantling................................................................................................................. 23
6Electrical wiring................................................................................................................................... 25
7 Commissioning................................................................................................................................... 29
8 Troubleshooting and customer service............................................................................................ 30
9 Index..................................................................................................................................................... 34
3

1 Safety and
usage instructions
1.1 General safety notes
Carefully read the operating manual before com-
missioning the units for the first time. It contains
useful tips and notes such as hazard warnings to
prevent personal injury and material damage.
Failure to follow the directions in this manual not
only presents a danger to people, the environment
and the system itself, but will void any claims for
liability.
Keep this operating manual and the refrigerant
data sheet near to the units.
1.2 Identification of notes
This section provides an overview of all important
safety aspects for proper protection of people and
safe and fault-free operation.The instructions and
safety notes contained within this manual must be
observed in order to prevent accidents, personal
injury and material damage.
Notes attached directly to the units must be
observed in their entirety and be kept in a fully
legible condition.
Safety notes in this manual are indicated by sym-
bols. Safety notes are introduced with signal words
which help to highlight the magnitude of the danger
in question.
DANGER!
Contact with live parts poses an immediate
danger of death due to electric shock. Damage
to the insulation or individual components may
pose a danger of death.
DANGER!
This combination of symbol and signal word
warns of a situation in which there is immediate
danger, which if not avoided may be fatal or
cause serious injury.
WARNING!
This combination of symbol and signal word
warns of a potentially hazardous situation,
which if not avoided may be fatal or cause
serious injury.
CAUTION!
This combination of symbol and signal word
warns of a potentially hazardous situation,
which if not avoided may cause injury or mate-
rial and environmental damage.
NOTICE!
This combination of symbol and signal word
warns of a potentially hazardous situation,
which if not avoided may cause material and
environmental damage.
This symbol highlights useful tips and recom-
mendations as well as information for efficient
and fault-free operation.
1.3 Personnel qualifications
Personnel responsible for commissioning, opera-
tion, maintenance, inspection and installation must
be able to demonstrate that they hold a qualifica-
tion which proves their ability to undertake the
work.
1.4 Dangers of failure to observe
the safety notes
Failure to observe the safety notes may pose a risk
to people, the environment and the units. Failure to
observe the safety notes may void any claims for
damages.
In particular, failure to observe the safety notes
may pose the following risks:
nThe failure of important unit functions.
nThe failure of prescribed methods of mainte-
nance and repair.
nDanger to people on account of electrical and
mechanical effects.
1.5 Safety-conscious working
The safety notes contained in this manual, the
existing national regulations concerning accident
prevention as well as any internal company
working, operating and safety regulations must be
observed.
REMKO fresh water station Controller
4

1.6 Safety instructions for the oper-
ator
The operational safety of the units and compo-
nents is only assured providing they are used as
intended and in a fully assembled state.
nThe units and components may only be set up,
installed and maintained by qualified per-
sonnel.
nThe existing regulations concerning accident
prevention must be adhered to.
nDo not operate units or components with
obvious defects or signs of damage.
nContact with equipment parts or components
can lead to burns or injury.
nEnsure that electrical energy does not pose a
risk.
nRegulations of the VDE and the local energy
supply company must be adhered to.
NOTICE!
Material damage due to mineral oils!
Mineral oil products permanently damage
EPDM seal elements; the sealing properties
may therefore be lost. We do not take respon-
sibility or provide warranty replacements for
damage caused by seals that are damaged in
this way.
–It is essential that you prevent EPDM from
coming into contact with mineral oil sub-
stances.
–Use a lubricant that is free of mineral oil
and has a silicone or polyalkylene basis,
such as Unisilkon L250L and Syntheso
Glep 1 made by Klüber, or a silicon spray.
1.7 Safety notes for installation and
inspection tasks
nThe operator must ensure that all inspection
and installation work is carried out by author-
ised and qualified personnel who have thor-
oughly read the operating manual.
nWorks on the pump/system may only be car-
ried out whilst at a standstill as a matter of prin-
ciple.
nAppropriate hazard prevention measures must
be taken to prevent risks to people when per-
forming installation, repair, maintenance or
cleaning work on the units.
nThe setup, connection and operation of the
units and its components must be undertaken
in accordance with the usage and operating
conditions stipulated in this manual and comply
with all applicable regional regulations.
nRegional regulations and laws as well as the
Water Ecology Act must be observed.
nThe power supply should be adapted to the
requirements of the units.
nThe units and components must be kept at an
adequate distance from flammable, explosive,
combustible, abrasive and dirty areas or
atmospheres.
nSafety devices may not be modified or
bypassed.
NOTICE!
Malfunction!
The fresh water module must be integrated into
the equipotential bonding system of the elec-
trical installation. If this is not ensured by the
pipe network, set up an approved potential
equalisation connection to the main potential
connection.
1.8 Unauthorised modification and
changes
The operational safety of the fresh water module
that was delivered is guaranteed only with
intended use in accordance with section 1.8 of the
operating instructions. Under no circumstances
should the threshold values specified in the data-
sheet be exceeded.
Modifications or changes to units and components
are not permitted and may cause malfunctions.
Safety devices may not be modified or bypassed.
Original replacement parts and accessories
authorised by the manufacturer ensure safety. The
use of other parts may invalidate liability for
resulting consequences.
5

1.9 Intended use
The fresh water controller, subsequently referred
to as the controller, is an independent, mounted
electronic temperature controller for assembly and
installation. Integration in a pump group is possible
if the technical data of the controller is complied
with. The maintenance-free controller is provided
exclusively for controlling and monitoring a
REMKO fresh water station. Use only REMKO
accessories in conjunction with the controller.
Any different or additional use is a non-intended
use. The manufacturer/supplier assumes no lia-
bility for damages arising from a non-intended use.
The user bears the sole risk in such cases.
Intended use also includes working in accordance
with the operating and installation instructions and
complying with the maintenance requirements.
The threshold values specified in the technical
data must not be exceeded.
1.10 Safety-conscious working
The safety notes contained in this manual, the
existing national regulations concerning accident
prevention as well as any internal company
working, operating and safety regulations must be
observed.
1.11 Warranty
For warranty claims to be considered, it is essential
that the ordering party or its representative com-
plete and return the "certificate of warranty" to
REMKO GmbH & Co. KG at the time when the
units are purchased and commissioned.
The warranty conditions are detailed in the "Gen-
eral business and delivery conditions". Further-
more, only the parties to a contract can conclude
special agreements beyond these conditions. In
this case, contact your contractual partner in the
first instance.
1.12 Transportation and pack-
aging
The units are shipped in sturdy transport pack-
aging or within the heat pump housing. Immedi-
ately check the units on delivery and make a note
of any damage or missing parts on the delivery
note. Inform the forwarding agent and contractual
partner. Claims under guarantee made at a later
date will not be accepted.
WARNING!
Plastic films and bags etc. are dangerous
toys for children!
Why:
- Leave packaging material are not around.
- Packaging material may not be accessible to
children!
1.13 Environmental protection and
recycling
Disposing of packaging
All products are packed for transport in environ-
mentally friendly materials. Make a valuable contri-
bution to reducing waste and sustaining raw mate-
rials. Only dispose of packaging at approved
collection points.
Disposing of the units and their components
For the manufacture of the units and components,
only recyclable materials have been used. Help
protect the environment by ensuring that the units
or components (for example batteries) are not dis-
posed of in household waste, but only in accord-
ance with local regulations and in an environmen-
tally safe manner, e.g. using authorised disposal
and recycling specialists or council collection
points.
REMKO fresh water station Controller
6

2 Technical data
2.1 Unit data
Series EFS
Inputs/outputs
Rated voltage (system voltage) V / Hz 115... 230V / 50/60 Hz
Energy consumption W ≤ 0.8 W, two Pt1000 temperature probes connected
Outputs R1, R2 - number
Type
Switching current
Voltage
2
Triac
2.0 (2.0) A
115... 230V / 50/60 Hz
Lconst - Switching current
Voltage
2.0 (2.0) A
115... 230V / 50/60 Hz
Total - Switching current
Voltage
4.2 (4.2) A
115... 230V / 50/60 Hz
Signal inputs/outputs
Signal inputs 1 ... 5 - Number
Type of signal inputs 1 ... 4
Type of signal input 5
5
Pt1000 (temperature detection)
Bus communication for cascading
Signal output RS type
Maximum contact rating Potential-free NO contacts
1 (0) A, 24 V
Signal outputs PWM R1, PWM R2 - type
Maximum load capacity
PWM, 250 Hz, 11 V;
Characteristics: 0 % PWM = Pump off
100 % PWM = Maximum speed
10 mA
Hydraulic variants
Number 5
Display
Type LCD with background illumination
Operating conditions
Enclosure class IP 22, DIN 40050 [without front panel: IP 20]
Protection class I
Ambient temperature °C 0 ... +50 °C for free wall mounting
7

Unit data (continued)
Series EFS
Physical values
Dimensions L x W x H mm 110 x 160 x 51
Weight g 350
Software class A
Mode of operation Type 1.Y
Fastening method for permanently-con-
nected lines Type X
Degree of contamination 2
Temperature of the ball pressure check Housing walls: 125 °C
Remaining housing parts: 75 °C
Overvoltage category Class II (2500 V)
2.2 Cable specification
Mains cable
Mains power supply type
Outer diameter of jacket
Single wire cross section (rigid)
finely-stranded (with wire end sleeves)
H05 VV-... (NYM…)
6.5 mm to 10 mm
≤ 2.5 mm2
≤ 1.5 mm2
Diameter of the internal strain relief mm 6.5 to 10
Signal cable
Length of probe cable m ≤ 100 m, including extension
Extension cable for probe configuration
Cross-section per conductor
Wires twisted in pairs for length > 10 m
0.75 mm2 for length < 50m
1.5 mm2 for length > 50 m
REMKO fresh water station Controller
8

3 Unit construction
3.1 Housing
2
1
4
3
5
6
Fig. 1: Front view of the controller
No. Element See
1 Operating mode button
(below the front panel)
2 Buttons
r, SET, ESC, s
3 Display
Ä
on page 9
4 Front panel
5 Terminal cover 1)
6 Fastening screw for the
terminal cover
1) You can find the description of the connection
terminals under the terminal cover here.
3.2 Display
Overview
error
v
1
2
3
4
1
2
4
3
Fig. 2: Overview over the areas of the display (all
elements visible)
1 System diagram
2 Setting menu
3 Pictograms for functions
4 Operating and setting values
The areas of the display are described below.
Symbols of the system diagram
The table below describes the symbols in the
system diagram (no. 1 in Fig. 2).
Symbol Description
Pipe
External heat exchanger
Domestic hot water extraction point
Storage tank
3-way valve with flow direction
specified
Pump, switched on
Pump, switched off
Temperature sensor
V
Medium flow rate probe
9

Setting menu
The setting menu (no. 2 in Fig. 2) contains the fol-
lowing entries:
2
1
4
35
Fig. 3: Setting menu
1: Time
2: Functions
3: Thermal disinfection
4: Domestic hot water target temperature
5: Reset to factory setting
Pictograms for functions
The table below describes the pictograms for func-
tions (no. 3 in Fig. 2).
Symbol Description
Manual mode
Pump is controlled with
speed regulation 1)
Alarm output 1)
Legio
Thermal disinfection 1)
1) The symbol is visible as long as the function/the
parameter is being edited in the setting menu.
REMKO fresh water station Controller
10

Operating and setting values
The display of the operating and setting values (no. 4 in Fig. 2) consists of the following elements:
2
1
4
35
6
Fig. 4: Display of operating and setting values
1 This symbol is displayed if an error occurs
2 Symbol for time control of functions. This symbol is displayed if:
• a time limit/time control is set
• the status of the time limit/time control is displayed
• the time limit blocks a temperature control (symbol flashes)
3 Number of the time window that is currently set/displayed in the setting menu or that actually
includes the current time. The time control of a functions consists of 1 or 3 time windows that can be
set.
Example:
Time window 1: 06:00 - 08:00
Time window 2: 11:00 - 12:30
Time window 3: 17:00 - 19:00
4 Additional information:
On, off: Switching status/switching condition on, off
max, min: maximum value, minimum value
Σ: cumulative operating value since initial commissioning, cannot be reset
Δ: cumulative operating value since the last reset to 0
5 Display of:
• Measured values
• Set values
• Error codes
• Additional information, e.g. software version
6 Physical unit of the value displayed in no. 5: °C, l/min, %‚ h, kWh, MWh
11

4 Operation
4.1 Buttons and Display
This section contains general information about
operating the controller.
Buttons
Operation takes place using the r, s, SET, ESC
and buttons as follows:
r• Scrolls up in the menu
• Increases the setting value by 1 level)
s• Scrolls down in the menu
• Reduces the set value by 1 level
SET • Selects a set value to be changed
(setting value flashes)
• Confirms a set value or moves down
one menu level
• Calls the set menu (not in manual
mode
ESC • Discards a setting
• Moves up one operating level
Sets the operating mode
We recommend noting changed settings in
writing.
Display during operation
nA component flashing in the system diagram
means the following: The operating value or
setting value that is displayed applies to the
flashing components. Exception: It
always flashes in manual mode.
nDisplays that are automatically alternating are
shown overlapping in the figures. Example:
Fig. 6.
4.2 Operating modes
Change operating mode
NOTICE!
Danger of damage to the pump due to dry run-
ning. Switch on the manual and automatic
operating modes only if the system is filled.
1. Remove the front panel.
2. Press the button for 2 seconds to
change the operating mode.
3. Repeat step 2 if required.
4. Attach the front cover.
2
13
Fig. 5: Change operating mode
1: Off
2: Manual mode 3: Automatic
REMKO fresh water station Controller
12

Operating mode off
Method of operation
nAll outputs are switched off (outputs/control
outputs switched off, relay open)
DANGER!
The pump lines are still powered because
these are constantly supplied with 230 V
n"OFF" and the software version are displayed
alternating. Example in Fig. 6: Software version
St 1.3
nThe background lighting is red
nThe variant display can be called (see Fig. 6)
Operation
1. Press "SET" to call the display of the pre-set
Friwa variant.
Fig. 6: Operating mode off - operation
2. Press the "r" and " s" buttons at the same
time for 2 seconds, in order to access variant
selection. The pre-set REMKO factory setting
is for the EFS 25 variant 02, for the EFS 35
variant 04 and for the EFS 50 variant 10.
NOTICE!
The variant may only be changed by a spe-
cialist. Otherwise, we cannot guarantee that
the Controller will function correctly after
changing the variant.
Manual operating mode
Method of operation
nThe background lighting is red, the open-end
wrench symbol flashes.
nThe outputs of the controller (pumps, valves)
can be switched manually.
Possible switching statuses:
0: Off
1: On
0% ... 100%: Control the HE pump via PWM
(only H1, H2)
A: Automatic operation in accordance with the
settings in the settings menu
nThe current temperatures and operating hours
can be displayed (status display).
nThe Display of the hot water temperature
shows a value that is not smoothed.
nWhen switching to manual operation, all out-
puts are set to A, R1 is displayed.
nTypical use: Function test (maintenance), trou-
bleshooting.
Operation
You can switch the outputs on and off as fol-
lows:
1. If necessary, press "r s" to select a dif-
ferent output.
2. Press "SET". The switching status flashes.
3. Press "r s" to change the switching status.
4. Press "SET" to apply the change.
Also see (
2
) in the next figure.
13

You can display the current temperature and
operating hours as follows:
1. Press "ESC". The temperature/operating
hours value is displayed, the corresponding
component flashes (
3
), the display is not
shown).
2. Press "r s" to select a different component.
3. Press "SET" to exit the display of the temper-
ature/operating hours value.
2
3
Fig. 7: Manual operating mode - operation
Automatic operating mode
Method of operation
Automatic operating mode is pre-set in the deliv-
ered state. Automatic is the normal operating
mode, the system is controlled automatically. The
following actions are possible:
nDisplay status (status display): Display status
of external components (temperatures, switch
statuses, running times)
4
nDisplay the saved minimum and maximum
values (temperature probe) or the cumulative/
difference values (operating hours1) of the
pumps and valves)
5
Cumulative values (Σ symbol): Operating hours
since initial commissioning. Cumulative values
cannot be reset.
Difference values (Δ symbol): Operating hours
since the last reset to 0
nReset the saved minimum/maximum/difference
values
6
nCall the setting menu
7
1) Cumulative switch on times for the outputs
REMKO fresh water station Controller
14

Operation
√ The controller is in the status display.
You can display and reset the saved minimum/
maximum/difference values as follows:
1. If necessary, press "r s" to display a dif-
ferent component
4
, component flashes).
2. Press "SET". The minimum/maximum/differ-
ence values are displayed alternately
5
.
3. If necessary, press "SET" for 2 seconds to
reset the value that is currently (!) displayed
6
.
4. Press "ESC". The status display is displayed.
5. Repeat steps 1 to 4 if required.
You can display the status of external compo-
nents as follows:
Press "r s" to display the status of a different
component (
4
).
You can call the setting menu as follows:
Press "SET" for 2 seconds
7
. The setting menu is
displayed.
7
7
7
7
6
6
6
6
Fig. 8: Automatic operating mode - operation
4.3 Setting menu
Overview
The diagram below provides an overview of the
structure of the setting menu.
Domestic hot water
target temp.
Time
SET
the time
Setting
Functions
SET
Heat content
F:01
Thermal
disinfection
Factory setting
Circulation
F:02
SET
5 Sek.
Reset to factory
setting
Distrib. valve in
return flow- F:03
Comfort
function F:04
Bypass
F:05
Follow-up
F:06
Sliding hot water
temp..- F:07
Thermal
disinfection F:08
Cascade
F:09
Call the setting menu and select the menu
entry
√ "Automatic" or "Off" operating mode is selected.
1. Press "SET" for two seconds. The setting
menu is displayed, the menu entry flashes.
2. Press "r s" to select a different menu entry.
3. Change the settings as described in the fol-
lowing sections.
15

Setting the time
√ flashes.
1. Press "SET". The hour flashes.
2. Press "rs" to set the hour.
3. Press "SET". The minute flashes.
4. Press "rs" to set the minute.
5. Press "SET".
6. Repeat steps 4 and 5 to set the year, month
and date.
Set functions
√
Func
flashes.
Proceed as described in
Ä
Chapter 4.4 ‘Functions’
on page 16.
Set the domestic hot water target temperature
Method of operation
The controller attempts to regulate the hot water
temperature to the set value. The hot water tem-
perature can be changed within the following limits:
Minimum: 20 °C
Maximum: 90 °C
Factory setting: 50 °C
Operation
√
Para
flashes.
1. Press "SET". The domestic hot water target
temperature is displayed, the corresponding
component in the system diagram flashes
(Fig. 9).
2. Press "SET". The temperature value flashes.
3. Press "r s" to change the value.
4. Press "SET", the change is applied.
Fig. 9: Set the domestic hot water target tempera-
ture
Switch on thermal disinfection
Method of operation
If required, the fresh water module provides higher
domestic hot water temperatures, in order to kill
dangerous germs. At the same time, the circulation
pump is activated, as long as the circulation func-
tion was activated. If the circulation function was
not activated, only the domestic hot water target
temperature is increased to the disinfection tem-
perature. Thermal disinfection is started via the
setting menu. After a manual start, thermal disin-
fection must be stopped again manually. For safety
reasons, thermal disinfection is deactivated after
one hour of running time if it was started manually.
Detailed settings for thermal disinfection must be
made in the corresponding function (F:08), see
Ä
‘Thermal disinfection’ on page 22.
In cascade operation, the master controller
releases both modules during the disinfection
period.
Operation
√ The "Thermal disinfection (F:08)" function was
activated, see the "Thermal disinfection" section.
Otherwise, "---" is displayed. √
Legio
flashes.
1. "StArt" is displayed.
2. Press "SET". "oFF" is displayed.
3. Press "SET". "oFF" flashes.
4. Press "rs". "on" and
Legio
flash.
5. Press "SET". The changes are applied.
Legio
flashes. The controller remains in the
Legio menu until thermal disinfection is deac-
tivated manually.
Reset to factory setting
√ flashes, "RESEt" is displayed.
1. Press "SET" for 5 seconds.
2. After a short running display, the controller
switches to "Automatic" operating mode.
4.4 Functions
General information for operating the functions
Display functions
When displaying the functions, the following infor-
mation is visible:
REMKO fresh water station Controller
16

nFunction number, e.g. F:01 (Fig. 10)
nSwitching status:
- "on": Function is activated
- "off": Function is deactivated (Fig. 10)
If the function is not displayed or if neither on
nor off are displayed, the function cannot be
used.
Possible reasons:
–The system set does not allow the function
–All outputs are occupied
You can display the functions as follows:
√
Func
flashes.
1. Press "SET". F:01 flashes.
2. Press "rs" to display the next function.
Fig. 10: Display functions
Activate function
In order to be able to use a function, it must be
activated (activation = "on") and its key variables
must be fully set. If the function is activated and
exited before all required key variables are set,
"oFF" flashes for a short time (Fig. 11). The func-
tion is then displayed with the switching status
"oFF" (function is deactivated).
You can activate a function as follows:
√ Function number flashes.
1. Press "SET". The function is selected and
flashes.
2. Press "SET". "oFF" is displayed.
3. Press "SET". "oFF" flashes.
4. Press "rs". "on" flashes.
5. Press "SET". The function is activated.
6. Set the key variables as described below.
Fig. 11: Activate function
Set key variable
The functions have a different number of key varia-
bles. The value of a key variable is always set with
the same operating steps.
You can set the value of a key variable as fol-
lows:
√ The function was activated as described above.
1. Press "r s" to select the key variable.
2. Press "SET". The value of the key variable
and the corresponding component flash in
the system diagram.
3. Press "r s" to change the value.
4. Press "SET" to apply the change.
5. Repeat steps 1 to 4 for further key variables.
6. Press "ESC" when all key variables of the
function are set. The function number
flashes.
Key variables
The following describes important key variables of
the functions. The figures show examples.
17

Temperature control
If a function is to be controlled by temperature, the
temperature control must be switched on (tc = tem-
perature control). In the Fig. 12, the temperature
control is activated ("on").
Fig. 12: Key variable for temperature control
Clock control
If a function is to be controlled by time, the clock
control must be switched on and the time window
set (cc = clock control). In the Fig. 13, the clock
control is activated ("on").
Fig. 13: Key variable of clock control
Start time of a time window
When setting the start time of a time window, the
following is displayed to the left of the start time
(see Fig. 14):
n
nNumber of time window 1 ... 3, its start time
was set (here: 1)
n"on"
Fig. 14: Key variable of time window start
End time of a time window
When setting the end time of a time window, the
following is displayed to the left of the end time
(see Fig. 15):
n
nNumber of time window 1 ... 3, its end time was
set (here: 1)
n"off"
Fig. 15: Key variable of time window end
The start time is always before the end time! If
you attempt to set the start time to later than
the end time, the end time is automatically
pushed back.
REMKO fresh water station Controller
18

Flow control
If a function is to be controlled by flow, the flow
control must be switched on (Fc = flow control). In
the Fig. 16, the flow control is activated ("on").
Fig. 16: Key variable of flow control
Speed control for the circulation pump
If a function is to be controlled by speed, the speed
of the circulation pump must be set.
Fig. 17: Key variable for speed control of pump
Function descriptions
The tables in this section describe the key variables of the functions as follows:
nThe rows contain the key variables in the same sequence as they appear on the display.
nThe columns contain the following information from left to right:
Column Description
Display Example for the display when setting the key variables.
Key variable Descriptions of the key variables and their dependencies to each other. Dependent key
variables can only be selected and set of the higher-level key variable has the value
"on". This is displayed as follows:
nHigher-level key variable: Bold font
nDependent key variables: Below the higher-level key variable and indented to the
right
Example: In the table of the circulation function, the probe input, switch-on temperature
and switch-off temperature key variables are only displayed if the temperature control
has the value "on".
minimum, max-
imum, factory
setting
The lower (minimum) and upper (maximum) limits of the value range of a key variable,
as well as the factory setting. If a value range only contains a few values, these are
specified individually. Example: "on", "oFF".
Heat content
Calculates the heat content determined using the
following key variables:
nHot water temperature, secondary
nCold water temperature, secondary
nMedium flow rate, secondary
No further settings are required. The function can
only be activated or deactivated.
Fig. 18: Calculating heat content
Measured value display: The measured values
are displayed in the status menu. The current per-
formance and the daily heat content are displayed
after the fresh water values.
19

Current thermal performance: The corresponding
maximum value is displayed when "SET" is
pressed.
Fig. 19: Current thermal performance, maximum
value
Daily heat content: When "SET" is pressed, the
total heat content and the daily heat content are
displayed alternately.
Fig. 20: Display of total heat content and daily heat
content
In cascade operation, each controller displays
its "own" calculated heat content.
Key variable min. max. Factory setting
Activation on, oFF on
Circulation
Switches a circulation pump that is controlled by
temperature, clock and/or flow on and off. The
three control modes can be combined in any way.
Temperature control: If the temperature on the
circulation return falls below the Ton value, the cir-
culation pump is switched on until the temperature
reaches the Toff value. The temperature control is
time-limited if the clock control is activated.
Clock control: If the current time is within one of 3
time windows that can be set, the circulation pump
is:
nPermanently switched on if the temperature
control is deactivated ("oFF")
nControlled by temperature if the temperature
control is activated ("on")
Flow control: Flowing for a short time (<5s)
switches the circulation pump on for the duration of
activation. After the duration of activation expires,
the circulation pump remains switched off at least
for the duration of the waiting time. The flow con-
trol works independent of the clock control.
Key variable min. max. Factory
setting
Activation on, oFF oFF
Speed
regulation 0% 100% 40%
Temperature
control (tc) on, oFF oFF
Activation
temperature Ton 0 °C Toff -2 K 30 °C
Deactivation
temperature Toff Ton+2 K 95 °C 35 °C
Clock control
(cc) on, oFF oFF
Day day: 1 to day: 7 -
Time window 1
start/end 0:00 23:59 6:00/8:00
Time window 2
start/end 0:00 23:59 12:00/13:30
Time window 3
start/end 0:00 23:59 18:00/20:00
Flow control
(fc) on, oFF oFF
Duration of acti-
vation 1 min 10 min 2 min
Waiting time 0 min 60 min 10 min
Distribution valve in return flow
Switches the distribution valve in the return flow
on. The cold water probe is pre-defined at output
R2.
No further settings are required.
The function can only be activated or deactivated.
R2 on if TKW ≥ 28 °C
R2 off if TKW ≤ 23 °C
REMKO fresh water station Controller
20
Other manuals for EFS Series
4
This manual suits for next models
3
Table of contents
Other REMKO Controllers manuals
Popular Controllers manuals by other brands

Micropelt
Micropelt iTRV MVA 005 User manual and device specification

Mitsubishi Electric
Mitsubishi Electric FX5-ENET user manual

Vortice
Vortice C 1.5 Instruction booklet

Unitech
Unitech UNI-335 installation manual

Parker
Parker Sporlan S3C Installation and operation instructions

Honeywell
Honeywell Touchpoint Plus Technical handbook