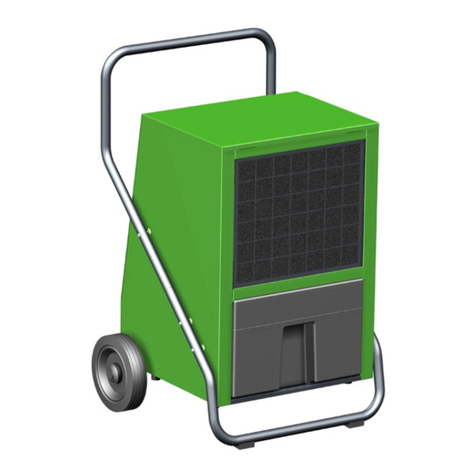
REMKO HITLINE TK Series User manual

Operating and
installation instructions
Edition EN - X07 Read the instructions prior to performing any task!
TK 300
REMKO TK series
Mobile dehumidifiers


3
Contents
Carefully read this operating manual prior to
commissioning/using the unit!
This operating manual is a translation of the German original.
This manual is an integral part of the unit and must always
be kept in the vicinity of the installation location or on the
unit itself.
Subject to modifications; no liability accepted for errors or misprints!
Air dehumidification 4-6
Safety notes 6-12
Unit description 13
Set-up 14
Commissioning 15-17
Shutdown 17
Unit transport 18
Care and maintenance 18-19
Troubleshooting 19-20
Electrical wiring diagram 20
Intended use 21
Customer service and guarantee 21
Environmental protection and recycling 21
Exploded view of the unit 22
Spare parts list 23
Maintenance protocol 24
Technical data 25
R290
Refrigerant

4
REMKO TK series
It is evident that the corrosion
rate below 50 % relative humidity
(RH) is low, and below 40 % is
negligible.
The corrosion rate increases
significantly above 60 % RH.
This threshold for damage as the
result of humidity also applies to
other materials, such as powdery
substances, packaging, wood and
electronic units.
Buildings may be dried in a variety
of ways:
1. By heating and air exchange:
The air in the room is heated
in order for moisture to be
removed and then this air is fed
outside. All of the energy that
is involved is lost together with
the moist air that is released.
2. By air dehumidification:
The moist air that is present
within an enclosed space is
continuously dehumidified
according to the condensation
principle.
The correlations occurring when
air is dehumidified are based on
physical laws.
These are depicted here in
graphical form in order to provide
you with a brief overview of the
principles of air dehumidification.
The use of REMKO
air dehumidifiers
■
Even if windows and doors
are well insulated, water and
moisture are still capable of
penetrating thick concrete walls.
■
The water required for setting
when producing concrete,
mortar and plaster etc. may only
be diffused after 1-2 months.
■
Even moisture trapped in the
masonry after a flood is released
very slowly.
■
The same is also true of
moisture contained in stored
materials for example.
The moisture (water vapour)
released from parts of a building
or materials is absorbed by the
surrounding air. As a result, the
moisture content increases, which
ultimately gives rise to corrosion,
mould, rot, peeling of paint and
other unwanted damage.
By way of example, the diagram
shows the corrosion rate of metal
in different levels of humidity.
Air dehumidification
With regard to energy
consumption, air dehumidification
has one distinct advantage:
Energy expenditure is limited
exclusively to the air volumes
present. The mechanical heat that
is released by the dehumidification
process is fed back into the room.
Under normal use, the
air
dehumidifier
uses approximately
25 % of the energy that is
required for the
“heating and
ventilating” principle.
Relative air humidity
Our ambient air is a gaseous
mixture which always contains
a certain volume of water in the
form of water vapour. This volume
of water is specified in g per kg of
dry air (absolute moisture content).
1 m3of air weighs approx. 1.2 kg
at 20 °C
Depending on the temperature,
each kg of air is only capable of
absorbing a certain volume of
water vapour. Once this capacity
has been reached, the air is
referred to as “saturated” and has
a relative humidity (RH) of 100 %.
Relative humidity is understood
to mean the ratio between the
current quantity of water vapour in
the air and the maximum possible
quantity of water vapour at the
same temperature.
The ability of the air to absorb
water vapour increases as
the temperature rises. I.e. the
maximum possible (absolute)
water content becomes greater as
the temperature rises.
Corrosion speed
Rel. humidity %

5
Water vapour
condensation
Because the capacity for the
maximum possible volume of
water vapour increases as the air
is heated, the volume of water
vapour contained remains constant
and so relative humidity falls.
In contrast, because the capacity
for the maximum possible volume
of water vapour decreases as the
air is cooled, the volume of water
vapour contained remains constant
and so relative humidity increases.
If the temperature continues to
fall, the capacity for the maximum
possible volume of water vapour
is reduced so much so that it is
ultimately equal to the volume of
water vapour contained in the air.
This temperature is referred to
as the dew point. If the air is
cooled to below the dew point,
the volume of water vapour in
the air will become greater than
the maximum possible volume of
water vapour.
At this point, the water vapour
begins to precipitate.
This condenses to water and
moisture is removed from the air.
Examples of condensation include
steamed-up window panes in
winter, or the moisture on the
outside of a cold drinks bottle.
As the relative humidity of the air
increases, so too does the dew
point, making it easier for the
temperature to fall below it.
Building materials and structures
are capable of absorbing
considerable volumes of water,
such as brick 90-190 l/m³, heavy
concrete 140-190 l/m³ and
limestone 180-270 l/m³.
The drying of moist materials such
as masonry is effected as follows:
■
The moisture
moves from
the inside of the
material to its
surface
■
Evaporation occurs on the
surface = Transfer of water
vapour to the ambient air
■
The air containing water vapour
is constantly circulated through
the REMKO air dehumidifier.
The air is dehumidified and,
slightly heated, leaves the unit
in order to re-absorb water
vapour
■
In this way, the moisture
contained in the material is
reduced gradually
The material is dried!
The accumulated condensate is
collected in the unit and drained
off from there.
Drying materials
Verdampfer Kondensator
°C
30
25
20
15
% r.F.
100
90
80
70
60
50
40
30
20
10
+
+
-
Lufttemperatur
Luftfeuchte
Verlauf
Luftrichtung
As it flows through or over the evaporator, the air stream is cooled
to dew point. The water vapour condenses, and is collected
in a condensate trap from where it is drained off.
Temp. Water vapour content in g/m3at humidity of
°C 40 % 60 % 80 % 100 %
-5 1.3 1.9 2.6 3.3
+10 3.8 5.6 7.5 9.4
+15 5.1 7.7 10.2 12.8
+20 6.9 10.4 13.8 17.3
+25 9.2 13.8 18.4 23.0
+30 12.9 18.2 24.3 30.3
CondenserEvaporator
% RH
Air temperature
Air direction
Air humidity
Progression

6
REMKO TK series
Safety notes
Condensation heat
The Energy transferred to the air
from the condenser consists of:
1. The amount of heat derived
beforehand in the evaporator.
2. The electrical drive energy.
3. The condensation heat released
by liquefying the water vapour.
Energy must be supplied when
liquid is converted into a gas.
This energy is designated as
evaporation heat. It does not
cause any increase in temperature,
but is required to convert a liquid
into a gas. Conversely, energy is
released when gas is liquefied,
this is designated as condensation
heat.
The amount of energy from
evaporation heat and condensation
heat is the same.
For water, this is:
2250 kJ/kg (4.18 kJ = 1kcal)
From this it is evident that the
condensation of water vapour
causes a large quantity of energy
to be released.
If the moisture that it is to be
condensed is not introduced by
evaporation in the room itself,
but from outside, e.g. through
ventilation, the condensation
heat released contributes to
the heating of the room. With
drying operations, a heat cycle
is created, whereby heat is
consumed for evaporation
and released for condensation.
When dehumidifying fed air,
a larger contribution of heat is
created, which manifests itself as
a temperature increase.
Generally speaking, the time
required for the drying process is
not only dependent on the output
of the unit, but is determined to
a greater extent by the speed at
which the material or building
section loses its moisture.
General safety notes
■Carefully read the manual before
commissioning the units or their
components for the first time. It
provides useful tips and notes
such as hazard warnings to pre-
vent injury and material damage.
Failure to follow the directions in
this manual can endanger per-
sons, the environment and the
equipment itself or its compo-
nents and will void any claims for
liability.
■Store this manual and the infor-
mation required for the operation
of this system (e.g. refrigerant
datasheet) in the vicinity of the
units.
■This unit may only be installed
and operated as described in this
manual.
■Independent conversion and/or
modification of any kind is strictly
prohibited.
■National regulations in connec-
tion with installation must be
observed.
■Children must not be left unsu-
pervised when close to the unit.
■For safety reasons, people with
mental, physical or other health
limitations must not operate this
unit unattended.
■The unit is not permitted to be
operated with damaged cables.
The unit must be repaired by a
specialist immediately.
■The unit may only be operated
via a power supply with ground-
ing.
■The use of extension cables is not
recommended.
■The air filter must be cleaned
at intervals of no more than 2
weeks.
■The unit is not permitted to be
operated in the vicinity of heat
sources.
■The unit must be transported up-
right. Residue from the conden-
sate must be drained off before
transport. The unit must be stood
upright for 1 hour prior to com-
missioning.
■Combustible substances and
pressure containers must be kept
at least 50 cm from the unit.
■The unit must not be stored and
operated in rooms with oil, gas or
sulphur.

7
■The unit must always be switched
off with the on/off switch.
■Do not place anything on the
device in particular heavy or hot
objects.
■Repairs may only be carried out
by authorised and certified spe-
cialist personnel.
■This unit must be disposed of
professionally in accordance with
environmental protection.
■The safety notes in regards to the
room sizes and the flammability
of the refrigerant must not be
removed from the machine.
■The units may only be operated
in well ventilated areas.
■The unit can be used by children
8 years and up and by persons
without physical, mental or other
health limitations if this knowl-
edge has been obtained via the
necessary safety notes..
■Children must never play with the
unit.
■Cleaning the units must not be
carried out by children without
parental/guardian supervision.
■The appliance is intended only
for indoor use (excluding laundry
rooms).
The following notes must be
observed in full:
■
The units must not be operated
at an ambient temperature
below 5 °C.
■
The units may not be set
up or operated in explosive
environments.
■
The units must not be installed
or operated in atmospheres
containing oil, sulphur, chlorine,
salt or dust.
■
Never insert foreign objects into
the units.
■
The units may not be exposed to
direct jets of water.
■
An unobstructed air inlet and air
outlet must be guaranteed at all
times.
■
The air-inlet grille must always
be kept free of dirt and loose
objects.
■
The units must not be covered
during operation.
■
The units must be installed
upright and in a stable position.
■
The units must not be
transported while they are
running.
■
All electrical cables on the
outside of the units must be
protected against damage (e.g.
by animals etc.)
.
■
Before each change of location,
the condensate containers must
be emptied
.
■Appropriate hazard prevention
measures must be taken to
prevent risks to people when
performing installation, repair,
maintenance or cleaning work on
the units.
■The units and components
should not be exposed to any
mechanical load, extreme levels
of humidity or direct exposure to
sunlight.
Warning of inflammable
substances !
Additional safety notes when
handling refrigerant R290
■The refrigerant R290 fulfils the
requirements of the European
F-Gas regulation.
■The units contain 0.122 kg of
refrigerant R290 depending on
the unit type.
■The maximum permitted amount
of refrigerant R290 is 0.3 kg.
■The units must not be burned,
drilled or pierced.
■Only use cleaning agents which
have been approved by the
manufacturer for cleaning.
■The unit must never be operated
in rooms with naked flames (e.g.
gas heaters, open fireplaces, etc.).
■Refrigerant circuit components
must not be deformed.

8
REMKO TK series
■The contained refrigerant R290 is
colourless and odourless.
■The unit must not be stored or
operated in rooms which have a
room area of 6 m2or less.
■The accumulation of refrigerant
due to leakages can lead to a fire
and explosions in rooms which
are too small due to the develop-
ment of heat or ignition sources.
■The units must be stored care-
fully. Mechanical damage must
be avoided.
■Intervention in the refrigeration
circuit may only be done by certi-
fied specialist personnel taking
into account the safety notes of
the manufacturer.
■Maintenance and repairs may
only be carried out by authorised
personnel which have the cor-
responding knowledge in regards
to flammable refrigerant.
Do not use anything other than
the agent recommended by
the manufacturer to speed up
a possible defrosting process or
to clean the units. The unit may
only be operated and stored in
rooms where there are no devices
with potential ignition sources.
Do not go below the minimum
room area of 6 m2. Note that leak-
ing refrigerant is colourless and
odourless.
The unit must not be burned or
pierced!
!WARNING!
Safety instructions for the
operator
The operational safety of the units
and components is only assured
providing they are used as intended
and in a fully assembled state.
■This unit may only be installed
and operated as described in this
manual.
■Independent conversion and/or
modification of any kind is strictly
prohibited.
■Children must not be left unsu-
pervised when close to the unit.
■For safety reasons, people with
mental, physical or other health
limitations must not operate this
unit unattended.
■The unit is not permitted to be
operated with damaged cables.
The unit must be repaired by a
specialist immediately.
■The unit may only be operated
via a power supply with ground-
ing.
■The use of extension cables is not
recommended.
■The air filter must be cleaned
at intervals of no more than 2
weeks.
■The unit is not permitted to be
operated in the vicinity of heat
sources.
■The unit must be transported up-
right. Residue from the conden-
sate must be drained off before
transport. The unit must be stood
upright for 1 hour prior to com-
missioning.
■Operating the units in rooms with
potential ignition sources (naked
flames, gas or electrical heaters,
fireplaces) is prohibited.
■The unit may only be installed,
operated and stored in rooms
larger than 6 m2.
■Protective covers (grilles) over
moving parts must not be
removed from units that are in
operation.
■Do not operate units or compo-
nents with obvious defects or
signs of damage.
■Contact with equipment parts or
components can lead to burns or
injury.
■The units and components must
not be exposed to any mechani-
cal load, extreme levels of humid-
ity or extreme temperatures.
■Never drill through the housing
cover or have the unit come into
contact with fire.
■Rooms in which refrigerant may
escape must be adequately aer-
ated and ventilated. Otherwise
there is danger of suffocation.
■All housing parts and unit open-
ings, e.g. air inlets and outlets,
must be free from foreign objects,
fluids or gases.
■Do not leave the units running
for an extended period unsuper-
vised.
UImproper use can cause serious
damage to the unit.
Read this manual carefully before
commissioning!

9
Never cover the air inlets and out-
lets.
Do not allow children to play with
the unit.
Do not stand or sit on the unit.
Unplug the power plug before
cleaning the unit.
Do not disassemble housing parts
(consult a specialist company).
Unplug the power plug when not in
use for a long period.
Ensure the voltage is correct
(220-240 V AC, 50 Hz).
Do not operate the unit with defec-
tive cables or sockets.
The unit and in particular the
control panel must not come into
contact with water.
Safety notes for installation,
maintenance and inspection
■
Check the work area
Before starting work on units
with combustible refrigerants,
ensure that any potential igni-
tion sources are removed and
the risk of igniting the refriger-
ants is eliminated. The aforemen-
tioned safety notes for repairing
the units must be observed at all
times. Work may only be car-
ried out by authorised specialist
personnel with knowledge of
handling combustible refriger-
ants!
■
Prepare the work area
Any persons present must be
informed about the repair proc-
ess accordingly and persons not
involved must vacate the work
area. Working in rooms with lim-
ited space is prohibited. Ensure
that sucient space is available
at the workplace. Ensure that the
ambient conditions are suitable
for working with combustible
refrigerants.
■
Identify refrigerant leaks, check
the atmosphere
Refrigerant may unexpectedly
escape when working on the
refrigerant circuit. Ensure that
the atmosphere in the workplace
is not combustible at all times by
using suitable refrigerant detec-
tors. Be sure to ensure that the
refrigerant detector used is suit-
able, approved and calibrated for
use with refrigerant R290.
■
Provide re extinguishers
Provide appropriate re extin-
guishers before starting work.
For this purpose, dry powder or
CO2re extinguishers are suit-
able.

10
REMKO TK series
■
Remove any potential ignition
sources
Leaking refrigerant in combina-
tion with corresponding ignition
sources can lead to an explo-
sion. All ignition sources must
therefore be kept away from
the working area at all times!
This also includes the smoking
of cigarettes. Inform all persons
present that this includes the
axing of safety notes and the
closing o of the working area.
■
Sucient ventilation
Before starting work, ensure that
the working area is outdoors
or has sucient ventilation. A
continuous ventilation stream
is required while working. The
safety of the persons working
must be guaranteed by the ex-
haust air equipment: potentially
leaking refrigerant must be lead
away safely and drained into the
atmosphere in an optimum man-
ner.
■
Checking the refrigerant circuit
If electronic components need
to be replaced, ensure that
the spare parts have the same
function and identical technical
specications. The maintenance
and replacement regulations of
the manufacturer must always
be observed and complied with.
Please contact the support of the
manufacturer with any problems
or queries. The following safety
checks must be carried out when
using combustible refrigerants:
- The ll level adjusts to the size
of the rooms in which the unit is
located.
- The exhaust air equipment and
its outlets function properly and
are not blocked or obstructed.
■
Checking the electronic compo-
nents
A component and safety check
must be carried out before
repairing and maintaining
electronic components. If safety
cannot be ensured due to a de-
fect on a component, installation
must not take place until safety
can be guaranteed again. If the
defect on the spare part cannot
be remedied and downtime of
the unit is no longer acceptable,
an adequate temporary solution
must be arranged. The owner/
operator of the unit must be in-
formed about this. The detailed
safety check must include the
following aspects:
- Capacitors are discharged. Dis-
charging must be done in a safe
process to prevent ying sparks.
- There must be no electronic
components active or uninsu-
lated wires while lling, repairing
or cleaning.
- There must be no earthing of
the system.
■
Repairs to closed components
Before repairing closed compo-
nents/housing parts, the unit
must be free from voltage. If
carrying out the repairs free from
voltage cannot be avoided, the
critical points of potential refrig-
erant leakages must be checked
using a leak detector.
The following notes must be
observed when working on elec-
tronic components if the hous-
ing is changed in such a way that
its safety is inuenced. This also
relates to cases where the lines
are damaged, there is excessive
or incorrect pin assignment, con-
nections are not assigned in the
original way or similar deviations
to the expected condition are
determined.
■
Repairing of intrinsically safe
components
Do not introduce permanent
inductive or capacitive loads
into the existing circuits without
ensuring that the maximum
permitted voltages and amper-
ages of the assemblies and lines
are not exceeded. Intrinsically
safe components are individual
components that can be operat-
ed in the presence of ammable
substances. The test equipment
must be adjusted according to
the situation-dependent condi-
tions. Only use components
which are ocially approved by
the manufacturer as spare parts.
Unapproved components can
cause a re in the event of a leak-
age in the refrigerant circuit.

11
■
Wiring
Lines must be checked for the
following damage:
- Damage to the insulation
- Corrosion at the contact points
- Excessive pressure on the lines
- Damage due to vibrations
- Damage due to sharp edges
- Damage due to other inu-
ences not mentioned here
Also consider the ageing of the
material and continuous vibra-
tion loads due to compressors or
fans when checking.
■
Identify combustible refriger-
ant
Do not use any potential igni-
tion source when searching
for refrigerant leaks under any
circumstance. The use of a leak
detection lamp or other similar
devices with a naked ame is not
permitted.
1. Ensure that the components
are installed correctly.
2. Ensure that sealing materi-
als are not changed in such a
way that combustible gases or
objects could penetrate into the
interior of the components.
3. Spare parts must correspond
to the manufacturer’s specica-
tions.
NOTE
The use of silicones can inuence
the eectiveness of leak detection
devices! Intrinsically safe com-
ponents must not be insulated
before starting work.
■
Leak detection methods
The following leak detection
methods are permitted for sys-
tems with combustible refriger-
ants. Electronic equipment must
be used for detecting leaks.
These must be selected with the
sensitivity matched to the situ-
ation and recalibrated if neces-
sary (calibration must take place
in a refrigerant-free environ-
ment). The leak detection device
must be adjusted to the lowest
ammability limit (LFL) of the re-
frigerant. Liquid leakage instru-
ments are permitted for most
refrigerants. Chlorinated sub-
stances are the exception here
as the chlorine in combination
with the refrigerants can cause
corrosion on the copper cables.
If a leak is detected, all potential
open ignition sources must be
removed immediately. If a leak
has been detected in the system
which requires reworking of the
piping in the form of soldering,
the system must be completely
free of refrigerant or, if possible,
the aected part disconnected
from the system using stopcocks.
The aected system parts must
be ushed with oxygen-free
nitrogen run before and during
the repair work.
■
Emptying and evacuating the
system
If the refrigerant circuit must
be opened for repairs or other
reasons, this must be carried out
in a safe and professional way. In
any event, proceed with extreme
caution since ignition may occur
at any time! Stick to the follow-
ing procedure:
1. Drain the refrigerant
2. Flush the system with insert
gas
3. Evacuate
4. Repeat steps 2 to 3 if required
5. Opening the system by cutting
or soldering
The system must be ushed with
oxygen-free nitrogen in order to
guarantee safety. The ushing
process must be repeated multi-
ple times if necessary. Do not use
compressed air or oxygen for the
ushing process! After evacuat-
ing, ushing takes place by lling
with dried nitrogen until the
operating pressure is reached
and then the system must be
evacuated again. This ushing
process must often be repeated
until there is no more refriger-
ant in the system. After the last
ushing, the system must be
brought to the ambient pres-
sure in order to start work. The
ushing process is indispensable
when soldering work is required
on the piping. Ensure that the
vacuum pump outlet is not near
an ignition source and continu-
ous ventilation is guaranteed.
■
Filling process
The following requirements for
the general specications must
also be fullled during the lling
process:
- Ensure that no contamination
occurs from other refrigerants
(residues in the lling equip-
ment).
- Keep the lines as short as pos-
sible to minimise the likelihood
of residues forming.
- Filling bottles and cylinders
must be stood upright.
- Ensure that the system is
earthed before lling.
- Label the system with the re-
frigerant type designation after
lling
- Never exceed the maximum ll
level.
The system must be checked for
leaks (pressure test!) before ll-
ing. The system must be checked
for leaks once more after ll-
ing and before commissioning.
Check for leaks again when leav-
ing the work space.

12
REMKO TK series
■
Labelling when shutting down
If a unit must be taken out of op-
eration and the refrigerant must
be disposed of, the unit must
be labelled with the date and a
signature. Ensure that the note
remains attached to the combus-
tible refrigerant.
■
Transportation of units which
contain combustible refriger-
ants
National provisions must be
observed.
■
Storing of units which contain
combustible refrigerant
National provisions must be
observed.
■
Transportation without the
original packaging
If the units are transported
without the original packaging,
they must be packed in such a
way that mechanical damage
is prevented. The units must be
transported upright.

13
Unit description
Operating sequence
The units are switched on and off
by the Power key.
The fan extracts the moist room air
through the intake grill with filter,
evaporator and the condenser
behind.
Heat is removed from the room air
on the cold evaporator. The air is
then cooled to below dew point.
The water vapour contained in
the room air is then deposited
as condensate or rime on the
evaporator fins.
On the condenser (heat
exchanger), the cold and
dehumidified air is warmed up
again and discharged back into
the room via the outlet grill
with a temperature increase of
around 5 - 10 °C above the room
temperature.
The processed, dry air then re-
mixes with the room air.
Continuous circulation of the room
air through the unit gradually
reduces the relative humidity
(% RH) in the room to the desired
humidity level.
Depending on the room air
temperature and the relative
humidity, condensed water will
drip into the condensate trap
and then through the integrated
discharge nozzle into the
condensate container below either
continuously or only during the
defrosting phases.
A float is installed inside the
condensate container. In the event
that the container is full, the float
will activate a microswitch which
will switch off dehumidification
mode.
The units switch off and the
“container full” indicator light
on the control panel illuminates.
This extinguishes again when the
empty condensate container
is re-inserted.
The units then restart after
a switch-on delay of around
3 minutes.
In unattended continuous
operation with an external
condensate connection,
the condensate that occurs is
drained continuously via a hose
connection.
The units have been designed for
universal and straightforward air
dehumidification.
Their compact dimensions allow
the unit to be transported and set
up with ease.
The units operate in accordance
with the condensation principle
and are equipped with
a hermetically sealed refrigerant
system, heat gas defrosting,
low-noise and low-maintenance
fan and connection cable with
plug.
The fully automatic control,
the variable hygrostat, the
condensate container with
integrated overflow protection
and the connection nozzle for
condensate drainage guarantee
fault-free continuous operation.
The units conform to the
fundamental health and safety
requirements of the appropriate
EU stipulations.
The units are dependable and offer
ease of operation.
The units are used in all locations,
where dry air is a must and where
economic consequential damage
(such as that caused by mould)
must be prevented.
The units may be used for the
drying and dehumidification of
areas such as:
■
Living rooms, bedrooms,
shower rooms or cellar rooms
■
Weekend homes, caravans
■
Warehouses, archives
laboratories
■
Bathrooms, wash rooms
and changing rooms etc.
■
Cellar rooms, storage rooms
Recirculating fan
Condensate
container
Condenser
Evaporator
Condensate trap
Compressor
Schematic depiction of the workings of the REMKO air dehumidifier
Moist room air
Dehumidified
room air

14
REMKO TK series
Electrical wiring
■
The units are
operated
with 230 V/50 Hz
alternating current
■
The electrical connection is
made using a built-in mains
cable with earthed safety plug
■
Extensions to the connection
cable may only be carried out
by authorised electricians,
subject to the length of
the cable, connected load
of the unit and taking into
consideration how the unit is
used at its location
Set-up
For the best economic and safe use
of the units, the following notes
must be followed in full:
■
The units must be set up in
an upright and level position,
to ensure that the condensate
can drain freely
■
To ensure optimum air
circulation, the units should be
set up in the centre of the room,
where possible
■
Ensure that the room air can
be sucked in and discharged
without hindrances
■
Observe a minimum clearance
of 50 cm from walls at all times
■
Units must never be set up in
the immediate vicinity of heaters
or other sources of heat
■
Air circulation is improved if the
unit is set up approx. 1 m above
the ground
■
The room being dried or
dehumidified must be closed to
the surrounding atmosphere
■
Avoid having opened windows
and doors etc., and avoid
frequent entry to or exit from
the room as much as possible
■
The units may not be used
in environments containing
a great deal of dust or chlorine,
or in places with atmospheres
containing ammonia
■
The output of the unit is entirely
dependent on the conditions
inside the room, room
temperature, relative humidity
and observance of the set-up
instructions
NOTE
The electrical connection
to the units must be made
at feedpoints with residual
current devices in accordance
with VDE 0100, Section 704.
When installing the units in
extremely damp environments
such as laundry rooms,
showers etc., the unit must
secured with a residual
current device provided by the
customer in accordance with
the regulations.
Wall clearance
min. 0.5 m
Maintain adequate clearance from
heaters or other sources of heat.
Keep windows and doors closed!
Schematic depiction of how to set up the REMKO air dehumidifier
All cable extensions must only
be used in a fully unrolled or
reeled off condition.
!CAUTION

15
2. Open the air flap on the top
of the unit.
3. Use the Power button.
4. Use the SET key to select
thedesired humidity level in the
installation room
Commissioning
Control panel
NOTE
In room temperatures below
10 °C
and relative humidity
below
40 %
, economical use
of the unit can no longer be
guaranteed.
NOTE
Note that the compressor does
not switch on until a waiting
time of 3 minutes has elapsed.
Restart protection!
NOTE
The devices can be switched
ON and OFF via an external
time (accessory) if required.
Before commissioning the unit
or if local requirements dictate,
the air-inlet grill and air-outlet
grill must be checked for
contamination.
Important notes prior
to commissioning
■
All extensions to the electrical
connection must be of
a sufficient cable size and must
only be used fully rolled out or
unrolled
■
Never use the mains cable
as a pull cord
■
After being switched on,
the units operate fully-
automatically until switched off
by the hygrostat or float when
the condensate container is full
■
The condensate container must
be inserted properly
The unit cannot be operated if
the condensate container is not
inserted properly!
■
In order to prevent damage to
the condenser, the units are
equipped with a mechanism
that prevents the compressor
being immediately switched
back on after it is switched off
The units do not switch back
on until a waiting time of
around 3 minutes has elapsed!
■
If the units work in continuous
operation with an external
condensate drainage
connection, refer to the
relevant section
NOTE
A contaminated grille or filter
must be cleaned or replaced
immediately.
The units are only permitted
to be operated with the air
flap open in order to prevent
overheating.
!CAUTION
Commissioning the units
1. Connect the unit's electrical
connection to a properly
installed mains socket.
MAX. AUTO
rF
SET
21
4
356
Power key
The POWER key switches the unit on and off.
SET key
Use the SET key to select the desired humidity in the installation
room.
„MAX“ status light
This light indicates that the unit is in continuous operation
„AUTO“ status lights
These lights indicate which humidity level has been set. .
“Container full” indicator light
This light indicates that the condensate container is full and must
be emptied
Defrost mode” indicator light
This light indicates that the automatic defrost system that
is integrated in the unit has switched on the defrost cycle
1
2
3
4
5
6

16
REMKO TK series
Adjusting the discharge
direction
The dehumidified room air is
discharged on the top of the unit.
The pivotable air flap [S] is used to
adjust the discharge direction.
Press the air flap’s rear surface [D]
to open it.
The front folds upwards. The air
direction can be adjusted infinitely.
The following notes must also be
observed in full:
■
If possible, open the air flap
completely to direct the air flow
upwards
■
Ensure that the air can
discharge without hindrances
This is the only way to
guarantee optimum unit
operation!
■
Ensure that sensitive objects
such as house plants are not
placed directly in the air flow
emerging from the unit
DS
Automatic defrost system
The moisture contained in the
room air condenses when cooling
and coats the evaporator fins
with rime or ice depending on the
air temperature and the relative
humidity (% RH).
The automatic defrost system that
is integrated in the unit switches
the defrost cycle on if required.
The rime or ice that has
accumulated on the exchanger
surfaces is defrosted using heat gas
as required.
This defrosting method is
particularly fast and effective, and
guarantees high dehumidification
performance.
Dehumidification mode is only
paused for a short time during the
defrost phase.
The “Defrost mode” indicator light
indicates that the defrost cycle is
running.
NOTE
If the room temperature is
sufficiently high, the surface
of the fins will not be cold
enough for rime formation to
occur, rendering defrosting
unnecessary.
Therefore, the air dehumidifier
works economically.
Adjusting units/moisture
The unit’s dehumidification power
is entirely dependent on the
conditions inside the room, the
room temperature, the relative
humidity and observance of the
notes in the “Setting up”chapter.
The higher the room temperature
and relative air humidity,
the higher the dehumidification
power.
A relative humidity of around
45 to 60 % is sufficient in living
rooms. The air humidity should not
exceed 40 to 45 % in warehouses,
archives, etc.
The set target value can be read
from the “AUTO” and “MAX.”
Status lights.
In automatic mode (“AUTO”) the
device works fully automatically
and switches off automatically
when the setpoint has been
reached.
In continuous operation (“MAX.”)
The device works without
interruption and ensures maximum
dehumidification.
The setpoint is changed by
pressing the SET button. The LED
display changes from right to left.
NOTE
The maximum possible
dehumidification power is only
obtained when the air flap is
opened completely.
MAX. AUTO
rF
SET
NOTE
The built-in hygrostat is
not a calibrated measuring
instrument and is located
inside the unit. The averaged
air humidity in the installation
room may deviate from
the set value.under certain
circumstances.

17
Continuous operation with
external condensate outlet
The units are equipped with
a special connection nozzle on the
left side.
A standard 1/2” water hose can
be connected to this.
1. To do this, use a suitable tool
to break the cover [F] out of the
side wall.
Only required for the first
connection!
2. Connect a sufficiently long
and suitable drain hose to the
connection nozzle that is now
exposed.
In unattended permanent
operating mode, the condensate
should preferably be drained into
a lower-level drain.
If using an external collection
container (pan, bucket, etc.),
the unit must be placed
at a correct height.
F
Emptying the condensate
container
The integrated condensate
container must be emptied from
time to time.
Dehumidification mode is switched
off if the condensate container is
full.
The “Container full” indicator light
indicates that the unit has switched
off.
1. Pull the full container forwards
and out carefully.
2. Pour the water into a drain.
3. Re-insert the emptied container
carefully into the unit.
The “Container full” indicator light
extinguishes and the unit
continues to run automatically.
NOTE
The unit can only be started
once the condensate container
has been inserted correctly.
NOTE
After being emptied, the
condensate container incl.
float must be checked for
damage, contamination etc.
There is no unit overflow
protection in this variant.
!CAUTION
Ensure that the drainage hose
is placed at an incline to the
drain to allow the condensate
to drain without hindrance!
!CAUTION
Leakage control device
The unit is equipped with a leaka-
ge control device to prevent dama-
ge in the event of refrigerant loss.
If the unit detects a leak, the
compressor is switched off. The
fan continues to operate without
interruption in order to prevent an
accumulation of refrigerant.
HINWEIS
By switching the compres-
sor off and on again, the unit
initially continues to run in
normal operation until the
leakage control device switch-
es the compressor off again.
A lack of refrigerant can cause
damage to the unit. If a lack of
refrigerant is detected (con-
tinuous fan operation when
the compressor is not running),
the unit must be taken out of
operation immediately!
Work on the refrigerant system
and on the electrical equip-
ment must only be conducted
by a specially authorised
specialist!
The leakage control device
must not be viewed as a
replacement for maintenance
work and damage checks!
!ACHTUNG

18
REMKO TK series
The units are equipped with four
foot rollers and an additional
handle for easy and convenient
transport.
■
Before each change of location,
switch off the unit and remove
the power plug from the mains
socket
■
Empty the condensate
container completely
NOTE
Beware of dripping
condensate.
After switching off the units,
the evaporator may continue
to defrost under the influence
of the ambient temperature.
Unit transport
The mains cable must never
be used as a pull cord or fixing
device.
!CAUTION
Use the POWER key to switch the
unit off.
If the units are
inactive for longer
periods, disconnect
them from the mains
power supply.
Empty the condensate container
completely and dry with a clean
cloth.
Beware of dripping condensate!
The units must be cleaned and
dried completely before storing.
When storing the unit, cover with
a plastic sheet/foil if necessary
and store in an upright position in
a sheltered and dry location.
The units are only permitted to be
stored upright in a suitable storage
location that is protected against
dust and direct sunlight.
Shutdown
■
If moisture residual remains on
the evaporator or water remains
in the condensate container, the
units must only be transported
in an upright position
■
The transport rollers are only
suitable for use on level and
smooth ground
■
The devices must be carried
when transporting on rough
terrain or uneven surfaces

19
All moving parts have
a low-maintenance permanent
coat of lubricant. The entire
refrigerant system is designed as
a maintenance-free, hermetically
sealed system and may only be
repaired by a specialist.
Care and maintenance
NOTE
Regular care and maintenance
is fundamental to a long
service life and fault-free
operation of the unit.
Cleaning the condenser and
evaporator
The unit housing must be opened
to allow the inside of the unit to be
cleaned and to provide access to
electrical components.
■
Clean the condenser and
the evaporator by blowing,
vacuuming or using a soft brush
Do not use water jets!
■
Clean the interior surfaces
on the units, the condensate
traps with hose connection,
the fan and the fan housing
carefully
■
Check all unit components for
damage and repair if necessary
■
Carefully refit all parts that
were removed in reverse order
NOTE
When cleaning the exchanger,
particular care must be taken
because the fine aluminium
fins bend very easily.
NOTE
Adjustment and maintenance
work may only be carried out
by authorised and qualified
technicians.
Before undertaking any work
on the units, the power plug
must be removed from the
mains socket.
!CAUTION
An electrical safety check must
be carried out in accordance
with VDE 0701 after any work
on the units.
!CAUTION
■
Observe the regular care and
maintenance intervals
■
In accordance with the
operating conditions, the units
must, if necessary, be checked
at least yearly by a specialist
to ensure that they are in
a condition that is safe to use
■
Only clean the units with a dry
or damp cloth
Do not use a water jet!
■
Never use abrasive or
solvent-based cleaners
■
Use only suitable cleaners, even
for heavy contamination
■
Check the inlet and outlet grille
for contamination on a regular
basis
Clean or replace if required!

20
REMKO TK series
Troubleshooting
The units are manufactured
using state-of-the-art production
methods and tested several times
to verify their correct function.
However, if a functional fault
should occur, the unit should first
be checked in accordance with the
following list.
The unit does not start:
■
Check the hygrostat’s setting
The set value must be lower
than the relative humidity in
the installation room!
■
Check the power supply and
the power fuse provided by the
customer 230V/1~/50 Hz
■
Check the power plug and the
cable for damage
■
Check the condensate tank’s fill
level and seating
The “Container full” indicator
light must not be illuminated!
■
Check that the microswitch
[MS] on the condensate
container is functioning
■
Check that the inlet and outlet
are free
Overheating!
■
Check the fuse on the control
board
5. Clean the air filter with
lukewarm water or a vacuum
cleaner.
6. Heavier contamination may be
remedied by rinsing the filter in
a lukewarm (max. 40 °C) soap
solution.
Finally, always rinse the filter
carefully with clear water and
allow to dry!
7. Also check the intake grill for
contamination and clean if
necessary.
8. Before refitting grill and filter,
ensure that they are fully dry
and that no damage has been
sustained.
NOTE
Heavily contaminated or
damaged air filters must be
replaced with new parts.
Only original spare parts may
be used.
NOTE
Adjustment and maintenance
work may only be carried out
by authorised and qualified
technicians.
Filter cleaning
To prevent damage to the unit, it is
equipped with an intake grill with
integrated air filter.
In order to prevent power losses or
unit faults, the intake grill with
filter must be inspected as
required, but every 2 weeks at the
latest, and cleaned if necessary.
1. Use the hygrostat to switch the
unit off.
2. Remove the power plug from
the mains socket.
3. Reach into the recess [G],
push the intake grill backwards
slightly and pull it upwards and
out of the unit’s rear wall.
4. Remove the filter that is behind
the intake grill.
G
s
s
s
The units are not permitted to
be operated without the
intake grill and air filter fitted!
!CAUTION
This manual suits for next models
1
Table of contents
Other REMKO Dehumidifier manuals

REMKO
REMKO ASF 100 User manual

REMKO
REMKO ETF 550 User manual

REMKO
REMKO LTE 120 User manual

REMKO
REMKO AMT Series User manual

REMKO
REMKO ETF 320 User manual

REMKO
REMKO ETF 360 User manual

REMKO
REMKO ETF 320 Eco User manual

REMKO
REMKO AMT 60-E User manual

REMKO
REMKO SLN 40 User manual

REMKO
REMKO ETF-S Series User manual

REMKO
REMKO LTE 50 User manual

REMKO
REMKO ETF 100 User manual

REMKO
REMKO ETF Series User manual

REMKO
REMKO SLE 20 User manual

REMKO
REMKO SLE 65 User manual

REMKO
REMKO ETF 240 User manual

REMKO
REMKO ETF Eco Series User manual

REMKO
REMKO AMT 45-E User manual

REMKO
REMKO SLE Series User manual

REMKO
REMKO ETF 220 User manual