1
2
3
4
IMPORTANT INFORMATION
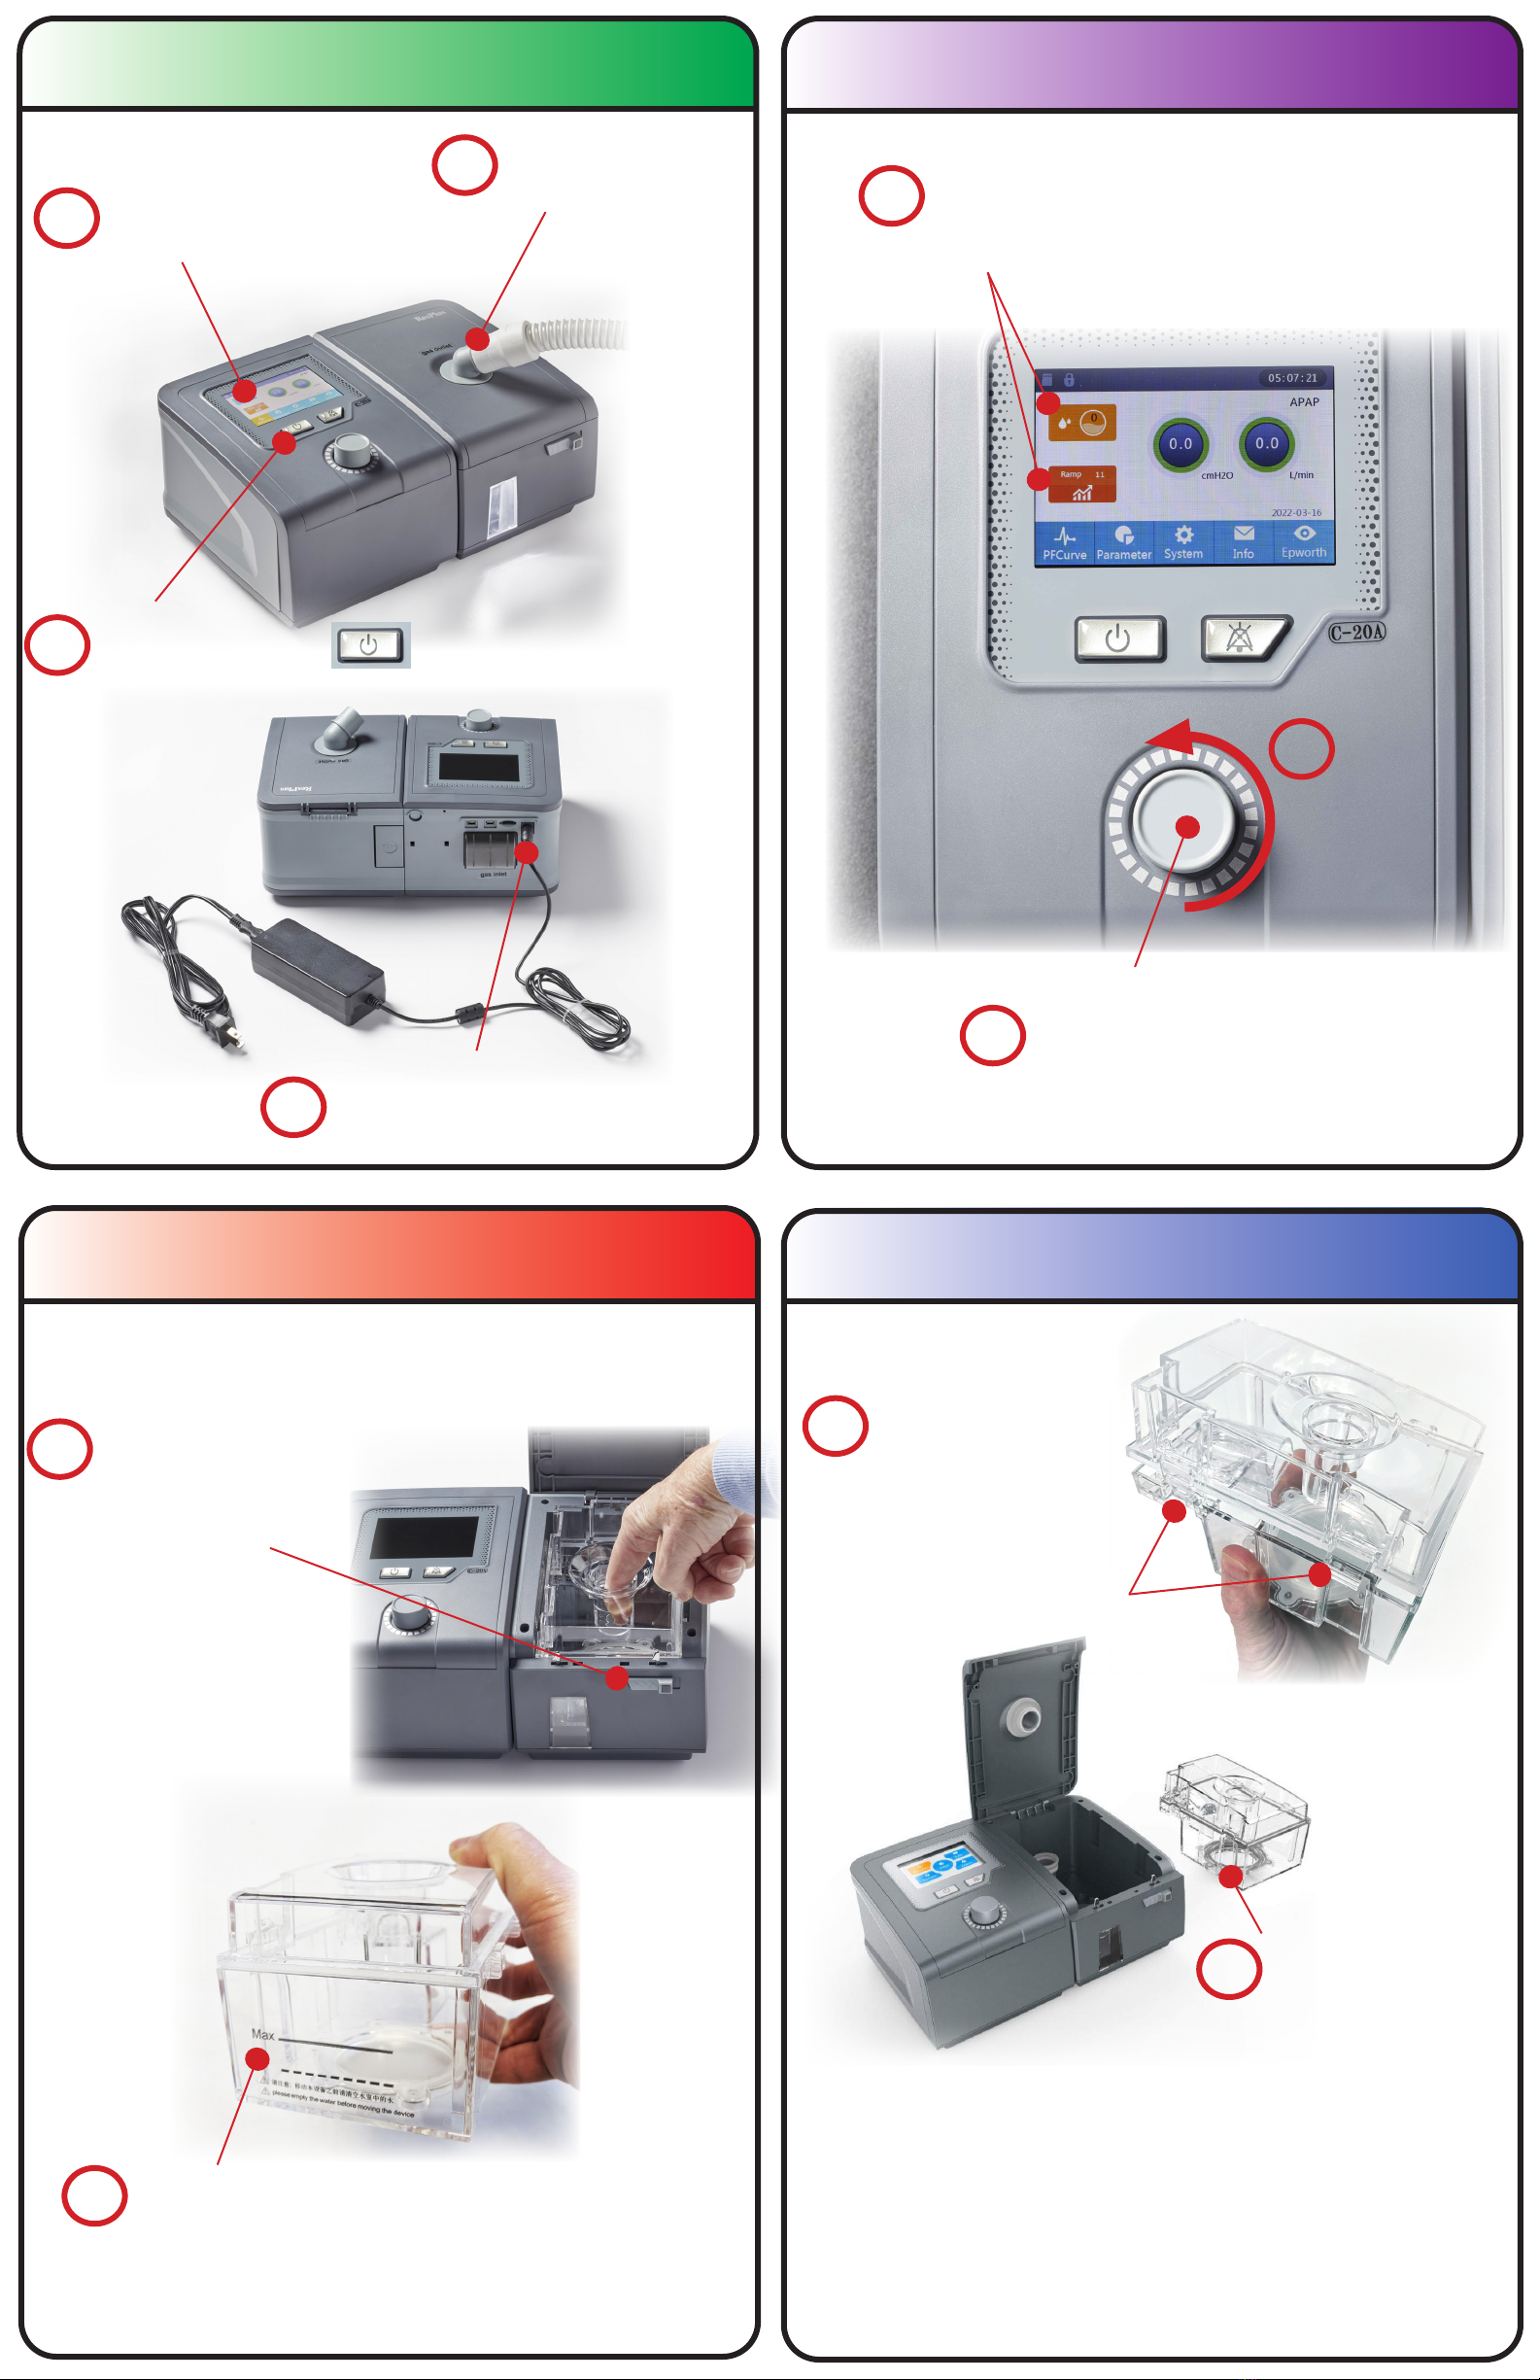
IMPORTANT - When relling the heating humidier, turn o the CPAP.
STEP 5
STEP 7
Connect Tubing and
Interface to Swivel
Outlet
STEP 4
Plug in power supply to
back of unit and to a 110V
Wall source.
Press POWER button machine will turn on.
Machine will turn on and
display will illuminate
If you need to set Ramp or Humidity
levels, simply highlite either function by
turning the knob.
1
2
Once highlited, press the knob.
Turning the knob will change the
parameters within that function.
Once you have arrived at the
parameter, press the knob once to
record that setting.
1
Push Rotate
HUMIDIFER SET UP and OPERATION
1Open the Humidier by
pushing the slide to the
right. The humidier lid
will open.
2Remove the clear plastic container and ll with
water (distilled preferred) up to the the MAXIMUM
FILL line. DO NOT OVERFILL!
1
The Humidifer water
container can be opened
for cleaning by ipping up
the two tabs on the side
2Return the container
to the humidifer com-
partment and close the
lid. It is now ready for
operation.
IMPORTANT - Do NOT move the ResPlus if the humidier contains
water as water could ow back into the machine and cause it to shut
down. Do NOT add water when the machine is running.
STEP 6


