- 4 -
2.6 Adjusting the Automatic
Start Feature
In the automatic mode, the Silent TS is switched on
and off by an automatic start system.
This automatic start feature reacts to the current con-
sumed by an electronic equipment plugged into the
the Silent TS
The factory set parameter for the start-up
threshold enables the Silent TS to react cor-
rectly for most electrical dental equiment.
Should this not be the case for a particu-
lar piece of equipment (eg. a handpiece),
then the start-up threshold can be adjusted
accordingly.
To change the activation threshold:
1. Switch Silent TS on.
2. Press and hold for 3 sec.;
- LED and
-
3. Switch electronic equipment off. For units equip-
ped with a standby mode, switch them to this
mode (e.g., for units equipped with handpieces,
only switch the controller on without activating the
handpiece).
4. Press the key.
-
5. Switch the electrical appliance on, i.e. activate the
hand piece at the speed at which the Silent TS is
required to start up.
6. Press the key
-
has been successfully performed.
The Silent TS returns to the operating mode (conti-
nuous or automatic operation) which was set for the
2.7 "Change Filter" - Indicator
LED (K) coming on indicates that either the dust bag
An acoustic signal will also sound three times in this
case. In this case, follow the instructions given in the
If the dust extractor continues to be used
after the “Change Filter” indicator goes on,
The LED display blinks (K).
The indicator can be turned off by switching
the Silent TS OFF and ON, thus restarting
extraction.
system can result in hazards and damage to
the extractor. Filters must be replaced if the
2.7.1 ADJUST THE SENSITIVITY OF THE „REPLACE
FILTER“ INDICATOR.
It may be necessary to reduce responsivi-
ty if the suction support of the connected
appliance has a smaller diameter than the
Silent TS. (<< 32.5mm).
limits.
To do this:
Silent TS off;
Silent TS on, and in doing so keep the
blink. (5=factory set parameter)
Press button ,
- Reduce level of sensitivity,
-
- ==> Dust bag will get very full
Press button ,
- Increase level of sensitivity,
-
- ==> Dust bag will get less full
Press button ,
-
2.7.2 ACTIVATING / DEACTIVATING THE „REPLACE
FILTER“ INDICATOR TONE
deactivated.
To do this:
Silent off;
and keys, switch
the Silent back on and wait for the indicator tone
- Brief indicator tone: acoustic signal deactivated.
- Longer indicator tone: acoustic signal active
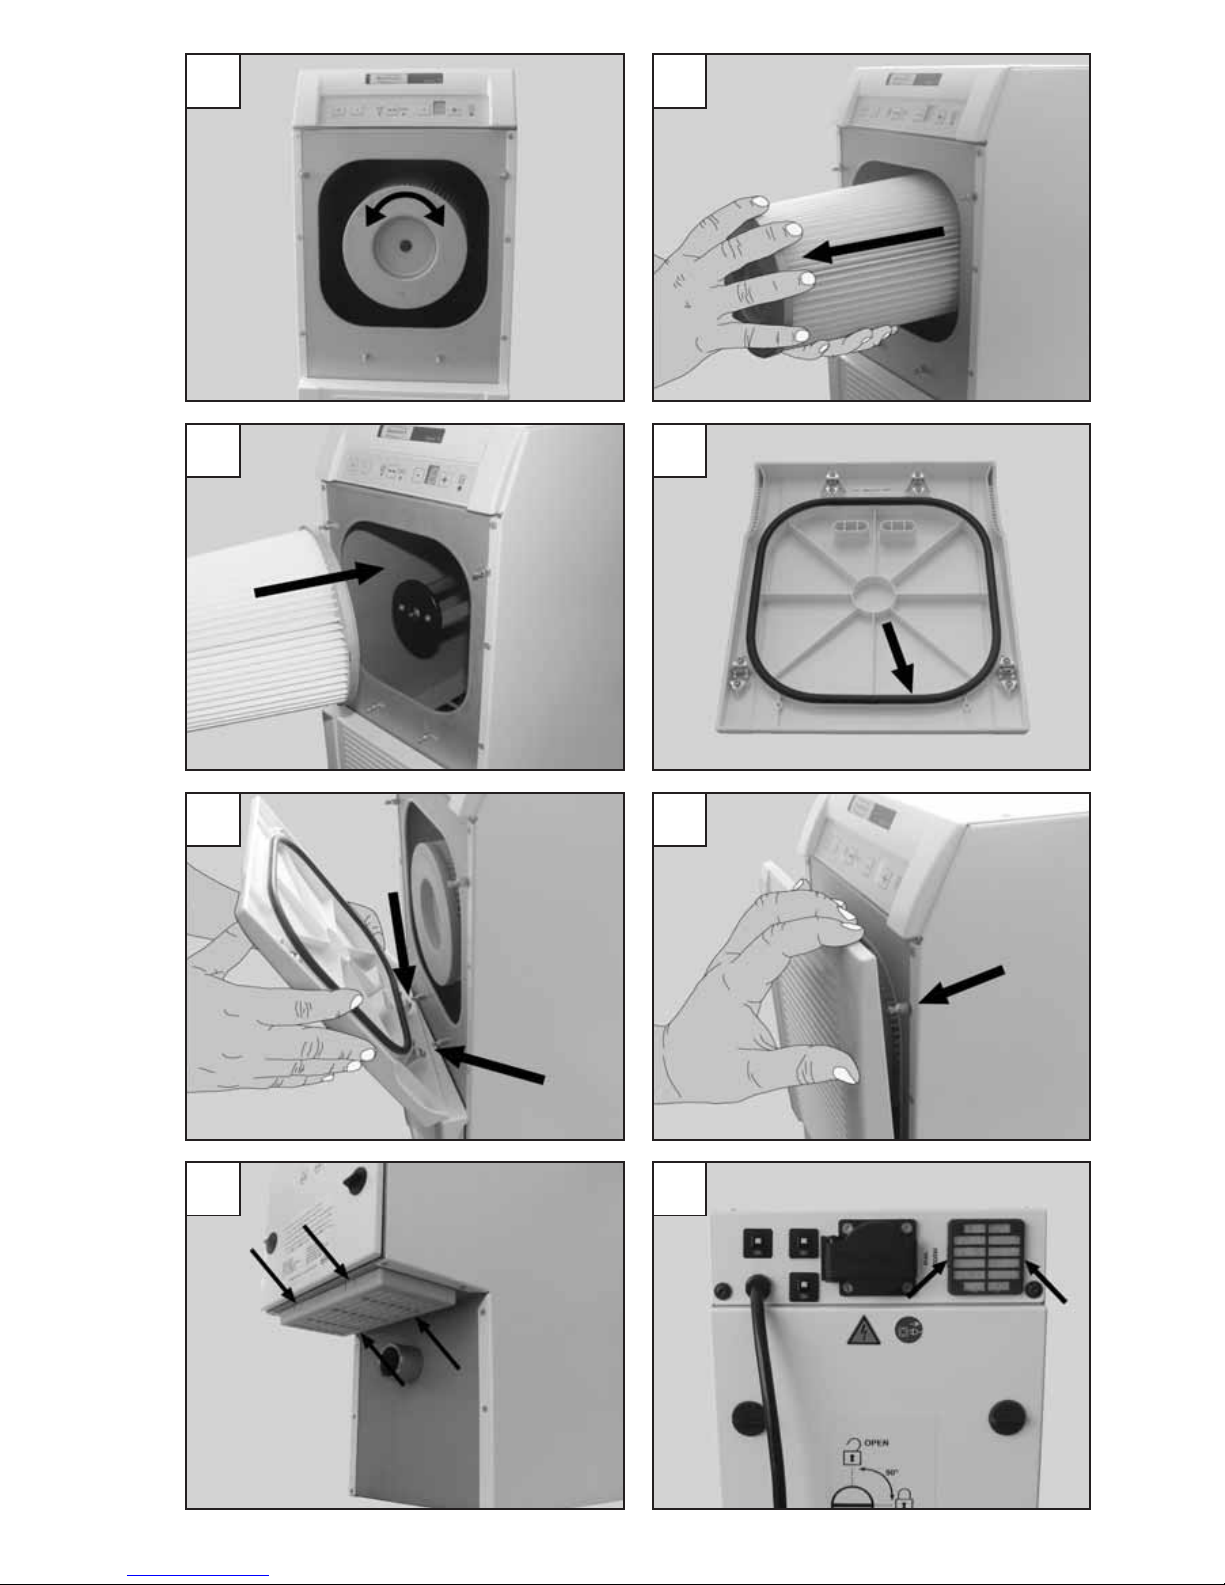
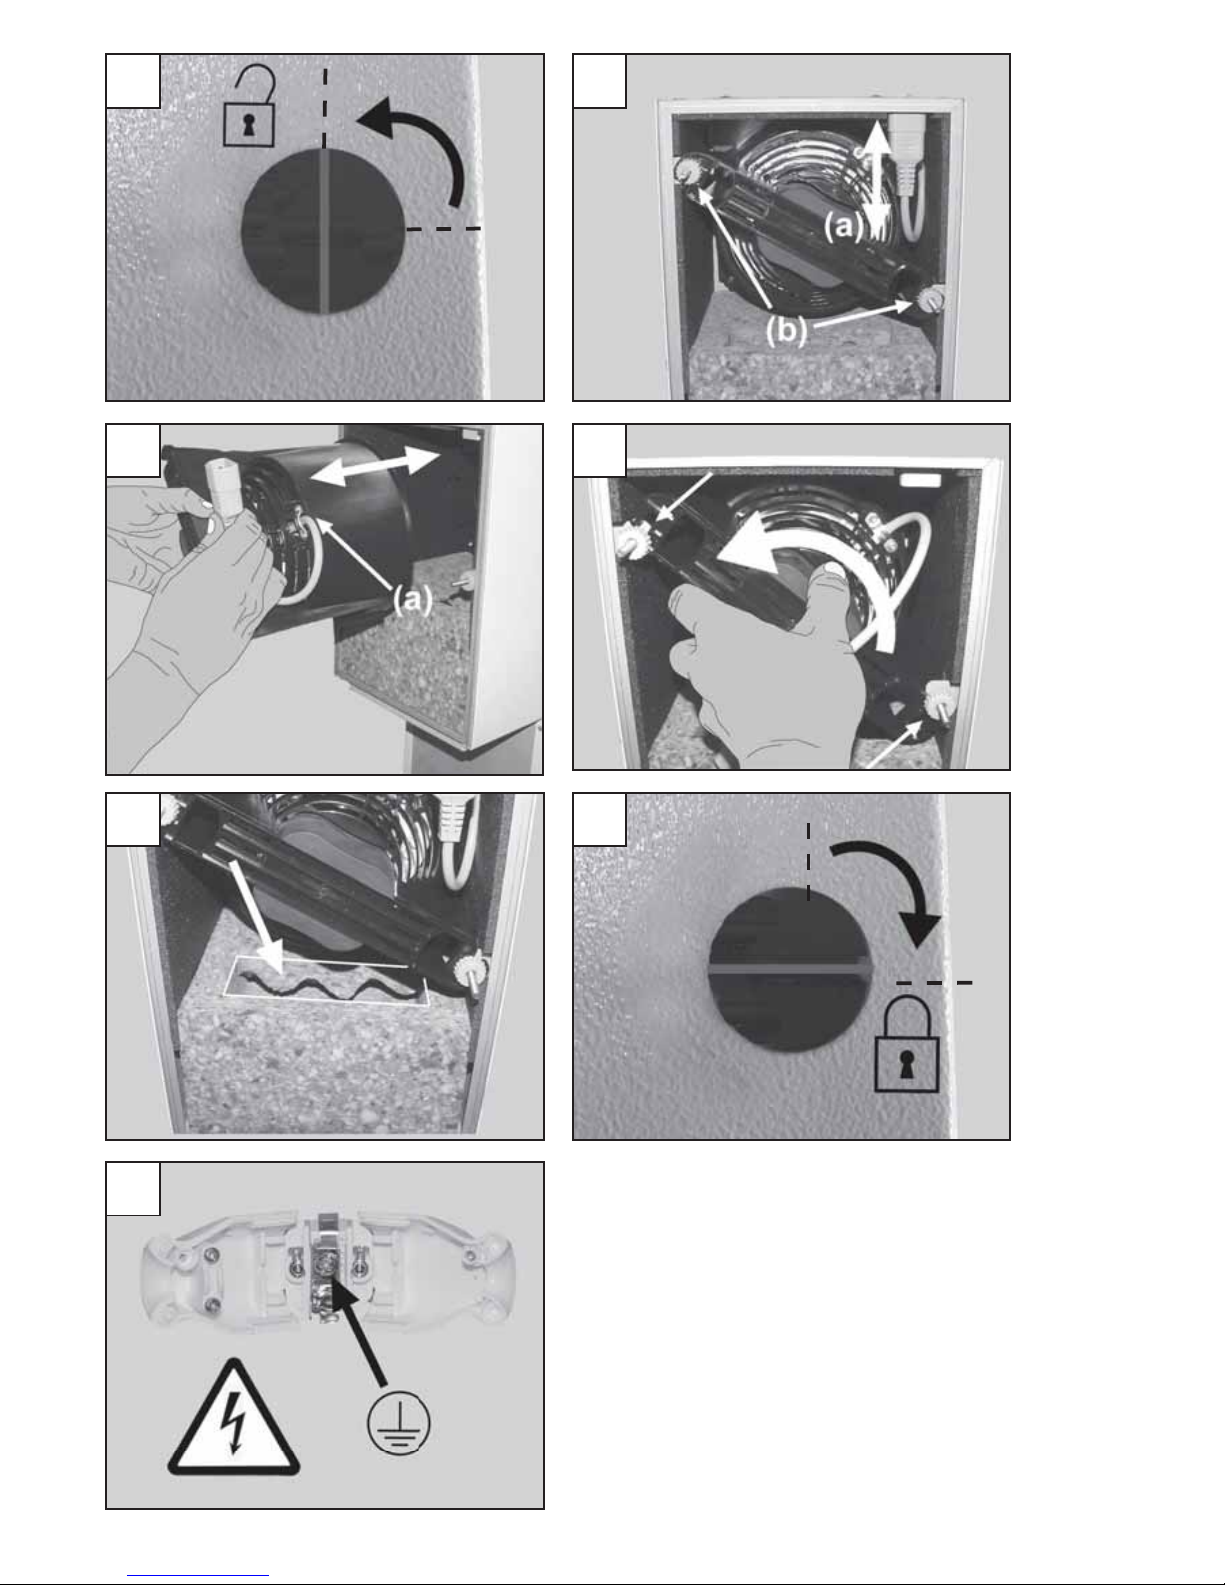
3. Cleaning / Maintenance
Always unplug the unit from the wall outlet
before beginning any cleaning or mainte-
nance tasks.
Examine the power cord regularly, but at
least annually, for damage or signs of
aging. Immediately replace damaged power
cords.
3.1 Seals
is vital that the following three seals:
are not damaged.
Inspect these seals when replacing the associated
damaged (refer to the spare parts list).