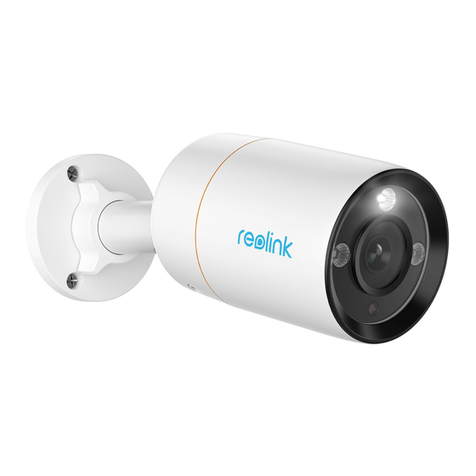
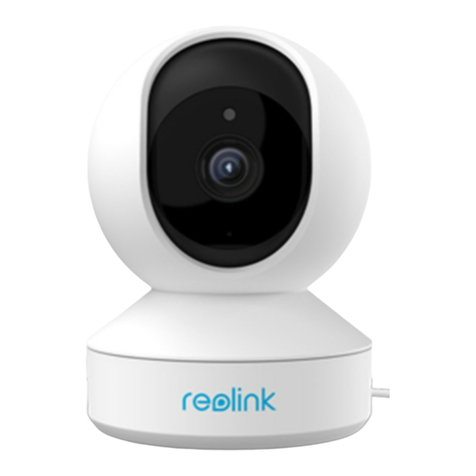
Reolink E1 Outdoor PoE Quick start guide

Apply to: E1 Outdoor PoE
Operational Instruction
EN/DE/FR/IT/ES
January 2023
QSG1_A_EN
58.03.005.0094
REOLINK INNOVATION LIMITED
FLAT/RM 705 7/F FA YUEN COMMERCIAL BUILDING 75-77 FA YUEN
STREET MONG KOK KL HONG KONG
Product Ident GmbH
UK REP
EU REP
APEX CE SPECIALISTS LIMITED
Hoferstasse 9B, 71636 Ludwigsburg, Germany
Email: prodsg@libelleconsulting.com
Addr.: 89 Princess Street, Manchester, M14HT, UK

1 2
What's in the Box
Camera
Mounting
Template
1m
Network Cable
Quick
Start Guide
Surveillance
Sign
Camera Bracket Reset Needle Pack of Screws
EN
Content
What's in the Box··········································································· 2
Camera Introduction ······································································· 3
Connection Diagram ······································································· 4
Set up the Camera ········································································· 5
Install the Camera·········································································· 6
Troubleshooting············································································ 9
Specications ············································································· 9
Notication of Compliance ································································· 9

3 4
Connection DiagramCamera Introduction
Reset Button
Micro SD Card Slot
Daylight Sensor
Spotlight
Infrared Lights
Lens
Status LED
Built-in Mic
Speaker
Network Cable
Power Cable
* Press for more than ve seconds to
restore the device to default settings.
* Rotate the lens to nd the
reset button and the SD card slot.
Micro SD
VGAHDMIUSB
AUDIO
OUT
DC 48V
ON
2 4 6 8
1 3 5 7
OFF
LAN
eSATA
Before using the camera, please connect your camera as instructed below to nish initial setup.
1. Connect the camera to a Reolink NVR (not included) with an Ethernet cable.
2. Connect the NVR to your router, and then power on the NVR.
NOTE: The camera should be powered with a 12V DC adapter or a PoE powering device
such as PoE injector, PoE switch or Reolink NVR (not included in the package).
Power Adapter
Ethernet Cable
Ethernet Cable
* You may also connect the camera to a PoE switch or PoE injector.
Reolink NVR *
Camera
Router
3
4
5
8
9
10
11
7
6
1
1
2
3
4
5
6
7
8
9
10
11
2

5 6
Set up the Camera
• On Smartphone
Scan to download the Reolink App.
Download and Launch the Reolink App or Client software, and follow the onscreen
instructions to nish initial setup.
NOTE: If you are connecting the camera to a Reolink PoE NVR, please set up the
camera via the NVR interface.
Install the Camera
Mount the Camera to the Wall
For outdoor use, the camera must be installed upside down for better waterproof performance.
Pull the button of the security mount and
unscrew the bracket to separate the two
parts.
Screw the bracket to the bottom of the camera.
1
2
3
“click”
“click”
open close
1
2
3
“click”
“click”
open close
1 2
English English
Devices
Cloud
You haven't added any device. Please click
the"+"button in the top right corner to add
Devices
Cloud
You haven't added any device. Please click
the"+"button in the top right corner to add

7 8
Drill holes in accordance with the mounting
template and screw the security mount to
the wall.
Choose a proper direction of the camera
and then align the bracket to the security
mount and lock the camera in place by
turning anti-clockwise.
Devices
Cloud
You haven't added any device. Please click
the"+"button in the top right corner to add
1
2
3
“click”
“click”
open close
Devices
Cloud
You haven't added any device. Please click
the"+"button in the top right corner to add
1
2
3
“click”
“click”
open close
NOTE: Use the drywall anchors included in the package if needed.
3 4
Mount the Camera to the Ceiling
Pull the button of the security mount and unscrew the ceiling bracket from the mount.
Install the bracket to the ceiling. Align the camera with the bracket and turn the camera unit
clockwise to lock it in position.
Devices
Cloud
You haven't added any device. Please click
the"+"button in the top right corner to add
1
2
3
“click”
“click”
open close
Devices
Cloud
You haven't added any device. Please click
the"+"button in the top right corner to add
1
2
3
“click”
“click”
open close

9 10
Troubleshooting
Specications
Camera is Not Powering on
Software Features
General
If your camera is not powering on, please try
the following solutions:
• Make sure your camera is powered properly.
The PoE camera should be powered by a PoE
switch/injector, the Reolink NVR or a
12V power adapter.
• If the camera is connected to a PoE device
as listed above, connect the camera to
another PoE port and see if the camera will
power on.
• Try again with another Ethernet cable.
If the problem is not solved, please contact
Reolink Support.
Audio: Two-way audio
IR Cut Filter: Yes
Operating Temperature:
-10°C to 55°C (14°F to 131°F)
Size: 84.7×117.8 mm
Weight: 380g
Notication of
Compliance
FCC Compliance Statement
This device complies with Part 15 of the FCC
Rules. Operation is subject to the following
two conditions: (1) this device may not cause
harmful interference, and (2) this device must
accept any interference received, including
interference that may cause undesired
operation.
NOTE: This equipment has been tested
and found to comply with the limits for a
Class B digital device, pursuant to Part 15
of the FCC Rules. These limits are designed
to provide reasonable protection against
harmful interference in a residential
installation. This equipment generates, uses
and can radiate radio frequency energy and, if
not installed and used in accordance with the
instructions, may cause harmful interference
to radio communications. However, there is
no guarantee that interference will not occur
in a particular installation. If this equipment
does cause harmful interference to radio or
television reception, which can be determined
by turning the equipment o and on, the
user is encouraged to try to correct the
interference by one or more of the following
measures:
• Reorient or relocate the receiving antenna.
• Increase the separation between the
equipment and receiver.
• Connect the equipment into an outlet on a
circuit dierent from that to which the receiver
is connected.
• Consult the dealer or an experienced radio/
TV technician for help.
Caution: Changes or modications not
expressly approved by the party responsible
for compliance could void the user’s authority
to operate the equipment.
Reolink declares that this device is in com-
pliance with the essential requirements and
other relevant provisions of EMC Directive
2014/30/EU and LVD 2014/35/EU.
Simplied EU Declaration of
Conformity
This Class B digital apparatus complies with
Canadian ICES-003.
Cet appareil numérique de la classe B est
conforme à la norme NMB-003 du Canada.
Reolink declares that this product is in com-
pliance with Electromagnetic Compatibility
Regulations 2016 and Electrical Equipment
Safety Regulations 2016.
ISED Compliance Statements
UKCA Declaration of Conformity
This product comes with a 2-year limited
warranty that is valid only if purchased from
Reolink Ocial Store or a Reolink authorized
reseller.
Limited Warranty
Deutsch Deutsch11 12
Lieferumfang
Kamera
Montageschablone1m
Netzwerkkabel
Schnellstart-
Leitfaden
Aufsichtsschild
Kamerahalterung Reset-Nadel Schraubenpack
DE
Katalog
Lieferumfang ···············································································12
Über die Kamera············································································13
Verbindungsdiagramm······································································14
Einrichten der Kamera ······································································15
Installieren der Kamera· · · · · · · · · · · · · · · · · · · · · · · · · · · · · · · · · · · · · · · · · · · · · · · · · · · · · · · · · · · · · · · · · · · · · · 16
Fehlersuche·················································································19
Spezikationen··············································································19
Konformitätserklärung ······································································19

Deutsch Deutsch13 14
VerbindungsdiagrammÜber die Kamera
Reset-Taste
MicroSD-Kartenslot
Tageslichtsensor
Spotlight
IR-LED
Objektiv
Status-LED
Einbau-Mikrofon
Lautsprecher
Netzwerkkabel
Stromkabel
* Zurück auf Werkseinstellungen:
Reset Taste über 5s drücken.
*Das Objektiv drehen, um die
Reset-Taste und den SD-Kartenslot
zu nden.
Micro SD
VGAHDMIUSB
AUDIO
OUT
DC 48V
ON
2 4 6 8
1 3 5 7
OFF
LAN
eSATA
Schließen Sie vor allem Ihre Kamera bitte wie unten beschrieben an, um die erste Einrichtung
abzuschließen.
1. Schließen Sie die Kamera über ein Netzwerkkabel an einen Reolink NVR (nicht im Lieferumfang) an.
2. Schließen Sie den NVR an Ihren Router an und schalten Sie den NVR ein.
HINWEIS: Die Kamera soll mit einem 12V DC Netzadapter oder PoE-Stromversorgungsgerät wie
einem PoE-Injektor, PoE-Switch oder Reolink NVR (nicht im Lieferumfang enthalten) betrieben
werden.
Netzadapter
Netzwerkkabel
Netzwerkkabel
* Sie können die Kamera auch an einen PoE-Switch / PoE-Injektor anschließen.
Reolink NVR *
Kamera
Router
3
4
5
8
9
10
11
7
6
1
1
2
3
4
5
6
7
8
9
10
11
2

Deutsch Deutsch15 16
Einrichten der Kamera
• Auf Smartphone
Scannen & Reolink App herunterladen
Laden Sie die Reolink App oder Client Software herunter, starten Sie sie und folgen Sie den
Anweisungen auf dem Bildschirm, um die Ersteinrichtung abzuschließen.
HINWEIS: Wenn Sie die Kamera an einen Reolink PoE NVR anschließen, richten Sie
die Kamera bitte über die NVR-Schnittstelle ein.
Installieren der Kamera
Montage an der Wand
Im Freien muss die Kamera für bessere Wasserdichtigkeit mit dem Kopf nach unten installiert
werden.
Ziehen Sie den Knopf der Sicherheitshalterung
und schrauben Sie die Halterung ab, um die
beiden Teile zu trennen.
Schrauben Sie die Halterung an der Unterseite
der Kamera fest.
Devices
Cloud
You haven't added any device. Please click
the"+"button in the top right corner to add
1
2
3
“click”
“click”
open close
Devices
Cloud
You haven't added any device. Please click
the"+"button in the top right corner to add
1
2
3
“click”
“click”
open close
1 2

Deutsch Deutsch17 18
Bohren Sie Löcher gemäß der
Montageschablone und schrauben Sie die
Sicherheitshalterung an die Wand
Wählen Sie die richtige Ausrichtung der
Kamera, richten Sie dann die Halterung an
der Sicherheitshalterung aus und verriegeln
Sie die Kamera durch Drehen gegen den
Uhrzeigersinn.
Devices
Cloud
You haven't added any device. Please click
the"+"button in the top right corner to add
1
2
3
“click”
“click”
open close
Devices
Cloud
You haven't added any device. Please click
the"+"button in the top right corner to add
1
2
3
“click”
“click”
open close
HINWEIS: Verwenden Sie bei Bedarf die im Lieferumfang enthaltenen Trockenbauanker.
3 4
Montage an der Decke
Ziehen Sie den Knopf der Sicherheitshalterung und schrauben Sie den Deckensockel von der
Halterung ab.
Bringen Sie den Sockel an der Decke an. Richten Sie die Kamera an dem Sockel aus und drehen
Sie die Kameraeinheit im Uhrzeigersinn, um sie zu xieren.
Devices
Cloud
You haven't added any device. Please click
the"+"button in the top right corner to add
1
2
3
“click”
“click”
open close
Devices
Cloud
You haven't added any device. Please click
the"+"button in the top right corner to add
1
2
3
“click”
“click”
open close

Deutsch Deutsch19 20
Fehlersuche Spezikationen
Kamera lässt sich nicht einschalten Über Software
Das Allgemeine
Wenn Ihre Kamera nicht eingeschaltet wird,
versuchen Sie bitte die folgenden Lösungen:
•Stellen Sie sicher, dass Ihre Kamera richtig
eingeschaltet ist. Die PoE-Kamera sollte über
einen PoE-Switch/-Injektor, den Reolink NVR
oder ein 12V-Netzadapter mit Strom versorgt
werden.
•Wenn die Kamera wie oben beschrieben an
ein PoE-Gerät angeschlossen ist, schließen Sie
die Kamera an einen anderen PoE-Anschluss
an und prüfen Sie, ob die Kamera einges-
chaltet wird.
• Versuchen Sie es erneut mit einem anderen
Netzwerkkabel.
Bleibt es ungelöst, kontaktieren Sie bitte
Reolink Support.
Audio: Zwei-Wege-Audio
IR-Sperrlter: Ja
Betriebstemperatur:
-10°C bis 55°C (14°F bis 131°F)
Größe: 84,7×117,8 mm
Gewicht: 380g
Konformitätserklärung
FCC-Konformitätserklärung
Das Gerät erfüllt die Anforderungen von Teil
15 der FCC-Vorschriften. Der Betrieb unterliegt
den zwei Bedingungen: Das Gerät darf keine
schädlichen Interferenzen verursachen, muss
alle empfangenen Interferenzen akzeptieren,
inkl. Interferenzen, die unerwünschten Betrieb
verursachen können.
HINWEIS: Dieses Gerät wurde getestet und
entspricht den Grenzwerten für ein digitales
Gerät der Klasse B gemäß Teil 15 der FCC
Vorschriften. Diese Grenzwerte sind so
ausgelegt, dass sie einen angemessenen
Schutz gegen schädliche Störungen bei der
Installation in Wohngebieten sicherstellen.
Dieses Gerät erzeugt und verwendet
Hochfrequenzenergie und kann diese
ausstrahlen. Wenn es nicht gemäß den
Anweisungen installiert und verwendet wird,
kann es schädliche Störungen im Funkverkehr
verursachen. Es kann jedoch nicht garantiert
werden, dass bei einer bestimmten Installation
keine Störungen auftreten. Wenn dieses Gerät
Störungen des Radio- oder Fernsehempfangs
verursacht, was durch Ein- und Ausschalten
des Geräts festgestellt werden kann, sollte der
Benutzer versuchen, die Störungen durch eine
oder mehrere der folgenden Maßnahmen zu
beheben:
•Richten Sie die Empfangsantenne neu aus
oder stellen Sie sie um.
•Vergrößern Sie den Abstand zwischen dem
Gerät und dem Empfänger.
•Schließen Sie das Gerät an eine Steckdose
eines anderen Stromkreises an als den, an
den der Empfänger angeschlossen ist.
•Wenden Sie sich an den Händler oder einen
Reolink erklärt, dass dieses Gerät den wes-
entlichen Anforderungen und anderen ein-
schlägigen Bestimmungen der EMV-Richtlinie
2014/30/EU und LVD 2014/35/EU entspricht.
Vereinfachte EU
Konformitätserklärung
Dieses digitale Gerät der Klasse B entspricht
der kanadischen Norm ICES-003.
Cet appareil numérique de la classe B est
conforme à la norme NMB-003 du Canada.
ISED-Konformitätserklärungen
erfahrenen Radio- / TV-Techniker, um Hilfe zu
erhalten.
Achtung: Änderungen oder Modikationen,
die nicht explizit von der für die Einhaltung
Verantwortlichen erlaubt sind, können
Berechtigung des Benutzers zum Betrieb der
Geräte aufheben.

Deutsch21
Reolink erklärt, dass dieses Produkt den Bestimmungen von Electromagnetic
Compatibility Regulations 2016 und Electrical Equipment Safety Regulations
2016 entspricht.
UKCA-Konformitätserklärung
Dieses Produkt wird mit einer eingeschränkten 2-Jahres-Garantie gelief-
ert, die nur gültig ist, wenn es im oziellen Reolink-Shop oder bei einem
autorisierten Reolink-Händler gekauft wurde.
Eingeschränkte Garantie

Français Français23 24
Contenu de la Boîte
Caméra
de montage ModèleCâble réseau
de 1 m
Guide de Démarrage
Rapide
de surveillance
Panneau
Support de caméra Aiguille de
réinitialisation
Paquet de vis
FR
Contenu
Contenu de la Boîte ········································································24
Introduction de la caméra ··································································25
Diagramme de connexion ··································································26
Congurer la caméra······································································· 27
Installer la caméra ········································································· 28
Dépannage ·················································································31
Spécications ···············································································31
Notication de Conformité···································································31

Français Français25 26
Diagramme de connexionIntroduction de la caméra
Bouton de réinitialisation
Fente pour carte Micro SD
Capteur de lumière du jour
Projecteur
Lumières infrarouges
Objectif
Voyant d’état
Micro intégré
Haut-parleur
Câble réseau
Câble d’alimentation
* Appuyez sur cette touche pendant
plus de cinq secondes pour restaurer
les paramètres par défaut de
l’appareil.
* Faites tourner l’objectif pour trouver
le bouton de réinitialisation et la fente
pour la carte SD.
Micro SD
VGAHDMIUSB
AUDIO
OUT
DC 48V
ON
2 4 6 8
1 3 5 7
OFF
LAN
eSATA
Avant d’utiliser la caméra, veuillez connecter votre caméra comme indiqué ci-dessous pour
terminer la conguration initiale.
1. Connectez la caméra à un NVR Reolink (non inclus) avec un câble Ethernet.
2. Connectez le NVR à votre routeur, puis allumez le NVR.
REMARQUE : La caméra doit être alimentée avec un adaptateur 12 V CC ou un dispositif
d’alimentation PoE tel qu’un injecteur PoE, un commutateur PoE ou un NVR Reolink (non inclus
dans le boîtier).
Adaptateur
Câble Ethernet
* Vous pouvez également connecter la caméra à un commutateur PoE ou à un injecteur PoE.
Reolink NVR *
Caméra
Route
3
4
5
8
9
10
11
7
6
1
1
2
3
4
5
6
7
8
9
10
11
2

Français Français27 28
Congurer la caméra
• Sur smartphone
cannez pour télécharger l’application Reolink.
Téléchargez et lancez l’application Reolink ou le logiciel client, et suivez les instructions à
l’écran pour terminer la conguration initiale.
REMARQUE : Si vous connectez la caméra à un NVR Reolink PoE, veuillez
congurer la caméra via l’interface NVR.
Installer la caméra
Monter la caméra au mur
Pour une utilisation en extérieur, la caméra doit être installée à l’envers pour une meilleure
performance imperméable à l’eau.
Tirez sur le bouton du support de sécurité
et dévissez le support pour séparer les deux
parties.
Vissez le support au bas de la caméra.
Devices
Cloud
You haven't added any device. Please click
the"+"button in the top right corner to add
1
2
3
“click”
“click”
open close
Devices
Cloud
You haven't added any device. Please click
the"+"button in the top right corner to add
1
2
3
“click”
“click”
open close
1 2

Français Français29 30
Percez des trous conformément au gabarit
de montage et vissez le support de sécurité
au mur.
Choisissez une direction correcte de
la caméra, puis alignez le support sur
le support de sécurité et verrouillez la
caméra en place en tournant dans le sens
antihoraire.
Devices
Cloud
You haven't added any device. Please click
the"+"button in the top right corner to add
1
2
3
“click”
“click”
open close
Devices
Cloud
You haven't added any device. Please click
the"+"button in the top right corner to add
1
2
3
“click”
“click”
open close
REMARQUE : Utilisez les ancrages de cloison sèche inclus dans l’emballage si nécessaire.
3 4
Monter la caméra au plafond
Tirez sur le bouton du support de sécurité et dévissez le support de plafond du support.
Installez le support au plafond. Alignez la caméra avec le support et tournez l’unité de caméra
dans le sens des aiguilles d’une montre pour la verrouiller en position.
Devices
Cloud
You haven't added any device. Please click
the"+"button in the top right corner to add
1
2
3
“click”
“click”
open close
Devices
Cloud
You haven't added any device. Please click
the"+"button in the top right corner to add
1
2
3
“click”
“click”
open close

Français Français31 32
Dépannage
Spécications
La caméra ne s’allume pas
Dispositifs de logiciel
Généralités
Si votre appareil photo ne s’allume pas, es-
sayez les solutions suivantes :
• Assurez-vous que votre appareil photo est
correctement alimenté. La caméra PoE doit
être alimentée par un commutateur/injecteur
PoE, le NVR Reolink ou un
Adaptateur d’Alimentation 12V.
• Si la caméra est connectée à un périphérique
PoE comme indiqué ci-dessus, connectez la
caméra à un autre port PoE et voyez si la
caméra s’allume.
• Réessayez avec un autre câble Ethernet.
Si le problème n’est pas résolu, veuillez con-
tacter l’assistance Reolink.
Audio : Filtre de coupure
IR audio bidirectionnel : Oui
Température de fonctionnement :
-10 °C à 55 °C (14 °F à 131 °F)
Taille : 84,7×117,8 mm
Poids : 380g
Notication de
Conformité
Déclaration de conformité FCC
Cet appareil est conforme à la partie 15 des
règles de la FCC. Son utilisation est soumise
aux deux conditions suivantes: (1) cet appareil
ne doit pas causer d’interférences nuisibles
et (2) cet appareil doit accepter toute inter-
férence reçue, y compris les interférences
susceptibles de provoquer un fonctionnement
indésirable.
REMARQUE: Cet équipement a été testé et
déclaré conforme aux limites d’un appareil
numérique de classe B, conformément à la
partie 15 des règles de la FCC. Ces limites
sont conçues pour assurer une protection
raisonnable contre toute interférence nuisible
dans une installation
Installation . Cet équipement génère, utilise
et peut émettre de l’énergie radiofréquence
et, s’il n’est pas installé et utilisé selon les
instructions, il peut causer du brouillage
nuisible aux communications radio. Toutefois,
il n’y a
aucune garantie que des interférences ne
se produiront pas dans une installation
particulière. Si cet équipement provoque
eectivement un brouillage préjudiciable à la
réception radio ou télévisuelle, ce qui peut être
établi en éteignant et rallumant l’équipement,
l’utilisateur est invité à tenter de corriger le
brouillage par une ou plusieurs des mesures
suivantes :
• Réorienter ou déplacer l’antenne de
réception.
• Augmenter la distance entre l’équipement et
le récepteur.
• Brancher l’équipement dans une prise
d’alimentation qui est sur un circuit diérent
de celui sur lequel le récepteur est branché.
• Contacter le revendeur ou un technicien
radio/TV qualié pour obtenir de l’aide.
Attention : Les changements ou modications
n’ayant pas été expressément approuvés
Reolink déclare que cet appareil est con-
forme aux exigences essentielles et aux autres
dispositions pertinentes de la directive EMC
2014/30/EU et LVD 2014/35/EU.
Déclaration simpliée de l’UE
Conformité
Cet appareil numérique de classe B est con-
forme à la norme ICES-003 du Canada.
Cet appareil numérique de la classe A est
conforme à la norme NMB-003 du Canada.
Reolink déclare que ce produit est conforme à
la réglementation sur la compatibilité électro-
magnétique de 2016 et à la réglementation
sur la sécurité des équipements électriques de
2016.
Déclarations de conformité ISED
Déclaration de conformité UKCA
par la partie responsable de la conformité
peuvent priver l’utilisateur de son droit d’usage
de l’équipement.

Français33
Ce produit est assorti d’une garantie limitée de 2 ans qui n’est valable
que s’il est acheté dans la boutique ocielle de Reolink ou auprès d’un
revendeur agréé par Reolink.
Garantie limitée

Italiano Italiano35 36
Cosa c’è nella scatola
Telecamera
Sagoma di
montaggio
1m Cavo di rete Guida rapida Cartello di
sorveglianza
Supporto Ago di reset Pacchetto di viti
IT
Content
Cosa c’è nella scatola ······································································ 36
Introduzione alla telecamera ································································37
Diagramma di connessione································································· 38
Congurazione della telecamera···························································· 39
Installazione della telecamera ······························································40
Risoluzione dei problemi···································································· 43
Speciche tecniche········································································· 43
Avviso di Conformità ······································································· 43

Italiano Italiano37 38
Diagramma di connessioneIntroduzione alla telecamera
Pulsante di reset
Slot per scheda Micro SD
Sensore di luce diurna
Faretto
Luci a infrarossi
Lente
LED di stato
Microfono
Altoparlante
Cavo di rete
Cavo di rete
* Premere per più di cinque secondi
per ripristinare le impostazioni
* Ruotare l’obiettivo per individuare
il pulsante di ripristino e lo slot per la
scheda SD.
Micro SD
VGAHDMIUSB
AUDIO
OUT
DC 48V
ON
2 4 6 8
1 3 5 7
OFF
LAN
eSATA
Prima di utilizzare la fotocamera, collegarla come indicato di seguito per completare la
congurazione iniziale.
1. Collegare la telecamera a un NVR Reolink (non incluso) con un cavo Ethernet.
2. Collegare l’NVR al router, quindi accendere l’NVR.
NOTA: La telecamera deve essere alimentata con un adattatore da 12 V CC o con un dispositivo
di alimentazione PoE come un iniettore PoE, uno switch PoE o un NVR Reolink (non incluso nella
confezione).
Adattatore di alimentazione
Cavo Ethernet
* You may also connect the camera to a PoE switch or PoE injector.
Reolink NVR *
Telecam
Router
3
4
5
8
9
10
11
7
6
1
1
2
3
4
5
6
7
8
9
10
11
2
Table of contents
Languages:
Other Reolink Outdoor Camera manuals

Reolink
Reolink RLC-1212A User manual

Reolink
Reolink Argus 2 Quick start guide

Reolink
Reolink Go User manual

Reolink
Reolink Argus PT Ultra Quick start guide

Reolink
Reolink Go PT User manual

Reolink
Reolink Argus 3 User manual

Reolink
Reolink Duo 2 PoE Quick start guide

Reolink
Reolink Argus Eco Quick start guide

Reolink
Reolink Duo 2 Quick start guide

Reolink
Reolink Duo User manual

Reolink
Reolink RLC-511WA Quick start guide

Reolink
Reolink Lumus User manual

Reolink
Reolink TrackMix LTE User manual

Reolink
Reolink B5M11WA Quick start guide

Reolink
Reolink Argus 2E Quick start guide

Reolink
Reolink E1 Series Quick start guide

Reolink
Reolink Argus 2 Quick start guide

Reolink
Reolink Argus PT User manual