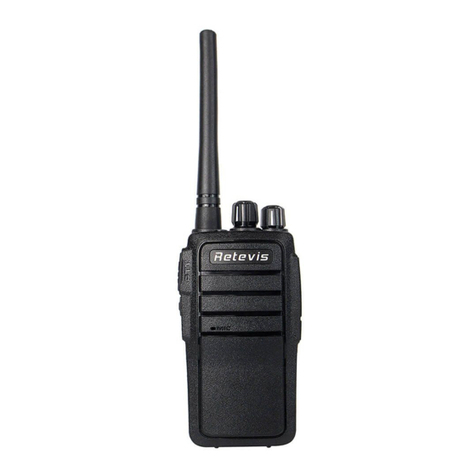
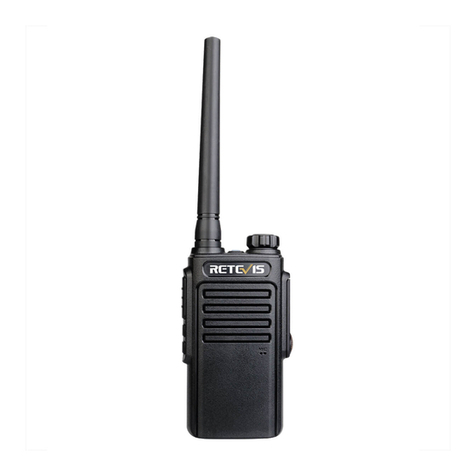
Retevis RB27 User manual

RB27
TWO WAY RADIO

PREFACE
Thank you for purchasing RB27 Two Way Radio, It is a multitask GMRS
transceiver. Combining the latest technology in radio communication along with
a sturdy mechanical frame, RB27 is the ideal and effective solution for the
professionals who need to stay in touch with the working team (in construction
sites, buildings, shows, trade fairs or hotels) or for leisure users that just want to
keep up with friends and family.
IMPORTANT NOTICE:
To help you ward off bodily injury or property loss that may arise from improper
operation, please read all the information carefully before using our products.
This contains instructions for safe usage and RF energy awareness and control
for compliance with applicable standards and regulation.
Safety Information for RETEVIS Radios
Your wireless handheld portable transceiver contains a low power transmitter.
When the talk button is pushed, it sends out radio frequency (RF) signals. The
device is authorized to operate at a duty factor not to exceed 50%. In August
1996, the Federal Communications Commissions (FCC) adopted RF exposure
guidelines with safety levels for handheld wireless devices.

Table of Contents
1. GETTING STARTED ................................................................................................
1.1 Regulations and Safety Warnings .......................................................................
1.2 Content of the packaging ......................................................................................
1.3 Main features ............................................................................................................
2. BATTERY INFORMATION ......................................................................................
2.1 Charging the Battery Pack ....................................................................................
2.2 Charger Supplied ....................................................................................................
2.3 Use Caution with the Li-ion Battery ....................................................................
2.4 How to Charge .........................................................................................................
2.5 LED Indicator ............................................................................................................
2.6 How to Store the Battery .......................................................................................
3. INSTALLATION OF ACCESSORIES ...................................................................
3.1 Installing / Removing the Antenna .......................................................................
3.2 Installing the belt clip ..............................................................................................
3.3 Installing the battery pack ......................................................................................
3.4 Additional Speaker/Microphone (Optional).........................................................
4. RADIO OVERVIEW ..................................................................................................
4.1 Main controls and parts of the radio ...................................................................
4.2 LCD Display .............................................................................................................
5. BASIC OPERATIONS ..............................................................................................
5.1 Turning your Radio On and Off ............................................................................
5.2 Setting the Volume ..................................................................................................
5.3 Choosing a Channel ...............................................................................................
5.4 Talking and Listening ..............................................................................................
5.5 SCAN .........................................................................................................................
5.6 Monitor .......................................................................................................................
5.7 Keypad lock ..............................................................................................................
5.8 A/B switch ..................................................................................................................
5.9 Flashlight and Emergency Alert ...........................................................................
5.10 FM Radio (FM) .......................................................................................................
5.11 NOAA Weather Radio ..........................................................................................
5.12 1000Hz, 1450Hz, 1750Hz Tone-burst ..............................................................
6. WORKING THE MENU SYSTEM .........................................................................
6.1 Basic use ...................................................................................................................
6.2 Shortcut Menu operations .....................................................................................
6.3 Menu settings ...........................................................................................................
7. ON-LINE SERVICE AND SUPPORT ...................................................................
Appendix A. - Trouble shooting guide .......................................................................
Appendix B. - Technical Specifications .....................................................................
Frequency ........................................................................................................................
01
01
02
02
03
03
03
03
03
04
04
04
04
04
04
04
04
04
05
06
06
06
06
06
06
07
07
07
07
07
07
07
08
08
08
09
12
12
13
14

1. GETTING STARTED
1.1 Regulations and Safety Warnings
This device complies with Part 15 of the FCC Rules. Operation is subject to the following two conditions:
(1) This device may not cause harmful interference.
(2) This device must accept any interference received, including interference that may cause undesired operation.
Important: Any changes or modifications not expressly approved by the party responsible for compliance could
void the user's authority to operate this device. Your radio is set up to transmit a regulated signal on an assigned
frequency. It is against the law to alter or adjust the settings inside the radio to exceed those limitations. Any
adjustments to your radio must be made by qualified technicians.
To be safe and sure:
• Never open your radio’s case.
• Never change or replace anything in your radio except the battery.
Your radio might cause TV or radio interference even when it is operating properly. To determine whether your
radio is causing the interference, turn it off. If the interference goes away, your radio is causing it. Try to eliminate
the interference by moving your radio away from the receiver. If you cannot eliminate the interference, the FCC
requires that you stop using the radio.
Hazardous Environments: Do not operate the radio in hazardous environments. Explosion or fire may result.
Do not operate the radio near unshielded electrical blasting caps.
Under certain conditions, radios can interfere with blasting operations and may cause an explosion. Turn your
radio OFF to prevent accidental transmission when in a blasting area or in areas posted: "Turn off two-way radio."
Construction crews often use remote control RF devices to set off explosives.
Care and Safety: To clean the radio, use a soft cloth dampened with water. Do not use cleaners or solvents
because they can harm the body of the unit and leak inside, causing permanent damage. Use a dry, lint-free cloth
to clean the battery contacts.
RF Exposure Information
WARNING! Read this information before using the radio. In August 1996 the Federal Communications
Commission (FCC) of the United States with its action in Report and Order FCC 96-326 adopted an updated
safety standard for human exposure to radio frequency electromagnetic energy emitted by FCC regulated
transmitters.
Those guidelines are consistent with the safety standard previously set by both U.S. and international standards
bodies. The design of the radio complies with the FCC guidelines and these international standards.
Never allow children to operate the radio without adult supervision and the knowledge of the following guidelines.
WARNING! It is up to the user to properly operate this radio transmitter to insure safe operation. Please adhere to
the following:
Use only the supplied or an approved antenna. Unauthorized antennas, modifications, or attachments could impair
call quality, damage the radio, or result in violation of FCC regulations.
Do not use the radio with a damaged antenna.
If a damaged antenna comes into contact with the skin, a minor burn may result. Please contact your local dealer
for a replacement antenna.
Hand-held Operation (Held-to-Face)
This device was evaluated for typical hand-held (held-to- face) operations with a 1 inch spacing from the front of
the radio. For hand-held operation, the radio should be held 1 inch from the user's face in order to comply with
FCC RF exposure requirements.
For more information about RF exposure, please visit the FCC web site at www.fcc.gov.
Body-worn Operation
This device was evaluated for body-worn operations with the supplied belt-clip accessory. (All necessary
accessories are included in the package; any additional or optional accessories are not required for compliance
with the guidelines.) Third party accessories (unless approved by the manufacturer) should be avoided as these
might not comply with FCC RF exposure guidelines.
For more information about RF exposure, please visit the FCC web site at www.fcc.gov.
1
GMRS Communication
This GMRS (General Mobile Radio Service) feature is a land-mobile service available for short-distance, two-way
communications in the USA. You must have a valid FCC license to communicate on these channels. The
GMRS/FRS frequencies that radio this radio uses are set aside for communicating with others while hiking, biking,
and working; keeping track of family and friends at a crowded public event; checking with travel companions in
another car; talking with neighbors; arranging meeting spots with others while shopping at the mall. Licensed
users will be issued a call sign by the FCC, which should be used for station identification when operating this
radio. GMRS users should also cooperate by engaging in permissible transmissions only, avoiding channel
interference with other GMRS users, and being prudent with the length of their transmission time.
FCC License Required
This two-way radio operates on GMRS (General Mobile Radio Service) frequencies which require an FCC
(Federal Communications Commission) license. A user must be licensed prior to transmitting on the GMRS band
with this radio. Serious penalties could result for unlicensed use of GMRS channels, in violation of FCC rules.
Operation of this radio is subject to additional rules specified in 47 C.F.R. Part 95. For licensing information and
application forms, please call the FCC Hotline at 800418-FORM. Request form #159 and form #605. Questions
regarding the license application should be directed to the FCC at 888-CALL-FCC. Additional information is
available on the FCC’s website at www.fcc.gov.
NOTE: Even if you operate this radio on FRS (Family Radio Service) channels at low power (0.5 watt), you are
required to have an FCC license. Because this radio operates in the 0.5 to 5 watt GMRS power range all GMRS
rules apply and will require you have a GMRS license even for FRS (Family Radio Service) communication.
Normal FRS only radios operate at a maximum power of 0.5 watt (500 mill watt) power and have an integral
(non-detachable) antenna.
FCC Warnings
Replacement or substitution of transistors, regular diodes or other parts of a unique nature, with parts other than
those recommended by Pofung may cause a violation of the technical regulations of part 95 of the FCC rules, or
violation of type acceptance requirements of part 2 of the rules.
1.2 Content of the packaging
• 1 RB27 transceiver • 1 Li-Ion battery pack 1500mAh 7.4V
• 1 Fast desktop charger • 1 Wall adaptor
• 1 Belt clip • Antenna
*If any item is missing, please verify with your Pofung dealer.
1.3 Main features
• Scan receiving frequency band: 136-174 & 400-520MHz
• 23 GMRS & 7 FRS Channels • Output power: 5W
• 10 Selectable Call/Call Alerts • 11 Channels NOAA Weather Radio
• 258 Privacy Codes (50 CTCSS Tones and 208 DCS Codes) • 1750Hz tone for repeaters
• SOS Emergency function • FM radio receiver (88-108MHz)
• Channel Monitor, Channel Scan, Dual Watch functions • TOT (Time out timer)30/60/90/120/150/180s
• CTCSS and DCS codes research • Busy Channel Lockout function (BCL)
• Hands-Free Operation (VOX) • Power HI/ LO Settings
• Frequency step: 12.5KHz • Squelch adjustable in 9 levels
• VOICE: Vocal indication of the function selected • Keypad lock
• Low battery voice indicator • Battery Saver
• LED Flashlight • Support USB (Type-C) charging
• Li-Ion 1500mAh battery pack • 2pin Kenwood accessory jack
• Up to 8 Mile Range*
*Range may vary depending on environmental and/or topographical conditions.
About Range
Your RB27 Series radios are designed to give you maximum range under optimum conditions.
• Maximum Range: Little to No sight Obstruction.
2

• Medium Range: Partial Obstruction to line of sight.
• Short Range: Major Obstruction to Ling of Sight.
Optimum Conditions are:
• Over water
• Open rural areas without obstructions
• Flat areas where you can see the other person
To ensure you get maximum range:
• Be sure to use fresh or fully charged batteries - low batteries will cause low power conditions.
• Be sure you are on a GMRS channel - FRS channels are restricted by the FCC to low power.
• Be sure to set your radio to use Hi power.
2. BATTERY INFORMATION
2.1 Charging the Battery Pack
The Li-ion battery pack is not charged at the factory; please charge it before use. Charging the battery pack for the
first time after purchase or extended storage (more than 2 months) may not bring the battery pack to its normal
maximum operating capacity. Best operation will require fully charging/ discharging the battery two or three times
before the operating capacity will reach its best performance. The battery pack life may be depleted when it’s
operating time decreases even though it has been fully and correctly charged. If this is the case, replace the
battery pack.
2.2 Charger Supplied
Please use the specified charger provided by RETEVIS. Other models may cause explosion and personal injury.
After installing the battery pack, and if the radio displays low battery with a voice prompt, please charge the
battery.
2.3 Use Caution with the Li-ion Battery
a. Do not short the battery terminals or throw the battery into a fire. Never attempt to remove the casing from the
battery pack, as RETEVIS cannot be held responsible for any accident caused by modifying the battery.
b. The ambient temperature should be between 5℃-40℃ (40˚F - 105˚F) while charging the battery. Charging
outside this range may not fully charge the battery.
c. Please turn off the radio before inserting it into the charger. It may otherwise interfere with correct charging.
d. To avoid interfering with the charging cycle, please do not cut off the power or remove the battery during
charging until the green light is on.
e. Do not recharge the battery pack if it is fully charged. This may shorten the life of the battery pack or damage
the battery pack.
f. Do not charge the battery or the radio if it is damp. Dry it before charging to avoid damage.
WARNING!
When keys, ornamental chain or other electric metals contact the battery terminal, the battery may become
damage or injure a human. If the battery terminals are short circuited it will generate a lot of heat. Take care when
carrying and using the battery. Remember to put the battery or radio into an insulated container. Do not put it into
a metal container.
2.4 How to Charge
Your radios include a charging cradle and battery packs. Follow these instructions to recharge your radios.
Make sure to turn the radio OFF before placing the radio in the charging cradle.
1) Connect the adapter's plug to DC IN 10V jack of the charging cradle and plug the other end into an AC outlet.
2) Set the charging cradle on the desk or tabletop and place the radio in the charging cradle with the keypad
facing forward.
3) Make sure that the LED illuminates. Charge the battery pack for 6 hours and remove the radio from the
charging cradle after charging.
Note:
• Use only the supplied battery and AC adapter or approved accessories from pofung.
• Charge time may vary depending on the battery life remaining.
• The battery must be installed for the unit to operate, even if the unit is also connected to external power.
• If battery power is low, you cannot operate the radio even using external power. Allow the battery to charge
before using. If you try to transmit while power is low, the radio will automatically turn off.
• For fastest charging, turn off the radio before charging.
3

NOTE:Trouble means battery too warm, battery short-circuited or charger short-circuited.
2.6 How to Store the Battery
a. If the battery needs to be stored, keep it in status of 80% discharged.
b. It should be kept in low temperature and dry environment.
c. Keep it away from hot places and direct sunlight.
» Do not short circuit the battery terminals.
» Never attempt to remove the casing from the battery pack.
» Never store the battery in unsafe surroundings, as a short may cause an explosion.
» Do not put the battery in a hot environment or throw it into a fire, as it may cause an explosion.
3. INSTALLATION OF ACCESSORIES
Before the radio is ready for use we need to attach the battery pack, as well as charge the battery.
3.1 Installing/ Removing the Antenna
a. Installing the Antenna: Screw the antenna into the connector on the top of the transceiver by holding the
antenna at its base and turning it clockwise until secure.
b. Removing the Antenna: Turn the antenna counter-clockwise to remove it.
3.2 Installing the belt clip
a. To install the BELT CLIP, slide the clip down into the slot on the back of the radio until the BELT CLIP LATCH
clicks.
b. To remove the BELT CLIP, press the LOCK TAB down, and then gently pull the belt clip up toward the top of the
radio.
3.3 Installing the battery pack
Before attaching or removing the battery make sure your radio is turned off by turning the power/volume knob all
the way counter-clockwise.
To install the battery pack:
a. With the back of the radio facing you, insert the bottom part of the Li-ion battery pack to the bottom of the radio.
b. Push down the Li-ion battery pack into the radio until the Battery Lock Tab locks into place.
To remove the battery pack:
a. Press the Battery Lock Tab downward until the Li-ion battery pack unlocks from the radio.
b. Pull the Li-ion battery pack away from the radio.
3.4 Installing the Additional Speaker/Microphone (Optional)
Pry open the rubber MIC-Headset jack cover and then insert the Speaker / Microphone plug into the double jack.
4. RADIO OVERVIEW
4.1 Main controls and parts of the radio
1.Antenna
2.LED Flashlight
3.Power Switch/ Volume control
4.Led: transmission (red) / reception (green)
5.[LAMP]: Press the key once to turn on the flashlight, Press and hold the key again to flash the flashlight, and
press the hand again to turn off the flashlight; Press and hold the key to turn on the audible and visual alarm
function
6.[PTT]:Transmit key, hold the key to speak, release the key after speaking, and receive incoming calls;
7.FM: Press to turn on the radio function, and press again to turn off the radio function;
2.5 LED Indicator
STATUS LED
No Battery Green and red alternately flashing
Charge Normally Red
Fully Charged Green
Trouble Red blinks fast for a long time
4

8.[SCAN]: Press to send a CALL ALERT signal; Press and hold to enter SCAN mode.
9.[MONI]: Press to enter weather forecast mode; Press and hold to enter MONITOR mode.
10.Battery release latch
11.Belt clip
12.Charging indicator: The red light is always on during charging, and the green light is always on when charging
is full.
13.Micro-USB Charging Port: DC5V USB input
14Speaker
15.External Speaker/Microphone Jack: allows the connection with external devices such as headsets,
microphones.
16.LCD Display
17.+/- keys: push to select functions or Menu. Channel mode, press + to switch up the channel; press - to switch
channel down.
18.Menu: press to enter the Menu functions and to confirm your selections.
19.[A/B] In standby mode, press this key to switch between main/sub channels between A/B channels. Press and
hold this key to lock or unlock the keyboard. Menu mode, Press the key to exit the menu; Press to enter SCAN
mode. Press and hold to turn KEY LOCK on/off.
4.2 LCD Display
5

5. BASIC OPERATIONS
5.1 Turning your Radio On and Off
To turn your radio ON, turn the rotary knob clockwise.
To turn your radio OFF, turn the rotary knob counterclockwise.
5.2 Setting the Volume
Increase volume by turning the rotary knob clockwise.
To decrease volume, turn the rotary knob counterclockwise.
Do not hold the radio close to your ear. If the volume is set to an uncomfortable level, it could hurt your ear.
5.3 Choosing a Channel
Your radio has 30 channels and 260 Privacy codes you can use to talk to others. In order to speak to someone,
both your radios must be set to the same channel and Privacy code.
Press [+/UP] to move up one channel at a time. Press and hold the key to scroll quickly up the channels.
Press [-/DOWN] to move down one channel at a time. Press and hold the key to scroll quickly down the channels.
5.4 Talking and Listening
All radios in your group must be set to the same channel and Sub-Code in order to communicate.
1. Hold your radio 2–3 cm from your mouth.
2. Press and hold the [PTT] key while speaking. The Transmit TX --- icon appears on the display.
3. Release the [PTT] key. You can now receive incoming calls. When you do, the Receive RX --- icon appears on
the display.
For maximum clarity, hold the radio 2 to 3 cm away and avoid covering the microphone while talking.
5.5 SCAN
Your RB27 can scan all 30 channels for activity. Pressing and holding [SCAN] key for 2 seconds to enter. Repeat
the same procedure to exit.
Transmit and receive instructions
In channel mode, display the current channel frequency;
In menu mode, display menu items;
Battery level indicator. When the battery is almost used up, the icon starts blinking and the
transmission is blocked. Charge the radio.
Indicates the channel number that you stored
Appears when a positive shift is activated.
Appears when a negative shift is enabled.
Activation of the VOX function
This icon indicates the keypad lock. To unlock it press A/B key.
This symbol appears during transmission (when you press the PTT key) or reception. When the
radio is in rx mode, the led will light up green, while in tx mode it will be red.
Press and release to transmit your unique Call Tone signal to another radio.
The other person will hear a two second call tone. This tone is used only to establish voice
communications.
This letter is displayed when the Dual Watch function is active.
Low power selection
Narrow bandwidth: N = narrow. When the wide (W) bandwidth is activated, no icon is displayed.
These symbols show that you set a CTCSS code in tx or rx. In tx mode it appears while you are
transmitting, while in rx mode it is shown also in stand-by condition.
These symbols show that you set a DCS code in tx or rx. In tx mode it appears while you are
transmitting, while in rx mode it is shown also in stand-by condition.
This icon indicates where the radio is operating, in which frequency or function. The arrow is
displayed close to the frequency band in use.
Enter weather forecast receiving mode (transmission prohibited in this mode)
WEATHE
6

Your radio will rapidly scan each of the 30 channels and stop on any active channel. Your radio will resume
scanning after 4 seconds when the channel is no longer active.
When you press the [PTT] key to transmit on an active channel, the scanning function will stop and remain on the
active channel for 5 seconds before resuming scan when [PTT] key is no longer pressed.
To resume scanning, quickly press the key.
5.6 Monitor
Press and hold the [MONI] key for around 2 second will let you hear noise so you can adjust the volume level of
the radio when not receiving a signal. This should be used to check activity on your current channel before
transmitting.
Press and hold the [MONI] key for 3 second again to get out of Monitor mode.
5.7 Keypad lock
This function locks the keypad to prevent accidental pressure of the controls.
To avoid accidentally changing the radio setting, press the [A/B] key for 2 seconds. The icon will appear on the
display. PTT, LAMP, MONITOR, and FM Radio keys will still be active. Repeat the same procedure to unlock the
keypad.
5.8 A/B switch
Press the [A/B] switch to select the master frequency.
5.9 Flashlight and Emergency Alert
This function is very useful for night illumination.
To turn it on press [LAMP]; push it again, the flash light will be strobe; push it again: it will turn off.
Open radio, press and hold the [LAMP] key for about 2 seconds to activate the sound and light alarm function.
Press [LAMP] key again to exit the alarm state.
5.10 FM Radio (FM)
The frequency range to listen to the radio is 78-108MHz.
With RB27 turned on, Press [FM] to turn on the radio. Select the desired radio frequency with
the [+UP]/[-DOWN] keys. Press [FM] to exit FM radio.
Note: while you are listening to the radio, the channel of A / B receiving signal will automatically
switch to the channel mode for normal transmitting and receiving.
When the signal disappears the radio will automatically switch again to FM radio mode.
5.11 NOAA Weather Radio
Your radio can receive weather broadcasts from the NOAA National Weather Service.
While using the Weather Radio, you are not able to receive GMRS communications.
1>To turn on the Weather Radio Broadcast mode, press [MONI]. appears.
2> Press [+UP]/[-DOWN] to select the desired number of weather channels.
3> To exit the Weather Radio Broadcast mode, press [MONI]. disappears.
NOTE: There are 11 NOAA channel frequencies available and these frequencies are common between the US
and Canada. You need to know what frequency is being transmitted in your location.
NOAA Weather Radio Frequency List:
5.12 1000Hz, 1450Hz, 1750Hz Tone-burst
To send out a tone-burst; you simultaneously will press a key while holding down the PTT. No further configuration
required using this feature.
The following configurations will transmit accordingly:
•[PTT] +[-DOWN] = Transmits 1450Hz Tone Burst
•[PTT] +[+UP] = Transmits 1750Hz Tone Burst
•[PTT] +[MENU] = Transmits 2100Hz Tone Burst
Chan. Freq.(MHz) Chan. Freq.(MHz)
WEATHER 1 162.550 WEATHER 7 162.525
WEATHER 2 162.400 WEATHER 8 161.650
WEATHER 3 162.475 WEATHER 9 161.775
WEATHER 4 162.425 WEATHER10 161.750
WEATHER 5 162.450 WEATHER11 162.000
WEATHER 6 162.500 --- ---
7

If you have the keypad lock enabled on your radio, you can still send a 1750Hz tone the regular way without
having to unlock your radio.
6. WORKING THE MENU SYSTEM
6.1 Basic use
Using the menu with arrow keys
1> Press the [MENU] key to enter the menu.
2> Use the [+UP] and [-DOWN] keys to navigate between menu items.
3>Once you find the desired menu item, press [MENU] again to select that menu item.
4>Use the [+UP] and [-DOWN] keys to select the desired parameter.
5>When you've selected the parameter you want to set for a given menu item;
a). To confirm your selection, press [MENU] and it will save your setting and bring you back to the main menu.
b). To cancel your changes, press [A/B] and it will reset that menu item and bring you out of the menu entirely.
6> To exit out of the menu at any time, press the [A/B] key.
6.2 Shortcut Menu operations
MENU No. Name(Full Name) LCD display Selectable
RXCODE
-Receiver
Privacy Codes
TXCODE
-Transmitter
Privacy Codes
SQL
- Squelch Level
LIGHT
-Back Light
BEEP
- Keypad Beep
VOX - VOX
TDR – Dual Watch
Operation
SAVE
- Battery Saving
OFF;67.0…D754N
The Privacy Codes is off, and the display is OFF. When
the display is OFF, press +key to select CTCSS with
priority; When the display is OFF, press - key to select
DCS with priority.
OFF;67.0…D754N
The Privacy Codes is off, and the display is OFF. When
the display is OFF, press +key to select CTCSS with
priority; When the display is OFF, press - key to select
DCS with priority.
.0-9 Levels
.0:Lowest
.9:Highest
.OFF
.ON
.KEY
.OFF
.ON
*Allows audible confirmation of a key press.
.OFF will turn off VOX function.
.1:Lowest Sensitivity
.5:Highest Sensitivity
OFF ON
*Monitor [A] and [B] at the same time. Activate the dual
watch, and the screen will display the ‘S’ icon.
OFF:
ON:
1
2
3
4
5
6
7
8
8

6.3 Menu settings
6.3.1 Receiving with Privacy Codes (RXCODE) - MENU 01
You can configure different Receiving Privacy Codes for each channel. The selected Privacy Code may be
different for each channel.
Note: Selecting a Privacy Code of "OFF" will disable the Privacy feature. To communicate between two RB27
radios, all radios in your group must be set to the same channel and Privacy Code selections.
The Receiving Privacy Codes setting steps are as follows:
1> Press [MENU] key to enter the main menu, and press [+UP]/[-DOWN] key to enter the MENU 01.
2> Press [MENU] key again to enter the RXCODE menu;
3> Press [+UP]/[-DOWN] key to select the Privacy Code, and the selection range is OFF / 67.0~754N.
Note: The state of the Privacy Code is off, and the display is OFF. When the display is OFF, press the [+UP] key to
select CTCSS with priority, range 67~254.1Hz (50 groups in total); when the display is OFF, press the [-DOWN]
key to select DCS with priority, range D754I-023N (104 groups in total).
During the selection process, Pressing and holding the [+UP]/[-DOWN] key to quickly search for the sub-tone
code.
4> Press [MENU] key to confirm;
5> Press [PTT] or [A/B] key to exit the menu mode.
6.3.2 Transmitting with Privacy Codes (TXCODE) --- MENU 02
You can configure different transmission Privacy Codes for each channel. The selected Privacy Code may be
different for each channel.
MENU No. Name(Full Name) LCD display Selectable
TOT
- Time-Out-Timer
BCLO
-Busy Channel
Lock-out
RING
-Call Tone Select
VOICE
-Voice Reminding
RESET
-Restore defaults
OFF,30,60…180S
*This feature provides a safety switch that limits
transmission time to a programmed value. This will
promote battery conservation by not allowing you to
make excessively long transmissions, and in the event
of a stuck PTT switch it can prevent interference to
other users as well as battery depletion
OFF ON
*Disables the[PTT] key on a channel that is already in
use. The transceiver will sound a beep tone and will not
transmit if the[PTT] key is pressed when a channel is
already in use.
.OFF- close call tone;
.Select 1-10 process, you can listen to the call tone.
.OFF - turn off voice prompts;
.CHI- voice prompt is Chinese;
.ENG- voice prompts in English.
*Allows audible voice confirmation of a key press.
*Resets the radio to factory defaults.
9
10
11
12
13
9

Note: Selecting a Privacy Code of "OFF" will disable the Privacy feature. To communicate between two RB27
radios, all radios in your group must be set to the same channel and Privacy Code selections.
The transmission Privacy Codes setting steps are as follows:
1> Press [MENU] key to enter the main menu, and press [+UP]/[-DOWN] key to enter the MENU 02.
2> Press [MENU] key again to enter the TXCODE menu;
3> Press [+UP]/[-DOWN] key to select the Privacy Code, and the selection range is OFF / 67.0~754N.
Note: The state of the Privacy Code is off, and the display is OFF. When the display is OFF, press the [+UP] key to
select CTCSS with priority, range 67~254.1Hz (50 groups in total); when the display is OFF, press the [-DOWN]
key to select DCS with priority, range D754I-023N (104 groups in total).
During the selection process, Pressing and holding the [+UP] / [-DOWN] key to quickly search for the sub-tone
code.
4> Press [MENU] key to confirm;
5> Press [PTT] or[A/B] key to exit the menu mode.
6.3.3 Squelch level (SQL) - MENU 03
This function turns on the Squelch when the signal is strong; the Squelch will stay off when the signal is weak. Set
the same DCS codes of your group and turn on the squelch.
By setting the level too high, you may not receive the weak signals; while by setting it too low you may receive
noises or undesired signals.
NOTE: This transceiver has 10 (0-9) available levels: 0 means that the Squelch is turned on. From level 1 to level
9 you will have different levels of noises reduction.
The higher is the level, the louder will be the Squelch.
The steps for setting the squelch level are as follows:
1> Press [MENU] key to enter the main menu, and press [+UP]/[-DOWN] key to enter the MENU 03.
2> Press [MENU] key again to enter the SQL menu;
3> Press [+UP]/[-DOWN] key to select the squelch level, select the range 0, 1-9
4> Press [MENU] key to confirm;
5> Press [PTT] or [A/B] key to exit the menu mode.
6.3.4 Backlight intensity (LIGHT) - MENU 04
The LCD backlight is convenient for you to use at night or in a dark environment. The LCD backlight setting steps
are as follows:
1> Press [MENU] key to enter the main menu, and press [+UP]/[-DOWN] key to enter the MENU 04.
2> Press [MENU] key again to enter the LIGHT menu;
3> Press [+UP]/[-DOWN] key to select the LCD backlight switch, and the selection range is ON/OFF/KEY;
Note: ON-backlight will be always on; OFF-backlight will be always off; KEY-touch key will automatically activate
the backlight. Without any key operation, the backlight will be automatically turned off after a delay of 5 seconds.
4> Press [MENU] key to confirm;
5> Press [PTT] or [A/B] key to exit the menu mode.
6.3.5 Beep tone (BEEP) - MENU 05
If you enable this function, every time a key is pressed, you will hear a Beep tone. You can set it as follows:
1> Press [MENU] key to enter the main menu, and press the [+UP]/[-DOWN] key to enter the MENU 05.
2> Press [MENU] key again to enter the BEEP menu;
3> Press [+UP]/[-DOWN] key to select the BEEP switch, and the selection range is ON/OFF;
Note: ON-turn on the key prompt sound; OFF-turn off the key prompt sound.
4> Press [MENU] key to confirm;
5> Press [PTT] or [A/B] key to exit the menu mode.
6.3.6 VOX (VOX) - MENU 06
Your radio has 5 VOX level settings: (OFF/1~5).
This function allows hands-free conversations: just speak in the direction of the microphone and the communica-
tion will be automatically activated.
The steps for setting up VOX voice control transmission are as follows:
1> Press [MENU] key to enter the main menu, and press the [+UP]/[-DOWN] key to enter the MENU 06.
2> Press [MENU] key again to enter the VOX menu;
3> Press [+UP]/[-DOWN] key to select the VOX switch and sensitivity, the selection range is OFF, 1~5;
Note: Level 5 low sensitivity, use under high background noise; Level 1 high sensitivity, use under low background
noise. Select ‘OFF’ will turn off the VOX function. After the VOX function is turned on, the screen will display the
’VOX‘icon.
10

4> Press [MENU] key to confirm;
5> Press [PTT] or [A/B] key to exit the menu mode.
6.3.7 Dual Watch function (TDR) - Menu 07
This function is a dual-channel monitor scan, which can monitor the A and B segments in the normal mode. If a
signal is received on the monitoring channel, the scan stays on this channel. The steps for setting the
dual-frequency waiting function are as follows:
1> Press [MENU] key to enter the main menu, press [+UP]/[-DOWN] key to enter the MENU 07.
2> Press [MENU] key again to enter the TDR menu;
3> Press [+UP]/[-DOWN]key to select the dual-frequency wait switch, and the selection range is ON/OFF;
Note: OFF-turn off the dual watch function; ON-turn on the dual watch function.
Turn on the dual watch function; the screen will display the 'S' icon.
4> Press [MENU] key to confirm;
5> Press [PTT] or [A/B] key to exit the menu mode.
6.3.8 Power save (SAVE) - MENU 08
To save battery power, this function can turn off the transceiver when no signal is received.
1> Press [MENU] key to enter the main menu, press [+UP]/[-DOWN] key to enter the MENU 08.
2> Press [MENU] key again to enter the SAVE menu;
3> Press [+UP]/[-DOWN] key to select the power saving mode, and the selection range is ON/OFF;
Note: ON-turn on the power saving mode; OFF-turn off the power saving mode.
4> Press [MENU] key to confirm;
5> Press [PTT] or [A/B] key to exit the menu and return to normal operation mode.
6.3.9 Time out Timer (TOT) - MENU 09
The TOT function is used to prevent a too long transmission. This function temporarily blocks transmissions if the
radio has been used beyond the maxi- mum time permitted. Once reached the preset timer, the radio will be
forced in reception mode. The transmission time can be set in 6 levels with 30 seconds each (between 30 and 180
seconds). The setting steps are as follows:
1> Press [MENU] key to enter the main menu, press [+UP]/[-DOWN] key to enter the MENU 09.
2> Press [MENU] key again to enter the TOT menu;
3> Press [+UP] / [-DOWN] key to select the transmission time limit, the selection range is
OFF/30S/60S/90S/120S/150S/180S;
4> Press [MENU] key to confirm;
5> Press [PTT] or [A/B] key to exit the menu mode.
6.3.10 Busy channel lockout (BCLO) - MENU 10
When this function is active, if you select a busy channel and press the PTT, the transceiver will not transmit.
1> Press [MENU] key to enter the main menu, press the [+UP]/[-DOWN] key to enter the MENU 10.
2> Press [MENU] key again to enter the BCLO menu;
3> Press [+UP]/[-DOWN] key to select the switch and select the range ON/OFF;
4> Press [MENU] key to confirm;
5> Press [PTT] or [A/B] key to exit the menu mode.
6.3.11 Call Tone Select (RING)- MENU 11
This setting will allow you to transmit a unique Call Tone alert to identify your radio when you transmit messages.
You can select from one of 10 different Call Tone signals. To Set Call Tone:
1> Press [MENU] key to enter the main menu, press [+UP]/[-DOWN] key to enter the MENU 11.
2> Press [MENU] key again to enter the RING menu;
3> Press the [+UP]/[-DOWN] key to select a different Call Tone. An example of each call tone will sound for 1.5
seconds.
Note: OFF-turn off the call reminder tone; during the selection of 1-10, you can listen to the call tone.
Before you initiate a voice intercom, you can press the [CALL] key to remind the call.
4> Press [MENU] again to confirm;
5> Press [PTT] or [A/B] key to exit the menu and return to normal operation mode.
6.3.12 VOICE Selection (VOICE) - MENU 12
Your RB27 radio has voice prompt function for channel and function operation, you can choose to switch voice
function or prompt language type. The setting steps are as follows:
1> Press [MENU] key to enter the main menu, and press [+UP]/[-DOWN] key to enter the MENU 12.
11

2> Press [MENU] key again to enter the VOICE menu;
3> Press [+UP]/[-DOWN] key to OFF or Chinese and English selection, the selection range is OFF/CHI/ENG
Note: OFF-turn off the voice prompts function; CHI-prompt voice is Chinese; ENG-prompt voice is English.
After turning off the voice prompt function, there will be a beep prompt when you select a channel or menu setting.
4> Press [MENU] key to confirm;
5> Press [PTT] or [A/B] key to exit the menu mode.
6.3.13 Restore factory settings (RESET)-MENU 13
Your RB27 radio has a reset function. To reset the radio, proceed as follows:
1>Press [MENU] key to enter the main menu, and press [+UP]/[-DOWN] key to enter the MENU 13, the screen
displays RESET.
2> Press [MENU] key to confirm, and the radio resets the parameters.
7. ON-LINE SERVICE AND SUPPORT
The Pofung website provides additional information about obtaining service or support for the Pofung line of
FCC Licensing Information This pofung radio operates on Commercial/ Land Mobile frequencies which require a
license from the Federal Communications Commission (FCC) for business, personal, education and recreational
use. To obtain forms, call the FCC forms hotline at: 1-800-418-3676 or go to http://www.fcc.gov For questions
concerning commercial licensing, contact the FCC at 1-888CALL-FCC (1-888-225-5322).
Appendix A. – Trouble shooting guide
Phenomena Analysis Solution
You cannot turn
on the radio.
During receiving,
the voice is weak
or intermittent.
You cannot
communicate with
other group
members.
You hear
unknown voices
or noise.
You are unable to
hear anyone
because of too
much noise and
hiss.
The radio keeps
transmitting.
The battery may be installed improperly.
The battery power may run out.
The battery may suffer from poor contact
caused by dirty or damaged battery contacts.
The battery voltage maybe low.
The volume level may be low.
The antenna maybe loose or maybe installed
incorrectly.
The speaker maybe blocked.
The frequency or signaling type maybe
inconsistent with that of other members.
You may be too far away from other
members.
You may be interrupted by radios using the
same frequency.
The radio in analog mode maybe set with no
signaling.
You may be too far away from other members.
You may be in an unfavorable position. For
example, your communication may be
blocked by high buildings or blocked in an
underground area.
It may be the result of external disturbance
(such as electromagnetic interference).
VOX may be turned on or the headset is not
installed in place
Remove and reattach the battery.
Recharge or replace the battery.
Clean the battery contacts or replace the
battery.
Recharge or replace the battery.
Increase the volume.
Turnoff the radio, and then remove and
reattach the antenna.
Clean the surface of the speaker.
Verify that your TX/RX frequency and
signaling type are correct.
Move towards other members.
Change the frequency, or adjust the
squelch level.
Request your dealer to set signaling for
the current channel to avoid interference
Move towards other members.
Move to an open and flat area, restart
the radio, and try again.
Stay away from equipment that may
cause interference.
Turn off the VOX function. Check that
the headphones are in place.
12

Appendix B. - Technical Specifications
General
Frequency Range GMRS (RX & TX)
Memory Channel 30 GMRS Channels + 11 NOAA Weather
Operation Voltage DC7.4V ±10%
Battery Capacity 1500mAH (Li-Ion)
Frequency Stability ±2.5ppm
Operating Temperature -20℃to +60℃
Mode of Operation Simplex
Antenna Impedance 50ohm
Transmitter Part
Spurious Emission 13dBm<1GHz,-13dBm>1GHz
Adjacent Channel Power 60dB @ 12.5 KHz
Transmission current ≤600mA
Receiver Part
Receive Sensitivity 0.25μV (12dB SINAD)
Rated Audio Power Output 1W @16ohms
Receive current ≤350mA
Rated Audio Distortion ≤5%
NOTE: All specifications may be modified without prior notice or liability. Thank you.
13

1
2
3
4
5
6
7
8
9
10
11
12
13
14
15
16
17
18
19
20
21
22
23
24
25
26
27
28
29
30
462.5625
462.5875
462.6125
462.6375
462.6625
462.6875
462.7125
467.5675
467.5875
467.6125
467.6375
467.6625
467.6875
467.7125
462.5500
462.5750
462.6000
462.6250
462.6500
462.6750
462.7000
462.7250
467.5500
467.5750
467.6000
467.6250
467.6500
467.6750
467.7000
467.7250
462.5625
462.5875
462.6125
462.6375
462.6625
462.6875
462.7125
467.5675
467.5875
467.6125
467.6375
467.6625
467.6875
467.7125
462.5500
462.5750
462.6000
462.6250
462.6500
462.6750
462.7000
462.7250
462.5500
462.5750
462.6000
462.6250
462.6500
462.6750
462.7000
462.7250
5
5
5
5
5
5
5
0.5
0.5
0.5
0.5
0.5
0.5
0.5
5
5
5
5
5
5
5
5
5
5
5
5
5
5
5
5
12.5
12.5
12.5
12.5
12.5
12.5
12.5
12.5
12.5
12.5
12.5
12.5
12.5
12.5
12.5
12.5
12.5
12.5
12.5
12.5
12.5
12.5
12.5
12.5
12.5
12.5
12.5
12.5
12.5
12.5
67.0
118.8
127.3
131.8
136.5
141.3
146.2
D243N
D032N
D047N
D051N
D053N
D065N
D116N
123
D743I
D332I
127.3
D243I
D606N
D731I
136.5
136.5
136.5
136.5
136.5
136.5
136.5
136.5
136.5
Channel TX RX Power Bandwidth Subaudio
Frequency
14

RF ENERGY EXPOSURE AND PRODUCT SAFETY GUIDE FOR PORTABLE
TWO-WAY RADIOS
Before using this radio, read this guide which contains important operating instructions for
safe usage and rf energy awareness and control for compliance with applicable standards
and regulations.
ATTENTION!
This two-way radio uses electromagnetic energy in the radio frequency (RF) spectrum to provide communications
between two or more users over a distance. RF energy, which when used improperly, can cause biological
damage.
All Retevis two-way radios are designed, manufactured, and tested to ensure they meet government-established
RF exposure levels. In addition, manufacturers also recommend specific operating instructions to users of
two-way radios. These instructions are important because they inform users about RF energy exposure and
provide simple procedures on how to control it.
Please refer to the following websites for more information on what RF energy exposure is and how to control
your exposure to assure compliance with established RF exposure limits:http://www.who.int/en/
Local Government Regulations
When two-way radios are used as a consequence of employment, the Local Government Regulations requires
users to be fully aware of and able to control their exposure to meet occupational requirements. Exposure
awareness can be facilitated by the use of a product label directing users to specific user awareness information.
Your Retevis two-way radio has a RF Exposure Product Label. Also, your Retevis user manual, or separate safety
booklet includes information and operating instructions required to control your RF exposure and to satisfy
compliance requirements.
Radio License
Governments keep the radios in classification, business two-way radios operate on radio frequencies that are
regulated by the local radio management departments (FCC, ISED, OFCOM, ANFR, BFTK, Bundesnetzagen-
tur...).To transmit on these frequencies, you are required to have a license issued by them. The detailed
classification and the use of your two radios, please contact the local government radio management
departments.
Use of this radio outside the country where it was intended to be distributed is subject to government regulations
and may be prohibited.
Unauthorized modification and adjustment
Changes or modifications not expressly approved by the party responsible for compliance may void the user’s
authority granted by the local government radio management departments to operate this radio and should not be
made. To comply with the corresponding requirements, transmitter adjustments should be made only by or under
the supervision of a person certified as technically qualified to perform transmitter maintenance and repairs in the
private land mobile and fixed services as certified by an organization representative of the user of those services.
Replacement of any transmitter component (crystal, semiconductor, etc.) not authorized by the local government
radio management departments equipment authorization for this radio could violate the rules.
FCC Requirements:
This device complies with part 15 of the FCC Rules. Operation is subject to the condition that this device does not
cause harmful interference. (Licensed radios are applicable);
This device complies with part 15 of the FCC Rules. Operation is subject to the following two conditions: (Other
devices are applicable)
(1) This device may not cause harmful interference, and
(2) this device must accept any interference received, including interference that may cause undesired operation.
NOTE:
•This equipment has been tested and found to comply with the limits for a Class A digital device, pursuant to part
15 of the FCC Rules. These limits are designed to provide reasonable protection against harmful interference
when the equipment is operated in a commercial environment. This equipment generates, uses, and can radiate
radio frequency energy and, if not installed and used in accordance with the instruction manual, may cause
harmful interference to radio communications. Operation of this equipment in a residential area is likely to cause
harmful interference in which case the user will be required to correct the interference at his own expense.
15

•This equipment has been tested and found to comply with the limits for a Class B digital device, pursuant to part
15 of the FCC Rules. These limits are designed to provide reasonable protection against harmful interference in a
residential installation. This equipment generates, uses and can radiate radio frequency energy and, if not
installed and used in accordance with the instructions, may cause harmful interference to radio communications.
However, there is no guarantee that interference will not occur in a particular installation. If this equipment does
cause harmful interference to radio or television reception, which can be determined by turning the equipment off
and on, the user is encouraged to try to correct the interference by one or more of the following measures:
—Reorient or relocate the receiving antenna.
—Increase the separation between the equipment and receiver.
—Connect the equipment into an outlet on a circuit different from that to which the receiver is connected.
—Consult the dealer or an experienced radio/TV technician for help.
CE Requirements:
•(Simple EU declaration of conformity) Shenzhen Retevis Technology Co., Ltd. declares that the radio equipment
type is in compliance with the essential requirements and other relevant provisions of RED Directive 2014/53/EU
and the ROHS Directive 2011/65/EU and the WEEE Directive 2012/19/EU; the full text of the EU declaration of
conformity is available at the following internet address: www.retevis.com.
•Restriction Information
This product can be used in EU countries and regions, including: Belgium (BE), Bulgaria (BG), Czech Republic
(CZ), Denmark (DK), Germany (DE), Estonia (EE), Ireland (IE), Greece (EL), Spain (ES), France (FR), Croatia
(HR), Italy (IT), Cyprus (CY), Latvia (LV), Lithuania (LT), Luxembourg (LU), Hungary (HU), Malta (MT),
Netherlands (NL), Austria (AT), Poland (PL), Portugal (PT), Romania (RO), Slovenia (SI), Slovakia (SK), Finland
(FI), Sweden (SE) and United Kingdom (UK).
For the warning information of the frequency restriction, please refer to the package or manual section.
•Disposal
The crossed-out wheeled-bin symbol on your product, literature, or packaging reminds you that in the
European Union, all electrical and electronic products, batteries, and accumulators (rechargeable ba-
tteries) must be taken to designated collection locations at the end of their working life. Do not dispose
of these products as unsorted municipal waste. Dispose of them according to the laws in your area.
IC Requirements:
Licence-exempt radio apparatus
This device contains licence-exempt transmitter(s)/receiver(s) that comply with Innovation, Science and Economic
Development Canada’s licence-exempt RSS(s). Operation is subject to the following two conditions:
(1) This device may not cause interference.
(2) This device must accept any interference, including interference that may cause undesired operation of the
device.
Le présent appareil est conforme aux CNR d’Industrie Canada applicables aux appareils radio exempts de
licence. L’exploitation est autorisée aux deux conditions suivantes :
(1) l’appareil ne doit pas produire de brouillage;
(2) l’utilisateur de l’appareil doit accepter tout brouillage radioélectrique subi, même si le brouillage est susceptible
d’en compromettre le fonctionnement.
RF Exposure Information
•DO NOT operate the radio without a proper antenna attached, as this may damage the radio and may also cause
you to exceed RF exposure limits. A proper antenna is the antenna supplied with this radio by the manufacturer or
an antenna specifically authorized by the manufacturer for use with this radio, and the antenna gain shall not
exceed the specified gain by the manufacturer declared.
•DO NOT transmit for more than 50% of total radio use time, more than 50% of the time can cause RF exposure
compliance requirements to be exceeded.
•During transmissions, your radio generates RF energy that can possibly cause interference with other devices or
systems. To avoid such interference, turn off the radio in areas where signs are posted to do so.
•DO NOT operate the transmitter in areas that are sensitive to electromagnetic radiation such as hospitals,
aircraft, and blasting sites.
•Portable Device, this transmitter may operate with the antenna(s) documented in this filing in Push-to-Talk and
body-worn configurations. RF exposure compliance is limited to the specific belt-clip and accessory configurations
as documented in this filing and the separation distance between user and the device or its antenna shall be at
least 2.5 cm.
16

•Mobile Device, during operation, the separation distance between user and the antenna subjects to actual
regulations, this separation distance will ensure that there is sufficient distance from a properly installed
externally-mounted antenna to satisfy the RF exposure requirements.
•Occupational/Controlled Radio, this radio is designed for and classified as “Occupational/Controlled Use Only”,
meaning it must be used only during the course of employment by individuals aware of the hazards, and the ways
to minimize such hazards; NOT intended for use in a General population/uncontrolled environment.
•General population/uncontrolled Radio, this radio is designed for and classified as “General population/uncon-
trolled Use”.
RF Exposure Compliance and Control Guidelines and Operating Instructions
To control your exposure and ensure compliance with the occupational/controlled environment exposure limits,
always adhere to the following procedures.
Guidelines:
•User awareness instructions should accompany the device when transferred to other users.
•Do not use this device if the operational requirements described herein are not met.
Operating Instructions:
•Transmit no more than the rated duty factor of 50% of the time. To Transmit (Talk), push the Push to Talk (PTT)
button. To receive calls (listen), release the PTT button. Transmitting 50% of the time, or less, is important
because the radio generates measurable RF energy exposure only when transmitting in terms of measuring for
standards compliance.
•Transmit only when people outside the vehicle are at least the recommended minimum lateral distance away
from a properly installed according to installation instructions, externally mounted antenna.
•When operating in front of the face, worn on the body, always place the radio in a Retevis approved clip, holder,
holster, case, or body harness for this product. Using approved body-worn accessories is important because the
use of Non-Retevis approved accessories may result in exposure levels, which exceed the IEEE/ICNIRP RF
exposure limits.
Hand-held Mode
• Hold the radio in a vertical position with the microphone (and other parts of the radio including the
antenna) at least 2.5 cm (one inch) away from the nose or lips. The antenna should be kept away
from the eyes. Keeping the radio at a proper distance is important as RF exposure decreases with
increasing distance from the antenna.
Phone Mode
•When placing or receiving a phone call, hold your radio product as you would a wireless telephone. Speak
directly into the microphone.
Electromagnetic Interference/Compatibility
NOTE: Nearly every electronic device is susceptible to electromagnetic interference (EMI) if inadequately
shielded, designed, or otherwise configured for electromagnetic compatibility
Avoid Choking Hazard
Small Parts. Not for children under 3 years.
Turn off your radio power in the following conditions:
WARNING
•Turn off your radio before removing (installing) a battery or accessory or when charging battery.
•Turn off your radio when you are in a potentially hazardous environments: Near electrical blasting
caps, in a blasting area, in explosive atmospheres (inflammable gas, dust particles, metallic
powders, grain powders, etc.).
•Turn off your radio while taking on fuel or while parked at gasoline service stations.
To avoid electromagnetic interference and/or compatibility conflicts
•Turn off your radio in any facility where posted notices instruct you to do so, hospitals or health care
facilities (Pacemakers, Hearing Aids and Other Medical Devices) may be using equipment that is
sensitive to external RF energy.
•Turn off your radio when on board an aircraft. Any use of a radio must be in accordance with
applicable regulations per airline crew instructions.
17
Table of contents
Other Retevis Two-way Radio manuals

Retevis
Retevis TWINTALKER User manual

Retevis
Retevis RT10 User manual

Retevis
Retevis RT602 User manual

Retevis
Retevis RT37 User manual

Retevis
Retevis RT41 User manual

Retevis
Retevis RT36 User manual

Retevis
Retevis RT-35 User manual

Retevis
Retevis RT22 User manual

Retevis
Retevis RB17 User manual

Retevis
Retevis RT32 User manual

Retevis
Retevis RT31 User manual

Retevis
Retevis RT642 User manual

Retevis
Retevis RB22 User manual

Retevis
Retevis RT29 User manual

Retevis
Retevis RT30 User manual

Retevis
Retevis NR10 User manual

Retevis
Retevis RT78 User manual

Retevis
Retevis RT66 User manual

Retevis
Retevis RB627B User manual

Retevis
Retevis RT95 User manual