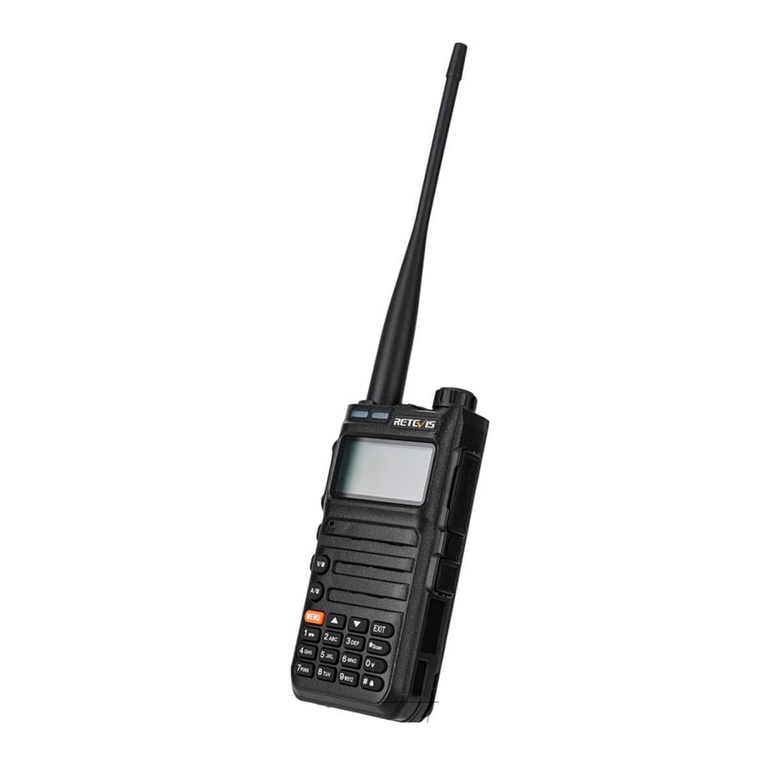
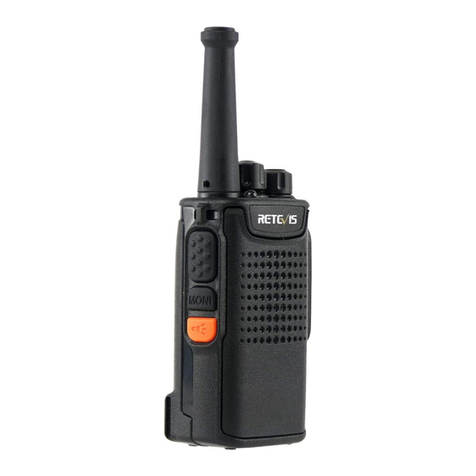
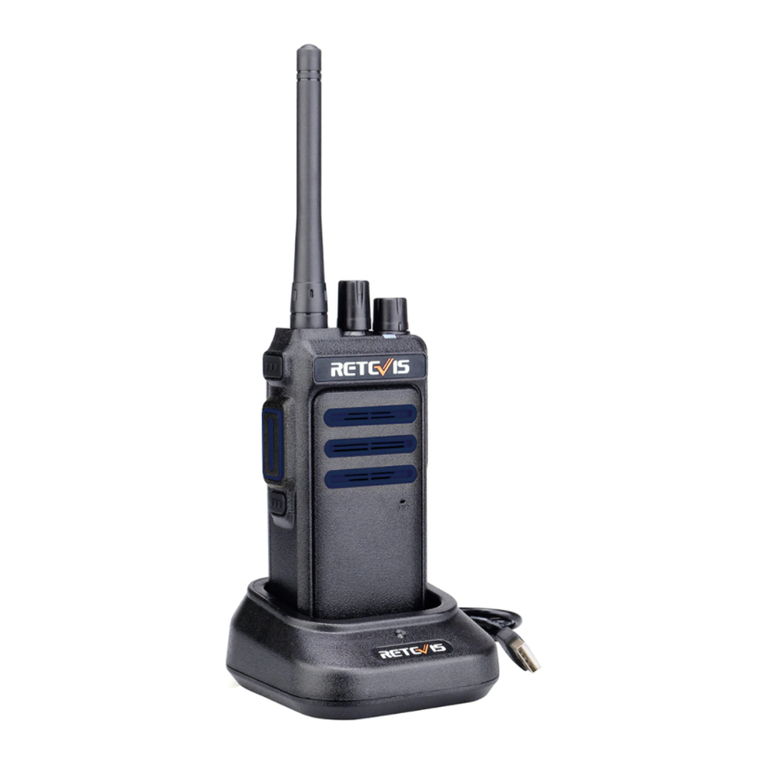
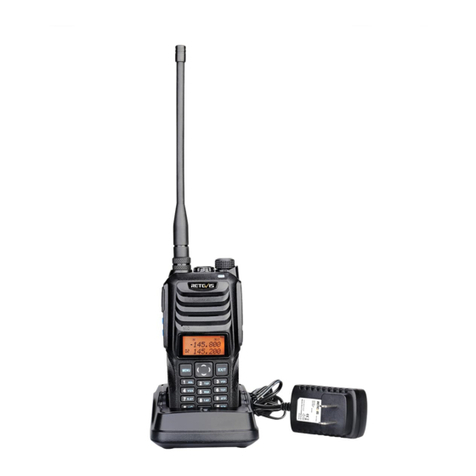
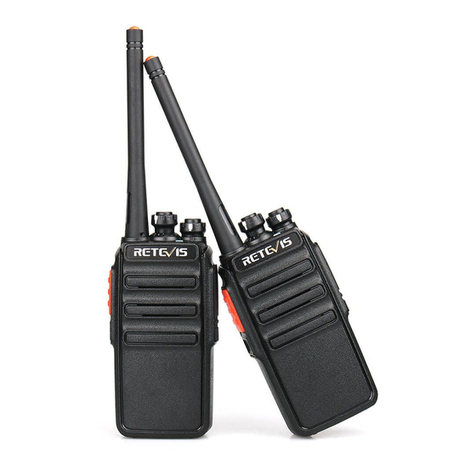
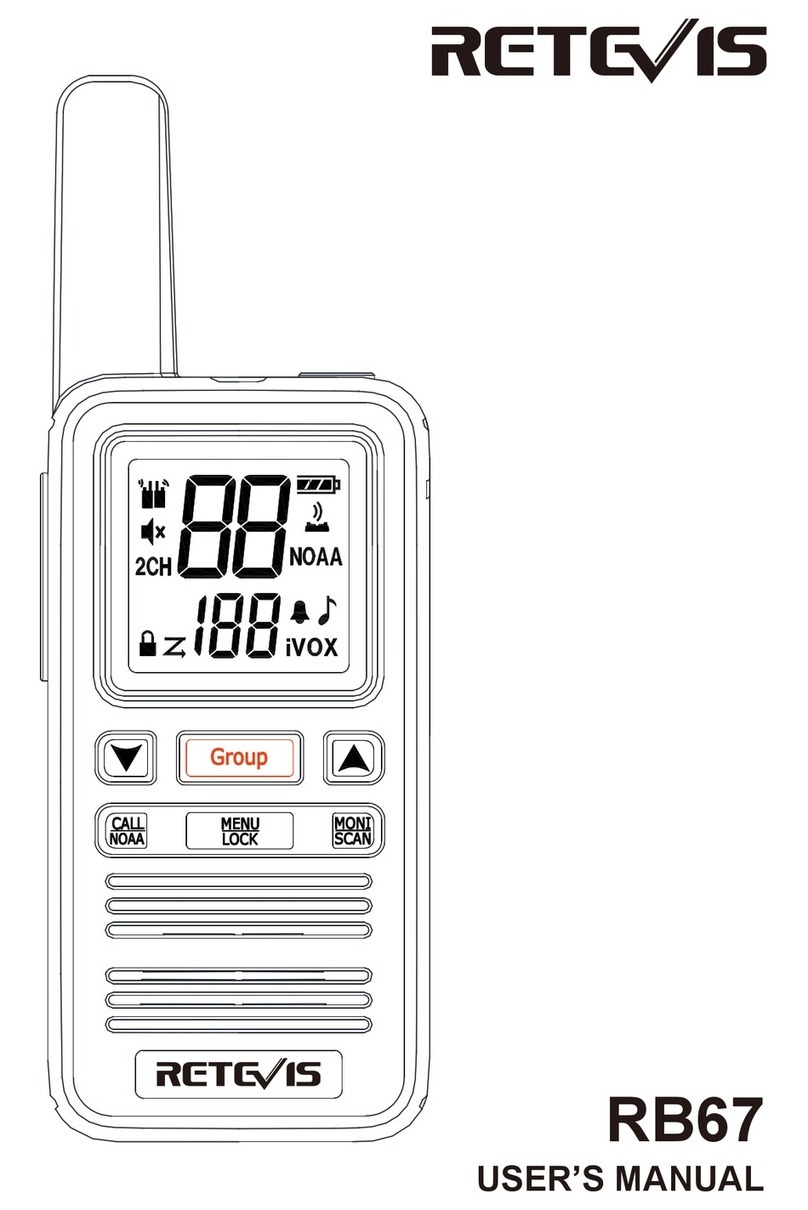
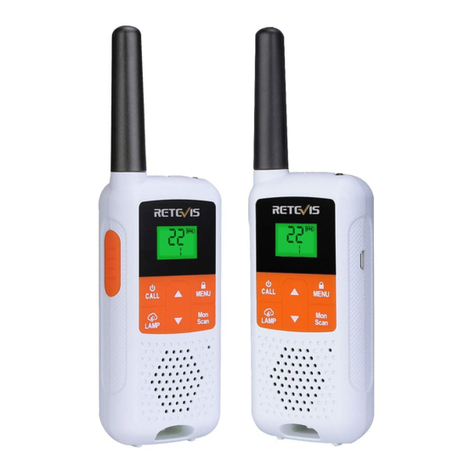
Retevis RB628 User manual

RB628
User Manual

CONTENTS
Features...........................................................................................
Buttons and functions....................................................................
LCD display.....................................................................................
Battery installation.........................................................................
Battery display and low battery warning......................................
Use the charger to charge.............................................................
Turn on/off the radio.......................................................................
Volume setting................................................................................
Transmit and receive......................................................................
TOT function...................................................................................
Set the channel...............................................................................
Tone code selection.......................................................................
Set the calling tone.........................................................................
Vox function....................................................................................
Power...............................................................................................
Scan function..................................................................................
Roger beep......................................................................................
Button control.................................................................................
Lock key..........................................................................................
Power saving function...................................................................
Headphone function.......................................................................
Programme......................................................................................
Specification Table.........................................................................
Frequency table(PMR)....................................................................
DE(14-28)
FR(29-42)
IT (43-56)
ES(57-70)
01
01
02
02
02
03
03
03
03
03
03
04
04
04
04
05
05
05
05
06
06
06
07
07

Features
• LCD backlight display
• 16 channels
• 121 subtone codes (38 analog, 83 digital)
• Busy lock
• Headphone jack
• 10 optional calling tones
•(VOX)Vox function
• Roger beep
• Companding function
• Battery display
• Scanning function
• Keypad lock
• Voice prompt
• Power saving function
• Low battery alarm
• Keypad tones
• TOT function
• Weather forecast stations (please refer to the weather forecast frequency
table), only the US version and the Canadian version are supported.
• Weather forecast function, only supported by the US and Canadian versions.
Buttons and functions
1
Antenna LCD display
Power on/off and
scan switch
Earpiece and
programme jack
Type-C charging port
Down/calling tone button
Lock and menu button
Speaker
PTT
Mic
UP/Monitor
mode

Battery installation
1) Battery: Li-ion battery.
2) Press the battery upwards to remove the battery.
3) Put the battery into the battery slot, pay attention to install the battery strictly
according to the positive + negative-instructions in the slot, and press down
firmly.
4) Reinstall the battery.
Battery display and low battery warning
The battery icon shows the battery level, from full display to space (0 battery).
The 0 battery reminds the user to charge in time, and is accompanied by a low
battery reminder (once 30 seconds). When the battery power is low, the intercom
will be shut down.
Note: When storing the radio for a long time, please remove the battery first.
Long-term corrosion of the battery will cause damage to the radio.
LCD display
Battery power
Scan
Lock
Status(tx/rx)
High power
Volume mute
Vox
2

Use the charger to charge
1) Make sure the radio is closed.
2) Insert the Type-c charging plug into the jack of the radio with the rechargeable
battery, and plug the other end of the charger into the power socket on the wall.
3) During the charging process, the battery symbol is displayed on the mobile to
indicate the charging state. When the battery is fully charged, the battery symbol
stops.
Flashing, Advise to keep the radio closed when it’s charging, if you try to perform
an intercom operation during charging, some abnormal phenomena may occur
when the battery is almost empty.
Turn on/off the radio
Press the button to turn on or off the radio. When turn on the radio, the horn of
radio sounds a boot prompt and displays all the icons on the full screen.
After the power-on done, the radio is in the walkie-talkie mode by default,
displaying the currently used channel number and subtone code, etc.
Volume setting
1) In the standby or receiving state, press the ˂ or ˃ key, the LCD of the radio will
display the current volume.
2) Then press ˂ or ˃ to increase or decrease the volume of the radio. 0,1-9 level
the volume can be adjusted.
3) Press the key to decrease the volume to level 0, the mute icon ( ) will be
displayed on the LCD of the walkie-talkie, and the speaker sound will be turned
off.
Note: When the volume is not adjusted to a proper state, Don’t put the speaker of
the walkie-talkie too close to your ears to avoid damage to your ears due to too
much sound.
Transmit and receive
1) Press and hold the [PTT] key, keep a distance of 3 to 5 cm from the micro-
phone, and talk at a normal speaking rate. When the display launches When the
icon ( ) is displayed, it means that a message is being sent. In order to avoid
cutting off your call, please press the [PTT] button to pause for a while, and then
start speaking.
2) When you finish the call, please release the [PTT] key. You can receive the
signal. When receiving, the icon ( ) will be displayed.
TOT function
When you press and hold the [PTT] button for more than 15-180 seconds, the
intercom will emit a continuous warning tone and the intercom will automatically
stop transmitting.
Set the channel
1) In the standby state of the radio mode, press the ◎key once, the current
channel will flash.
2) Press the ˂ or ˃ key to select the channel number you want to set.
3) Press【PTT】key to save the current setting and exit the menu or press ◎
3

key to skip to the next menu setting.
4) The radio can only be communicated when the radio is set to the same
channel, and the radio is clear and no noise.
Tone code selection
The distribution of tone codes can reduce the mutual interference between
radios, but the radios with different tone codes cannot make calls. Each channel
has 0 to 121 tone codes, so that your communication is more confidential. The
analog subtone codes Code 1-38 are available, and the digital subtone codes
Code 39-121 are available. Code 0 is the closed state of the tone code.
1) In the standby mode of the radio mode, press the ◎key twice, the current
tone code will flash.
2) Press the ˂ or ˃ key to select the tone code you want to set. Press and hold
the ˂ or ˃ key to quickly switch tones
3) Press【PTT】key to save the current setting and exit the menu or press ◎
key to skip to the next menu setting.
Set the calling tone
1) In the standby state of the radio mode, press the ◎key 3 times, the current
call tone setting interface will flash "CA"
2) Press ˂ or ˃ to select the calling tone you want to set, and the intercom
speaker will emit the corresponding set calling tone sound
3) Press【PTT】key to save the current setting and exit the menu or press ◎
key to skip to the next menu setting.
Note: When the calling tone menu setting is set to 0, it means that the setting is
no calling tone, and the calling function will be invalid when the ˃ key is long
pressed.
Vox function
When the VOX function is set to on, you can use the radio to talk without
pressing the [PTT] key, and speaking directly into the microphone will
automatically start the transmission.
1) In the standby mode of the walkie-talkie mode, press the ◎key 4 times, VOX
will appear on the screen, and the VOX level can be set.
2) Press ˂ or ˃ key to select sensitivity level 1-9:
9 = High sensitivity level 5 = Medium sensitivity level
1 = Low sensitivity level 0 = OFF
3) Press【PTT】key to save the current setting and exit the menu or press ◎
key to skip to the next menu setting.
Select sensitivity 0, turn off the VOX function, and the VOX icon will disappear.
4) The transmitter can be launched into the microphone. There is a short delay
between the start of speaking and the launch of the radio
5) Stop speaking, you can enter the receiving state.
Power
In the standby state of the radio mode, press the ◎key 5 times, and "Pr" will be
displayed on the screen.
4

Scan function
In the standby state of the radio mode, press the ◎key 6 times, and "SC" will be
displayed on the screen.
Press ˂ or ˃ key to select on and off
Press【PTT】key to save the current settings and exit the menu to start
The scanning function of the radio scans the effective signal channels, which can
easily scan 16 channels
Note: When the scan menu setting is selected as OF, the scan function will be
invalid when you press the [Power Switch/Scan] key.
Start scanning:
1) In the radio standby mode, press the [Power Switch/Scan] key to enter the
scan mode, the channel number will be displayed in upward increments, and the
SCAN icon will be displayed on the LCD.
2) When an active channel is detected, the intercom will automatically suspend
receiving signals on this channel until the signal disappears.
Lost. After the signal disappears and wait for 5 seconds, the intercom will
continue to scan.
3) Press the [PTT] key during scanning, and the intercom will stop transmitting
on the channel that started scanning. in the case of
When a valid signal is detected and the reception is stopped, press the [PTT]
key, and the intercom will transmit on the current channel. release
Wait 5 seconds after 【PTT】key, the intercom will continue to scan
4) Press the [Power Switch/Scan] key again to exit the scan and return to the
radio standby mode.
Roger beep
1) In the standby state of the radio mode, press the ◎key 7 times, the setting
interface of the current call end tone will display "rb".
2) Press ˂ or ˃ key to select on and off,
3) Press【PTT】key to save the current setting and exit the menu or press ◎
key to end the setting.
Note: When the call end tone is turned on, press PTT after the call ends, the
machine will give a prompt tone, and the receiver will also receive a prompt tone.
Button control
1) [Power switch/scan] key: long press this key to turn on or off the radio; short
press this key to turn on or off the scan.
2)【˂ 】key: long press this key to switch between radios and monitor modes;
short press this key to increase the volume.
3) 【˃ 】key: long press this key to emit the calling tone; short press this key to
decrease the volume.
4) 【◎ 】key: long press this key to operate the lock or unlock function; short
press this key to enter or exit the menu.
5) 【PTT】key can be set: transmit or save settings (in menu mode).
Lock key
The keyboard lock function is to prevent users from misoperation when they don't
want to change the settings of the radio
5

1) Press and hold the 【◎ 】key until the icon ( ) appears to enter the
keyboard lock state.
2) Long press and hold the 【◎ 】key until the icon ( ) disappears to exit the
keyboard lock state.
Note: When the keyboard is locked, except for pressing the [PTT] and [Power
Switch/Scan] keys, any key press will sound a key failure tone.
Power saving function
The radio has a unique function to extend the service life of the battery. If there is
no call or voice reception within 10 seconds, the walkie-talkie will automatically
enter the power saving mode. In this mode, the radio can still receive information.
Headphone function
1) Connect the earphone to the walkie-talkie (radio A&B).
2) Press the PTT button of the headset of the radio A to send a voice to the MIC
of the headset, and the radio B should be able to receive normally. Repeat the
same operation on radio B.
Programme
The programming software can quickly change and expand the function.
6

Specification Table
7
Frequency table(PMR)
Channel Frequency Max Power
Output
1 446.00625MHz 0.5 W
2 446.01875MHz 0.5 W
3 446.03125MHz 0.5 W
4 446.04375MHz 0.5 W
5 446.05625MHz 0.5 W
6 446.06875MHz 0.5 W
7 446.08125MHz 0.5 W
8 446.09375MHz 0.5 W
Channel Frequency Max Power
Output
9 446.10625MHz 0.5 W
10 446.11875MHz 0.5 W
11 446.13125MHz 0.5 W
12 446.14375MHz 0.5 W
13 446.15625MHz 0.5 W
14 446.16875MHz 0.5 W
15 446.18125MHz 0.5 W
16 446.19375MHz 0.5 W
GENERAL
Frequency Rang 446.00625~446.19375MHz
Channel capacity 16 CH
Working Voltage 3.7 V
Antenna impedance 50Ω
Step frequency 12.5KHz
TRANSMITTER
Output power ≤0.5 W
Adjacent channel power ≥60dB
TX current ≤1.35A
Spurious radiation ≤7.5µW
Modulation limited ≤2.5kH
RECEIVER
RF sensitivity ≤0.25uV
Opening sensitivity ≤0.20uV
Audio output ≥300mW
Receive current ≤410 mA
Waiting current ≤20mA

8
RF ENERGY EXPOSURE AND PRODUCT SAFETY GUIDE
FOR PORTABLE TWO-WAY RADIOS
Before using this radio, read this guide which contains important
operating instructions for safe usage and rf energy awareness
and control for compliance with applicable standards and
regulations.
ATTENTION!
This two-way radio uses electromagnetic energy in the radio frequency (RF)
spectrum to provide communications between two or more users over a distance.
RF energy, which when used improperly, can cause biological damage.
All Retevis two-way radios are designed, manufactured, and tested to ensure
they meet government-established RF exposure levels. In addition, manufactur-
ers also recommend specific operating instructions to users of two-way radios.
These instructions are important because they inform users about RF energy
exposure and provide simple procedures on how to control it.
Please refer to the following websites for more information on what RF energy
exposure is and how to control your exposure to assure compliance with
established RF exposure limits:http://www.who.int/en/
Local Government Regulations
When two-way radios are used as a consequence of employment, the Local
Government Regulations requires users to be fully aware of and able to control
their exposure to meet occupational requirements. Exposure awareness can be
facilitated by the use of a product label directing users to specific user awareness
information. Your Retevis two-way radio has a RF Exposure Product Label. Also,
your Retevis user manual, or separate safety booklet includes information and
operating instructions required to control your RF exposure and to satisfy
compliance requirements.
Radio License
Governments keep the radios in classification, business two-way radios operate
on radio frequencies that are regulated by the local radio management
departments (FCC, ISED, OFCOM, ANFR, BFTK, Bundesnetzagentur...).To
transmit on these frequencies, you are required to have a license issued by them.
The detailed classification and the use of your two radios, please contact the
local government radio management departments.
Use of this radio outside the country where it was intended to be distributed is
subject to government regulations and may be prohibited.
Unauthorized modification and adjustment
Changes or modifications not expressly approved by the party responsible for
compliance may void the user’s authority granted by the local government radio
management departments to operate this radio and should not be made. To
comply with the corresponding requirements, transmitter adjustments should be
made only by or under the supervision of a person certified as technically
qualified to perform transmitter maintenance and repairs in the private land
mobile and fixed services as certified by an organization representative of the
user of those services.

Replacement of any transmitter component (crystal, semiconductor, etc.) not
authorized by the local government radio management departments equipment
authorization for this radio could violate the rules.
FCC Requirements:
This device complies with part 15 of the FCC Rules. Operation is subject to the
condition that this device does not cause harmful interference. (Licensed radios
are applicable);
This device complies with part 15 of the FCC Rules. Operation is subject to the
following two conditions: (Other devices are applicable)
(1) This device may not cause harmful interference, and
(2) this device must accept any interference received, including interference that
may cause undesired operation.
NOTE:
•This equipment has been tested and found to comply with the limits for a Class
A digital device, pursuant to part 15 of the FCC Rules. These limits are designed
to provide reasonable protection against harmful interference when the
equipment is operated in a commercial environment. This equipment generates,
uses, and can radiate radio frequency energy and, if not installed and used in
accordance with the instruction manual, may cause harmful interference to radio
communications. Operation of this equipment in a residential area is likely to
cause harmful interference in which case the user will be required to correct the
interference at his own expense.
•This equipment has been tested and found to comply with the limits for a Class
B digital device, pursuant to part 15 of the FCC Rules. These limits are designed
to provide reasonable protection against harmful interference in a residential
installation. This equipment generates, uses and can radiate radio frequency
energy and, if not installed and used in accordance with the instructions, may
cause harmful interference to radio communications. However, there is no
guarantee that interference will not occur in a particular installation. If this
equipment does cause harmful interference to radio or television reception, which
can be determined by turning the equipment off and on, the user is encouraged
to try to correct the interference by one or more of the following measures:
—Reorient or relocate the receiving antenna.
—Increase the separation between the equipment and receiver.
—Connect the equipment into an outlet on a circuit different from that to which
the receiver is connected.
—Consult the dealer or an experienced radio/TV technician for help.
CE Requirements:
•(Simple EU declaration of conformity) Shenzhen Retevis Technology Co., Ltd.
declares that the radio equipment type is in compliance with the essential
requirements and other relevant provisions of RED Directive 2014/53/EU and the
ROHS Directive 2011/65/EU and the WEEE Directive 2012/19/EU; the full text of
the EU declaration of conformity is available at the following internet address:
www.retevis.com.
•Restriction Information
This product can be used in EU countries and regions, including: Belgium (BE),
Bulgaria (BG), Czech Republic (CZ), Denmark (DK), Germany (DE), Estonia
9

10
(EE), Ireland (IE), Greece (EL), Spain (ES), France (FR), Croatia (HR), Italy (IT),
Cyprus (CY), Latvia (LV), Lithuania (LT), Luxembourg (LU), Hungary (HU), Malta
(MT), Netherlands (NL), Austria (AT), Poland (PL), Portugal (PT), Romania (RO),
Slovenia (SI), Slovakia (SK), Finland (FI), Sweden (SE) and United Kingdom (UK).
For the warning information of the frequency restriction, please refer to the
package or manual section.
•Disposal
The crossed-out wheeled-bin symbol on your product, literature, or packaging
reminds you that in the European Union, all electrical and electronic products,
batteries, and accumulators (rechargeable batteries) must be taken to
designated collection locations at the end of their working life. Do not
dispose of these products as unsorted municipal waste. Dispose of
them according to the laws in your area.
IC Requirements:
Licence-exempt radio apparatus
This device contains licence-exempt transmitter(s)/receiver(s) that comply with
Innovation, Science and Economic Development Canada’s licence-exempt
RSS(s). Operation is subject to the following two conditions:
(1) This device may not cause interference.
(2) This device must accept any interference, including interference that may
cause undesired operation of the device.
Le présent appareil est conforme aux CNR d’Industrie Canada applicables aux
appareils radio exempts de licence. L’exploitation est autorisée aux deux
conditions suivantes :
(1) l’appareil ne doit pas produire de brouillage;
(2) l’utilisateur de l’appareil doit accepter tout brouillage radioélectrique subi,
même si le brouillage est susceptible d’en compromettre le fonctionnement.
RF Exposure Information
•DO NOT operate the radio without a proper antenna attached, as this may
damage the radio and may also cause you to exceed RF exposure limits. A
proper antenna is the antenna supplied with this radio by the manufacturer or an
antenna specifically authorized by the manufacturer for use with this radio, and
the antenna gain shall not exceed the specified gain by the manufacturer
declared.
•DO NOT transmit for more than 50% of total radio use time, more than 50% of
the time can cause RF exposure compliance requirements to be exceeded.
•During transmissions, your radio generates RF energy that can possibly cause
interference with other devices or systems. To avoid such interference, turn off
the radio in areas where signs are posted to do so.
•DO NOT operate the transmitter in areas that are sensitive to electromagnetic
radiation such as hospitals, aircraft, and blasting sites.
•Portable Device, this transmitter may operate with the antenna(s) documented in
this filing in Push-to-Talk and body-worn configurations. RF exposure compliance
is limited to the specific belt-clip and accessory configurations as documented in
this filing and the separation distance between user and the device or its antenna
shall be at least 2.5 cm.

•Mobile Device, during operation, the separation distance between user and the
antenna subjects to actual regulations, this separation distance will ensure that
there is sufficient distance from a properly installed externally-mounted antenna
to satisfy the RF exposure requirements.
•Occupational/Controlled Radio, this radio is designed for and classified as
“Occupational/Controlled Use Only”, meaning it must be used only during the
course of employment by individuals aware of the hazards, and the ways to
minimize such hazards; NOT intended for use in a General population/uncon-
trolled environment.
•General population/uncontrolled Radio, this radio is designed for and classified
as “General population/uncontrolled Use”.
RF Exposure Compliance and Control Guidelines and Operating
Instructions
To control your exposure and ensure compliance with the occupational/controlled
environment exposure limits, always adhere to the following procedures.
Guidelines:
•User awareness instructions should accompany the device when transferred to
other users.
•Do not use this device if the operational requirements described herein are not
met.
Operating Instructions:
•Transmit no more than the rated duty factor of 50% of the time. To Transmit
(Talk), push the Push to Talk (PTT) button. To receive calls (listen), release the
PTT button. Transmitting 50% of the time, or less, is important because the radio
generates measurable RF energy exposure only when transmitting in terms of
measuring for standards compliance.
•Transmit only when people outside the vehicle are at least the recommended
minimum lateral distance away from a properly installed according to installation
instructions, externally mounted antenna.
•When operating in front of the face, worn on the body, always place the radio in
a Retevis approved clip, holder, holster, case, or body harness for this product.
Using approved body-worn accessories is important because the use of
Non-Retevis approved accessories may result in exposure levels, which exceed
the IEEE/ICNIRP RF exposure limits.
Hand-held Mode
• Hold the radio in a vertical position with the microphone (and other parts of the
radio including the antenna) at least 2.5 cm (one inch) away from the
nose or lips. The antenna should be kept away from the eyes. Keeping
the radio at a proper distance is important as RF exposure decreases
with increasing distance from the antenna.
Phone Mode
•When placing or receiving a phone call, hold your radio product as you would a
wireless telephone. Speak directly into the microphone.
Electromagnetic Interference/Compatibility
NOTE: Nearly every electronic device is susceptible to electromagnetic
interference (EMI) if inadequately shielded, designed, or otherwise configured for
electromagnetic compatibility
11

12
Avoid Choking Hazard
Small Parts. Not for children under 3 years.
Turn off your radio power in the following conditions:
WARNING
•Turn off your radio before removing (installing) a battery or
accessory or when charging battery.
•Turn off your radio when you are in a potentially hazardous
environments: Near electrical blasting caps, in a blasting area, in
explosive atmospheres (inflammable gas, dust particles, metallic
powders, grain powders, etc.).
•Turn off your radio while taking on fuel or while parked at gasoline
service stations.
To avoid electromagnetic interference and/or compatibility conflicts
•Turn off your radio in any facility where posted notices instruct you
to do so, hospitals or health care facilities (Pacemakers, Hearing
Aids and Other Medical Devices) may be using equipment that is
sensitive to external RF energy.
•Turn off your radio when on board an aircraft. Any use of a radio
must be in accordance with applicable regulations per airline crew
instructions.
• Use the lowest volume necessary to do your job.
• Turn up the volume only if you are in noisy surroundings.
• Turn down the volume before adding headset or earpiece.
• Limit the amount of time you use headsets or earpieces at high
volume.
• When using the radio without a headset or earpiece, do not place
the radio's speaker directly against your ear
• Use careful with the earphone maybe possible excessive sound
pressure from earphones and headphones can cause hearing loss
Note: Exposure to loud noises from any source for extended periods
of time may temporarily or permanently affect your hearing. The
louder the radio's volume, the less time is required before your
hearing could be affected. Hearing damage from loud noise is
sometimes undetectable at first and can have a cumulative effect.
Antennas
•Do not use any portable radio that has a damaged antenna. If a
damaged antenna comes into contact with the skin when the radio is
in use, a minor burn can result.
Batteries (If appropriate)
•When the conductive material such as jewelry, keys or chains touch
exposed terminals of the batteries, may complete an electrical circuit
(short circuit the battery) and become hot to cause bodily injury such
as burns. Exercise care in handling any battery, particularly when
placing it inside a pocket, purse or other container with metal objects
Protect your hearing:
WARNING
WARNING
Avoid Burns

Forbid
•Do not use charger outdoors or in moist environments, use only in dry
locations/conditions.
•Do not disassemble the charger, that may result in risk of electrical
shock or fire.
•Do not operate the charger if it has been broken or damaged in any
way.
•Do not place a portable radio in the area over an air bag or in the air
bag deployment area. The radio may be propelled with great force and
cause serious injury to occupants of the vehicle when the air bag
inflates.
To reduce risk
•Pull by the plug rather than the cord when disconnecting the charger.
•Unplug the charger from the AC outlet before attempting any
maintenance or cleaning.
•Contact Retevis for assistance regarding repairs and service.
•The adapter shall be installed near the equipment and shall be easily
accessible
Long transmission
•When the transceiver is used for long transmissions, the radiator and
chassis will become hot.
•Contact Retevis for assistance regarding repairs and service.
•The adapter shall be installed near the equipment and shall be easily
accessible
•This radio meets the RF exposure guidelines when used with the
Retevis accessories supplied or designated for the product. Use of
other accessories may not ensure compliance with the RF exposure
guidelines and may violate regulations.
•For a list of Retevis-approved accessories for your radio model, visit
the following website: http://www.Retevis.com
Approved Accessories
WARNING
Safety Operation
WARNING
13

Eigenschaften
• LCD-Hintergrundbeleuchtungsanzeige
• 16 Kanäle
• 121 Untertoncodes (38 analog, 83 digital)
• Sperre besetzt
• Kopfhöreranschluss
• 10 optionale Ruftöne
• Vox-Funktion
• Leistung
• Roger Piep
• Kompandierungsfunktion
• Batterieanzeige
• Scanfunktion
• Tastensperre
• Sprachaufforderung
• Energiesparfunktion
• Alarm bei schwacher Batterie
• Tastentöne
• TOT-Funktion
Tasten und Funktionen
Antenne LCD Bildschirm
Ein-/Ausschalten
und Scannen
Hörer und Programm
Typ Aufladen
Ab/Rufton
Schloss und Menü
Lautsprecher
PTT
Mic
UP/Monitor-
Modus
14

Batterieinstallation
1) Batterie: Lithium-Ionen-Batterie
2) Drücken Sie den Akku nach oben, um den Akku zu entfernen
3) Setzen Sie die Batterie in den Batterieschacht ein, achten Sie darauf, die
Batterie streng nach den Plus- + Minus-Anweisungen in den Steckplatz zu
installieren und drücken Sie sie fest nach unten.
4) Setzen Sie die Batterie wieder ein
Batterieanzeige und Warnung bei schwacher Batterie
Das Batteriesymbol zeigt den Batteriestand von der vollen Anzeige bis zum
Leerzeichen (0 Batterie) an. Der 0-Akku erinnert den Benutzer daran,
rechtzeitig aufzuladen, und wird von einer schwachen Akku-Erinnerung begleitet
(einmal 30 Sekunden). Wenn die Batterieladung niedrig ist, wird die Gegenspre-
chanlage abgeschaltet.
Hinweis: Wenn Sie das Radio über einen längeren Zeitraum lagern, entfernen
Sie bitte zuerst die Batterie. Langfristige Korrosion des Akkus führt zu Schäden
am Radio.
LCD-Anzeige
Batterieleistung
Scan
Sperren
Status (tx/rx)
Hohe Energie
Lautstärke stumm
Vox
15

Verwenden Sie das Ladegerät zum Aufladen
1) Stellen Sie sicher, dass das Radio geschlossen ist
2) Stecken Sie den Typ-C-Ladestecker in die Buchse des Radios mit dem Akku
und stecken Sie das andere Ende des Ladegeräts in die Steckdose an der
Wand.
3) Während des Ladevorgangs wird auf dem Handy das Akkusymbol angezeigt,
um den Ladezustand anzuzeigen. Wenn der Akku vollständig geladen ist, hört
das Akkusymbol auf symbol
Blinkt, Bitte lassen Sie das Funkgerät während des Ladevorgangs geschlossen.
Wenn Sie versuchen, während des Ladevorgangs eine Gegensprechanlage
durchzuführen, können bei fast leerem Akku einige ungewöhnliche Phänomene
auftreten.
Schalten Sie das Radio ein/aus
Drücken Sie die Taste, um das Radio ein- oder auszuschalten. Beim Einschalten
des Radios ertönt das Radiohorn einen Boot-Prompt und zeigt alle Symbole auf
dem Vollbild an.
Nach dem Einschalten befindet sich das Funkgerät standardmäßig im
Walkie-Talkie-Modus und zeigt die aktuell verwendete Kanalnummer und den
Subtone-Code usw.
Lautstärkeeinstellung
1) Drücken Sie im Standby- oder Empfangszustand die Taste ˂ oder ˃, das LCD
des Radios zeigt die aktuelle Lautstärke an.
2) Drücken Sie dann ˂ oder ˃, um die Lautstärke des Radios zu erhöhen oder zu
verringern. 0,1-9 Stufe kann die Lautstärke eingestellt werden.
3) Drücken Sie die Taste , um die Lautstärke auf Stufe 0 zu verringern, das
Stummschaltsymbol [ ] wird auf dem LCD des Walkie-Talkies angezeigt und
der Lautsprecherton wird ausgeschaltet.
Hinweis: Wenn die Lautstärke nicht richtig eingestellt ist, platzieren Sie den
Lautsprecher des Walkie-Talkies nicht zu nah an Ihren Ohren, um Schäden an
Ihren Ohren durch zu viel Ton zu vermeiden.
Senden und empfangen
1) Halten Sie die [PTT]-Taste gedrückt, halten Sie einen Abstand von 3 bis 5 cm
zum Mikrofon und sprechen Sie mit normaler Sprechgeschwindigkeit. Wenn das
Display startet, Wenn das Symbol [ ] angezeigt wird, bedeutet dies, dass eine
Nachricht gesendet wird. Um zu vermeiden, dass Ihr Anruf unterbrochen wird,
drücken Sie bitte die [PTT]-Taste, um eine Weile zu pausieren, und beginnen Sie
dann zu sprechen.
2) Wenn Sie das Gespräch beendet haben, lassen Sie bitte die [PTT]-Taste los.
Sie können das Signal empfangen. Beim Empfang wird das Symbol [ ]
angezeigt.
TOT-Funktion
Wenn Sie die [PTT]-Taste länger als 15-180 Sekunden gedrückt halten, gibt die
Gegensprechanlage einen durchgehenden Warnton aus und die Gegenspre-
chanlage stoppt automatisch die Übertragung.
16

Kanaleinstellung
1) Drücken Sie im Bereitschaftszustand des Radiomodus einmal die ◎-Taste,
der aktuelle Kanal blinkt.
2)Drücken Sie die Taste ˂ oder ˃, um die Kanalnummer auszuwählen, die Sie
einstellen möchten.
3) Drücken Sie die 【PTT】-Taste, um die aktuelle Einstellung zu speichern und
das Menü zu verlassen oder drücken Sie die ◎-Taste, um zur nächsten
Menüeinstellung zu springen.
4) Das Funkgerät kann nur kommuniziert werden, wenn das Funkgerät auf den
gleichen Kanal eingestellt ist und das Funkgerät klar und rauschfrei ist.
Toncode-Auswahl
Die Verteilung von Toncodes kann die gegenseitige Interferenz zwischen
Funkgeräten reduzieren, aber die Funkgeräte mit unterschiedlichen Toncodes
können keine Anrufe tätigen. Jeder Kanal hat 0 bis 121 Toncodes, damit Ihre
Kommunikation vertraulicher ist. Es stehen die analogen Subtone-Codes Code
1-38 und die digitalen Subtone-Codes Code 39-121 zur Verfügung. Code 0 ist
der geschlossene Zustand des Toncodes.
1) Drücken Sie im Standby-Modus des Radiomodus zweimal die Taste ◎, der
aktuelle Toncode blinkt.
2)Drücken Sie die Taste ˂ oder ˃, um den Toncode auszuwählen, den Sie
einstellen möchten. Halten Sie die Taste ˂ oder ˃ gedrückt, um schnell zwischen
den Tönen zu wechseln
3) Drücken Sie die 【PTT】-Taste, um die aktuelle Einstellung zu speichern und
das Menü zu verlassen, oder drücken Sie die ◎-Taste, um zur nächsten
Menüeinstellung zu springen.
Stellen Sie den Rufton ein
1) Drücken Sie im Bereitschaftszustand des Radiomodus dreimal die ◎-Taste,
die aktuelle Ruftoneinstellungsoberfläche blinkt "CA"
2) Drücken Sie ˂ oder ˃, um den Rufton auszuwählen, den Sie einstellen
möchten, und der Lautsprecher der Gegensprechanlage gibt den entsprechen-
den eingestellten Rufton aus
3) Drücken Sie die 【PTT】-Taste, um die aktuelle Einstellung zu speichern und
das Menü zu verlassen, oder drücken Sie die ◎-Taste, um zur nächsten
Menüeinstellung zu springen.
Hinweis: Wenn die Menüeinstellung Rufton auf 0 gesetzt ist, bedeutet dies, dass
die Einstellung kein Rufton ist und die Ruffunktion ungültig ist, wenn die Taste ˃
lange gedrückt wird.
Vox-Funktion
Wenn die VOX-Funktion eingeschaltet ist, können Sie das Funkgerät zum
Sprechen verwenden, ohne die [PTT]-Taste zu drücken, und wenn Sie direkt in
das Mikrofon sprechen, wird die Übertragung automatisch gestartet.
1)Drücken Sie im Standby-Modus des Walkie-Talkie-Modus viermal die Taste
times, VOX erscheint auf dem Bildschirm und der VOX-Pegel kann eingestellt
werden.
17

18
2)Drücken Sie die Taste ˂ oder ˃, um die Empfindlichkeitsstufe 1-9 auszuwählen:
9 = Hohe Empfindlichkeitsstufe 5 = Mittlere Empfindlichkeitsstufe
1 = Niedrige Empfindlichkeitsstufe 0 = AUS
3)Drücken Sie【PTT】, um die aktuelle Einstellung zu speichern und das Menü
zu verlassen oder drücken Sie die ◎-Taste, um zur nächsten Menüeinstellung zu
springen.
Wählen Sie die Empfindlichkeit 0, schalten Sie die VOX-Funktion aus und das
VOX-Symbol wird ausgeblendet.
4)Der Sender kann in das Mikrofon gestartet werden. Es gibt eine kurze
Verzögerung zwischen dem Beginn des Sprechens und dem Start des Radios
5)Hören Sie auf zu sprechen, Sie können in den Empfangsstatus wechseln.
Leistung
Drücken Sie im Bereitschaftszustand des Radiomodus 5 Mal die ◎-Taste, und
"Pr" wird auf dem Bildschirm angezeigt.
Drücken Sie die【PTT】Taste, um das Menü zu verlassen
Scanfunktion
Drücken Sie im Bereitschaftszustand des Radiomodus 6-mal die ◎-Taste, und
„SC“ wird auf dem Bildschirm angezeigt.
Drücken Sie die Taste ˂ oder ˃, um Ein und Aus auszuwählen
Die Scanfunktion des Radios scannt die effektiven Signalkanäle, die problemlos
Kanäle scannen können
Hinweis: Wenn die Einstellung des Scan-Menüs auf OF gewählt ist, wird die
Scan-Funktion ungültig, wenn Sie die Taste [Netzschalter/Scan] drücken.
Scannen starten:
1) Drücken Sie im Radio-Standby-Modus die Taste [Power Switch/Scan], um in
den Scan-Modus zu gelangen. Die Kanalnummer wird in aufsteigenden Schritten
angezeigt und das SCAN-Symbol wird auf dem LCD angezeigt.
2) Wenn ein aktiver Kanal erkannt wird, unterbricht die Gegensprechanlage
automatisch den Empfang von Signalen auf diesem Kanal, bis das Signal
verschwindet.
Hat verloren. Nachdem das Signal erloschen ist und 5 Sekunden warten, wird
die Gegensprechanlage weiter scannen.
3) Drücken Sie während des Suchlaufs die [PTT]-Taste, und die Gegensprechan-
lage stoppt die Übertragung auf dem Kanal, der den Suchlauf gestartet hat. Im
Falle von
Wenn ein gültiges Signal erkannt und der Empfang gestoppt wird, drücken Sie
die [PTT]-Taste und die Gegensprechanlage sendet auf dem aktuellen Kanal.
Veröffentlichung
Warten Sie 5 Sekunden nach der Taste 【PTT】, die Gegensprechanlage sucht
weiter
4) Drücken Sie die Taste [Power Switch/Scan] erneut, um den Scan zu beenden
und in den Radio-Standby-Modus zurückzukehren.
Roger-Piep
1) Drücken Sie im Bereitschaftszustand des Radiomodus 7 Mal die ◎-Taste, die
Einstellungsoberfläche des aktuellen Rufendetons zeigt "rb" an.
Table of contents
Languages:
Other Retevis Two-way Radio manuals

Retevis
Retevis TWINTALKER User manual

Retevis
Retevis RB75 User manual

Retevis
Retevis RT29 User manual

Retevis
Retevis RT49B User manual

Retevis
Retevis RB35 User manual

Retevis
Retevis RB19P User manual

Retevis
Retevis RT-628 Manual

Retevis
Retevis RA636 User manual

Retevis
Retevis RT-35 User manual

Retevis
Retevis RT18 User manual

Retevis
Retevis RT-388 User manual

Retevis
Retevis RT22 User manual

Retevis
Retevis RT639 User manual

Retevis
Retevis RT22 User manual

Retevis
Retevis RT67 User manual

Retevis
Retevis RT31 User manual

Retevis
Retevis RT85 User manual

Retevis
Retevis RT37 User manual

Retevis
Retevis RB637 User manual

Retevis
Retevis RB19P User manual