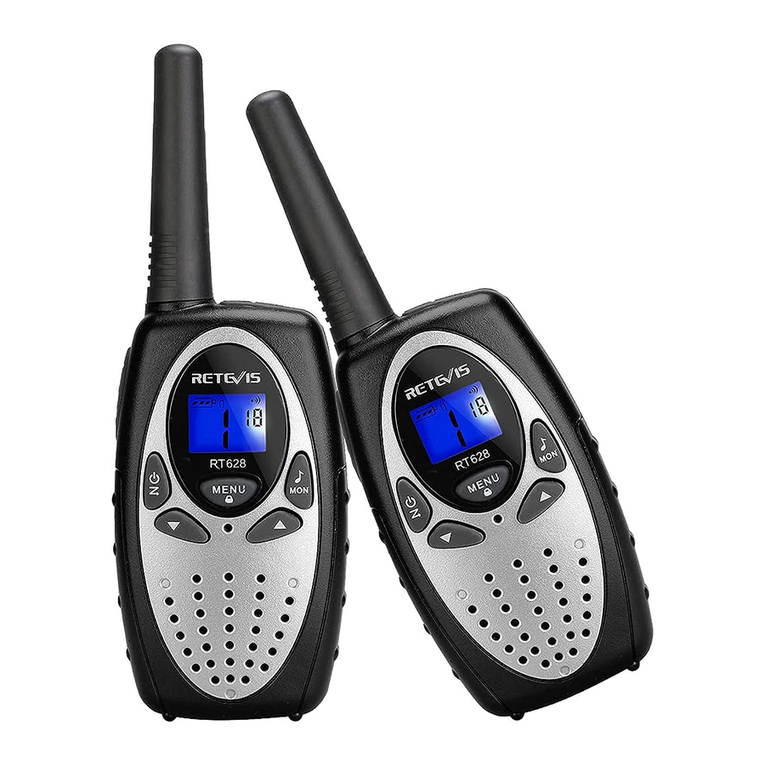
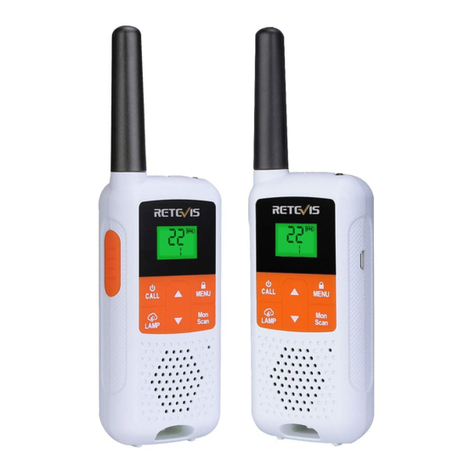
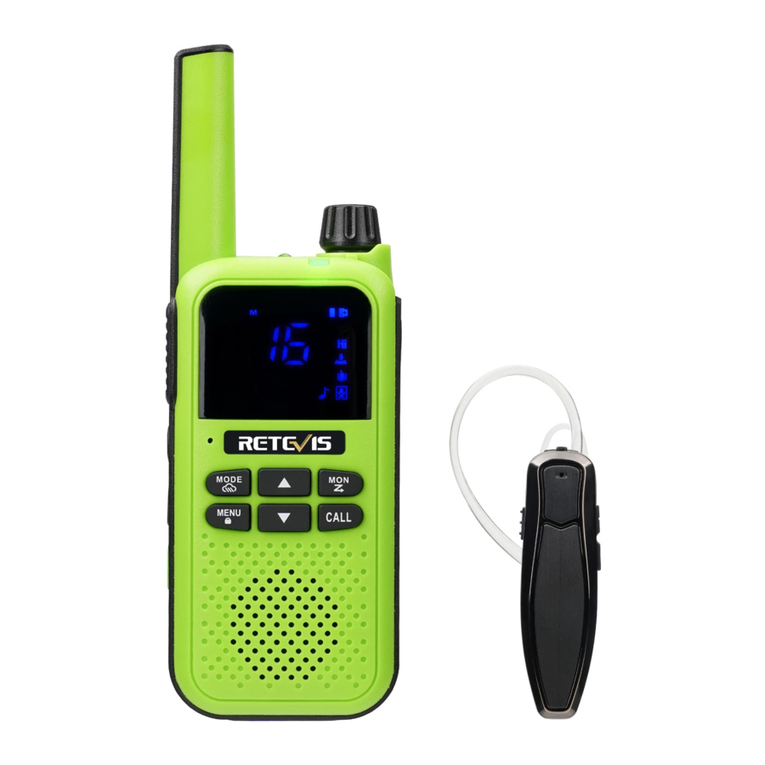
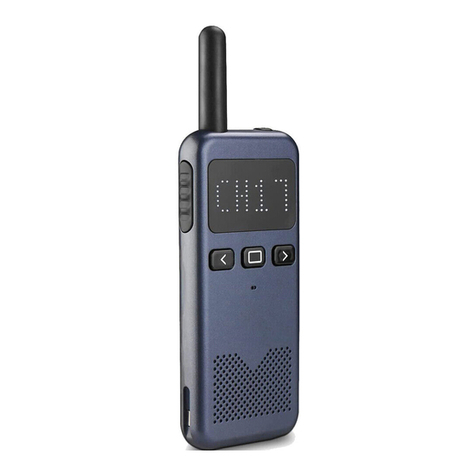
Retevis RA636 User manual

RA636
TWO WAY RADIO
USER'S MANUAL

CONTENTS
Main functions .......................................................
Unpacking and checking equipment ...................
Charging the Battery .............................................
Using the battery ...................................................
Installing and uninstalling of the accessories ....
Getting acquainted ................................................
Basic opeartions ...................................................
Specification ..........................................................
Warnings ................................................................
FR(14-27)
DE(28-41)
IT(42-54)
ES(55-68)
RUS(69-82)
EU Importer: Germany Retevis Technology GmbH
Address: Uetzenacker 29,38176 wendeburg
For downloading further resources:
Brochures, Software/Firmware, Manual etc, Pls contact your direct reseller first
OR go to website retevis.com and check “support” in the each product link to
01
01
01
01
02
03
04
06
07
download it.

The package includes 3 pack walkie-talkies with license-free operation, which
conform to European Radio Communications Committee and Federal
Communications Act. it is a simplex device that operates on assigned
frequencies. They come with 16(PMR446)+LPD433 channels, and a backlit LCD
screen, allowingmile in open areas).
Note: Please read user instructions carefully before using the equipment and
keep it for future consultation!
Precautions:
To avoid the risk of burns, do not use the device if the aerial is damaged in
any
way.
Don not use the device in a potentially explosive setting (e.g. Around pumps,
on the lower deck of a boat or around a fuel-storage installation or chemical
products).
If traveling in a car or by bike, stop before using the device.
Switch off the device if on an airplane or in a hospital.Never use the device in
close proximity to a radio to avoid interference.
Remove the batteries if the device is not used for an extended period of time.
Never mix used batteries with new ones.
Keep the transmitter and antenna at least 5cm from your face. Direct the
antenna upwards and speak normally.
Clean the device with a damp cloth. Avoid the use of cleaning agents and
solvents.
Do not modify the device in any way. In the event of damage occurring,
The device cannot be used to contact emergency services
Getting Staeted
Reset: press[ ]button power on, It can be restored to default settings
1
Scanning
Vox
Double waiting
Battery Level
PTT Button
Microphone
Call Button
Down/Monitor Button
Speaker
Antenna
Flashlight Power Switch/
Volume Control knob
Channel/Menu Item
CTCSS/Menu Option
Tx/Rx Icon
Sperker/Mic/
Charger Jack
Keypad Lock
Flashlight Button
Up/Scan Button
Menu/Lock Button

BEFORE USE
Removing the belt clip
Before insert batteries into the devices, first pull and hold
latch on the belt clip and slide the belt clip up to remove it
2

Installing Battery
A. For use of non-rechargeable batteries:
B. For use of rechargeable batteries with Walkie
1.Open the battery compartment cover.
2.Insert 4 x AAA Battery (Not included)
3.Install the battery according to the polarity marks on the battery compartment.
4.After placing the battery in the correct position, replace
Charge the rechargeable battery on the radio with the specified charging cable.
Using the device
Turning the device on/off
Adjusting the volume
1.Volume up: Turn the volume ON/OFF switch knob clockwise;
2.Volume down: Turn the volume ON/OFF switch knob
3.Battery Charge Level/Low Battery Indication
The battery charge level is indicated by the number of
squares present inside the battery icon on the LCD Screen.
Battery Full
Battery 2/3 charged
Battery 1/3 charged
Battery empty
When the battery charge level is low, the battery icon will flash and a beep will be
heard to indicate that the batteries need to be replaced or recharged.
4. Receiving/transmitting communications:
The devices are in ''Reception” mode when it is turned ON and no transmitting.
When a signal is received on the active channel, the LCD will display in
reception.
When you press the PTT (push to talk) button, the device switches to
“Transmission" mode.
Hold the device in a vertical position with the MIC (microphone) 3-5 cm away
from your mouth. While holding the PTT button, speak into the microphone in a
normal tone of voice.
Release the PTT button when you have finished transmitting.For others to
receive your transmission, they must be on the same channel with you.
Note:
1.The talking range depends on terrain and weather conditions. It will be
affected by obstructions such as hills, bush or buildings.
2.Don't try to use two devices which are less than 1.5m (5 feet) apart.
Otherwise, you may experience interference.
5. Changing Channels
Press the MENU button one time, the channel number willlash on the display.
Press the up▲/down▼ button to change the channel.
Press the PTT button to confirm and return to standby mode.
Note: if no button is pressed within 10 31seconds during setting, the device will
return to standby mode.
1.Switch on: Turn on the volume ON/OFF switch knob clockwise until a beep
heard;
2.Shutdown: Turn the volume ON/OFF switch knob counterclockwise.
3

6. 99 Privacy codes
Press the MENU button twice, the current privacy code will flashon the
display.
Press the PTT button to confirm and return to stand-by mode.Press the up
▲/down▼ button to change the 99 available privacycodes.
By using privacy codes, your channel will not be easily occupied or interfered
by others. It makes your communication more safe and privacy.
7. VOX (Hands free function)
Press the MENU button three times, the current VOX setting will flash on the
display and the VOX icon will display,
Press UP▲ button to set the VOX sensitivity level between 1 and 3 level
(level 3 is the high sensitive level).
Press down▼ button until “OFF ” appears on the display to turn VOX OFF.
Press the PTT button to confirm and return to standby mode.In VOX mode,
the radio will transmit a signal when it is activated by your voice or other sound
around you.VOX Operation is not recommended if you plan to use your device
in a noisy or windy environment.
Note: VOX mode will be over-ridden when you press the PTT button
8. Scanning for an active radio channel
Press and hold the UP▲ button 2 seconds: The “SCAN”function indicator
will appear on the display and the channel will scan continuously from 1 to 8 /I to
85. Once an active channel is found,the scanning will stop and you can listen to
the transmission.
When the transmission is on the found channel stop, the scanning will resume
automatically.Note: If you press the PTT button while listening to a found
channel,
9. Monitor
Press and hold the DOWN▼ button about 3 seconds to active monitor.Release
the DOWN ▼ button return to standby mode.
10. Setting the Call tones
The device has 10 call tones.Press the MENU button 4 times, “CA”isdisplayed
and on the current call tone. Press the UP▲/Down▼ button to change another
call tones.
Press the PTT button to confirm and return to standby mode.
11. Sending a call tone
Press the button ; the call tone will be transmitted on the setting channel.
12. Key-Tone On/Off
When a button is pressed, the unit will beep briefly. To set the key-tone.
● Press the MENU- button five times. “to” will be displayed.
● Press ▲ to enable (ON) or ▼ disable the Key Tones (OFF) ● Press the PTT-
button to confirm your selection and return to the standby mode.
13. Roger Beep On/Off
After the PTT button is released, the device will send out a Roger beep to
confirm that have stopped talking.
Press the MENU button six times; “ro” will be displayed.
Press the UP▲/Down▼ button to disable the Roger beep ON/OFF.Press The
PTT button to confirm your selection and return to the standby mode.
4

14. Double waiting
Dual standby function allows the device to receive messages from two
channels
● Press the MENU- button 7 times, the 2CH character flashes on the display
● Press the ▲up key or the down key to select the second channel, and select
to (OF) to close the dual standby function
● Press the PTT- button to confirm the selection and return to standby mode.
15. Backlit display
Press any button except for the MENU button to activate the backlight of the
LCD display. The backlight will light on about 5 seconds.
16. Earpiece connection
The device can be used with an earpiece (If there is an earpiece packed
together with the device).
The connector is located on the top of the device.
Insert the earpiece plug into the connector (2.5mm jack).There is a small
“PTT” button on the earpiece that has the same function as the PTT button on
the device.
When you use the PTT button from the earpiece, you must also use the
microphone from the earpiece to talk.Note: Do not connect other earpieces; it
may damage your device.
17. Battery saving function
When the device has not been used for 6 seconds, the economy mode is
automatically activated. This does not affect the reception of transmission and
the standby mode is automatically re-activated as soon as a signal is detected.
18. Built-in Flashlight
Your device has a built-in flashlight that can be used in sending light signals or
for our lighting needs.
19. Lock & Unlock the device
Press and hold the MENU button for 3 seconds to lock the device.
Press and hold the MENU button for 3 seconds to unlock the device.
20. Technical specifications
Channel: 16(PMR446)+LPD433 channels
Frequency: 446.00625MHz ~ 446.19375MHz (PMR)
433.0750 MHz ~ 434,7750 MHz (LPD433)
Privacy Code: 99 Groups
Transmission Power ≤0.5W
Range Up to 5 mile in open field
Battery type 4 x AAA Alkaline/rechargeable batteries
(DC 6.0V The battery voltage: 1.5V)
Modulation type FM-F3E
Channel spacing 12.5 kHz
5

Channel and Frequency (MHZ)
Europe (85CH)
Support 8 channels in Russia
ch .
23
24
25
26
27
28
29
30
31
32
33
34
35
36
37
38
39
40
41
42
43
ch .
1
2
3
4
5
6
7
8
9
10
11
12
13
14
15
16
17
18
19
20
21
22
ch .
44
45
46
47
48
49
50
51
52
53
54
55
56
57
58
59
60
61
62
63
64
ch .
65
66
67
68
69
70
71
72
74
74
75
76
77
78
79
80
81
82
83
84
85
446.03125
446.04375
446.01875
446.00625
Frequency
446.09375
446.10625
446.08125
446.06875
446.05625
446.15625
446.16875
446.14375
446.13125
446.11875
433.1000
433.0750
446.19375
446.18125
433.2000
433.1750
433.1500
433.1250
Frequency
433.4000
433.4250
433.3750
433.3500
433.3250
433.3000
433.2750
433.2500
433.2250
433.4500
433.6250
433.6000
433.5750
433.5500
433.7250
433.7000
433.6750
433.6500
433.5250
433.5000
433.4750
Frequency
433.9250
433.9500
433.9000
433.8750
433.8500
433.8250
433.8000
433.7750
433.7500
433.9750
434.1500
434.1250
434.1000
434.0750
434.2500
434.2250
434.2000
434.1750
434.0500
434.0250
433.0000
Frequency
434.4500
434.4750
434.4250
434.4000
434.3750
434.3500
434.3250
434.3000
434.2750
434.5000
434.6750
434.6500
434.6250
434.6000
434.7750
434.7500
434.7250
434.7000
434.5750
434.5500
434.5250
6

7
RF ENERGY EXPOSURE AND PRODUCT SAFETY GUIDE
FORPORTABLE TWO-WAY RADIOS
This two-way radio uses electromagnetic energy in the radio frequency (RF)
spectrum to provide communications between two or more users over a
distance. RF energy, which when used improperly, can cause biological
damage.
All Retevis two-way radios are designed, manufactured, and tested to ensure
they meet government-established RF exposure levels. In addition,
manufacturers also recommend specific
operating instructions to users of two-way radios. These instructions are
important because they inform users about RF energy exposure and provide
simple procedures on how to control it.Please refer to the following websites
for more information on what RF energy exposure is and how to control your
exposure to assure compliance with established RF exposure
limits:http://ww-w.who.int/en/
Local Government Regulations
When two-way radios are used as a consequence of employment, the Local
Government
Regulations requires users to be fully aware of and able to control their
exposure to meet occupational requirements. Exposure awareness can be
facilitated by the use of a product label directing users to specific user
awareness information. Your Retevis two-way radio has a RF
Exposure Product Label. Also, your Retevis user manual, or separate safety
booklet includes information and operating instructions required to control
your RF exposure and to satisfy compliance requirements.
Radio License
Governments keep the radios in classification, business two-way radios
operate on radio frequencies that are regulated by the local radio
management departments (FCC, ISED, OFCOM, ANFR,
BFTK,Bundesnetzagentur...).To transmit on these frequencies, you are
required to have a license issued by them. The detailed classification and the
use of your two radios, please contact the local government radio
management departments.
Use of this radio outside the country where it was intended to be distributed is
subject to government regulations and may be prohibited.
Unauthorized modification and adjustment
Changes or modifications not expressly approved by the party responsible for
compliance may void the user’s authority granted by the local government
radio management departments to operate this radio and should not be
ATTENTION!
Before using this radio, read this guide which contains important
operating instructions for safe usage and RF energy awareness
and control for compliance with applicable standards and
regulations

8
made. To comply with the corresponding requirements, transmitter
adjustments should be made only by or under the supervision of a person
certified as technically qualified to perform transmitter maintenance and
repairs in the private land mobile and fixed services as certified by an
organization representative of the user of those services.Replacement of any
transmitter component (crystal, semiconductor, etc.) not authorized by the
local government radio management departments equipment authorization for
this radio could violate the rules.
FCC Requirements:
This device complies with part 15 of the FCC Rules. Operation is subject to
the condition that this device does not cause harmful interference. (Licensed
radios are applicable); This device complies with part 15 of the FCC Rules.
Operation is subject to the following two conditions: (Other devices are
applicable)
(1) This device may not cause harmful interference, and
(2) this device must accept any interference received, including interference
that may cause undesired operation.
NOTE:
•(If applicable)This equipment has been tested and found to comply with the
limits for a Class A digital device, pursuant to part 15 of the FCC Rules. These
limits are designed to provide reasonable protection against harmful
interference when the equipment is operated in a commercial environment.
This equipment generates, uses, and can radiate radio frequency energy
and, if not installed and used in accordance with the instruction manual, may
cause harmful interference to radio communications. Operation of this
equipment in a residential area is likely to cause harmful interference in which
case the user will be required to correct the interference at his own expense.
•(If applicable)This equipment has been tested and found to comply with the
limits for a Class B digital device, pursuant to part 15 of the FCC Rules.
These limits are designed to provide reasonable protection against harmful
interference in a residential installation. This equipment generates, uses and
can radiate radio frequency energy and, if not installed and used in
accordance with the instructions, may cause harmful interference to radio
communications. However, there is no guarantee that interference will not
occur in a particular installation. If this equipment does cause harmful
interference to radio or television reception, which can be determined by
turning the equipment off and on, the user is encouraged to try to correct the
interference by one or more of the following measures:
—Reorient or relocate the receiving antenna.
—Increase the separation between the equipment and receiver.
—Connect the equipment into an outlet on a circuit different from that to which
the receiver is connected.
—Consult the dealer or an experienced radio/TV technician for help.
CE Requirements:
9
•(Simple EU declaration of conformity) Shenzhen Retevis Technology Co.,
Ltd. declares that the radio equipment type is in compliance with the essential
requirements and other relevant provisions of RED Directive 2014/53/EU and
the ROHS Directive 2011/65/EU and the WEEE Directive 2012/19/EU; the full
text of the EU declaration of conformity is available at the following internet
address: www.retevis.com.
•Restriction Information
This product can be used in EU countries and regions, including: Belgium
(BE), Bulgaria (BG), Czech Republic (CZ), Denmark (DK), Germany (DE),
Estonia (EE), Ireland (IE), Greece (EL), Spain (ES), France (FR), Croatia
(HR), Italy (IT), Cyprus (CY), Latvia (LV), Lithuania (LT), Luxembourg (LU),
Hungary (HU), Malta (MT), Netherlands (NL), Austria (AT), Poland (PL),
Portugal (PT), Romania (RO), Slovenia (SI), Slovakia (SK), Finland (FI),
Sweden (SE) and United Kingdom (UK).
For the warning information of the frequency restriction, please refer to the
package or manual section.
•Disposal
The crossed-out wheeled-bin symbol on your product, literature, or packaging
reminds you that in the European Union, all electrical and electronic
products, batteries, and accumulators (rechargeable batteries) must
be takento designated collection locations at the end of their working
life. Do not dispose of these products as unsorted municipal waste.
Dispose of them according to the laws in your area.
IC Requirements:
Licence-exempt radio apparatus
This device contains licence-exempt transmitter(s)/receiver(s) that comply
with Innovation, Science and Economic Development Canada’s
licence-exempt RSS(s). Operation is subject to thefollowing two conditions:
(1) This device may not cause interference.
(2) This device must accept any interference, including interference that may
cause undesired operation of the device.Le présent appareil est conforme aux
CNR d’Industrie Canada applicables aux appareils radio exempts de licence.
L’exploitation est autorisée aux deux conditions suivantes :
(1) l’appareil ne doit pas produire de brouillage;
(2) l’utilisateur de l’appareil doit accepter tout brouillage radioélectrique subi,
même si le brouillage est susceptible d’en compromettre le fonctionnement.
RF Exposure Information(if applicable)
•DO NOT operate the radio without a proper antenna attached, as this may
damage the radio and may also cause you to exceed RF exposure limits. A
proper antenna is the antenna supplied with this radio by the manufacturer or
an antenna specifically authorized by the manufacturer for use with this radio,
and the antenna gain shall not exceed the specified gain by the manufacturer
declared.

10
•DO NOT transmit for more than 50% of total radio use time, more than 50%
of the time can cause RF exposure compliance requirements to be exceeded.
•During transmissions, your radio generates RF energy that can possibly
cause interference with other devices or systems. To avoid such interference,
turn off the radio in areas where signs are posted to do so.
•DO NOT operate the transmitter in areas that are sensitive toelectromagnetic
radiation such as hospitals, aircraft, and blasting sites.
•Portable Device, this transmitter may operate with the antenna(s)
documented in this filing in Push-to-Talk and body-worn configurations. RF
exposure compliance is limited to the specific belt-clip and accessory
configurations as documented in this filing and the separation distance
between user and the device or its antenna shall be at least 2.5 cm.
•Mobile Device, during operation, the separation distance between user and
the antenna subjects to actual regulations, this separation distance will
ensure that there is sufficient distance from a properly installed
externally-mounted antenna to satisfy the RF exposure requirements.
•Occupational/Controlled Radio, this radio is designed for and classified as
“Occupational/Con�trolled Use Only”, meaning it must be used only during
the course of employment by individuals aware of the hazards, and the ways
to minimize such hazards; NOT intended for use in a General
population/uncontrolled environment.
•General population/uncontrolled Radio, this radio is designed for and
classified as “General population/uncontrolled Use”.
RF Exposure Compliance and Control Guidelines and Operating
Instructions
To control your exposure and ensure compliance with the
occupational/controlled environment exposure limits, always adhere to the
following procedures.
Guidelines:
•User awareness instructions should accompany the device when transferred
to other users.
•Do not use this device if the operational requirements described herein are
not met.
Operating Instructions (if applicable):
•Transmit no more than the rated duty factor of 50% of the time. To Transmit
(Talk), push the Push to Talk (PTT) button. To receive calls (listen), release
the PTT button. Transmitting 50% of the time, or less, is important because
the radio generates measurable RF energy exposure only when transmitting
in terms of measuring for standards compliance.
•Transmit only when people outside the vehicle are at least the recommended
minimum lateral distance away from a properly installed according to
installation instructions, externally mounted antenna.
•When operating in front of the face, worn on the body, always place the radio
in a Retevis approved clip, holder, holster, case, or body harness for this
product. Using approved body-worn accessories is important because the use
of Non-Retevis approved accessories may result in exposure levels, which

11
Protect your hearing:
WARNING
exceed the IEEE/ICNIRP RF exposure limits.
Hand-held Mode(if applicable)
• Hold the radio in a vertical position with the microphone (and other parts of
the radio including the antenna) at least 2.5 cm (one inch) away from the nose
or lips. The antenna should be kept away from the eyes. Keeping the radio at
a proper distance is important as RF exposure decreases with increasing
distance from the antenna.
Phone Mode(if applicable)
•When placing or receiving a phone call, hold your radio product as you would
a wireless telephone. Speak directly into the microphone.
Electromagnetic Interference/Compatibility
NOTE: Nearly every electronic device is susceptible to
electromagnetic interference (EMI) if inadequately shielded,
designed, or otherwise configured for electromagnetic compatibility
Avoid Choking Hazard
Small Parts. Not for children under 3 years.
Turn off your radio power in the following
•Turn off your radio before removing (installing) a battery or
accessory or when
•Turn off your radio when you are in a potentially hazardous
environments: Near electrical blasting caps, in a blasting area, in
explosive atmospheres (inflammable gas, dust particles, metallic
powders, grain powders, etc.).
•Turn off your radio while taking on fuel or while parked at gasoline
service stations.To avoid electromagnetic interference and/or
compatibility conflicts
•Turn off your radio in any facility where posted notices instruct you
to do so, hospitals or health care facilities (Pacemakers, Hearing
Aids and Other Medical Devices) may be using equipment that is
sensitive to external RF energy.
•Turn off your radio when on board an aircraft. Any use of a radio
must be in accordance with applicable regulations per airline crew
instructions.
• Use the lowest volume necessary to do your job.
• Turn up the volume only if you are in noisy
surroundings.
• Turn down the volume before adding headset or earpiece.
• Limit the amount of time you use headsets or earpiec
WARNING

12
es at high volume.
• When using the radio without a headset or earpiece, do not
place the radio's speaker directly against your ear
• Use careful with the earphone maybe possible excessive sound
pressure from earphones and headphones can cause hearing
loss
Note: Exposure to loud noises from any source for extended
periods of time may temporarily or permanently affect your
hearing. The louder the radio's volume, the less
time is required before
•your hearing could be affected. Hearing damage from loud noise
is sometimes
undetectable at first and can have a cumulative effect.
Antennas
•Do not use any portable radio that has a damaged antenna. If a
damaged antenna comes into contact with the skin when the
radio is in use, a minor burn can result.
Batteries (If appropriate)
•When the conductive material such as jewelry, keys or chains
touch exposed terminals of the batteries, may complete an
electrical circuit (short circuit the battery) and become hot to
cause bodily injury such as burns. Exercise care in handling any
battery, particularly when placing it inside a pocket, purse or other
container with metal objects
Long transmission
•When the transceiver is used for long transmissions,
the radiator and chassis will become hot. charging battery.
Forbid
•Do not use charger outdoors or in moist environments, use only
in dry locations/conditions.
•Do not disassemble the charger, that may result in risk of
electrical shock or fire.
•Do not operate the charger if it has been broken or damaged in
any way.
•Do not place a portable radio in the area over an air bag or in the
air bag deployment area. The radio may be propelled with great
force and cause serious injury to occupants of the vehicle when
the air bag inflates.
To reduce risk
•Pull by the plug rather than the cord when disconnecting the
charger.
•Unplug the charger from the AC outlet before attempting any
maintenance or cleaning.
•Contact Retevis for assistance regarding repairs and service.
Avoid Burns
Safety Operation
WARNING
WARNING

•The adapter shall be installed near the equipment and shall be
easily accessible
•This radio meets the RF exposure guidelines when used with the
Retevis accessories supplied or designated for the product. Use
of other accessories may not ensure compliance with the RF
exposure guidelines and may violate regulations.
•For a list of Retevis-approved accessories for your radio model,
visit the following website: http://www.Retevis.com
Approved Accessories
WARNING
13

Le package comprend 3 talkies walkies avec fonctionnement sans licence,
conformes au Comité européen des radio communications et à la loi fédérale sur
les communications. c'est un appareil simplex qui fonctionne sur des fréquences
assignées. Ils sont livrés avec 16 canaux (PMR446) + LPD433 et un écran LCD
rétroéclairé, vous permettant de communiquer gratuitement sur plusieurs
kilomètres. (Jusqu'à 5 miles dans les zones ouvertes).
Remarque: veuillez lire attentivement les instructions d'utilisation avant d'utiliser
l'équipement et conservez-le pour une consultation ultérieure!
Précautions:
Pour éviter tout risque de brûlure, n'utilisez pas l'appareil si l'antenne est
endommagée de quelque manière que ce soit.
N'utilisez pas l'appareil dans un environnement potentiellement explosif (par
exemple autour de pompes, sur le pont inférieur d'un bateau ou autour d'une
installation de stockage de carburant ou de produits chimiques).
Si vous voyagez en voiture ou à vélo, arrêtez-vous avant d'utiliser l'appareil.
Éteignez l'appareil si vous êtes dans un avion ou dans un hôpital.N'utilisez
jamais l'appareil à proximité d'une radio pour éviter les interférences.
Retirez les piles si l'appareil n'est pas utilisé pendant une période prolongée.
Ne mélangez jamais des piles usagées avec des neuves.
Gardez l'émetteur et l'antenne à au moins 5 cm de votre visage. Dirigez
l'antenne vers le haut et parlez normalement.
Nettoyez l'appareil avec un chiffon humide. Évitez d'utiliser des produits de
nettoyage et des solvants.
Ne modifiez en aucun cas l'appareil. En cas de dommage, assurez-vous que
l'appareil est contrôlé par un professionnel qualifié.
L'appareil ne peut pas être utilisé pour contacter les services d'urgence.
Commencer
Scanning
Vox
Double attente
Niveau de batterie
PTT Bouton
Microphone
Bouton d’Appel
Down / Moniteur Bouton
Orateur
Antenne
Lampe de poche
Interrupteur d'alimentation /
bouton de contrôle
du volume
Canal /Élément du menu
CTCSS/Menu Option
Tx / Rx Icône
Prise haut-parleur /
micro / chargeur
Verrouillage du clavier
Bouton de lampe de poche
Up/Scan Button
Bouton Menu / Verrouillage
14

Réinitialiser: appuyez sur le bouton[ ]sous tension, il peut être restauré aux
paramètres par défaut
AVANT UTILISATION
Retrait du clip ceinture
Avant d'insérer les piles dans les appareils, tirez d'abord et maintenez le
loquet du clip de ceinture et faites glisser le clip de ceinture vers le haut
pour le retirer.
15

Installation de la batterie
A.Pour l'utilisation de piles non rechargeables:
1.Ouvrez le couvercle du compartiment des piles.
2. insérez 4 piles AAA (non incluses)
3.Installez la batterie en respectant les marques de polarité sur le compartiment
de la batterie.
4.Après avoir placé la batterie dans la bonne position, remplacez
B. Pour l'utilisation de batteries rechargeables avec Walkie
Chargez la batterie rechargeable de la radio avec le câble de charge spécifié.
Utilisation de l'appareil
Allumer / éteindre l'appareil
1.Allumer: allumez le bouton de l'interrupteur de volume ON / OFF dans le sens
des aiguilles d'une montre jusqu'à ce qu'un bip se fasse entendre;
2. Éteindre: Tournez le bouton de l'interrupteur ON / OFF du volume dans le
sens antihoraire.
Réglage du volume
1.Volume vers le haut: tournez le bouton de l'interrupteur marche / arrêt du
volume dans le sens des aiguilles d'une montre;
2.Volume vers le bas: Tournez le bouton de l'interrupteur ON / OFF du volume
dans le sens antihoraire.
3.Niveau de charge de la batterie / Indication de batterie faible
Le niveau de charge de la batterie est indiqué par le nombre de carrés présents
à l'intérieur de l'icône de la batterie sur l'écran LCD.
Batterie pleine
Batterie chargée aux 2/3
Batterie chargée au 1/3
Batterie vide
Lorsque le niveau de charge de la batterie est faible, l'icône de la batterie
clignote et un bip retentit pour indiquer que les batteries doivent être remplacées
ou rechargées.
4.Réception / transmission de communications:
Les appareils sont en mode “Réception”lorsqu'il est allumé et qu'il n'y a pas de
transmission.
Lorsqu'un signal est reçu sur le canal actif, l'écran LCD s'affiche en réception.
Lorsque vous appuyez sur le bouton PTT (push to talk), l'appareil passe en
mode “Transmission”.
Tenez l'appareil en position verticale avec le MIC (microphone) à 3-5 cm de votre
bouche. Tout en maintenant le bouton PTT enfoncé, parlez dans le microphone
avec un ton de voix normal.
Relâchez le bouton PTT lorsque vous avez terminé la transmission.
Pour que d'autres personnes reçoivent votre transmission, elles doivent être sur
le même canal que vous.
Remarque:
1.La portée de conversation dépend du terrain et des conditions
16

météorologiques. Il sera affecté par des obstacles tels que des collines, des
buissons ou des bâtiments.
2.N'essayez pas d'utiliser deux appareils distants de moins de 1,5 m (5 pieds).
Sinon, vous risquez de rencontrer des interférences.
5.Changer de chaîne
Appuyez une fois sur le bouton MENU, le numéro de canal clignotera sur l'écran.
Appuyez sur le bouton haut ▲ / bas ▼ pour changer de chaîne.
Appuyez sur le bouton PTT pour confirmer et revenir en mode veille.
Remarque: si aucun bouton n'est enfoncé dans les 10 31 secondes pendant le
réglage, le l'appareil retournera en mode veille.
6.99 codes de confidentialité
Appuyez deux fois sur le bouton MENU, le code de confidentialité actuel
clignotera sur l'écran.
Appuyez sur le bouton PTT pour confirmer et revenir en mode veille.
Appuyez sur le bouton haut ▲ / bas ▼ pour modifier les 99 codes de
confidentialité disponibles.
En utilisant des codes de confidentialité, votre chaîne ne sera pas facilement
occupée ou interférée par d'autres. Cela rend votre communication plus sûre et
privée.
7.VOX (fonction mains libres)
Appuyez trois fois sur le bouton MENU, le réglage VOX actuel clignote sur
l'écran et l'icône VOX s'affiche,
Appuyez sur le bouton UP ▲ pour régler le niveau de sensibilité VOX entre 1 et
3 niveaux (le niveau 3 est le niveau de sensibilité élevée).
Appuyez sur le bouton DOWN▼ jusqu'à ce que «OFF» apparaisse sur
l'affichage pour désactiver VOX.
Appuyez sur le bouton PTT pour confirmer et revenir en mode veille.
En mode VOX, la radio transmettra un signal lorsqu'elle est activée par votre
voix ou un autre son autour de vous.
L'utilisation de VOX n'est pas recommandée si vous prévoyez d'utiliser votre
appareil dans un environnement bruyant ou venteux.
Remarque: le mode VOX sera annulé lorsque vous appuyez sur le bouton PTT
8.Scanner d'un canal radio actif
Appuyez sur le bouton UP ▲ et maintenez-le enfoncé pendant 2 secondes:
L'indicateur de fonction «SCAN» apparaît sur l'écran et le canal balaie en
continu de 1 à 8 / I à 85. Une fois qu'un canal actif est trouvé, le balayage
s'arrête et vous pouvez écoutez la transmission.
Lorsque la transmission est sur l'arrêt du canal trouvé, le balayage reprend
automatiquement.
Remarque: si vous appuyez sur le bouton PTT pendant l'écoute d'un canal
trouvé
9.Moniteur
17

Appuyez sur le bouton DOWN ▼ et maintenez-le enfoncé pendant environ 3
secondes pour activer le moniteur.
Relâchez le bouton DOWN ▼ pour revenir en mode veille.
10.Réglage des tonalités d'appel
L'appareil dispose de 10 tonalités d'appel.
Appuyez 4 fois sur la touche MENU, «CA» s'affiche et sur la tonalité d'appel en
cours. Appuyez sur le bouton HAUT ▲ / Bas ▼ pour modifier une autre tonalité
d'appel.
Appuyez sur le bouton PTT pour confirmer et revenir en mode veille.
11.Envoi d'une tonalité d'appel
Appuie sur le bouton ; la tonalité d'appel sera transmise sur le canal de
réglage.
12.Activation / désactivation de la tonalité des touches
Lorsqu'une touche est enfoncée, l'appareil émet un bref bip.
Pour régler la tonalité des touches.
● Appuyez cinq fois sur la touche MENU. «To» s'affiche.
● Appuyez sur ▲ pour activer (ON) ou sur ▼ pour désactiver les tonalités des
touches (OFF)
● Appuyez sur le bouton PTT- pour confirmer votre sélection et revenir en mode
veille.
13.Roger Beep On/Off
Une fois le bouton PTT relâché, l'appareil émettra un bip Roger pour confirmer
que vous avez cessé de parler.
Appuyez six fois sur le bouton MENU; «Ro» s'affiche.
Appuyez sur le bouton UP ▲ / Down ▼ pour désactiver le bip Roger ON / OFF.
Appuyez sur le bouton PTT pour confirmer votre sélection et revenir en mode
veille.
14.Double attente
La fonction de veille double permet à l'appareil de recevoir des messages de
deux canaux
● Appuyez 7 fois sur la touche MENU-, le caractère 2CH clignote sur l'affichage
● Appuyez sur la touche haut ▲ ou sur la touche bas pour sélectionner le
deuxième canal, et sélectionnez (OF) pour fermer la fonction de veille double
● Appuyez sur le bouton PTT- pour confirmer la sélection et revenir en mode
veille.
15.Écran rétroéclairé
Appuyez sur n'importe quel bouton à l'exception du bouton MENU pour activer le
rétroéclairage de l'écran LCD. Le rétroéclairage s'allumera environ 5 secondes.
16.Connexion de l'écouteur
L'appareil peut être utilisé avec un écouteur (s'il y a un écouteur emballé avec
18
Table of contents
Languages:
Other Retevis Two-way Radio manuals

Retevis
Retevis RT66 User manual

Retevis
Retevis NR10 User manual

Retevis
Retevis RT76P User manual

Retevis
Retevis RT30M User manual

Retevis
Retevis RT22 User manual

Retevis
Retevis RT32 User manual

Retevis
Retevis RB22 User manual

Retevis
Retevis RB18 User manual

Retevis
Retevis RB20 User manual

Retevis
Retevis RT24 User manual

Retevis
Retevis RB17P User manual

Retevis
Retevis RT5 User manual

Retevis
Retevis A9136A User manual

Retevis
Retevis RB23 User manual

Retevis
Retevis RT622 User manual

Retevis
Retevis H-777 User manual

Retevis
Retevis RT25 User manual

Retevis
Retevis RT46 User manual

Retevis
Retevis RT639 User manual

Retevis
Retevis RT31 User manual