Rexton Adore StyleLine BT User manual

www.rexton.com
Adore StyleLine BT
Connexx Slim-RIC BT Charging Case
User Guide

2
Content
Welcome 4
Intended use 5
Your hearing inruments 6
Inrument type 6
Getting to know your hearing inruments 7
Components and names 7
Hearing programs 9
Features 9
Daily use 10
Charging 10
Turning on and o hearing inruments 14
Switching to andby mode 15
Inserting and removing the hearing inruments 16
Adjuing the volume 20
Changing the hearing program 20
Charging the internal battery of your charger 21
Checking the battery capacity of your charger 23
Special liening situations 24
On the phone 24
Audio reaming with iPhone 25
Airplane mode for hearing inruments 25
Frequently asked queions 26

3
Maintenance and care 28
Hearing inruments 28
Ear pieces 30
Charger 32
Professional maintenance 33
Important safety information for hearing
inruments and charger 34
Safety information on lithium-ion rechargeable
batteries 34
Safety information for hearing inruments 35
Safety information for charger 36
Further information 40
Accessories 40
Operating, transport and orage conditions for
hearing inruments and charger 40
Disposal information 41
Symbols 42
Troubleshooting 44
Country-specic information 45
Important information 46
Conformance information for charger 46
Service and warranty 47

4
Welcome
Thank you for choosing our hearing inruments to
accompany you through everyday life. Like anything new,
it may take you a little time to become familiar with them.
This guide, along with support from your Hearing Care
Professional, will help you underand the advantages
and greater quality of life your hearing inruments oer.
To receive the mo benet from your hearing inruments,
it is recommended that you wear them every day, all day.
This will help you get adjued to them.
CAUTION
It is important to read this user guide and the safety
manual thoroughly and completely. Follow the
safety information to avoid damage or injury.
Before using your hearing inruments for the
r time, fully charge them. Follow the inructions
in the charger's user guide.

5
Intended use
Hearing inruments are intended to improve the hearing
of hearing impaired persons. Diagnosis and prescription
of a hearing inrument mu be performed by hearing
health specialis, e.g. acouicians, audiologis or
ENT doctors.
The charger is intended to charge our specic hearing
inruments with built-in power cells (lithium-ion
rechargeable batteries).
Use the hearing inruments and accessories only as
described in the respective user guides.

6
Your hearing inruments
This user guide describes optional features that
your hearing inruments may or may not have.
Ask your Hearing Care Professional to indicate the
features that are valid for your hearing inruments.
Inrument type
Your hearing inruments are a RIC (Receiver-in-Canal)
model. The receiver is placed within the ear canal
and connected to the inrument via a receiver cable.
The inruments are not intended for children under the
age of 3 years or persons with a developmental age
of under 3 years.
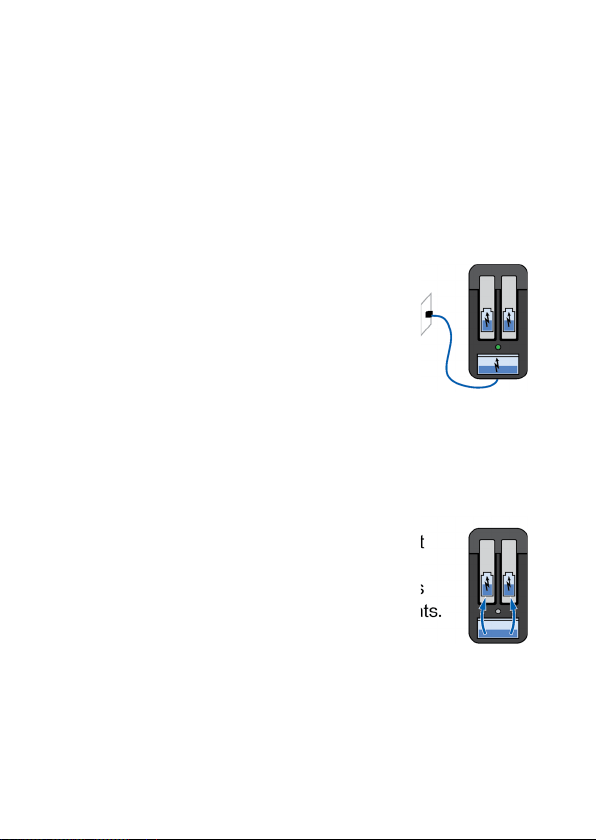
A power cell (lithium-ion rechargeable battery) is
permanently built into your hearing inrument. This
enables easy charging with our charger.
The wireless functionality enables advanced
audiological features and synchronization between
your two hearing inruments.
Your hearing inruments feature Bluetooth®low energy*
technology allowing for easy data exchange with your
smartphone, and for seamless audio reaming with your
iPhone**.
* The Bluetooth word mark and logos are owned by the Bluetooth SIG, Inc.,
and any use of such marks by the legal manufacturer of this product is under licenses.
Other trademarks and trade names are those of their respective owners.
** iPad, iPhone, and iPod touch are trademarks of Apple Inc., regiered in the U.S.
and other countries.

7
Getting to know your hearing inruments
Your hearing inruments have no controls.
If you want to adju the volume or switch hearing
programs manually, you can ask your Hearing Care
Professional about a remote control option.
Components and names
➍
➊
➊
➊
➊
Ear piece
➋
Receiver
➌
Receiver cable
➍
Microphone openings
➎
Charging contacts
➏
Side indicator
(R = right ear, L = left ear)

8
➎
➌
➌
➌
➍
➍
➊
Lid
➋
Charging slots
➌
Status LEDs
➍
Button
➎
USB port for power supply
➏
USB power cable
You can use the following andard ear pieces:
Standard ear pieces Size
Click Sleeve
(vented or closed)
Click Dome™ single
(open or closed)
Click Dome semi-open
Click Dome double

9
You can easily exchange the andard ear pieces.
Read more in section "Maintenance and care".
Hearing programs
1
2
3
4
5
6
Read more in section "Changing the hearing program".
Features
The Tinnitus Function generates a sound to
diract you from your tinnitus.

10
Daily use
Charging
How you can use the charger
You can use your charger in three dierent ways.
Charging via electrical outlet
When the charger is plugged in, it charges
the hearing inruments (if they are
placed in the charger) and it charges the
integrated battery at the same time.
The front atus LED permanently shows
the charging atus of the charger. The
hearing inruments' charging atus is shown when
opening the lid and/or pushing the button.
Mobile charging
When you are mobile with no electrical outlet
available, you can ill charge your hearing
inruments. Energy is fed from the charger's
integrated battery into your hearing inruments.
The charger mu be turned on to do so.
The charging atus of charger and hearing inruments
is shown by pushing the button or opening the lid.

11
Safekeeping
When no charging is needed, turn the charger
o and safely ore your hearing inruments
inside of it. The charger can only be turned o
when it is not plugged in.
No charging atus can be displayed.
Turning the charger on or o
When the charger is connected to an electrical outlet,
it is automatically turned on and cannot be turned o.
During mobile charging, press and hold the button for
5 seconds to turn the charger on or o.
■ When the charger turns on, the atus of the hearing
inruments and the atus of the charger's internal
battery are displayed for 7 seconds.
■ When the charger turns o, the front LED ashes
green for approximately 15 seconds.

12
Charging hearing inruments
XPlace the right hearing
inrument in the charging
slot marked with an
"R", and the left hearing
inrument in the charging
slot marked with an "L".
XStow the ear pieces nicely.
XClose the charger's lid
(optional).
XThe hearing inruments are automatically turned
o and art charging. The charging atus is
shown for 7 seconds.
If the atus LEDs do not light up when you insert the
hearing inruments, check the following:
■ The hearing inruments are not correctly placed.
Push them slightly into their charging slots or close
the charger's lid.
■ The charger is not connected to an electrical outlet
and it is o. Press and hold the button for 5 seconds
to turn on the charger.
■ The charger's internal battery is too low for mobile
charging. Connect the charger to an electrical outlet.

13
NOTICE
If you put a hearing inrument in the wrong
charging slot, the receiver cable may be damaged
when closing the charger's lid.
Charging atus of hearing inruments
The LED next to the hearing inrument
indicates the charging atus of the hearing
inrument. Note that the atus is only
displayed immediately after putting the hearing
inruments in the charger, when you briey
press the button or when you open the lid.
When the charger is o, no atus is displayed at all.
LED Status description
Pulsing green
Hearing inrument is being charged.
Green
Hearing inrument is fully charged.
LED is o
No hearing inrument is in the charger, hearing
inrument is not placed correctly, or charger is o.

14
Low power indication of the hearing inruments
You will hear an alert signal to indicate the power cell
is running low. The signal will be repeated every
20 minutes. Depending on the usage of your hearing
inruments, you have approximately 1.5 hours to charge
your hearing inruments before they op working.
Turning on and o hearing inruments
You have the following options to turn your hearing
inruments on or o.
XTurning on: Take the inruments out of the charger.
The artup melody is played in your hearing
inruments. The default volume and hearing program
are set.
XTurning o: Place the hearing inruments in the
charger.
Note that the charger mu be on.

15
Switching to andby mode
Via remote control, you can switch your hearing
inruments to andby mode. This mutes the hearing
inruments. When you leave andby mode, the
previously used volume and hearing program are set.
Note:
■ In andby mode, the hearing inruments are not
turned o completely. They draw some power.
Therefore we recommend to use andby mode only
for a short period of time.
■ If you want to leave andby mode, but the remote
control is not at hand: Turn your hearing inruments
o and on again (by shortly placing them in the
charger until one or more LEDs light up). Wait
until the artup melody is played in your hearing
inruments. This may take several seconds. Note
that the default volume and hearing program are set.

16
Inserting and removing the hearing inruments
Your hearing inruments have been ne-tuned for
your right and left ear. Letters indicate
the side:
■ R = right ear
■ L = left ear
Inserting a hearing inrument:
XFor Click Sleeves, take care that
the bend of the Click Sleeve is in line with the bend
of the receiver cable.
Correct:
Incorrect:

17
XHold the receiver cable at the
bend closer to the ear piece.
XCarefully push the ear piece in
the ear canal ➊.
XTwi it slightly until it sits well.
Open and close your mouth
to avoid accumulation of air in
the ear canal.
XLift the hearing inrument and
slide it over the top of your
ear ➋.
CAUTION
Risk of injury!
XInsert the ear piece carefully and not too
deeplyinto the ear.
■ It may be helpful to insert the right hearing
inrument with the right hand and the left
hearing inrument with the left hand.
■ If you have problems inserting the ear piece,
use the other hand to gently pull your earlobe
downwards. This opens the ear canal and
eases insertion of the ear piece.

18
The optional retention rand helps to securely retain the
ear piece in your ear. To position the retention rand:
XBend the retention rand and
position it carefully into the
bottom of the bowl of your ear
(refer to the picture).

19
Removing a hearing inrument:
XLift the hearing inrument
and slide it over the top
of your ear ➊.
XGrip the receiver in the ear canal with two ngers
and pull it carefully out ➋.
Do not pull the receiver cable.
CAUTION
Risk of injury!
XIn very rare cases the ear piece could remain in
your ear when removing the hearing inrument.
If this happens, have the ear piece removed
by a medical professional.
Clean and dry your hearing inruments after usage.
Read more in section "Maintenance and care".

20
Adjuing the volume
Your hearing inruments automatically adju the volume
to the liening situation.
XIf you prefer manual volume adjument, use a
remote control option.
An optional signal can indicate the volume change.
Changing the hearing program
Depending on the liening situation, your hearing
inruments automatically adju their sound.
Your hearing inruments may also have several hearing
programs which allow you to change the sound, if needed.
An optional signal tone can indicate the program change.
XTo change the hearing program manually, use a
remote control option.
Refer to section "Hearing programs" for a li of your
hearing programs.
The default volume is applied.
This manual suits for next models
1
Table of contents
Other Rexton Hearing Aid manuals

Rexton
Rexton RX12 User manual

Rexton
Rexton M-Core B-Li-M User manual

Rexton
Rexton Adore MB PB User manual

Rexton
Rexton Finesse 2c User manual

Rexton
Rexton Targa S 5 User manual

Rexton
Rexton Gem User manual

Rexton
Rexton BTE User manual

Rexton
Rexton M-Core B-Li-M User manual

Rexton
Rexton inoX 6C User manual

Rexton
Rexton M-Core SR User manual