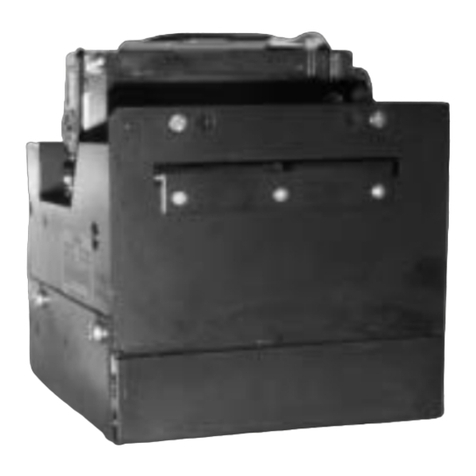
Rice Lake SP2200 User manual

38
Ticket Printer
SP2200
34171
Installation Manual
Software Version 1.2

36
Copyright © 1999 Rice Lake Weighing Systems.All rights reserved. Printed in the United States of America.
Specifications subject to change without notice.
Version 1.2, June 1999
Contents
About this Manual................................................................................................................................. 1
1.0 Introduction .............................................................................................................................. 1
1.1 Operating Modes...................................................................................................................... 1
1.1.1 Weight Extraction Mode............................................................................................................. 1
1.1.2 Standard Input Mode ................................................................................................................. 1
1.1.3 Self-Test and Monitor Mode ...................................................................................................... 2
1.2 Optional Equipment.................................................................................................................. 2
1.2.1 20mA Current Loop Interface .................................................................................................... 2
1.2.2 RS-422A Interface ..................................................................................................................... 2
1.2.3 Parallel Interface ........................................................................................................................ 2
1.2.4 Switch Module ........................................................................................................................... 2
1.2.5 Time and Date ........................................................................................................................... 2
1.3 Front Panel Indicators .............................................................................................................. 2
2.0 Installation and Setup .............................................................................................................. 3
2.1 Unpacking and Inspecting........................................................................................................ 3
2.2 Setup........................................................................................................................................ 3
2.2.1 Installing the Print Ribbon .......................................................................................................... 3
2.2.2 Setting the Head Gap ................................................................................................................ 5
2.3 Printer Self-Test ....................................................................................................................... 5
2.3.1 Self-Test Procedure ................................................................................................................... 6
2.3.2 Using Monitor Mode................................................................................................................... 6
2.4 Installing Optional Equipment .................................................................................................. 7
2.4.1 Removing Covers and Print Mechanism.................................................................................... 7
2.4.2 20mA Current Loop Interface .................................................................................................. 10
2.4.3 RS-422A Interface ................................................................................................................... 10
2.4.4 Parallel Interface ...................................................................................................................... 10
2.4.5 Switch Module ......................................................................................................................... 10
2.4.6 Time and Date Module ............................................................................................................ 11
2.4.7 Reassembling Print Mechanism and Covers ........................................................................... 11
3.0 Connecting to Host Devices.................................................................................................... 12
3.1 SP2200 Communications....................................................................................................... 12
3.2 Serial Port Pin Connections ................................................................................................... 13
3.3 Parallel Port Pin Connections ................................................................................................13
3.4 IQ plus 310A Indicators.......................................................................................................... 14
3.4.1 RS-232 Connections................................................................................................................ 14
3.4.2 20mA Current Loop Connections ............................................................................................ 14
3.5 IQ plus 800/810 Indicators ..................................................................................................... 15
3.5.1 RS-232 Connections................................................................................................................ 15
3.5.2 20mA Current Loop Connections ............................................................................................ 15
3.6 IQ plus 350 Indicators ............................................................................................................ 16
3.6.1 RS-232 Connections................................................................................................................ 16
3.6.2 20mA Current Loop Connections ............................................................................................ 16
3.7 IQ plus 510/710 Indicators ..................................................................................................... 17
3.7.1 RS-232 Connections................................................................................................................ 17
3.7.2 20mA Current Loop Connections ............................................................................................ 17
4.0 Configuring the SP2200.......................................................................................................... 18
4.1 Printer Mode Switches ........................................................................................................... 18
4.1.1 Weight Extraction/Standard Input Mode .................................................................................. 18
4.1.2 Demand/Continuous Mode ...................................................................................................... 18
4.1.3 Test Mode ................................................................................................................................ 19
4.1.4 Switch Module ......................................................................................................................... 19

37
4.2 Communications Configuration Switches............................................................................... 19
4.2.1 Baud Rate ................................................................................................................................ 19
4.2.2 Handshaking ............................................................................................................................ 20
4.2.3 Communications Mode ............................................................................................................ 20
4.2.4 Echo......................................................................................................................................... 20
4.2.4 Toledo Interface Mode ............................................................................................................. 20
4.3 Printing Characteristics Switches........................................................................................... 20
4.3.1 Font Selection .......................................................................................................................... 20
4.3.2 Form Feed ............................................................................................................................... 21
4.3.3 Eat <LF> after <CR> ............................................................................................................... 21
4.3.4 Double Strike ........................................................................................................................... 21
4.3.5 Time and Date Printing ............................................................................................................ 21
4.3.6 Time and Date Format ............................................................................................................. 21
4.3.7 Paper Sensor ........................................................................................................................... 21
4.4 DIP Switch Configuration Summary....................................................................................... 22
4.5 Setting the Time and Date ..................................................................................................... 23
4.5.1 Setting the Time and Date Using the Switch Module .............................................................. 23
4.5.2 Setting Time and Date Using a Serial Command String.......................................................... 24
4.5.3 Disabling Time and Date Printing ............................................................................................ 24
4.6 Setting ID Codes .................................................................................................................... 25
4.6.1 Setting a Constant ID Code ..................................................................................................... 25
4.6.2 Clearing an ID Code ................................................................................................................ 25
4.6.3 Setting an Incrementing ID Code............................................................................................. 26
4.6.4 Stopping ID Code Incrementing............................................................................................... 27
4.7 Setting the Number of Line Feeds between Print Requests .................................................. 27
4.8 Switch Module Command Summary...................................................................................... 27
5.0 SP2200 Control Codes and Escape Sequences ..................................................................... 28
5.1 SP2200 Control Codes .......................................................................................................... 29
5.2 ASCII Character Set............................................................................................................... 30
6.0 Printer Maintenance............................................................................................................... 31
6.1 Routine Maintenance ............................................................................................................. 31
6.2 Printhead Service................................................................................................................... 31
6.3 Fuse Replacement ................................................................................................................. 31
6.3.1 Line Fuses ............................................................................................................................... 31
6.3.2 AC Power Supply Current Limiting Fuse ................................................................................. 32
6.3.3 Onboard 5 Volt Supply Fuse.................................................................................................... 32
6.4 Selected Replacement Parts.................................................................................................. 32
7.0 SP2200 Specifications ........................................................................................................... 34
7.1 Electrical Specifications ......................................................................................................... 34
7.2 Printing Specifications............................................................................................................ 34
7.3 Communications Specifications ............................................................................................. 34
7.4 Environmental Specifications .................................................................................................34
SP2200 Limited Warranty................................................................................................................... 35

1
About this Manual
This manual is intended for use by service technicians responsible for installing SP2200 ticket printers. The
manual is organized based on the procedures you will likely follow when setting up and using your printer.
This manual applies to printers using Version 1.2 of the SP2200 software.
Some procedures described in this manual require removal of the printer covers.
These procedures are to be performed by qualified service personnel only.
1.0 Introduction
The SP2200 Ticket Printer is a bidirectional dot matrix printer designed for use in electronic weighing, point-
of-sale, and industrial applications. The SP2200 is available in 115 VAC, and 230 VAC models.
1.1 Operating Modes
The SP2200 uses two principal operating modes, weight extraction mode and standard input mode, to process
and print the data sent by the host device. These modes are selected using a DIP switch on the back of the
SP2200. A third mode, called monitor mode, is a diagnostic mode associated with the printer self-test func-
tion.
1.1.1 Weight Extraction Mode
Weight extraction mode is used to extract weight information from the serial outputs of weighing devices.
Used in weight extraction mode, the SP2200 extracts weight, units, and status information from the scale
output and sends the data to the printer buffer in the format shown below. Note: The format of the printed
output depends on the SP2200 configuration.
WWWWWWW UU HH:MM xM MM/DD/YY CCCCCCCC
where:
•WWWWWWW is the weight
•UU is the units (lb or kg)
•HH:MM xM is the time (If US format is used, xM is the am/pm indicator. If international format is
used, time is shown as HH:MM using a 24-hour clock.)
•MM/DD/YY is the date (If US format is used. If international format is used, the date is shown in the
format DD/MM/YY.)
•CCCCCCCC is the ID code
The SP2200 must be configured for weight extraction mode when connected to devices sending data as
continuous output.
1.1.2 Standard Input Mode
Standard input mode is used to print data exactly as received from the sending device. In standard input mode,
the host device controls the content and formatting of the information printed.
!
Warning

2
1.1.3 Self-Test and Monitor Mode
The self-test function and monitor mode are used to test the SP2200 and installed options. The self-test
function provides a dot firing test, an ASCII character dump routine, and a list of installed options and DIP
switch settings. Monitor mode is a test state entered once the self-test is complete. In monitor mode, the
SP2200 prints characters and control codes sent to it without interpreting the data.
See Section 2.3 for more information about using the SP2200 self-test and monitor mode.
1.2 Optional Equipment
The following sections describe optional equipment available for the SP2200 ticket printer. If you ordered
your printer with one or more of the options listed below, the option was installed at the factory. For informa-
tion about installing the options, see Section 2.4, Installing Optional Equipment.
1.2.1 20mA Current Loop Interface
The 20mA current loop interface is a current-based serial interface, capable of data rates of 300 to 19200 bits
per second over a cable length of up to 1000 feet (300 meters). The 20mA interface is used to connect the
SP2200 printer to host devices using that interface rather than the standard RS-232C interface.
1.2.2 RS-422A Interface
The RS-422A interface is a differential voltage-based serial interface capable of transmitting data over
distances of up to 4000 feet (1200 meters) at data rates of up to 10 Mbps. RS-422 can be configured for multi-
drop communications with as many as ten receivers.
1.2.3 Parallel Interface
The parallel interface option is used to connect the SP2200 printer to host devices with parallel data ports.
Many personal computers and ASCII terminals use parallel ports for printer connection.
1.2.4 Switch Module
The switch module option provides the SP2200 printer with a number of capabilities that may be required for
some applications. The switch module option lets you:
• Enter ID codes to be printed with weight information
• Set time and date without an attached serial sending device (requires time and date module)
• Request printing using the PRINT button on the SP2200 switch module
1.2.5 Time and Date
The time and date option provides time and date stamping for tickets printed by the SP2200. The time and
date module can be programmed using the optional switch module or a serial sending device.
1.3 Front Panel Indicators
The three LEDs on the front panel of the SP2200 are used as follows:
POWER (green LED) Indicates that the printer is connected to a power source and the rear panel
power switch is on.
FORM OUT (red LED) Indicates that there is no ticket in the printer. This indicator is active only if
the paper sensor is set on. See Section 4.3.7 for more information.
FAULT (amber LED) Indicates that the time and date or ID code information being entered is either
incomplete or invalid. The FAULT LED is normally lit when using the
switch module to enter this information. When the entry is complete, the
LED turns off.

3
2.0 Installation and Setup
2.1 Unpacking and Inspecting
Immediately after unpacking, perform a visual inspection of the SP2200. Notify the shipper and Rice Lake
Weighing Systems immediately if any damage occurred during transportation.
Replace all packing materials, including the plastic bag and the cardboard insert, in the shipping carton. Store
the carton in a safe place so that it will available if the printer is relocated or returned for service.
Factory installation of some printer options, such as the switch module and the parallel interface, can be
verified by visual inspection. For other options, such as the time and date module and the 20mA current loop
interface, use the self-test procedure described in Section 2.3 to verify installation.
2.2 Setup
Initial setup of the SP2200 consists of installing the print ribbon, setting the head gap, and running the printer
self-test. See Section 2.4 for information about installing optional equipment.
Before connecting the printer to a power source, check the operating voltage shown on the back panel of the
printer. Verify that the source voltage is within the operating range of the printer.
2.2.1 Installing the Print Ribbon
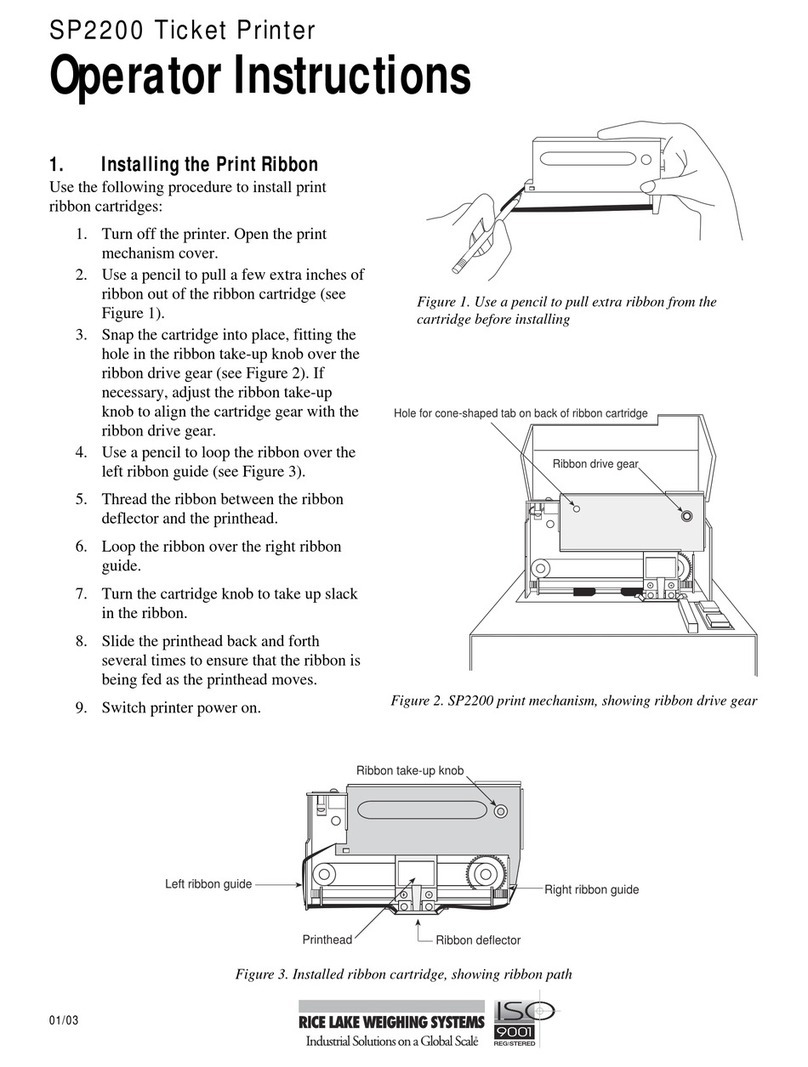
Use the following procedure to install print ribbon cartridges:
1. Turn off the printer. Open the print mechanism cover.
2. Use a pencil to pull a few extra inches of ribbon out of the ribbon cartridge (see Figure 2-1).
Figure 2-1. Use a pencil to pull extra ribbon from the cartridge before installing

4
Hole for cone-shaped tab on back of ribbon cartridge
Ribbon drive gear
Figure 2-2. SP2200 print mechanism, showing ribbon drive gear
3. Snap the cartridge into place, fitting the hole in the ribbon take-up knob over the ribbon drive gear. If
necessary, adjust the ribbon take-up knob to align the cartridge gear with the ribbon drive gear.
4. Use a pencil to loop the ribbon over the left ribbon guide (see Figure 2-3).
5. Thread the ribbon between the ribbon deflector and the printhead.
6. Loop the ribbon over the right ribbon guide.
Left ribbon guide Right ribbon guide
Printhead Ribbon deflector
Ribbon take-up knob
Figure 2-3. Installed ribbon cartridge, showing ribbon path
7. Turn the cartridge knob to take up slack in the ribbon.
8. Slide the printhead back and forth several times to ensure that the ribbon is being fed as the printhead
moves.
9. Switch printer power on.

5
2.2.2 Setting the Head Gap
The SP2200 is designed to accept forms up to a thickness of .024 inches (0.609 mm). The head gap adjust-
ment lever (Figure 2-4) can be set to print up to 5-part forms. The six detents allow a head gap range of .004
to .024 inches in .004-inch increments. Move the adjustment lever toward the back of the printer to increase
the head gap.
Figure 2-4. Head gap adjustment lever, located on left side of the print mechanism
2.3 Printer Self-Test
The SP2200 self-test function is used to verify the operation of the printer. The self test should be run before
using the printer when first installed and after installing any optional equipment. The SP2200 self-test pro-
vides the following information:
• Software revision number
• Dot firing test
• Printout of ASCII character set
• Configured baud rate
• List of installed options
• DIP switch settings
Figure 2-5 shows an example of a ticket printed using the SP2200
self test.
Figure 2-5. Printer self-test ticket

6
2.3.1 Self-Test Procedure
To run the SP2200 self-test, do the following:
1. Turn off the printer.
2. Set DIP switch 3-7 on. This switch puts the printer in self-test/monitor mode.
3. Insert a form into the printer.
4. Turn on the printer to print the self-test information.
To test the serial port, you must use a test plug for the loop-back test. Running the self-test with a test plug
connected to the serial port checks the configured baud rate and verifies that serial communications is opera-
tional. When the serial port is configured correctly, the self-test ticket includes the statement SERIAL BAUD
RATE CHECKS GOOD (see Figure 2-5); if the port is incorrectly configured, the ticket reads SERIAL BAUD
RATE IS HUNG.
A test plug can be easily fabricated using a male DB-25 connector. Figures 2-6a, 2-6b, and 2-6c show test
plugs for RS-232, 20mA current loop, and RS-422A interfaces.
Notes:
1. You must use a separate test plug for each of the interfaces used by the SP2200. A test plug wired for
both RS-232 and 20mA current loop will not verify operation of the 20mA circuit.
2. RS-232 communications is disabled if either of the other serial communications options is installed.
See Section 2.4 for instructions on installing or removing communications options.
2.3.2 Using Monitor Mode
Once the printer self-test has run, the SP2200 goes into a diagnostic state called monitor mode. In monitor
mode, the SP2200 prints any data sent to it without interpreting the data. The SP2200 remains in monitor
mode until DIP switch 3-7 is turned off and the printer is turned off and on again.
You can use monitor mode to determine exactly what information is being sent to the SP2200 by the indicator
or other host device. The full ASCII character set, including the SP2200 control codes (ASCII values 0–31
decimal, 0–1F hexadecimal), are printed without formatting.
Control codes are shown with a caret (^) symbol followed by a second ASCII character that indicates the
specific control code. For example, a carriage return (ASCII value CR, 13 decimal, 0D hex) is shown as ^M; a
line feed (ASCII value LF, 10 decimal, 0A hex) is shown as ^J. See Sections 5.0 and 5.1 for more informa-
tion and a complete list of SP2200 control codes.
Figure 2-6a. Test plug for RS-232C interface
Figure 2-6b. Test plug for 20mA current loop interface
Figure 2-6c. Test plug for RS-422A interface
13 12 11 10 9 8 7 6 5 4 3 2 1
25 24 23 22 21 20 19 18 17 16 15 14
13 12 11 10 9 8 7 6 5 4 3 2 1
25 24 23 22 21 20 19 18 17 16 15 14
20 OHM, 1/4 WATT
13 12 11 10 9 8 7 6 5 4 3 2 1
25 24 23 22 21 20 19 18 17 16 15 14

7
2.4 Installing Optional Equipment
To install the 20mA current loop, RS-422A, and parallel interface options you must remove the print mecha-
nism cover and the electronics cover (see Figure 2-7). To install the switch module or the time and date
module, you must also remove the print mechanism. This section provides procedures for installing or remov-
ing the SP2200 options.
2.4.1 Removing Covers and Print Mechanism
Disconnect power before removing printer covers.
Follow the steps listed below to remove the covers
and print mechanism. See the procedure for the
particular option you are installing to determine
whether the print mechanism must be removed.
1. Turn off printer and unplug from wall outlet.
2. Remove 3 screws from back of print mechanism cover (see Figure 2-8). Lift and remove cover.
12345678 12345678 1 2345678
PARALLEL INPUT
LINE
SERIAL I/O S1 S2 S3
ON
Print mechanism cover screws (3)
Electronics cover screw
Figure 2-8. Back of SP2200, showing screws for removing electronics and print mechanism covers
Figure 2-7. Electronics and print mechanism covers
PRINT
POWER FORM FAULT
OUT
SET
A
POWER FORM FAULT
OUT
Print mechanism cover
Electronics cover
Caution
Use a wrist strap to ground yourself and
protect components from electrostatic
discharge (ESD) when working inside
the SP2200 enclosure.
!
Warning

8
3. Remove screw from the back of the base enclosure (see Figure 2-8). Slide the printhead to the far left
(home position) then remove the electronics cover by lifting at back, tipping forward, and lifting over
print mechanism.
4. If the print mechanism must be removed, turn the printer on its side and remove the 4 screws that
hold the print mechanism to the bottom of the base enclosure (see Figure 2-9).
Print mechanism screws (4)
Figure 2-9. Bottom view of SP2200, showing screws for removing print mechanism
5. Set the printer upright, then remove the print mechanism. Do not disconnect cables between the print
mechanism and the SP2200 circuit board. Replugging cables into the wrong connectors will result
in circuit damage.
Once the print mechanism has been removed from the base enclosure, all of the circuit board sockets, jump-
ers, and connectors can be easily accessed. Figure 2-10 shows the locations of these components on the circuit
board. Continue with the procedure for the particular option you want to install.

9
Figure 2-10. SP2200 circuit board, showing locations of optional components and connectors
+
++ +
+
+
U17
U25
U16
U9
U22
U31
U24
U15
SW3 SW2 SW1
U27
U26
U23
Y1
C24
C23
U3
C5
C9
C7
C8
C4
J3
R18
Q2
R1
R19
C3
J8
R20
Q3
R3
R5
J1
R31
R21
Q1
R4
R2
J7
Q12
Q13
Q11
Q9
Q10
Q8
Q7
R32
J9
Q6
D17
D14
D16
D10
D11
D13
D12
D8
U7
C18
U5
U6
U33
R80
C37
R76
R77
CR10
L1
C35
C34
U32
R79
R78
C36
J10
U2
U10
Q5
J4
J2
R30
Q4
R22
C20 C13
C21
D9
C12
U4
U13
Q17
R39
C19
D1
U14
Q18
R40
C28
D2
U21
Q22
R56
C25
D3
U18
Q19
R53
C26
D4
U19
Q20
R54
C32
D5
U30
Q25
R75
C33
D6
U20
Q21
R55
C27
D7
U28
Q23
R73
D15
C11
C10
C22
C29
U29
Q24
R74
D18
C30
C2
J5
C6
CR1
U1
R13
C1
C31
U8
R65
R64
R62 R63
R24
R17
R66
R16
R15
D19
R61 R60
Q14
R58 R59
R57
R52
R50 R51R49 R48
R46 R47
R45
R44
R36 R43
R35 R42
R34 R41
R33
R67
R71
R72
R70
R69
R68
R25
R14
R12
R11
R10
R9
R8
R7
R6
R26
R27
R28
R29
R81
R82
C40 C41
C43 C44
C45
C46
C47 C48
J11
Q15
D22
R23
R37
R38
U11
C42
J6
4100
4200
Parallel Port
Switch Module
Time & Date Module
RS-422A
20mA
F R O N T
Serial Port
D
Print Mechanism
Ribbon Cable
F4

10
2.4.2 20mA Current Loop Interface
To install the 20mA current loop interface, disconnect power to the printer and follow the procedure for
removing the covers as described in Section 2.4.1. Once the covers are removed, continue with the following
steps:
1. If you are replacing the 20mA current loop chips, carefully remove chips from sockets U5 and U6
with a chip removal tool.
2. Install the new 20mA current loop chips. The 4100 chip goes in socket U5; the 4200 chip goes in
socket U6 (see Figure 2-10). The notch on the top of each chip must face the back of the printer when
installed.
3. Replace covers using the procedure described in Section 2.4.7.
4. Use the printer self-test procedure described in Section 2.3 to verify installation of the option.
2.4.3 RS-422A Interface
To install the RS-422A interface, disconnect power to the printer and follow the procedure for removing the
covers as described in Section 2.4.1. Once the covers are removed, continue with the following steps:
1. If you are replacing the RS-422A chip, carefully remove chip from socket U8 with a chip removal
tool.
2. Install the new RS-422A chip in socket U8 (see Figure 2-10). The notch on the top of the chip must
face the back of the printer when installed.
3. Replace covers using the procedure described in Section 2.4.7.
4. Use the printer self-test procedure described in Section 2.3 to verify installation of the option.
2.4.4 Parallel Interface
To install the parallel interface, disconnect power to the printer and follow the procedure for removing the
covers as described in Section 2.4.1. Once the covers are removed, continue with the following steps:
1. Remove the cover plate from the parallel input port.
2. Plug the parallel interface ribbon cable into socket J1 (see Figure 2-10).
3. Attach the connector to the parallel input port using the screws, lock washers, and nuts provided.
4. Set DIP switch 2-8 on for parallel communications.
5. Replace covers using the procedure described in Section 2.4.7.
6. Use the printer self-test procedure described in Section 2.3 to verify installation of the option.
2.4.5 Switch Module
To install the switch module, disconnect power to the printer and follow the procedure for removing the
covers and print mechanism as described in Section 2.4.1. Once the print mechanism is removed, continue
with the following steps:
1. Turn the printer on its side and remove the two screws shown in Figure 2-11. (These screws are used,
in the same locations, to attach the switch module.) Remove the blank plate assembly from the base
enclosure.
2. Install the switch module assembly in the same location, aligning the holes in the assembly with those
in the base enclosure. Reinstall screws removed in Step 1.
3. Plug the switch module cable onto connector J8 (see Figure 2-10).
4. Replace print mechanism and covers using the procedure described in Section 2.4.7.
5. Use the printer self-test procedure described in Section 2.3 to verify installation of the option.

11
Switch module screws (2)
Figure 2-11. Bottom of SP2200, showing screws for attaching switch module
2.4.6 Time and Date Module
To install the time and date module, disconnect power to the printer and follow the procedure for removing
the covers and print mechanism as described in Section 2.4.1. Once the print mechanism is removed, continue
with the following steps:
1. If you are replacing the time and date module, carefully remove chip from socket U9 with a chip
removal tool or small screwdriver.
2. Install the time and date module in socket U9 (see Figure 2-10). The notch on the top of the chip must
face the back of the printer when installed.
3. Replace print mechanism and covers using the procedure described in Section 2.4.7.
4. Use the printer self-test procedure described in Section 2.3 to verify installation of the option.
5. To set the time and date, see Section 4.5.
2.4.7 Reassembling Print Mechanism and Covers
Once the optional hardware has been installed, use the following procedure to reassemble the print mecha-
nism and covers before testing or configuring the option.
If any internal cables were unplugged during disassembly, ensure that they are replugged in the correct
sockets before continuing. Incorrect cable connections can cause serious damage to the printer.
1. If the print mechanism has been removed, place the print mechanism in the base enclosure, then turn
the printer on its side and replace the 4 screws that hold the print mechanism to the bottom of the base
enclosure. Do not overtighten the screws.
2. Ensure that the print mechanism ribbon cable is plugged securely into connector J2 on the circuit
board (see Figure 2-10).
3. Replace electronics cover and secure with screw in back of base enclosure. The print head must be in
the home position before replacing the cover.
4. Replace print mechanism cover and fasten with 3 screws.

12
3.0 Connecting to Host Devices
The SP2200 printer supports serial communications using RS-232C, 20mA current loop, and RS-422A
communications interfaces. A parallel communications interface is also available for use with host devices
with parallel printer ports.
Only ASCII-encoded data is supported by the SP2200. The SP2200 can be connected to host devices using
other data formats, but a protocol converter must be used to convert the data to ASCII encoding before the
SP2200 can process the data.
3.1 SP2200 Communications
RS-232C is the standard communications interface for the SP2200 printer. RS-232 is a voltage-based serial
interface, capable of data rates of 300 to 19200 bits per second over a cable length of up to 50 feet (15
meters). The optional 20mA current loop and RS-422A interfaces provide alternative serial communications
methods. The optional Centronics parallel interface allows connection to PCs and ASCII terminals equipped
with parallel printer ports.
Only one serial communications interface can be used at a time. Installation of either of the serial
communications options (20mA or RS-422) disables the RS-232 capability of the SP2200.
The serial and parallel and ports can be connected to host devices at the same time. However, only one of the
ports can be active. The active port is selected on power-up based on the setting of DIP switch 2-8 (see
Section 4.2.3). Connected host devices can toggle the active port between serial and parallel by sending an
ASCII EM character (25 decimal, 19 hexadecimal) to the SP2200.
Note:
To meet regulatory requirements for EMI/RFI suppression, you must install the included clamp-on EMI filter,
PN 38694, on the serial communications cable. To install, position the open filter on the serial cable, as close
as possible to the printer connection, then squeeze the filter halves together.

13
3.2 Serial Port Pin Connections
The following table lists the pin connections for
the SP2200 serial data input port.
Pin Signal
1 Chassis ground
2 TXD (RS-232)
3 RXD (RS-232)
4 +5V (4.7KΩresistor)
5 CTS/Clear to Send
6 Not used
7 Ground
8 Not used
9 +IN (20mA/RS-422A)
10 –IN (20mA/RS-422A)
11 Print (Active low)
12 Not used
13 Ground
14 +5V
15 Not used
16 Not used
17 Not used
18 +OUT (20mA/RS-422A)
19 –OUT (20mA/RS-422A)
20 DTR/Data Terminal Ready
21 Not used
22 Not used
23 Cash drawer OUT
24 +9V OUT (330Ωresistor)
25 +9V OUT
3.3 Parallel Port Pin Connections
The following table lists the pin connections for the
SP2200 parallel data input port.
Pin Signal
1 STROBE
2D0
3D1
4D2
5D3
6D4
7D5
8D6
9D7
10 ACK
11 BUSY
12 Ground
13 +5V
14-18 Not used
19-29 Ground
30-36 Not used

14
3.4 IQ plus 310A Indicators
The SP2200 can be connected to the IQ plus 310A indicator at baud rates of 1200 to 19.2 Kbps using either
the printer port (RS-232 or 20mA current loop) or the EDP port (RS-232 only). Communications cable
connections are made to the J4 terminal block in the 310A as shown in the following tables.
Note: For connections not using hardware handshaking (CTS/DTR), install a jumper between pins 4 and 5 on
the printer end of the serial cable.
3.4.1 RS-232 Connections
RS-232/Printer Port
IQ plus 310A Indicator SP2200 Ticket Printer
J4 Pin Port Description Serial Port Pin Description
2 EDP/Printer GND (Signal ground) 7 GND (Signal ground)
5 Printer TxD (RS-232) 3 RxD (RS-232)
RS-232/EDP Port
IQ plus 310A Indicator SP2200 Ticket Printer
J4 Pin Port Description Serial Port Pin Description
1 EDP TxD (RS-232) 3 RxD (RS-232)
2 EDP/Printer GND (Signal ground) 7 GND (Signal ground)
3 EDP RxD (RS-232) 2 TxD (RS-232)
3.4.2 20mA Current Loop Connections
20mA/Printer Port
IQ plus 310A Indicator SP2200 Ticket Printer
J4 Pin Port Description Serial Port Pin Description
2 EDP/Printer GND (Signal ground) 10 –20mA IN
4 Printer +20mA OUT 9 +20mA IN

15
3.5 IQ plus 800/810 Indicators
The SP2200 can be connected to the IQ plus 800 and 810 indicators at baud rates of 300 to 19.2 Kbps using
either the printer port (RS-232 or 20mA current loop) or the EDP port (RS-232 only). Communications cable
connections are made to the J7 terminal block in the indicator as shown in the following tables.
Note: For connections not using hardware handshaking (CTS/DTR), install a jumper between pins 4 and 5 on
the printer end of the serial cable.
3.5.1 RS-232 Connections
RS-232/Printer Port
IQ plus 800/810 Indicator SP2200 Ticket Printer
J7 Pin Port Description Serial Port Pin Description
5 Printer TxD (RS-232) 3 RxD (RS-232)
6 Printer GND (Signal ground) 7 GND (Signal ground)
RS-232/EDP Port
IQ plus 800/810 Indicator SP2200 Ticket Printer
J7 Pin Port Description Serial Port Pin Description
11 EDP TxD (RS-232) 3 RxD (RS-232)
12 EDP GND (Signal ground) 7 GND (Signal ground)
9 EDP RxD (RS-232) 2 TxD (RS-232)
3.5.2 20mA Current Loop Connections
20mA/Printer Port
IQ plus 800/810 Indicator SP2200 Ticket Printer
J7 Pin Port Description Serial Port Pin Description
4 Printer –20mA OUT 10 –20mA IN
6 Printer +20mA OUT 9 +20mA IN
20mA/EDP Port
IQ plus 800/810 Indicator SP2200 Ticket Printer
J7 Pin Port Description Serial Port Pin Description
10 EDP –20mA OUT 10 –20mA IN
12 EDP +20mA OUT 9 +20mA IN
7 EDP +20mA IN 18 +20mA OUT
8 EDP –20mA IN 19 –20mA OUT

16
3.6 IQ plus 350 Indicators
The SP2200 can be connected to the IQ plus 350 indicator at baud rates of 300 to 9600 bps. Communications
cable connections are made to the terminal blocks in the IQ plus 350 as shown in the following tables.
Note: For connections not using hardware handshaking (CTS/DTR), install a jumper between pins 4 and 5 on
the printer end of the serial cable.
3.6.1 RS-232 Connections
IQ plus 350 Indicator SP2200 Ticket Printer
Pin Description Serial Port Pin Description
J4-5 TxD (RS-232) 3 RxD (RS-232)
J4-2 GND (Signal ground) 7 GND (Signal ground)
3.6.2 20mA Current Loop Connections
IQ plus 350 Indicator SP2200 Ticket Printer
Pin Description Serial Port Pin Description
J4-4 +20mA OUT 9 +20mA IN
J4-2 –20mA OUT 10 –20mA IN

17
3.7 IQ plus 510/710 Indicators
The SP2200 can be connected to the IQ plus 510 and 710 indicators at baud rates of 300 to 9600 bps. Com-
munications cable connections are made to the J4 and J5 terminal blocks in the indicators as shown in the
following tables.
Note: For connections not using hardware handshaking (CTS/DTR), install a jumper between pins 4 and 5 on
the printer end of the serial cable.
3.7.1 RS-232 Connections
IQ plus 510/710 Indicator SP2200 Ticket Printer
Pin Port Description Serial Port Pin Description
J4-2 1/2 GND (Signal ground) 7 GND (Signal ground)
J4-5 1 RxD (RS-232) 2 TxD (RS-232)
J4-4 1 TxD (RS-232) 3 RxD (RS-232)
3.7.2 20mA Current Loop Connections
IQ plus 510/710 Indicator SP2200 Ticket Printer
Pin Port Description Serial Port Pin Description
J4-7 1 +20mA TxD 9 +20mA IN
J4-6 1 –20mA TxD 10 –20mA IN
Other manuals for SP2200
2
Table of contents
Other Rice Lake Printer manuals

Rice Lake
Rice Lake RL-42TT User manual

Rice Lake
Rice Lake Uni-9 Series User manual

Rice Lake
Rice Lake RL-HPJ Manual

Rice Lake
Rice Lake TM-U590 User manual

Rice Lake
Rice Lake TicketPress User manual

Rice Lake
Rice Lake ATK User manual

Rice Lake
Rice Lake Prove User manual

Rice Lake
Rice Lake RL-22DT User manual

Rice Lake
Rice Lake SST4 User manual

Rice Lake
Rice Lake SP2200 Specifications