Rice Lake Uni-9 Series User manual

Uni-9 Series
Scale and Printer
Installation Manual
PN 162299


Contents i
Contents
1.0 Introduction..................................................................................................................................... 1
1.1 Safety . . . . . . . . . . . . . . . . . . . . . . . . . . . . . . . . . . . . . . . . . . . . . . . . . . . . . . . . . . . . . . . . . . . . . . . . . . 1
1.2 Menu Navigation . . . . . . . . . . . . . . . . . . . . . . . . . . . . . . . . . . . . . . . . . . . . . . . . . . . . . . . . . . . . . . . . . 2
1.3 Menu Structure . . . . . . . . . . . . . . . . . . . . . . . . . . . . . . . . . . . . . . . . . . . . . . . . . . . . . . . . . . . . . . . . . . 3
1.3.1 Configuration Features with Menu Locations. . . . . . . . . . . . . . . . . . . . . . . . . . . . . . . . . . . . . . . . . . . . . . . 3
1.4 Passwords and Menu Navigation . . . . . . . . . . . . . . . . . . . . . . . . . . . . . . . . . . . . . . . . . . . . . . . . . . . . 5
1.4.1 Service Access Password. . . . . . . . . . . . . . . . . . . . . . . . . . . . . . . . . . . . . . . . . . . . . . . . . . . . . . . . . . . . . 5
1.4.2 General Access Password . . . . . . . . . . . . . . . . . . . . . . . . . . . . . . . . . . . . . . . . . . . . . . . . . . . . . . . . . . . . 5
1.4.3 Passwords . . . . . . . . . . . . . . . . . . . . . . . . . . . . . . . . . . . . . . . . . . . . . . . . . . . . . . . . . . . . . . . . . . . . . . . . 5
2.0 Installation and Setup..................................................................................................................... 6
2.1 Checking the Scale Firmware . . . . . . . . . . . . . . . . . . . . . . . . . . . . . . . . . . . . . . . . . . . . . . . . . . . . . . . 6
2.2 Updating the Scale Firmware . . . . . . . . . . . . . . . . . . . . . . . . . . . . . . . . . . . . . . . . . . . . . . . . . . . . . . . 7
2.2.1 Preparing a USB Memory Stick. . . . . . . . . . . . . . . . . . . . . . . . . . . . . . . . . . . . . . . . . . . . . . . . . . . . . . . . . 7
2.2.2 Saving All Data . . . . . . . . . . . . . . . . . . . . . . . . . . . . . . . . . . . . . . . . . . . . . . . . . . . . . . . . . . . . . . . . . . . . . 8
2.2.3 Initializing Data . . . . . . . . . . . . . . . . . . . . . . . . . . . . . . . . . . . . . . . . . . . . . . . . . . . . . . . . . . . . . . . . . . . . 10
2.2.4 Downloading Main Firmware. . . . . . . . . . . . . . . . . . . . . . . . . . . . . . . . . . . . . . . . . . . . . . . . . . . . . . . . . . 11
2.3 Clearing Memory . . . . . . . . . . . . . . . . . . . . . . . . . . . . . . . . . . . . . . . . . . . . . . . . . . . . . . . . . . . . . . . . 12
2.4 Downloading Sub-Application Firmware . . . . . . . . . . . . . . . . . . . . . . . . . . . . . . . . . . . . . . . . . . . . . 13
2.5 Restoring Database. . . . . . . . . . . . . . . . . . . . . . . . . . . . . . . . . . . . . . . . . . . . . . . . . . . . . . . . . . . . . . 13
2.5.1 Installing A Plug-In . . . . . . . . . . . . . . . . . . . . . . . . . . . . . . . . . . . . . . . . . . . . . . . . . . . . . . . . . . . . . . . . . 15
2.6 Memory Clear . . . . . . . . . . . . . . . . . . . . . . . . . . . . . . . . . . . . . . . . . . . . . . . . . . . . . . . . . . . . . . . . . . 16
2.7 Basic Configuration. . . . . . . . . . . . . . . . . . . . . . . . . . . . . . . . . . . . . . . . . . . . . . . . . . . . . . . . . . . . . . 17
2.8 Calibration . . . . . . . . . . . . . . . . . . . . . . . . . . . . . . . . . . . . . . . . . . . . . . . . . . . . . . . . . . . . . . . . . . . . . 18
3.0 Ethernet Configuration.................................................................................................................. 20
3.1 Wireless Configuration . . . . . . . . . . . . . . . . . . . . . . . . . . . . . . . . . . . . . . . . . . . . . . . . . . . . . . . . . . . 21
3.2 DHCP Configuration . . . . . . . . . . . . . . . . . . . . . . . . . . . . . . . . . . . . . . . . . . . . . . . . . . . . . . . . . . . . . 24
3.3 Browser Configuration . . . . . . . . . . . . . . . . . . . . . . . . . . . . . . . . . . . . . . . . . . . . . . . . . . . . . . . . . . . 25
3.3.1 Programming IP Address . . . . . . . . . . . . . . . . . . . . . . . . . . . . . . . . . . . . . . . . . . . . . . . . . . . . . . . . . . . . 25
3.3.2 Programming URL of Website. . . . . . . . . . . . . . . . . . . . . . . . . . . . . . . . . . . . . . . . . . . . . . . . . . . . . . . . . 25
3.3.3 Programming Browser Preset Key . . . . . . . . . . . . . . . . . . . . . . . . . . . . . . . . . . . . . . . . . . . . . . . . . . . . . 26
3.3.4 Programming Proxy Server . . . . . . . . . . . . . . . . . . . . . . . . . . . . . . . . . . . . . . . . . . . . . . . . . . . . . . . . . . . 26
4.0 Scale Configuration ...................................................................................................................... 28
4.1 Backup and Restore by USB Memory Stick . . . . . . . . . . . . . . . . . . . . . . . . . . . . . . . . . . . . . . . . . . 28
4.1.1 Backup Data Files from Scale . . . . . . . . . . . . . . . . . . . . . . . . . . . . . . . . . . . . . . . . . . . . . . . . . . . . . . . . . 28
4.1.2 Restore Data Files to Scale . . . . . . . . . . . . . . . . . . . . . . . . . . . . . . . . . . . . . . . . . . . . . . . . . . . . . . . . . . . 29
4.2 Label Setup . . . . . . . . . . . . . . . . . . . . . . . . . . . . . . . . . . . . . . . . . . . . . . . . . . . . . . . . . . . . . . . . . . . . 30
4.2.1 Label Cassette . . . . . . . . . . . . . . . . . . . . . . . . . . . . . . . . . . . . . . . . . . . . . . . . . . . . . . . . . . . . . . . . . . . . 30
4.2.2 Label Specification . . . . . . . . . . . . . . . . . . . . . . . . . . . . . . . . . . . . . . . . . . . . . . . . . . . . . . . . . . . . . . . . . 33
4.3 Advertising Messages . . . . . . . . . . . . . . . . . . . . . . . . . . . . . . . . . . . . . . . . . . . . . . . . . . . . . . . . . . . . 34
4.3.1 Basic Configuration of Ad Messages. . . . . . . . . . . . . . . . . . . . . . . . . . . . . . . . . . . . . . . . . . . . . . . . . . . . 34
4.3.2 Video AD Messages . . . . . . . . . . . . . . . . . . . . . . . . . . . . . . . . . . . . . . . . . . . . . . . . . . . . . . . . . . . . . . . . 36
4.4 Departments . . . . . . . . . . . . . . . . . . . . . . . . . . . . . . . . . . . . . . . . . . . . . . . . . . . . . . . . . . . . . . . . . . . 38
4.4.1 Using Designated Leading Digits of PLU No. As Department No. . . . . . . . . . . . . . . . . . . . . . . . . . . . . . . 38
4.4.2 Utilizing A Cassette Function. . . . . . . . . . . . . . . . . . . . . . . . . . . . . . . . . . . . . . . . . . . . . . . . . . . . . . . . . . 39
4.4.3 Cassette Switching . . . . . . . . . . . . . . . . . . . . . . . . . . . . . . . . . . . . . . . . . . . . . . . . . . . . . . . . . . . . . . . . . 39
© Rice Lake Weighing Systems. All rights reserved. Printed in the United States of America.
Specifications subject to change without notice.
Rice Lake Weighing Systems is an ISO 9001 registered company.
March 02, 2015
Technical training seminars are available through Rice Lake Weighing Systems.
Course descriptions and dates can be viewed at www.ricelake.com/training
or obtained by calling 715-234-9171 and asking for the training department.
ii Uni-9 Installation Manual
4.5 Top Sellers . . . . . . . . . . . . . . . . . . . . . . . . . . . . . . . . . . . . . . . . . . . . . . . . . . . . . . . . . . . . . . . . . . . . . 40
4.5.1 Creating Top Seller Preset Keys . . . . . . . . . . . . . . . . . . . . . . . . . . . . . . . . . . . . . . . . . . . . . . . . . . . . . . . 40
4.5.2 Programming the Scheduler for Top Sellers . . . . . . . . . . . . . . . . . . . . . . . . . . . . . . . . . . . . . . . . . . . . . . 41
4.6 VNC Viewer . . . . . . . . . . . . . . . . . . . . . . . . . . . . . . . . . . . . . . . . . . . . . . . . . . . . . . . . . . . . . . . . . . . . 42
4.7 Team Viewer . . . . . . . . . . . . . . . . . . . . . . . . . . . . . . . . . . . . . . . . . . . . . . . . . . . . . . . . . . . . . . . . . . . 43
5.0 Appendix ....................................................................................................................................... 45
5.1 Proxy Servers . . . . . . . . . . . . . . . . . . . . . . . . . . . . . . . . . . . . . . . . . . . . . . . . . . . . . . . . . . . . . . . . . . 45
5.1.1 Internet Explorer . . . . . . . . . . . . . . . . . . . . . . . . . . . . . . . . . . . . . . . . . . . . . . . . . . . . . . . . . . . . . . . . . . . 45
5.1.2 Firefox. . . . . . . . . . . . . . . . . . . . . . . . . . . . . . . . . . . . . . . . . . . . . . . . . . . . . . . . . . . . . . . . . . . . . . . . . . . 45
5.1.3 Chrome . . . . . . . . . . . . . . . . . . . . . . . . . . . . . . . . . . . . . . . . . . . . . . . . . . . . . . . . . . . . . . . . . . . . . . . . . 45
5.2 DNS Servers. . . . . . . . . . . . . . . . . . . . . . . . . . . . . . . . . . . . . . . . . . . . . . . . . . . . . . . . . . . . . . . . . . . . 45
Rice Lake continually offers web-based video training on a growing selection
of product-related topics at no cost. Visit www.ricelake.com/webinars.

Introduction 1
1.0 Introduction
For those familiar with the Ishida Uni-9 touch screen scale, this document may be used as a quick reference guide.
Refer to the Table of Contents to go to the appropriate page for instructions. It may also be used as a source of
detailed step-by-step instructions for setup and configuration of the scale.
Authorized distributors and their employees can view or download this manual from the Rice Lake
Weighing Systems distributor site at www.ricelakeretail.com.
1.1 Sa fet y
This scale is manufactured for use according to proper procedures by a qualified person and only for the purposes
described in this manual. Always heed the information provided in this manual. Failure to heed precautions can
result in personal injury or property damage.
Safety Symbol Definitions
WARNING
Important
CAUTION
WARNING
Indicates a potentially hazardous situation that, if not avoided, could result in serious injury or death, and
includes hazards that are exposed when guards are removed.
Indicates a potentially hazardous situation that, if not avoided, may result in minor or moderate injury.
Indicates information about procedures that, if not observed, could result in damage to equipment or
corruption to and loss of data.
Safety Precautions
Do not operate or work on this equipment unless you have read and understand the instructions and
warnings in this manual. Failure to follow the instructions or heed the warnings could result in injury or
death. Rice Lake Weighing Systems is not liable for any damage, loss or injury that results from
incorrect operation, insufficient caution, unauthorized modifications to the scale, or failure to follow the
instructions contained in this manual. Contact any Rice Lake Weighing Systems dealer for replacement
manuals. Proper care is your responsibility.
Some procedures described in this manual require work inside the indicator enclosure. These procedures
are to be performed by qualified service personnel only.
General Safety
WARNING
Failure to heed may result in serious injury or death. FOLLOW set-up instructions provided for proper
installation.
NEVER touch this machine without training and authorization from your supervisor.
Machine MUST be on a solid level support.
Guards MUST be in place before plugging in and turning on machine.
ALWAYS use the three (3) pronged grounded plug provided.
ALWAYS turn OFF and UNPLUG machine before cleaning or servicing.
NEVER operate machine with objects NOT provided by the manufacturer.

2Uni-9 Installation Manual
1.2 Menu Navigation
1. Select the desired menu on the left side of the screen – PROGRAM, SETUP, or ADJUST.
Note
The color of the icons indicates the selected menu.
Figure 1-1. Uni-9 Program Menu and Navigation Tabs
2. Use and buttons to scroll through the menu pages.
3. Tabs are used within menu steps with multiple pages.
Example: Select SETUP menu.
• Select MACHINE No.
• Five pages are available.
•Access each page by pressing the desired tab.
4. Press to exit the current section.
5. Press the SALES key to return to Normal Operation mode.

Introduction 3
1.3 Menu Structure
Table 1-1. Uni-9 Menu Structure
Operation Total Program Setup Adjust
Sales Daily Total P1 PLU P1 Machine No. Time/Date
ACC1 Weekly Total Campaign Sales Mode Touch Screen
ACC2 Cummulative Total Operators Password Display Check
ACC3 Traceability Total Preset Key Key Lock Sound
Total Adjust Preset Report Ad Message Data Storage Firmware Detail
Total Clear Scheduler Preset Report Memory Clear
Store PLU Overwrite Printer
Department PLU Initail Data Calibration
Group PLU Update Machine Type
Cooking Time Receipt Setting Download
Nutrition Cassette Option Check
Extra Msg #1 Label Spec Display Capture
Ingredient Label Format Gravity
Extra Msg #3 Barcode
Coupon Msg Custom Barcode
Pop Message Menu Titles
P2 Scheme Table P2 Operation Settings
Gen Table Error Process
Lookup Table Error Log
Mince Trace Traceability
Fix Price Symbol Dual Currency
P3 :Price Rounding
Free Msg #1 Frequent Shopper
Free Msg #15 Data Distribution
Check Label Tax
Stamp Price Standby Mode
Nutrition Text Country
File Save/Load
Note
Shaded boxes indicate hidden menu steps. Access by pressing 495344 and
PLU
from the main menu.
All items in unshaded boxes can be password protected. See Section 1.4.
1.3.1 Configuration Features with Menu Locations
Feature Menu Step Comments
Backup (by USB) Setup File Save/Load "Scale>USB": backup, "USB>Scale": restore
Barcode Format Setup Barcode POS Code, POS Format (Weight & Fix Price)
Barcode OCR Setup Barcode POS Code, OCR Style (12/13 digits)
Beeper Adjust Sound Beep Volume
Calibration Adjust Calibration
Cassette Setup Cassette
Cassette Switching Setup Cassette Cast. Switching
Comms Check Timer Setup Machine No. PC Comm
Country Setup Country 951753+PLU
Customer Disp. Color Adjust Machine Type Press current model: White or Black
Customer Disp. Image Adjust Machine Type Press current model: Images Yes or No
Table 1-2. Menu Locations of Configuration Features

4Uni-9 Installation Manual
Date & Time Adjust Date Time
DHCP Setup Machine No. IP Addr.
Display Capture Adjust Display Capture Press TARE, save to USB folder: "CAPTURE"
Dual-Range Adjust Calibration
Encryption Setup Machine No. WiFi
Error Log Setup Error Log
Forced Tare Setting Setup Error Process Issue ("Tare Weight Not Set")
Frequent Shopper Setup Freq. Shopper Bar Code Price, FS Image, Display Markdown
Freq Shop. Rounding Setup Price Rounding Discount Rounding
IP Address Setup Machine No. IP Addr.
Kg Setup Country 495344+PLU, Detail, Weight, 14789632+PLU
Label Format Setup Label Format
Language Setup Country
MAC Address Setup Machine No. IP Addr (use for RF MAC Address filtering)
Maximum Tare Setup Country 495344+PLU, Detail, Weight, 14789632+PLU
Min. Print Weight Setup Country 495344+PLU, Detail, Weight, 951753+PLU
Memory Clear Adjust Memory Clear
Password Setup Setup Password
Remote Operation Setup Machine No. Global SV, 495344+PLU, Remote Operation
Remote Scale Conn. Adjust Machine Type Press current model: wired or wireless
PLU Auto Program Setup PLU Overwrite Set temporary changes as permanent
PLU Update Setup PLU Update Mass update of PLU File
Port Number Setup Machine No. PC Comm
Print Head Error See Thermal Head Error
Preset Key Text Setup Machine No. PC Comm, Preset Function Name Refer
RF See Wireless
Screen Saver Program Ad Msg. "Ad Msg Control" button
Search Configuration Setup Operation Setting Call, Find PLU (Recommended: LINE2)
Self-Serve Config. Setup Operation Setting Self
Self-Serve Setup Setup Sales Mode Menu access: press Total Price seven times
Shelf Life: +1 Day Setup Country 495344+PLU, Detail, Date. "Shelf Life"
Single-Range Adjust Calibration
Spanish See Language
Standby Mode Setup Standby Mode Display dims, scale is active
Tare Select Setup Operation Setting Prod. (Select Tare 1 or 2)
Thermal Head Error Setup Error Process Common (Error 0347-000x)
Volume Adjust Sound Volume Level: videos
Wireless Setup Machine No. WiFi
Zero Price Settings Setup Error Process Issue
Feature Menu Step Comments
Table 1-2. Menu Locations of Configuration Features

Introduction 5
1.4 Passwords and Menu Navigation
The availability of the menus is based on the password entered. The service password, 495344, PLU provides
access to all menus. Refer to Section 1.3 for a list of all menu steps.
1.4.1 Service Access Password
1. Press to enter the Main menu.
2. Press .
3. Enter the password 495344 and press
PLU
to access hidden menu steps. All setup (two pages) and adjust
steps are available.
1.4.2 General Access Password
Press to enter the Main menu.
Some setup and adjust menu steps are available. Some open menu steps are accessible without passwords. It is
strongly recommended that secondary passwords be placed on the open items in the Setup menu to prevent
unauthorized access by store personnel. Refer to Section 1.4.3.
1.4.3 Passwords
1. Press to enter the Main menu.
2. Press .
3. Enter the password, then press
PLU
.
• Service password 495344 provides full access. This password cannot be changed.
• Manager's password allows access to any menu steps that are set for password protection. This includes
access to all items in the Program menu and several items in the Setup and Adjust menus.
Note
The manager's password is disabled by default.
Passwords may be entered at any time from the Main menu.
The manager's password is set in Setup menu, Password.
1. Enter a six-digit password, then press the
PASSWORD button.
Figure 1-2. Password Setup
Note
To clear the password, enter "000000".
One password is used for all menus.

6Uni-9 Installation Manual
2.0 Installation and Setup
2.1 Checking the Scale Firmware
Before configuring a new scale, it is important to check the firmware version. The scale firmware is loaded from a
USB memory stick. All service technicians working with the Uni-9 scale should have access to at least one
USB memory stick.
1. Unpack the scale and place it on a flat surface or work table.
2. Power up the scale, press Enter at the Date/Time confirm screen.
3. Press . The main menu will display. See Figure 2-2.
PLU Key
Figure 2-1. Main Menu and Keypad
4. Press .
5. Enter 495344 and press
PLU
to access hidden menu steps.
6. Press .
7. Select Firmware Details.
Firmware Version Number
Figure 2-2. Firmware Details
8. Verify the firmware shown as TITLE SOFTWARE is the current or desired version number.
Note
The current firmware version as of November 2014 is: C1921D
Confirm the FPGA App. and Printer App. versions are also correct based on the firmware Release Notes.

Installation and Setup 7
9. Press .
10. Press the Sales key to return to normal operation mode.
2.2 Updating the Scale Firmware
Firmware files are downloaded to the Uni-9 directly from a USB memory stick. Updating the firmware is a
multi-step process. Before installing new firmware, the current database must be saved and the scale’s data files
initialized. After downloading the new firmware, the original database is restored.
Note
If these steps are not followed, the scale’s operation may be affected.
2.2.1 Preparing a USB Memory Stick
The scale firmware must be loaded onto a USB memory stick.
1. Copy the scale firmware folder Soft onto an empty USB memory stick.
•The
Soft folder itself must not be zipped, even if some files in the folder are.
•The
Soft folder must be the only data on the USB memory stick.
2. Power up the scale and press the green Enter key on the Date/Time confirmation screen.
3. Raise the touch screen.
4. Open the access panel next to the power switch.
5. Insert the USB memory stick into any of the four USB ports. See Figure 2-3. Ensure no other USB devices
are connected.
Figure 2-3. Uni-9 USB Ports

8Uni-9 Installation Manual
2.2.2 Saving All Data
Backup the scale database to the USB memory stick.
Scale>USB
Output
Select
Figure 2-4. File Output to USB Memory Stick
1. Press to enter the Main menu.
2. Press .
3. Enter the password 495344 and press
PLU
to access hidden menu steps.
4. Press .
5. Select File Save/Load key.
6. Press the Scale>USB.
7. Press Output Select.
File Numbers
Edit
Figure 2-5. Create Output File
8. Press an unused file number, the line color changes to yellow.
9. Press Edit to name the file.
10. Enter a short name to describe the file, include the date if desired.
11. Press to exit and save the file name.

ALL SEL.
EXEC
OK
Message
Installation and Setup 9
Figure 2-6. Select All Files and Output to USB Memory Stick
12. Press the ALL SEL. to select all files for output. See Figure 2-6.
13. Press EXEC, at the next screen, press EXEC again to send the files to the USB Memory Stick. The screen
displays the progress of files being copied.
14. Press OK when backup is complete (message 14014-0000).
15. Press to exit.

10 Uni-9 Installation Manual
2.2.3 Initializing Data
After backing up the database continue on to initialize (delete) the data files.
ALL SEL.
EXEC
SCALE INT.
OK
Figure 2-7. Select all Files and Initialize
1. Press SCALE INIT.
2. Press the ALL SEL. button to select all files to be initialized.
3. Press EXEC, at the next screen, press EXEC again to initialize (delete) the files.
4. Press OK when initialization is complete (message 14028-0000).
5. Press to exit.
6. Turn off the scale.

Installation and Setup 11
2.2.4 Downloading Main Firmware
Load the firmware previously copied to the USB memory stick.
1. Confirm the USB memory stick is still in the USB port.
Note
Important
Do not remove the USB memory stick during the firmware update procedure.
2. Turn on the scale.
3. Press the green Enter key at the Date/Time confirmation screen.
The scale will take longer than usual to turn on while the USB memory stick is installed.
4. The scale will be in European mode with kg, euro, etc. See Figure 2-8.
Figure 2-8. Uni-9 Default Configuration - European Mode
5. Press to enter the Main menu.
6. Press .
7. Enter the password 495344 and press
PLU
to access hidden menu steps.
8. Press .
9. Select Download.
10. Press the firmware version to be installed. It will be highlighted in yellow. See Figure 2-9.
Firmware version
to install
EXEC
Figure 2-9. Select the Firmware File to Install
11. Press EXEC to confirm the selection.

EXEC
Message
12 Uni-9 Installation Manual
Figure 2-10. Begin Firmware Download
12. Press EXEC again to begin the firmware download. See Figure 2-10.
13. The screen will show the firmware download progress. The download will take several minutes to
complete.
14. When Re-Boot Check message 15029-0002 is displayed, the firmware download is complete. The scale
will automatically reboot.
15. Press the green Enter button at the Date/Time confirmation screen.
2.3 Clearing Memory
After loading the firmware, the memory should be cleared to ensure there is no unintended data resulting from the
new firmware.
1. Press to enter the Main menu.
2. Press .
3. Enter the password 495344 and press
PLU
to access hidden menu steps.
4. Press .
5. Select MEMORY CLEAR.
6. Press CLEAR to delete all data in the Program and Custom Label Formats menus.
Note
It is unnecessary to perform a Test Data Set.
CLEAR
Figure 2-11. Memory Clear Screen

Installation and Setup 13
7. Press EXEC to confirm the memory clear.
8. After the result OK is displayed, press .
2.4 Downloading Sub-Application Firmware
After clearing the memory, download any sub-application firmware programs, as needed, based on the initial check
of firmware versions (See Section 2.1 on page 6).
1. From the Adjust menu, select Download.
2. Press the SUB APP tab.
3. Select the program to be installed. It will be highlighted in yellow. Multiple Sub Apps (A) can be selected.
4. Press EXEC to confirm the selection.
5. At the next screen, press EXEC to begin the firmware download. The screen will show the firmware
download progress, it will take a several minutes to complete.
Selection
EXEC
SUB APP.
EXEC
Message
Figure 2-12. Select the Firmware File
6. When Re-Boot Check message 15029-0002 is displayed, the firmware download is complete. The scale
will automatically reboot.
7. Press the green Enter key at the Date/Time confirmation screen.
8. Enter the Adjust menu and repeat this procedure to load any other sub-application firmware as needed.
2.5 Restoring Database
Load the saved database back to the scale from the USB memory stick.
1. Press to enter the Main menu.
2. Press .
3. Enter the password 495344 and press
PLU
to access hidden menu steps.
4. Press .

14 Uni-9 Installation Manual
5. Select File Save/Load.
INPUT
SELECT
USB > SCALE
SET
Figure 2-13. File Input from USB Memory Stick
6. Press the USB>Scale tab.
7. Press the Input Select key. Depending on the size of the data files, it may take up to 15 seconds to display
a list. Select the backup file created earlier. It will be highlighted in yellow.
8. Press the Set key to continue.
9. Press the ALL SEL. key to select all files for input. The selected files are highlighted yellow.
10. Press EXEC, when the next screen appears, press EXEC again to receive the files from the USB
Memory Stick.

ALL SEL.
EXEC
OK
Message
Installation and Setup 15
Figure 2-14. Select All Files for Input
11. The screen displays the progress of files being copied.
12. Press OK, when restore is complete (message 14013-0000).
13. Press to exit.
14. Press the SALES key to return to normal operation mode.
2.5.1 Installing A Plug-In
Use this procedure for installing a plug-in on the scale to add additional features. These additional features will use
up memory space.
Important
When installing the Team Viewer Plug-In, make sure the option isn’t already installed by pressing the
Team Viewer preset key and waiting 30 seconds for the program to start. If it does not start, then
proceed with the install. Installing the Team Viewer Plug-In over an existing install will corrupt the OS
and hard drive.
Preparing a USB Memory Stick
The scale plug-in must be loaded on to a USB Memory Stick.
1. Copy the scale plug-in folder patch onto an empty USB memory stick.
•The
patch folder itself must not be zipped even if some files in the folder are.
2. Power up the scale and press the green ENTER key at the Date/Time confirm screen.
3. Raise the touch screen and open the access panel next to the power switch. Insert the USB memory stick
into any of the four USB ports. See Figure 2-3 on page 7.
• No other USB devices should be connected.
Downloading the Plug-In
1. Press to enter the Main menu.
2. Press .

16 Uni-9 Installation Manual
3. Enter 495344 and press
PLU
to access hidden menu steps.
4. Press .
5. Select DOWNLOAD.
Plug-in
EXEC
Figure 2-15. Plug-In Download
6. Press the plug-in to be loaded. It will highlight in yellow.
7. Press EXEC to confirm the selection.
8. Press EXEC again to begin the download.
9. Scale will reboot when download is complete.
2.6 Memory Clear
Use this procedure to clear all programmed data and reset configuration to factory defaults.
Note
If the firmware was updated as described in Section 2.2 on page 7, there is no need to clear the memory
again.
1. Press to enter the main menu.
2. Press .
3. Enter 495344 and press
PLU
to access hidden menu steps.
4. Press the .
5. Select MEMORY CLEAR.
Figure 2-16. Memory Clear and Test Data
Other manuals for Uni-9 Series
2
Table of contents
Other Rice Lake Printer manuals

Rice Lake
Rice Lake ATK User manual

Rice Lake
Rice Lake TM-U590 User manual

Rice Lake
Rice Lake TicketPress User manual

Rice Lake
Rice Lake TicketPress Parts list manual

Rice Lake
Rice Lake 5000 Series Owner's manual

Rice Lake
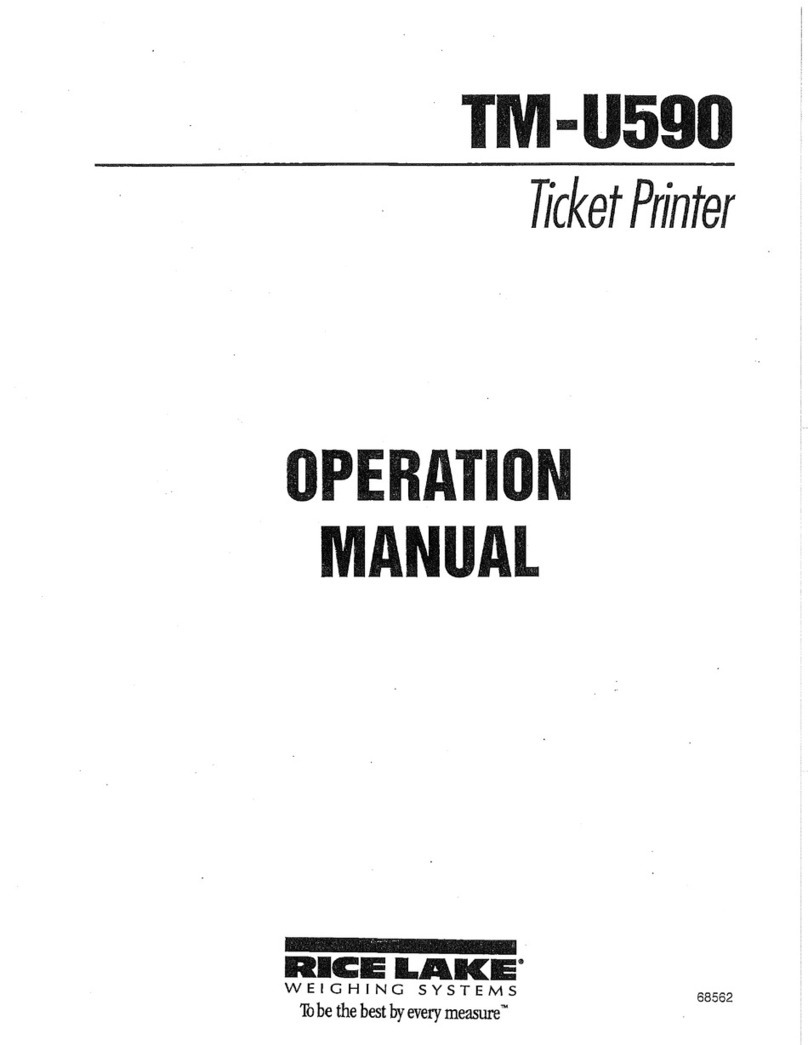
Rice Lake RL-42TT User manual

Rice Lake
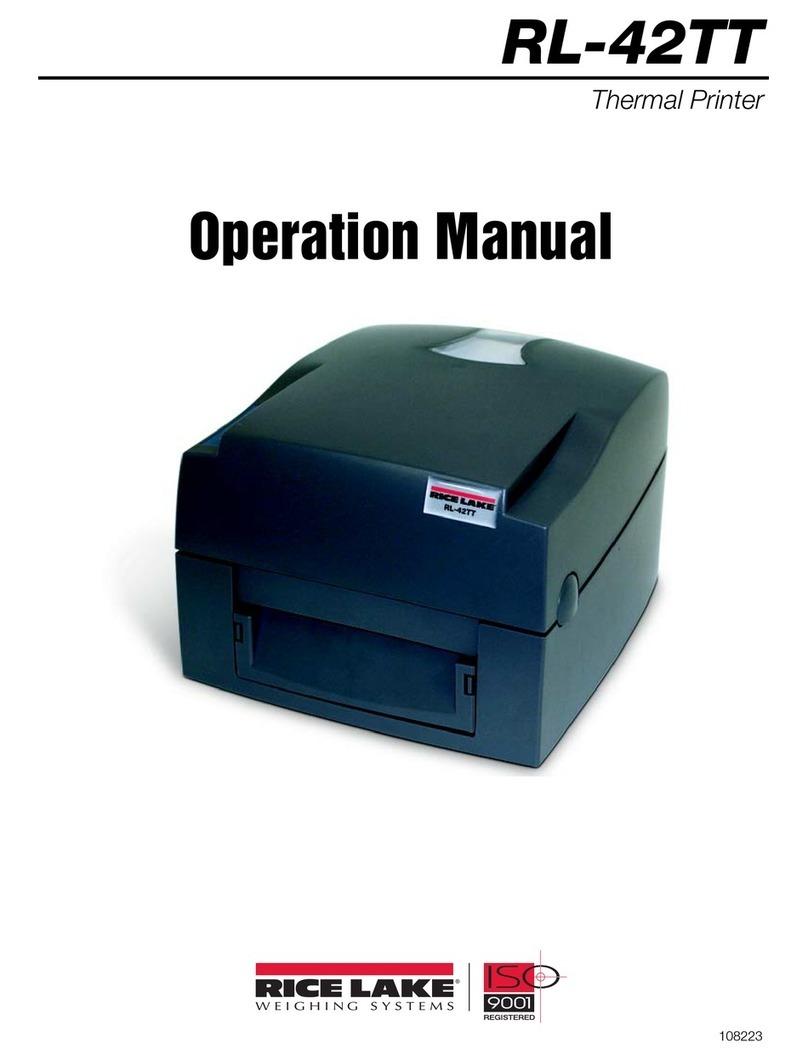
Rice Lake Prove User manual

Rice Lake
Rice Lake RL-22DT User manual

Rice Lake
Rice Lake SP2200 Specifications

Rice Lake
Rice Lake SP2200 User manual